K Service Source LaserWriter 12/640 PS
K Service Source Overview LaserWriter 12/640 PS
Overview About This Overview - 1 About This Overview This overview briefly describes the servicing issues of the LaserWriter 12/640 PS, especially those that distinguish it from previous Apple laser printers.
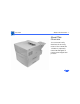
Overview General - 2 General The LaserWriter 12/640 PS is a 600 dpi, 12 ppm monochrome laser printer that is positioned as the workgroup laser printing solution for Mac OS and Windows users. It features excellent print quality, cross platform support, and state-of-theart paper handling options. LaserWriter driver 8.4 releases concurrently with this printer.
Overview Options - 3 Options LW 12/640 PS Options There are three options that are available for the LaserWriter 12/640 PS: • Duplexer unit • Face-up catch tray • 500-sheet feeder (accommodates either standard or envelope cassette) Each of the options can be added independently of one another so there are several configurations that you might encounter. The animation “LW12/640 PS Options” shows how the options go together.
Overview Paper Path - 4 Paper Path LW12/640 PS Paper Path The printer has a basic S-shaped paper path and multipurpose tray arrangement generally similar to the LaserWriter 16/600 PS. On the exit side of the fuser assembly, however, there is a brand new function: the paper deflector guide. This solenoid-actuated guide switches paper between one of two paths. The inside path is the face-down delivery path that continues straight up to the delivery rollers and output tray.
Overview Duplexer - 5 Duplexer The most unique mechanical feature you will encounter is the optional duplexer unit. The term “duplex” denotes twosided printing. The duplexer is an L-shaped feeder that cradles the underside and rear of the printer. When duplex printing is selected through software, the paper deflector guide is actuated and the sheet of paper diverts into the duplexer. There the paper is flipped and circulated back to the cassette feed roller in preparation for its second imaging cycle.
Overview Sheet Feeder - 6 Sheet Feeder An optional 500-sheet feeder is available. As with the LaserWriter 16/600 PS design, the sheet feeder fits squarely beneath the printer (or the duplexer, if present) to form a dual front-loading cassette arrangement. An envelope cassette is available for the sheet feeder only. The feeder has a receptacle connector that mates with the printer and has its own circuit board. However, the feeder does not have its own motor.
Overview Face-Up Tray - 7 Face-Up Tray The face-up tray is an option that attaches to the rear of the printer (or to the rear of the duplexer, if present). Optional Face-Up Tray This tray performs similarly to previous printers, except that output to this tray is selected through software, not by the setting of a lever. The presence of this tray is not sensed by the controller.
Overview Duplex Scan Anomalies - 8 Duplex Scan Anomalies After side one prints during a duplex job, the paper parks itself onto a horizontal shelf beneath the cassette. The duplexer motor then reverses direction. The trailing edge of the paper becomes the leading edge, and the paper exits the shelf and continues the path toward side-two printing. Order of Scanning Duplex documents stack in the face-down delivery tray in correct book order (with odd-numbered pages facing down).
Overview Duplex Scan Anomalies - 9 the software, the I/O controller flips the imaging data accordingly to counteract the reversal of the paper. The net effect is even-numbered pages scanned in reverse. For example, page 2 of a portrait oriented job images right to left from the bottom up. (This anomaly does not occur with short edge binding). For this reason, be aware that some skew or image cutoff symptoms may appear to be 180 degrees off from normally scanned pages.
Overview Miscellaneous - 10 Miscellaneous Fuser Pressure Roller The fuser pressure roller provides an opposing surface to the fuser heater roller, the same function as in previous laser printers. However in the LaserWriter 12/640 PS, this pressure roller is seated in the chassis and is not a part of the fuser assembly itself. Power Supply Assembly The power supply assembly is a large multifunctional circuit board located in the lower section of the engine.
Overview Miscellaneous - 11 Beam Detection Laser beam detection occurs outside of the laser/scanner assembly, in the start-of-scan (SOS) sensor located in the mirror assembly. Two Shutters There are two laser shutters, one inside the laser/scanner assembly and one covering the mirror assembly. Both are actuated with the closure of the top cover. Two "Exit" Sensors Unlike previous printers, there are two paper sensors downstream of the fuser assembly.
Overview Miscellaneous - 12 paper after it passes the deflection guide in route to facedown delivery on top of the printer. One Fan There is only one fan in this printer. Support for Heavy Paper The LaserWriter 12/640 PS supports throughput of 50 lb. paper for simplex (single-sided) print jobs. You must print from the multipurpose tray and choose face-up delivery when using 50 lb paper. RAM Upgrade The LaserWriter 12/640 PS comes with 4 MB of RAM in the righthand of two SIMM slots.
Overview Miscellaneous - 13 duplex printing nor does it enable PhotoGrade. Upgrades are required if you want either of these additional features. No SCSI There is no SCSI support in the LaserWriter 12/640 PS. Startup Page The startup page is a single-sided page with a layout similar to previous PostScript LaserWriter printers. The startup page does report the presence of a duplexer or sheet feeder but will not recognize the optional face-up tray.
Overview Miscellaneous - 14 Service Test Page You may print a service test page by jumpering connector J101 on the I/O controller board. Consequently, unlike previous printers, the I/O controller board must be installed to run a service test page.
Overview Miscellaneous - 15 Top Cover Closure The closing of the top cover initiates several more events than in previous printers. They are listed below and are described in detail in the “Principles of Operation” chapter.
K Service Source Principles of Operation LaserWriter 12/640 PS
Principles of Operation Print Process - 1 Print Process Print Process Overview The print process consists of the stages shown below, during which a toner image forms on the drum surface, transfers and then bonds to the paper. Each sheet of paper passes through steps 4 to 6. During printing,the drum surface repeatedly cycles through steps 1 to 5, as well as cleaning stage 7.
Principles of Operation Print Process - 2 Print Process Diagram and Paper Path Laser Beam 1 Charging 6 Fusing Fuser Roller 7 Cleaning 2 Exposure BCR 3 Development Drum Cleaning Blade Attraction Roller 5 Discharge Pressure Roller 4 Transfer Detack Saw BCR Transfer Roller CM Blade Laser/Scanner Assy Fuser Roller Pressure Roller Drum Detack Saw Paper Toner Cartridge Mirror Assembly Cleaning Blade CM Blade Transfer Roller Attraction Roller
Principles of Operation Print Process - 3 Print Process Description 1 Charging During this stage, the drum surface receives a uniform negative charge. Note: The drum surface is made of a photoconductive material and the inner part of the drum is made of a conductive material. This negative charge is actually placed onto the outside surface of the photoconductor layer. The charge is imparted by the bias charge roller (BCR) within the toner cartridge.
Principles of Operation Print Process - 4 2 Exposure During this stage, the laser beam scans across the negatively charged drum surface. The laser beam is emitted from the laser diode in the laser/scanner assembly. This diode is stationary. Its beam reflects off the face of a rapidly rotating scanning mirror, through a correction lens, and outward off a stationary mirror which directs the beam onto the surface of the drum.
Principles of Operation Print Process - 5 3 Development During this stage, the electrostatic latent image on the drum surface attracts toner and forms a visible toner image. The LaserWriter 12/640 PS uses nonconducting magnetic toner that readily transfers to plain paper. The toner is supplied from the toner compartment to the attraction roller positioned close to the drum within the toner cartridge.
Principles of Operation Print Process - 6 3 Development (cont.
Principles of Operation Print Process - 7 3 Development (cont.) The diagram below illustrates the change of the potential as the drum surface passes from the charging through the development stages:.
Principles of Operation Print Process - 8 4 Transfer During this stage, the toner transfers from the drum to the paper. The bias transfer roller (BTR), referred to herein simply as the transfer roller, applies a positive charge to the back side of the paper as it feeds between the roller and the drum. The toner image transfers from the drum surface to the front side of the paper due to this positive charge on the back side of the paper.
Principles of Operation Print Process - 9 5 Discharge During this stage, the paper comes off the drum surface. The detack saw applies a negative charge to the back side of the paper to neutralize the positive charge previously applied by the transfer roller. The force which attracts the paper to the drum surface disappears, and the paper releases naturally from the drum due to gravity.
Principles of Operation Print Process - 10 6 Fusing During this stage, heat and pressure fix toner to the paper. The toner image transferred from the drum surface to the paper is easily dislodged. To fix the image to the paper, the paper is passed between the fuser assembly and a pressure roller. The fuser roller applies the heat necessary to bond toner to paper and also supplies rotational force to help pull the paper evenly through.
K Service Source Specifications LaserWriter 12/640 PS
Specifications Introduction - 1 Introduction Specifications information for this product can be found in this chapter and also in the Spec Database, which you can access in one of three ways: Ñ Launch it directly by double-clicking the Apple Spec Database runtime alias at the top level of the Main Service Source CD. Ñ Select "Apple Spec Database" from the Service Source drop-down main menu. Ñ Click the Acrobat toolbar icon for the database, which is near the right end of the toolbar with the letters "SP.
Specifications Engine - 2 Engine Marking Engine Fuji Xerox P893 laser-xerographic Laser Type: Semiconductor laser GaAlAs Wavelength: 780 nm Output power: 5 mW Speed SimplexÑ12 pages per minute maximum using A4-size paper. Actual speed depends on the images printed. DuplexÑ8 pages per minute maximum using U.S. letter-size paper. Actual speed depends on the images printed. Life Expectancy (Printer) Average number of prints between failure is 180,000 pages.
Specifications Engine - 3 Life Expectancy (Toner Cartridge) Life expectancy is 6,000 pages when printing text documents with average page coverage (5% black). An example of a 5% black page coverage is a page consisting of double-spaced 14-point courier type. Printing images and other graphics may impact toner cartridge life expectancy.
Specifications Paper Sizes and Capacity Engine - 4 Supports U.S. letter, A4, B5, executive, and legal in the standard paper cassette. The paper cassette holds 250 sheets of 20pound (75 g/m 2 ) paper. The multipurpose tray can hold up to 80 sheets of standard U.S. letter paper, and other paper sizes from postcard up to U.S. legal. An optional 500-sheet cassette is available that supports letter, A4, and U.S. legal-paper sizes.
Specifications Dimensions Engine - 5 Printer only Height 9.5 in. 24.2 cm) Width 15.9 in. (40.5 cm) Depth 16.7 in. (42.4 cm) Printer with optional duplex printing unit Height 11.89 in. (30.2 cm) Width 15.9 in. (40.5 cm) Depth 20.47 in. (52.0 cm) Printer with optional 500-sheet cassette and feeder Height 14.0 in. (35.6 cm) Width 15.9 in. (40.5 cm) Depth 16.7 in. (42.4 cm) Printer with optional duplex printing unit and 500-sheet cassette feeder Height 16.2 in. (41.1cm) Width 15.9 in. (40.5 cm) Depth 20.4 in.
Specifications Engine - 6 Weight Approximately 30 lb. (14 kg) Voltage Requirements U.S. 103.5 to 126.5 VAC, 58 to 62 Hz Europe/Australia 198 to 264 VAC, 48 to 52 Hz Note: The LaserWriter 12/640 PS printer does not contain a universal power supply or fuser assembly.
Specifications Power Consumption Engine - 7 Energy-saving mode 26 W Standby average 100/120 V, approximately 125 W 220/240 V, approximately 120 W Operating average 110/120 V, approximately 390 W 220/240 V, approximately 370 W Maximum power consumption 110/120 V, approximately 790 W, 6.8 A 220/240 V, approximately 770 W, 3.
Specifications I/O Controller - 8 I/O Controller Microprocessor AMD Am29040 30-MHz RISC microprocessor ROM 4 MB (including 35 Type 1 fonts) RAM 4 MB (expandable to 64 MB) 72-pin, 70 ns or less SIMMs are required. See ÒUpgradesÓ for full information about possible configurations.
Specifications I/O Controller - 9 Ports LocalTalk Parallel AAUI Ethernet port with three protocols: EtherTalk Novell NetWare IPX (PSERVER or RPRINTER) TCP/IP (BSD lpd) External Ethernet transceivers available for: Thin Coax (10BASE-2) Twisted Pair (10BASE-T) Thick Coax (10BASE-5) (All ports/protocols simultaneously active) Two-position communication switch Resolution 600 dpi
Specifications I/O Controller - 10 Grayscale Imaging Standard 85 lines/inch dithered halftone, 101 gray levels 106 lines/inch dithered halftone, 129 gray levels 141 lines/inch dithered halftone, 73 gray levels PhotoGrade (12 MB of RAM required) 85 lines/inch halftone, 201 gray levels 106 lines/inch halftone, 257 gray levels 141 lines/inch halftone, 145 gray levels Languages PostScript Level 2 (2015) PCL5 (LaserJet IIID emulation)
Specifications Fonts on Disk I/O Controller - 11 Sixty-four fonts are provided with the LaserWriter 12/640 PS, including such fonts as ITC Avant Garde ¨ , ITC Bookman ¨ , Chicago, Courier, Delphian, Garamond Condensed, Geneva, Helvetica ¨ , Helvetica Black, Helvetica Compressed, Helvetica Narrow, Lubalin Graph, Lucida Bright, Machine, Monaco, Nadianne, New Century Schoolbook, New York, Old English Text, Onyx, Oxford, Palatino ¨ , Swing, Symbol, Times ¨ , ITC Zapf Chancery ¨ , ITC Zapf Dingbats ¨ , and Zea
Specifications I/O Controller - 12 Fonts in ROM PostScript The following fonts are resident in the printer ROM: AvantGarde Book, AvantGarde BookOblique, AvantGarde Demi, AvantGarde DemiOblique Bookman Demi, Bookman DemiItalic, Bookman Light, Bookman LightItalic Courier, Courier Bold, Courier BoldOblique, Courier Oblique Helvetica, Helvetica Bold, Helvetica Bold Oblique, Helvetica Narrow, Helvetica Narrow Bold, Helvetica Narrow BoldOblique, Helvetica Narrow Oblique, Helvetica Oblique NewCentury Schoolbook
Specifications PCL I/O Controller - 13 The following PCL fonts are resident in the printer ROM: Times Roman, Time Bold, Time Italic, Times Bold Italic Univers Medium, Univers Medium Bold, Univers Medium Italic, Univers Medium Bold Italic Courier 12 pitch, 10 point Medium; Courier 12 pitch, 10 point Bold; Courier 12 pitch, 10 point Italic; Courier 10 pitch, 12 point Medium; Courier 10 pitch, 12 point Bold; Courier 10 pitch, 12 point Italic Line Printer Font 16.67 pitch, 8.
Specifications Environmental Information - 14 Environmental Information Operating Temperature 50¡ to 90¡ F (10¡ to 32¡ C) Operating Humidity 15 to 80 percent RH non-condensing Storage (Toner Cartridge) Temperature 32¡ to 95¡ F (0¡ to 35¡ C) Humidity 15 to 85 percent RH non-condensing Storage (Printer) Temperature 32¡ to 122¡ F (0¡ to 40¡ C) Humidity 35 to 85 percent RH non-condensing
Specifications Finished Goods Accessories - 15 Finished Goods Accessories Ethernet Apple Ethernet Thin Coax Transceiver M0329Z/B Apple Ethernet Twisted Pair Transceiver M0437Z/B Apple Ethernet AUI Adapter M0432LL/A Toner Cartridge LaserWriter 12/640 PS Toner Cartridge M4683G/A Printer Options LaserWriter 12/640 PS 500-Sheet Feeder M4682G/A (includes standard 500-sheet cassette). Envelope cassette M4680G/A is also available for the sheet feeder.
Principles of Operation Print Process - 11 7 Cleaning During this stage, any residual toner on the drum is cleaned off to prepare for the next print cycle. The residual toner is collected in a special compartment separate from the fresh toner compartment. The transfer rate is more than 90%, but varies according to the percentage of printed pixels and the environmental conditions such as temperature and humidity. Residual toner cannot be re-used.
Principles of Operation Paper Transportation - 12 Paper Transportation Paper Path Flowchart The chart below shows the parts that feed paper through the LaserWriter 12/640 PS engine. Parts are shown in the order in which they occur during a print cycle.
Principles of Operation Paper Transportation - 13 Paper Path Diagram The cross-sectional diagram below illustrates the elements indicated in the previous chart. The roller diameters are listed below the diagram.
Principles of Operation Print Image Creation - 14 Print Image Creation Print Image Generation The image data signal (VIDEO) is sent from the I/O controller board to the laser/scanner assembly via the DC controller board. The video signal is passed through the DC controller board as received from the I/O controller without buffering or additional processing. The signal is converted into laser light, which is scanned onto the surface of the photosensitve drum as described below.
Principles of Operation Print Image Creation - 15 Laser/Scanner Assembly Structure and Operation The laser light source used for the LaserWriter 12/600 PS is a semiconductor laser diode (LD) with a rated maximum output power of 5 mW. The laser diode is switched on and off according to the video signal. The power of the laser light is monitored and controlled by the monitor circuit so that it remains constant.
Principles of Operation Print Image Creation - 16 Note: One horizontal line of an image is drawn by scanning the pulsating laser beam across the drum. The timing and location of the pulse is a function of the VIDEO signal originating from the I/O controller board. By rotating the drum and scanning additional lines, a two-dimensional image is built.
Principles of Operation Mechanical Drive - 17 Mechanical Drive The generation and transmission of mechanical drive in the LaserWriter 12/640 PS is shown in the diagram below. Pickup Motor Gear cluster in the pickup drive assembly transmits the drive force to the rollers shown to the right. Cassette Pickup Roller Cassette Feed Roller Preregistration Feed Roller Manual Feed Pickup Roller Main Motor Gear cluster in the main drive assembly transmits the drive force to the rollers shown to the right.
Principles of Operation Mechanical Drive - 18 1 Pickup Motor Mechanical Drive (Part 1 of 2) The drive force generated by the pickup motor is transmitted to the cassette and preregistration feed rollers and to the cassette feed clutch gear via the pickup drive assembly. The rotation of the cassette pickup roller is controlled by the cassette feed clutch gear and the cassette feed solenoid.
Principles of Operation Mechanical Drive - 19 2 Pickup Motor Mechanical Drive (Part 2 of 2) The drive force generated by the pickup motor is also transmitted to the manual feed clutch gear via the pickup drive assembly. The rotation of the manual feed pickup roller is controlled by the manual feed clutch gear and the manual feed solenoid.
Principles of Operation Mechanical Drive - 20 3 Main Motor Mechanical Drive (Part 1 of 3) The drive force from the main motor is transmitted to the registration feed roller via the main drive assembly.
Principles of Operation Mechanical Drive - 21 4 Main Motor Mechanical Drive (Part 2 of 3) The drive force from the main motor is also transmitted throught the main drive assembly to the photosensitive drum, and from the drum to the transfer roller.
Principles of Operation Mechanical Drive - 22 5 Main Motor Mechanical Drive (Part 3 of 3) The drive force from the main motor is also transmitted to the fuser roller drive gear and the delivery assembly drive gear via the drive transfer assembly. When the toner cartridge is removed, the idler gear opens the path of drive force transmission, thus cutting off mechanical drive to the fuser assembly.
Principles of Operation Function of Major Components - 23 Function of Major Components The function of the major components of the LaserWriter 12/640 PS is briefly described below. The components are divided into the following seven blocks, which correspond to the exploded views that appear in the exploded view chapter. Cassette (Deck 1) Paper Transport Fusing and Paper Exit Drive & Xerographic Electrical Frame Cassette (Deck 1) Paper Cassette The cassette holds cut sheets of plain paper.
Principles of Operation Function of Major Components - 24 Cassette (Deck 1) Paper Cassette Microswitches Cassette Sizing Assembly Leaf Spring Actuator
Principles of Operation Function of Major Components - 25 Paper Transport (1 of 2) Pickup Drive Assembly The pickup drive assembly is responsible for mechanical drive to the cassette and manual feed pickup rollers and to the cassette and preregistration feed rollers. It is powered by the pickup motor. Contained within the assembly itself are the two feed rollers and the cassette feed solenoid.
Principles of Operation Function of Major Components - 26 Paper Transport (1 of 2) Registration Pinch Roller Registration Feed Roller Main Drive Assembly Paper Deflector Solenoid Main Motor Paper Deflector Guide Pickup Motor Preregistration Feed Roller Cassette Feed Roller Pickup Drive Assembly Cassette Feed Solenoid Preregistration Actuator A Preregistration Actuator B Registration Actuator Cassette Pickup Roller Registration Sensor Registration Feed Roller Registration Pressure Roller Prere
Principles of Operation Function of Major Components - 27 Paper Transport (2 of 2) Multipurpose Frame Assembly The multipurpose frame assembly includes the manual feed solenoid, manual feed clutch gear, manual feed pickup roller, separation pad, and the manual feed paper-present sensor and actuator.
Principles of Operation Function of Major Components - 28 Paper Transport (2 of 2) Manual Feed Solenoid Manual Feed Clutch Gear Manual Feed Paper-Present Actuator Multipurpose Frame Assembly Manual Feed Paper-Present Sensor Manual Feed Pickup Roller Separation Pad
Principles of Operation Function of Major Components - 29 Fusing and Paper Exit Fuser Assembly The major parts contained within the fuser assembly include the fuser heater bulb, fuser roller, thermostat, fuse, and temperature sensor assembly. The fuser heater bulb is located inside the fuser roller. Power to the bulb is switched on and off so that the temperature of the fuser roller surface is kept constant.
Principles of Operation Function of Major Components - 30 Fusing and Paper Exit Fuser Exit Actuator Delivery Rollers Fuser Assembly Fuser Exit Sensor Temperature Sensor Assembly Thermostat Fuse Fuser Roller Pressure Roller Heater Bulb Fuser Roller Fuser Exit Pinch Roller Pressure Roller Fuser Exit Roller
Principles of Operation Function of Major Components - 31 Drive and Xerographic For full description of the components in this section, see the “Print Image Creation” topic. Laser/Scanner Assembly The laser/scanner assembly includes the laser diode, scanner, lenses, and mirrors. Note: The laser/scanner assembly is a precision optical system. Never open the cover. Touching the parts may result in permanent damage to the components.
Principles of Operation Function of Major Components - 32 Drive and Xerographic (1 of 2).
Principles of Operation Function of Major Components - 33 Drive and Xerographic (2 of 2) Start-of-Scan Sensor (SOS) Collimator Lens Mirror M1 Laser Diode Cylinder Lens Hexagonal Mirror Mirror Assembly Scanner Assembly CM Blade Lens L1 Bias Charge Roller Laser/Scanner Assembly Toner Cartridge Cleaning Blade Attraction Roller Shutter Photosensitive Drum
Principles of Operation Function of Major Components - 34 Electrical Power Supply Assembly The power supply assembly is a large multifunctional circuit board located in the lower section of the engine. Listed below are its major components. Low-voltage power supply (LVPS): The LVPS generates stabilized DC voltages of 5 V, 12 V, and 24 V and supplies these voltages to the electrical components of the printer.
Principles of Operation Function of Major Components - 35 Electrical I/O Controller Board DC Controller Board Power Inlet Fan Registration Sensor Cassette PaperPresent Sensor Preregistration Sensor Interlock Switch Power Supply Assembly
Principles of Operation Function of Major Components - 36 Frame When the top cover closes, the seven events described below take place. Cover Interlock Actuator Top cover closure actuates the interlock switch on the power supply assembly. There are three components that work together to actuate this switch. Top cover actuator: The thin plastic post built into the top cover. Spring-loaded actuator: The vertical assembly that transfers actuation downward.
Principles of Operation Function of Major Components - 37 Frame Mirror Assembly Shutter Fuser Idler Gear Actuation Toner Cartridge Latching Mechanism Cover Interlock Actuator Jam Release Plate Laser Shutter Cover Latch Interlock Switch (on Power Supply Assy.
Principles of Operation Function of Major Components - 38 General Wiring Diagram Fuser Assembly Fuser Heater Thermistor STS2 STS1 Delivery Sensor 2 Fuser Exit Sensor 2 2 J292 P/J 285 P/J 281 3 3 P/J291 P/J29 P/J11 P/J 28 N L Main Switch Inlet FG 7 Cover Interlock Switch P/J 222 Fan To Duplexer or Sheet Feeder 14 Preregistration Sensor J242 -2 Cassette Size Sensing Assembly P/J 232 P242 26 P/J 23 P231 J242 -1 P/J 21 15 Cassette PaperPresent Sensor P/J (not used) 221 Casset
Principles of Operation Function of Major Components - 39 Ports LocalTalk Port Ethernet Port Parallel Port Communication Switch
K Service Source Troubleshooting LaserWriter 12/640 PS
Troubleshooting About the Status Panel - 1 About the Status Panel Ready Paper Out Paper Jam The LaserWriter 12/640 PS has a status panel that consists of three LEDs. The status reported through the LEDs is generated by the I/O controller board based upon signals that the board receives from the printer sensing system and other engine monitoring mechanisms. There are two types of reporting. • End-user reporting consists of LED arrays that can be observed by end users without need of special tools.
Troubleshooting POST (Power-On Self Test) - 2 POST (Power-On Self Test) When you switch on power, all the status panel LEDs illuminate briefly. This confirms that power is getting to the status panel and that all LEDs are operational. All LEDs then extinguish and come back on. This marks the start of POST. POST is a set of diagnostic procedures that are written into firmware on the I/O controller board.
Troubleshooting POST (Power-On Self Test)/Stage Failure/POST - 3 Stage Failure/POST POST Example POST extinguishes the LEDs from top to bottom as each test stage passes. (The Ready LED is considered here to be the top LED). In a functional printer, the testing process takes about 40 seconds, after which control passes to PostScript code in ROM and the normal warm-up continues (see “PostScript Reporting” in this chapter).
Troubleshooting PostScript Reporting - 4 PostScript Reporting PostScript reporting starts as soon as POST is completed. Most of the time, PostScript will report according to the literal designation of the LED. (For example, the paper-out LED illuminates when the paper cassette is empty). However, there are some instances where closer observation is critical in interpreting the status panel.
Troubleshooting PostScript Reporting/End-User Error Codes - 5 End-User Error Codes Array Description Explanation Ready LED on Printer is ready Ready LED flashes Printer is warming up or processing a job Paper-Out and Paper-Jam LEDs flash An error has been detected in POST. Observation of LED behavior prior to this array can isolate the fault to one of three general area (see "POST") 2. All LEDs off The top cover is open. Paper-Out LED illuminates No paper or cassette is not installed 3.
Troubleshooting EPOST (Extended Power-On Self Test) - 6 EPOST (Extended Power-On Self Test) EPOST behaves exactly like POST in that it checks the same three areas in the same order and displays an error array if a fault is detected. However, EPOST has more extensive testing and its error arrays are completely different.
Troubleshooting EPOST (Extended Power-On Self Test) - 7 Initiating EPOST To initiate EPOST, you must have the printer rollback test plug (P/N 922-1489). This test plug is colored bright green to differentiate it from the older version black plug. Do not use the black plug on the LaserWriter 12/640 PS. It won’t harm anything; it just won’t work. Switch off the printer and install the test plug into the LocalTalk port on the back of the I/O controller board. Switch the printer back on.
Troubleshooting EPOST (Extended Power-On Self Test) - 8 Stage Failure/EPOST EPOST Example 1 EPOST Example 2 An EPOST error code can either illuminate solidly (for I/O controller failures) or flash (for engine failures). The chart on the next page shows the possible error arrays. The “EPOST Example” animations demonstrate two of the combinations. The “Example 1” animation simulates an I/O board error.
Troubleshooting EPOST (Extended Power-On Self Test)/EPOST Error Codes - 9 EPOST Error Codes All LEDs on for a second, then off for a second, followed by a one-second display of... ...Solid Jam LED = I/O Controller Board Error FLASH FLASH ...Solid Jam & Out LEDs = ROM (I/O Controller) Error ...Solid Ready LED = General SIMM Error ...Solid Ready & Jam LEDs = SIMM (A/B) Error ...Solid Ready & Out LEDs = SIMM (C/D) Error FLASH FLASH FLASH FLASH FLASH FLASH FLASH FLASH FLASH FLASH ...
Troubleshooting Cleaning the Mirror - 10 Cleaning the Mirror There is a small peach-colored square cleaner built into the mirror assembly. Slide this square back and forth to remove particles from the mirror.
Troubleshooting Duplexer Jams - 11 Duplexer Jams The paper guide provided with the duplexer must be installed during setup. (Refer users to page 137 of the user manual).
Troubleshooting Duplexer Jams - 12 fail to install this guide properly, jamming will frequently occur as paper enters the duplexer from the printer. Be sure that the two locking connectors are also fully snapped into place.
Troubleshooting Duplexer Jams - 13 If accordion-style jamming still occurs in the duplexer after proper installation of the paper guide, replace the vertical duplexer assembly (P/N 922-2001)
Troubleshooting Printing with 8.3 Driver/EPOST Error Codes - 14 Printing with 8.3 Driver For purposes of troubleshooting paper feed, you can print with the LaserWriter 8.3 driver from Mac OS computers. Simply copy the PPD for the LaserWriter 12/640 PS into the Printer Descriptions folder in the System Folder, select the printer through the Chooser, and click on Setup. You can print duplex jobs by clicking on the Options button in the print dialog and making the appropriate selection.
Troubleshooting Out of Paper in Multipurpose Tray - 15 Out of Paper in Multipurpose Tray If you are trying to print from the standard cassette and get an error message saying that there is no paper in the multipurpose tray, the problem may be in cassette setup. There is a paper-length guide at the end of the cassette that must be adjusted for letter size paper (the position as shipped is for A4 paper).
Troubleshooting Out of Paper in Multipurpose Tray/EPOST Error Codes - 16 .
Troubleshooting Multipurpose Tray Paper Jams - 17 Multipurpose Tray Paper Jams There have been a number of reported problems with the multipurpose tray and its associated components. In the process of resolving these problems, service providers may inadvertently dislocate the solenoid flapper or actuator that is responsible for releasing the multipurpose tray paper pickup roller so that it can complete its paper pickup cycle.
Troubleshooting False Paper Jam Error with Startup Page - 18 False Paper Jam Error with Startup Page Symptom: A false paper jam error occurs when the LaserWriter 12/640 tries to print the startup page. No paper is picked up. EPOST reports a DC Controller error. When the DC controller board is replaced, the problem remains. Upon initiating a service test print, the motor will spin for about a second and then will stop with no test page output.
Troubleshooting Print Quality Problems - 1 Image Quality Problems It can be easily determined whether an image quality problem is being caused by the print engine or by the I/O controller board by producing a service test page. The service test page can be generated by jumpering the two pins of connector J101 on the I/O controller board. If the test page is normal, but the regular prints have an image quality problem, the problem is probably with the I/O controller board.
Troubleshooting Print Quality Problems - 2 P-1 Light Prints Problem The overall image density is lighter than normal. Initial Analysis Inspect the following components.
Troubleshooting Print Quality Problems - 3 P-2 Blank Prints Problem The entire print is blank. Initial Analysis Inspect the following components.
Troubleshooting Print Quality Problems - 4 P-3 Black Prints Problem The entire print is black. Initial Analysis Inspect the following components.
Troubleshooting Print Quality Problems - 5 P-4 Vertical Band Deletions Problem There are areas of the image that are extremely light or missing entirely. These missing areas form wide bands that run vertically along the page, in the direction of paper travel. Initial Analysis Inspect the following components.
Troubleshooting Print Quality Problems - 6 P-5 Horizontal Band Deletions Problem There are areas of the image that are extremely light or missing entirely. These missing areas form wide bands that run horizontally across the page and parallel with the direction of paper travel. Initial Analysis Inspect the following components.
Troubleshooting Step 8 Print Quality Problems - 7 Actions and Questions Transfer Is the toner image on the drum transferred normally on the paper? Replace power supply assembly. If problem persists, replace DC controller board. Fuser heater roller and fuser pressure roller Replace the roller. * Switch off the printer power while the transfer is in progress, and visually check the toner image on the drum.
Troubleshooting Print Quality Problems - 8 P-6 Vertical Streaks Problem There are black lines running vertically along the page. Initial Analysis Inspect the following components.
Troubleshooting Print Quality Problems - 9 P-7 Horizontal Streaks Problem There are black lines running horizontally across the page. Initial Analysis Inspect the following components.
Troubleshooting Print Quality Problems - 10 P-8 Spot Deletions Problem There are areas of the images that are extremely light or missing entirely. These missing areas form spots that are localized to small areas of the page. Initial Analysis Inspect the following components.
Troubleshooting Print Quality Problems - 11 P-9 Spots Problem There are spots of toner all over the page. Initial Analysis Inspect the following components.
Troubleshooting Print Quality Problems - 12 P-10 Residual Image Problem There are ghosted images appearing on the page. Initial Analysis Inspect the following components.
Troubleshooting Print Quality Problems - 13 P-11 Background Problem There is toner contamination on all or part of the page. The contamination appears as a very light gray dusting. Initial Analysis Inspect the following components.
Troubleshooting Print Quality Problems - 14 P-12 Skewed Image Problem The printed image is not parallel with the sides of the page. Initial Analysis Inspect the following components. Are they compatible with your printer version, correctly installed, not damaged, deformed or contaminated, or free of foreign objects sticking? • Toner Cartridge • Transfer Roller Assy • Fuser Assembly • Regist.
Troubleshooting Print Quality Problems - 15 P-13 Damaged Prints Problem The printed page is wrinkled, creased, or torn. Initial Analysis Inspect the following components.
Troubleshooting Print Quality Problems - 16 P-14 Unfused Image Problem The printed image is not fully fused to the paper. The image easily rub off. Initial Analysis Inspect the following components.
Troubleshooting Print Quality Problems - 17 P-15 No PhotoGrade Problem The printed image is not printing in PhotoGrade. Step 1 Actions and Questions RAM Upgrade 12 MB of RAM is required to turn on PhotoGrade (20 MB if using the duplex feature). Have you installed the necessary RAM? Action (When There Is Problem) Install the RAM.
Troubleshooting Print Quality Problems - 18 P-16 No Duplex Printing Problem You cannot use the duplex printing option. Step Actions and Questions Action (When There Is Problem) 1 Driver Install the driver. 2 RAM Upgrade Install the RAM. Are you using the driver version that came with the printer (or later)? 12 MB of RAM is required to use the duplex printing option (20 MB to turn on PhotoGrade). 24 MB is required to do duplex printing with PhotoGrade on legal-size paper.
Troubleshooting Print Quality Problems - 19 P-17 Duplex Page Upside-Down Problem The back side of a duplex page is printing upside-down. 2 1 Step 1 Actions and Questions Driver Are you choosing the correct binding orientation in the driver? Action (When There Is Problem) Make the correct selections.
Troubleshooting Print Quality Problems - 20 P-18 No Multipurpose Tray Printing Problem Paper feed problems from the multipurpose tray.
K Service Source Upgrades LaserWriter 12/640 PS
Upgrades RAM Upgrade - 1 RAM Upgrade The LaserWriter 12/640 PS comes with 4 MB of RAM, an amount that you can increase up to 64 MB. In addition to font caching and other calculation-oriented factors, increasing RAM is required to enable duplex printing and the PhotoGrade features.
Upgrades RAM Upgrade - 2 Slot C/D Slot A/B Total Slot C/D Slot A/B 8 MB 4 MB 4 MB 4 MB 8 MB 0 MB 12 MB 4 MB 16 MB 8 MB 12 MB 16 MB 20 MB 24 MB 8 MB 4 MB 8 MB 8 MB 4 MB 8 MB 0 MB 16 MB 8 MB 16 MB 4 MB 16 MB 32 MB 16 MB 16 MB 36 MB 4 MB 32 MB 32 MB 40 MB I/O Controller Board 0 MB 0 MB 8 MB 32 MB 32 MB 48 MB 16 MB 32 MB 64 MB 32 MB 32 MB 48 MB 32 MB 16 MB
K Service Source Take Apart LaserWriter 12/640 PS
Take Apart Left Cover - 1 Left Cover Before you begin, pull out the cassette and open the top cover. Left Cover 1 Hook 2 2 Hook 1 Remove the two screws which fasten the rear end of the left cover. Shift the cover leftward to disengage the hidden hook at the lower right, raise the cover to clear the hidden hook on the top, and pull the cover from the printer.
Take Apart Multipurpose Cover - 2 Multipurpose Cover Pin Claws Pin Multipurpose Cover Before you begin, pull out the cassette. 1 2 3 Open the multipurpose cover. Disengage the pins at both sides in the lower part of the cover and open the cover further to about 90 degrees. Disengage the cover from the two claws and pull the cover off the printer.
Take Apart Multipurpose Tray - 3 Multipurpose Tray Before you begin, remove the multipurpose cover. 1 Multipurpose Tray (1) (2) Pin Using a small flat-blade screwdriver, release the pin on the right side of the multipurpose tray and pull the tray from the printer.
Take Apart Top Cover - 4 Top Cover Top Cover Tab 1 Release Lever No preliminary steps are required before you begin this procedure. Note: Peform this procedure only if you must replace the top cover. 1 2 Tab 1 Tab 2 Cover Trim Pull up the cover release and raise the top cover to about 90 degrees. Using a small flat-blade screwdriver, release the two tabs and lift the cover trim from the printer.
Take Apart Top Cover - 5 Top Cover 3 Spring Hinge Pin Tab 4 trim is the 13 x 3.75 inch plastic piece above the delivery rollers.) Release the tab that retains the right hinge pin and slide the pin out of the printer. Repeat for the left hinge pin. Note: The two door-open springs referenced below are identical and interchangeable Remove the two dooropen springs and lift the top cover from the printer.
Take Apart Main Cover - 6 Main Cover Main Cover (2) (1) Before you begin, remove the following: • Left cover • Multipurpose cover • Multipurpose tray Note: The main cover is a fixed, one-piece housing that consists of the front, rear, and right panels. Seven screws secure the cover to the chassis.
Take Apart Main Cover - 7 2 the rear side that secure the main cover to the chassis. Flex outward the edge of the cover just below the power switch and lift the cover straight up from the chassis. Replacement Note: A slight sideways pull from the I/O side helps seat the cover assembly.
Take Apart I/O Board - 8 1 4 3 2 5 I/O Board Before you begin, remove the following: • Left cover • Multipurpose cover • Multipurpose tray • Main cover Note: Perform this procedure only if you are replacing a defective I/O board. If you are removing the board to get to a deeper part, perform the “I/O Shield” procedure.
Take Apart I/O Board - 9 (with bracket) from the printer. I/O Bracket 4 3 5 6 2 2 1 Note: The I/O board connects to the engine through a receptacle connector. Remove the I/O board carefully to avoid damaging this connector Remove the two screws near the corner of the board and the four screws securing the connectors to the bracket and separate the bracket from the board.
Take Apart I/O Shield - 10 I/O Shield Before you begin, remove the following: • Left cover • Multipurpose cover • Multipurpose tray • Main cover 1 Location of Receptacle Connector I/O Shield Remove the six screws that attach the I/O shield to the chassis and pull the I/O shield (with board in place) from the printer.
Take Apart I/O Shield - 11 connector.
Take Apart DC Controller Board - 12 J292 P/J291 J30 J28 J29 J26 J25 DC Controller Board J24 J22 J23 Before you begin, remove the following: • Left cover • Multipurpose cover • Multipurpose tray • Main cover • I/O shield 1 DC Controller Board 2 Controller Mount Cover Plate Remove the screw and the black cover plate. Remove the screw that secures the rear edge of the controller mount to the chassis.
Take Apart DC Controller Board - 13 3 4 is accessible through a rounded notch in the fuser assembly. Pull the DC controller board straight out of the printer. The board mates into a receptacle connector and may offer some resistance when you begin to pull. Disconnect all connectors on the board. Perform the step below only if you are replacing a defective board. 5 Remove the two screws which fasten the DC controller board to its mount and separate the board from the mount.
Take Apart Laser/Scanner Assembly - 14 Laser/Scanner Assembly Laser/Scanner Assembly J262 J261 Before you begin, remove the following: • Left cover • Multipurpose cover • Multipurpose tray • Main cover 1 2 Remove the four screws at the base of the laser/ scanner assembly. Remove the one screw situated inside the round recess in top of the laser/scanner assembly.
Take Apart Laser/Scanner Assembly - 15 3 Caution: Do not remove any of the three screws inside the square recesses. Lift the laser/scanner assembly, disconnect the two connectors, and remove the assembly from the printer.
Take Apart Registration Guide Assembly - 16 Registration Guide Assembly Before you begin, remove the following: • Left cover • Multipurpose cover • Multipurpose tray • Main cover • Laser/scanner assembly 1 2 Registration Guide Assembly Remove the five screws and remove the assembly from the printer.
Take Apart Registration Guide Assembly - 17 registration guide assembly.
Take Apart Fan Duct - 18 Fan Duct Before you begin, remove the following: • Left cover • Multipurpose cover • Multipurpose tray • Main cover 1 Fan Duct Tab Remove the screw, release the tab, and remove the duct from the printer.
Take Apart Fan - 19 Fan Fan Before you begin, remove the following: • Left cover • Multipurpose cover • Multipurpose tray • Main cover • Fan duct 1 2 Note: Connector J221 is empty. J222 Disconnect the fan cable from connector J222 on the power supply. Remove the long two screws and pull the fan from the chassis.
Take Apart Note: Connector J221 is empty. Power Supply Assembly - 20 J11 Power Supply Assembly Before you begin, remove the following: • Left cover • Multipurpose cover • Multipurpose tray • Main cover • Fan duct • DC controller board. J222 1 2 Power Supply Assembly Place the printer on its side so that the fan points upward.
Take Apart Power Supply Assembly - 21 3 4 power supply. Disconnect the large white connector next to the power switch. Remove the seven screws and separate the power supply assembly from the chassis. Proceed with steps below only if you are replacing a faulty power supply board.
Take Apart Power Supply Assembly - 22 5 Power Supply Board 6 7 Remove the six screws which secure the power supply board to the plate. (One of them secures the grounding wire.) Remove the two screws which secure the power inlet to the plate. Slide the power switch out of its guide and lift the power supply board from the plate.
Take Apart Cartridge Press Actuator - 23 Cartridge Press Actuator Cam Spring E-Ring Guide Plate Before you begin, remove the following: • Left cover • Multipurpose cover • Multipurpose tray • Main cover 1 2 3 Remove the E-ring from the end of the geared cam. Working from the inside of the chassis, slide the cam from the guide plate.
Take Apart Cartridge Press Actuator - 24 slide the guide plate down and outward to remove it from the printer.
Take Apart Cover Interlock Actuator - 25 Cover Interlock Actuator Before you begin, remove the following: • Left cover • Multipurpose cover • Multipurpose tray • Main cover 1 Actuator Assembly 2 Remove the five screws which secure the actuator assembly to the chassis.
Take Apart Cover Interlock Actuator - 26 and remove the cover interlock actuator.
Take Apart Link Interlock Switch - 27 Link Interlock Switch Before you begin, remove the following: • Left cover • Multipurpose cover • Multipurpose tray • Main cover • Cover interlock actuator • Power supply assembly 1 Link Interlock Switch Release the latch and pul out the link interlock switch.
Take Apart Mirror Assembly - 28 Mirror Assembly Cable Guide Mirror Assembly J301 Before you begin, remove the following: • Left cover • Multipurpose cover • Multipurpose tray • Main cover 1 2 Free the cable from the guide and disconnect the connector on the underside of the assembly. Remove the two screws and lift the mirror assembly from the printer.
Take Apart Drive Transfer Assembly - 29 Drive Transfer Assembly Drive Transfer Assembly Before you begin, remove the following: • Left cover • Multipurpose cover • Multipurpose tray • Main cover 1 2 Free the cable that runs across the plate. Remove the three screws and pull off the drive transfer assembly.
Take Apart Main Drive Assembly - 30 Main Drive Assembly Before you begin, remove the following: • Left cover • Multipurpose cover • Multipurpose tray • Main cover • DC controller board • Drive transfer assembly 1 Main Drive Assembly J25 Remove the four screws and pull the main drive assembly from the chassis.
Take Apart Transfer Roller Assembly - 31 Transfer Roller Assembly Tab Transfer Roller Assembly Before you begin, remove the following: • Left cover • Multipurpose cover • Multipurpose tray • Main cover 1 Using a small flatblade screwdriver, pry each end of the transfer roller shaft and remove the assembly from the printer.
Take Apart Transfer Roller Assembly - 32 sure to fully seat the three tabs in the metal guide into the chassis.
Take Apart Registration Roller Assembly - 33 Registration Roller Assembly Registration Roller Assembly Before you begin, remove the following: • Left cover • Multipurpose cover • Multipurpose tray • Main cover 1 Remove the two screws and lift out the registration roller assembly.
Take Apart Paper Deflector Solenoid - 34 Paper Deflector Solenoid Before you begin, remove the following: • Left cover • Multipurpose cover • Multipurpose tray • Main cover • Power suppy • DC controller board Paper Deflector Solenoid 1 Remove the two screws and slide the solenoid out of the chassis.
Take Apart Delivery Sensor - 35 Delivery Sensor Before you begin, remove the following: • Left cover • Multipurpose cover • Multipurpose tray • Main cover 1 2 Mounting Plate Delivery Sensor Cable Remove the three screws which secure the mounting plate to the chassis. As necessary, disconnect the cable, release the tabs, and remove the photo-interrupter from the chassis.
Take Apart Delivery Sensor - 36 3 As necessary, remove the actuator(s) and springs(s) from the mounting plate.
Take Apart Paper Deflector Guide - 37 Paper Deflector Guide Paper Deflector Solenoid Before you begin, remove the following: • Left cover • Multipurpose cover • Multipurpose tray • Main cover 1 Bushing Paper Deflector Guide Bushing 2 At each end, release the white nylon bushing tabs that extend back into the chassis. Pull the paper deflector guide from the printer.
Take Apart Cassette Feed Roller Bearing - 38 Feed Roller Bearing Cassette Feed Roller Bearing Before you begin, remove the following: • Left cover • Multipurpose cover • Multipurpose tray • Main cover • Multipurpose frame assy 1 Release the tab, shift the bearing rightward, and remove it from the chassis.
Take Apart Cassette Feed Roller - 39 Cassette Feed Roller Cassette Feed Roller Before you begin, remove the following: • Left cover • Multipurpose cover • Multipurpose tray • Main cover • Multipurpose frame assy • Cassette feed roller bearing 1 Release the tab and slide the cassette feed roller off the shaft.
Take Apart Pickup Motor and Solenoid - 40 Cover Plate Pickup Motor Pickup Motor and Solenoid Before you begin, remove the following: • Left cover • Multipurpose cover • Multipurpose tray • Main cover 1 2 Cassette Pickup Solenoid Remove the two screws and remove the pickup motor from the printer.
Take Apart Pickup Motor and Solenoid - 41 3 drive assembly, and lift off the cover plate. Remove the one gear which conceals the pickup solenoid, remove the one screw, and remove the pickup solenoid from the printer.
Take Apart Registration Chute Assembly - 42 Registration Chute Assembly Chute Registraton Assembly Before you begin, remove the following: • Left cover • Multipurpose cover • Multipurpose tray • Main cover • DC controller board • Drive transfer assembly • Cover interlock actuator • Link interlock switch • Pickup drive assembly • Main drive assembly 1 Remove the five screws which fasten the regis-
Take Apart Registration Chute Assembly - 43 2 tration chute assembly. Pull out the right side portion first and then take out the entire registration chute assembly, taking care not to bump the assembly against the chassis.
Take Apart Cassette Pickup Roller - 44 Cassette Pickup Roller Before you begin, remove the following: • Left cover • Multipurpose cover • Multipurpose tray • Main cover • Fan duct • DC controller board • Power supply assembly 1 Cassette Pickup Roller Release the claw and slide the cassette pickup roller from the shaft.
Take Apart Multipurpose Frame Assembly - 45 J236-1 P/J236-2 Multipurpose Frame Assembly Before you begin, remove the following: • Left cover • Multipurpose cover • Multipurpose tray • Main cover 1 P/J234-2 P/J2342 Disconnect the two cables that run along the motor-side of the laser/ scanner assembly.
Take Apart Multipurpose Frame Assembly - 46 2 Multipurpose Frame Assembly Remove the four screws and pull the multipurpose frame assembly from the chassis.
Take Apart Manual Feed Solenoid - 47 Multipurpose Frame Assembly Manual Feed Solenoid Before you begin, remove the following: • Left cover • Multipurpose cover • Multipurpose tray • Main cover • Multipurpose frame assy 1 Manual Feed Solenoid Remove the one screw and pull the manual feed solenoid off the multipurpose frame assembly.
Take Apart Manual Feed Pickup Roller - 48 Manual Feed Pickup Roller Manual Feed Pickup Roller Before you begin, remove the following: • Left cover • Multipurpose cover • Multipurpose tray • Main cover • Multipurpose frame assy 1 Multipurpose Frame Assembly Release the latch and slide the manual feed pickup roller off the multipurpose frame assembly.
Take Apart Manual Feed Pickup Roller Holder - 49 Manual Feed Pickup Roller Holder Manual Feed Pickup Roller Holder Before you begin, remove the following: • Left cover • Multipurpose cover • Multipurpose tray • Main cover • Multipurpose frame assy • Manual feed pickup roller 1 Multipurpose Frame Assembly Remove the one screw, press the lever, and slide off the manual feed pickup roller.
Take Apart Manual Feed Clutch Gear - 50 Manual Feed Clutch Gear Before you begin, remove the following: • Left cover • Multipurpose cover • Multipurpose tray • Main cover • Multipurpose frame assy • Manual feed pickup roller • Manual feed pickup roller holder Cam Latch Lever Gear Manual Feed Clutch Gear 1 Release the latch and slide the cam off the shaft.
Take Apart Manual Feed Clutch Gear - 51 2 Cam Latch Lever Gear Manual Feed Clutch Gear Press the lever gear and pull the manual feed clutch gear from the multipurpose frame assembly. Note: Do not separate the two gears on the Manual Feed Clutch Gear (922-1964). Separating the gears may cause the small spring inside the gear to fall off, causing the pickup roller not to rotate, resulting in a timeout paper jam. You cannot see this spring unless you separate the two gears on the clutch.
Take Apart Pressure Plate - 52 Pressure Plate Pressure Plate Before you begin, remove the following: • Left cover • Multipurpose cover • Multipurpose tray • Main cover • Multipurpose frame assy • Manual feed pickup roller • Manual feed pickup roller holder • Manual feed clutch gear 1 Multipurpose Frame Assembly Release the pin on the left side and remove pressure plate from the multipurpose frame
Take Apart Pressure Plate - 53 assembly. Replacement Note: Place the spring over the positioning pin and hook the top of the spring in the small metal tab in the pressure plate.
Take Apart Manual Feed Paper-Present Sensor - 54 Manual Feed PaperPresent Sensor Multipurpose Frame Assembly Claw Manual Feed Paper-Present Sensor Before you begin, remove the following: • Left cover • Multipurpose cover • Multipurpose tray • Main cover • Multipurpose frame assy • Manual feed pickup roller • Manual feed pickup roller holder • Manual feed clutch gear • Pressure plate
Take Apart Manual Feed Paper-Present Sensor - 55 1 Press the claw and remove the sensor.
Take Apart Separation Pad - 56 Separation Pad Separation Pad Before you begin, remove the following: • Left cover • Multipurpose cover • Multipurpose tray • Main cover • Multipurpose frame assy • Manual feed pickup roller • Manual feed pickup roller holder • Manual feed clutch gear • Pressure plate 1 Press the claw from the bottom side to release the separation pad, turn
Take Apart Separation Pad - 57 the assembly about 90 degrees, slide it to align with the cuts in the support shaft, and remove it.
Take Apart Delivery Roller Shaft - 58 Tab 1 Gear Bushing Delivery Roller Shaft Delivery Roller Shaft Before you begin, remove the following: • Left cover • Multipurpose cover • Multipurpose tray • Main cover Tab 2 1 2 Bushing Release the tab and slide the gear and bushing off the one end of the roller shaft.
Take Apart Delivery Roller Shaft - 59 shaft to clear the holes and remove the shaft from the printer.
Take Apart J292 Fuser Assembly - 60 Fuser Assembly Fuser Assembly Before you begin, remove the following: • Left cover • Multipurpose cover • Multipurpose tray • Main cover • Delivery roller shaft 1 J11 2 Disconnect the large white connector next to the power switch. Remove the four screws that secure the fuser assembly to the printer.
Take Apart Fuser Assembly - 61 3 Raise the gear-side of the fuser and remove the entire assembly. Replacement Note: There are two exit actuators above the fuser assembly that are susceptible to damage during fuser replacement. Take great care to lift these actuators out of the way before setting the fuser assembly in place.
Take Apart Fuser Pressure Roller Fuser Pressure Roller - 62 Fuser Pressure Roller Before you begin, remove the following: • Left cover • Multipurpose cover • Multipurpose tray • Main cover • DC controller board • Delivery roller shaft • Fuser assembly 1 Snap the roller shaft from its bearings and lift the pressure roller directly out of the chassis.
Take Apart Fuser Exit Sensor - 63 Fuser Exit Sensor Before you begin, remove the following: • Left cover • Multipurpose cover • Multipurpose tray • Main cover • Fan duct • DC controller board • Power supply assembly 1 Fuser Exit Sensor J28 Release the tabs and remove the sensor from the printer.
Take Apart Top Cover Latches - 64 Left Cover Latch Right Cover Latch Top Cover Latches Before you begin, remove the following: • Left cover • Multipurpose cover • Multipurpose tray • Main cover • Laser/scanner assembly 1 Remove the screw that secures each latch and remove the latches from the printer.
Take Apart Cover Latch Shaft - 65 Cover Latch Shaft Before you begin, remove the following: • Left cover • Multipurpose cover • Multipurpose tray • Main cover • Laser/scanner assembly • Top cover latches Cover Latch Shaft 1 Pull the latch shaft rightward from the printer.
Take Apart Pickup Drive Assembly - 66 Pickup Drive Assembly Before you begin, remove the following: • Left cover • Multipurpose cover • Multipurpose tray • Main cover • DC controller board • Power supply assembly • Multipurpose frame assy • Cassette feed roller bearing 1 Pickup Drive Assembly Put the printer on the rear side.
Take Apart Pickup Drive Assembly - 67 2 3 Disconnect the harness of the pickup solenoid from the connector of the relay harness from the cassette size sensor assembly. Remove the four screws and remove the pickup drive assembly from the chassis.
Take Apart Jam Release Plate Preregistration Pinch Roller Assy - 68 Spring Preregistration Pinch Roller Assy Stopper Rod Before you begin, remove the following: • Left cover • Multipurpose cover • Multipurpose tray • Main cover • Multipurpose frame assy • Pickup drive assembly • Chute registration assy Spring 1 Preregistration Pinch Roller Assembly Raise the jam release plate and remove the two springs and the stopper rod.
Take Apart Preregistration Pinch Roller Assy - 69 2 3 Release the tabs and remove the pinch roller holder from the chassis. Remove the pinch roller assembly from the printer.
K Service Source Exploded View LaserWriter 12/640 PS
Exploded View 1 Overall Exploded View Note: For complete list of parts see the Parts chapter of the LaserWriter 12/640 PS service manual. Top Cover 922-2184 Left Cover 922-1944 Cable, Exit 922-1988 Main Cover 922-1943 Cable, Laser/Scanner 922-1984 Laser/Scanner Assembly 661-1097 Cover Latch Kit 076-0589 Transfer Roller Assy.
K Service Source REA Program LaserWriter 12/640 PS
REA Program Introduction - 1 Introduction A Repair Extension Authorization (REA) program has been initiated for the LaserWriter 12/640 PS printer. This program calls for the execution of four preventive maintenance procedures: • • • • Removal of a capacitor from the DC controller board Modification of an exit actuator Inspection of the cassette pinch roller Resetting of the multipurpose pressure plate.
REA Program Eligible Printers - 2 Eligible Printers Before performing this repair, you must first confirm that the printer is eligible for the program by making the following observations. 1 Location of White Dot 2 Pull the cassette from the printer and observe the face of the black chassis just to the left of where the cassette slides in. If there is a small white dot painted on the chassis, the repairs have already been performed.
REA Program Take Apart - 3 Take Apart Before you begin, remove the following: • Left cover • Multipurpose cover • Multipurpose tray • Main cover • I/O shield • DC controller board • Delivery roller shaft • Fuser assembly • Multipurpose frame assembly Note: All the “first-remove” procedures above have been appended to the back of this document. To reassemble the printer, perform the procedures in reverse.
REA Program Capacitor Removal - 4 Capacitor Removal Caution: While performing this procedure, use a grounded conductive workbench mat and grounding wriststrap, and ground your equipment to the mat. DC Controller Board (Component Side) C102 An intermittent failure could lead to incorrect reporting of the printer’s ready state. The removal of capacitor C102 on the DC controller board solves the problem.
REA Program Capacitor Removal - 5 Removal by Hand C102 Rocking Motion This is the preferred method of removing the capacitor and leads. 1 Hold the board in one hand and grasp the capacitor in the other. Carefully rock the capacitor back and forth while holding the board by its edges. Continue to rock until the capacitor snaps loose.
REA Program Capacitor Removal - 6 2 Leads Using an appropriate cutting tool, remove the two leads (if they have remained on the board after you removed the capacitor). Be careful not to damage any surrounding traces. Remove as much of the leads as possible to prevent potential shorting.
REA Program Capacitor Removal - 7 Removal by Desoldering This is an alternate method of removing capacitor C102. Desolder Points 1 2 3 DC Controller Board (Solder Side) Locate the two points on the solder-side of the board that correspond to capacitor C102. If you are using a vacuum-type soldering tool, apply heat to each of the points, suck the solder from the surface, and pull the capacitor from the board.
REA Program Actuator Modification - 8 Actuator Modification Tape Upper Actuators Closed Caution: The two upper exit actuators above the fuser are extremely susceptible to damage during fuser installation. Please tape them closed as shown before proceeding. Remove the tape after fuser replacement. In rare cases, removing paper jams from the fuser assembly can damage the lower exit actuator. This problem may be caused by tiny burrs at the tip of the actuator.
REA Program Actuator Modification - 9 1 Actuator Spring Exit Actuator Fuser Pressure Roller 2 Locate the exit actuator near the left end of the fuser pressure roller. Pull the exit actuator, along with the actuator spring, out of the slot in the printer frame.
REA Program Actuator Modification - 10 3 After Burnishing Burr Gently rub a small piece of paper against the tip of the actuator about 10-15 times. This burnishing action should remove any burrs that may exist.
REA Program Actuator Modification - 11 Actuator Spring 4 Exit Actuator 5 Reinstall the actuator spring onto the exit actuator. (See the illustration for correct positioning of the spring.) Press the new exit actuator into the slot in the printer frame.
REA Program Actuator Modification - 12 6 7 Use your finger to rock the exit actuator back and forth to make sure it moves freely and has a slight springaction return. Important: The exit actuator must be correctly oriented and there must be sufficient tension in the spring. Otherwise, the actuator will not sense the absence of paper and a paper jam will be reported on power up. Wipe the pressure roller clean using a soft dry cotton cloth.
REA Program Pinch Roller Inspection - 13 Pinch Roller Inspection Pinch Roller The pinch roller in the cassette provides a pressure surface against which the feed roller advances paper. If the pinch roller is misaligned, or its clearance from the feed roller too great, the feed roller may not grip properly and a paper jam can result.
REA Program Pinch Roller Inspection - 14 also serve to prevent the condition from developing in functioning units. Checking Alignment Remove the cassette and check the alignment of the roller. If the roller is not aligned fairly evenly across the pinch surface, make the adjustments described later in this topic. If the alignment is good, check for clearance.
REA Program Pinch Roller Inspection - 15 Screw Screw Cover into the slit between the pinch roller and the plastic molded paper guide. With the cassette correctly oriented (top facing up), the card should just barely stay in place when you remove your hand. If the card falls through the opening in the cassette, the clearance is probably too great and should be adjusted. Making Adjustments Pinch Roller and Bracket 1 2 3 4 Remove the two screws in the top face of the cassette and lift off the cover.
REA Program Pinch Roller Inspection - 16 Replacement Note: There are four claws on the bottom of the cassette cover. Seat the claws in place and then secure the two screws on the top face.
REA Program Pressure Plate Reset - 17 Pressure Plate Reset The pressure plate is the surface in the multipurpose tray that presses paper up against the sweep of the pickup roller. To observe how the pressure plate works, hold the multipurpose frame assembly in your hand and deflect the plate with your thumb. A functional pressure plate should be free to pivot approximately half an inch (1.25 cm) up and down. A snagged pressure plate would not pivot up and down at all.
REA Program Pressure Plate Reset - 18 Before you begin, remove the following from the multipurpose frame assembly: • Manual feed pickup roller • Manual feed pickup roller holder • Manual feed clutch gear Clutch Gear Pickup Roller Roller Holder
REA Program Pressure Plate Reset - 19 1 Carefully release the pivot pin at one end of the pressure plate and lift the plate from the multipurpose frame assembly.
REA Program Pressure Plate Reset - 20 2 Reinstall the pressure plate, making sure the leaf spring on the underside of the plate rests on top of the plastic multi-feed preventer. Also make sure the compression spring is positioned correctly behind the separation pad.
REA Program Pressure Plate Reset - 21 3 After removing and reinstalling the pressure plate, test its movement. If it has the half-inch play referenced above, the plate will be functional. If not, repeat steps 1 and 2. The tip of the leaf spring is visible when the pressure plate is correctly installed.
REA Program Confirming Printer Operation - 22 Confirming Printer Operation After completing the two procedures and reassembling the printer, perform the following steps: 1 2 3 Open the top cover and switch on power. After warming up, the jam light should illuminate. This indicates an operational DC controller board and top cover actuator system. Close the top cover. Send a print job to the printer (or wait for the startup page to print).
REA Program Confirming Printer Operation - 23 After confirming printer operation, you must mark the printer to show that it has undergone the REA work. The tool you will use is a DecoColor® opaque paint marker (white #300). This marker has been mailed to all service providers. Note: Try the marker on a test surface before applying a mark to the printer. If you apply too much pressure, the paint may flow too quickly and run along the face of the chassis. Protect all adjacent surfaces.
REA Program First-Remove Procedures - 24 First-Remove Procedures The following topics are taken from the take apart chapter of the LaserWriter 12/640 PS manual. These are the steps that you must perform prior to commencing the LaserWriter 12/640 PS REA procedures described in the previous topics.
REA Program Left Cover - 25 Left Cover Before you begin, pull out the cassette and open the top cover. Left Cover 1 Hook 2 2 Hook 1 Remove the two screws which fasten the rear end of the left cover. Shift the cover leftward to disengage the hidden hook at the lower right, raise the cover to clear the hidden hook on the top, and pull the cover from the printer.
REA Program Multipurpose Cover - 26 Multipurpose Cover Pin Claws Pin Multipurpose Cover Before you begin, pull out the cassette. 1 2 3 Open the multipurpose cover. Disengage the pins at both sides in the lower part of the cover and open the cover further to about 90 degrees. Disengage the cover from the two claws and pull the cover off the printer.
REA Program Multipurpose Tray - 27 Multipurpose Tray Before you begin, remove the multipurpose cover. 1 Multipurpose Tray (1) (2) Pin Using a small flat-blade screwdriver, release the pin on the right side of the multipurpose tray and pull the tray from the printer.
REA Program Main Cover - 28 Main Cover Main Cover (2) (1) Before you begin, remove the following: • Left cover • Multipurpose cover • Multipurpose tray Note: The main cover is a fixed, one-piece housing that consists of the front, rear, and right panels. Seven screws secure the cover to the chassis.
REA Program Main Cover - 29 2 the rear side that secure the main cover to the chassis. Flex outward the edge of the cover just below the power switch and lift the cover straight up from the chassis. Replacement Note: A slight sideways pull from the I/O side helps seat the cover assembly.
REA Program I/O Shield - 30 I/O Shield Before you begin, remove the following: • Left cover • Multipurpose cover • Multipurpose tray • Main cover 1 Location of Receptacle Connector I/O Shield Remove the six screws that attach the I/O shield to the chassis and pull the I/O shield (with board in place) from the printer.
REA Program I/O Shield - 31 connector.
REA Program DC Controller Board - 32 J292 P/J291 J30 J28 J29 J26 J25 DC Controller Board J24 J22 J23 Before you begin, remove the following: • Left cover • Multipurpose cover • Multipurpose tray • Main cover • I/O shield 1 DC Controller Board 2 Controller Mount Cover Plate Remove the screw and the black cover plate. Remove the screw that secures the rear edge of the controller mount to the chassis.
REA Program DC Controller Board - 33 3 4 5 is accessible through a rounded notch in the fuser assembly. Pull the DC controller board straight out of the printer. The board mates into a receptacle connector and may offer some resistance when you begin to pull. Disconnect all connectors on the board. Remove the two screws which fasten the DC controller board to its mount and separate the board from the mount.
REA Program Delivery Roller Shaft - 34 Tab 1 Gear Bushing Delivery Roller Shaft Delivery Roller Shaft Before you begin, remove the following: • Left cover • Multipurpose cover • Multipurpose tray • Main cover Tab 2 1 2 Bushing Release the tab and slide the gear and bushing off the end of the shaft. Release the tab at the opposite bushing, slide the shaft to clear the holes, and remove the shaft from the printer.
REA Program J292 Fuser Assembly - 35 Fuser Assembly Fuser Assembly Before you begin, remove the following: • Left cover • Multipurpose cover • Multipurpose tray • Main cover • Delivery roller shaft 1 J11 2 Disconnect the large white connector next to the power switch. Remove the four screws that secure the fuser assembly to the printer.
REA Program Fuser Assembly - 36 3 Tape Upper Actuators Closed Raise the gear-side of the fuser and remove the entire assembly. Replacement Warning: The two exit actuators above the area of the fuser are extremely susceptible to damage during fuser replacement. Please tape these actuators closed as shown before reinstalling the fuser. Remove the tape after the fuser is in place.
REA Program Multipurpose Frame Assembly - 37 J236-1 P/J236-2 Multipurpose Frame Assembly Before you begin, remove the following: • Left cover • Multipurpose cover • Multipurpose tray • Main cover 1 P/J234-2 P/J2342 Disconnect the two cables that run along the motor-side of the laser/ scanner assembly.
REA Program Multipurpose Frame Assembly - 38 2 Multipurpose Frame Assembly Remove the four screws and pull the multipurpose frame assembly from the chassis.
REA Program Manual Feed Pickup Roller - 39 Manual Feed Pickup Roller Manual Feed Pickup Roller Before you begin, remove the following: • Left cover • Multipurpose cover • Multipurpose tray • Main cover • Multipurpose frame assy 1 Multipurpose Frame Assembly Release the latch and slide the manual feed pickup roller off the multipurpose frame assembly.
REA Program Manual Feed Pickup Roller Holder - 40 Manual Feed Pickup Roller Holder Manual Feed Pickup Roller Holder Before you begin, remove the following: • Left cover • Multipurpose cover • Multipurpose tray • Main cover • Multipurpose frame assy • Manual feed pickup roller 1 Multipurpose Frame Assembly Remove the one screw, press the lever, and slide off the manual feed pickup roller.
REA Program Manual Feed Clutch Gear - 41 Manual Feed Clutch Gear Before you begin, remove the following: • Left cover • Multipurpose cover • Multipurpose tray • Main cover • Multipurpose frame assy • Manual feed pickup roller • Manual feed pickup roller holder Cam Latch Lever Gear Manual Feed Clutch Gear 1 Release the latch and slide the cam off the shaft.
REA Program Manual Feed Clutch Gear - 42 2 Press the lever gear and pull the manual feed clutch gear from the multipurpose frame assembly.