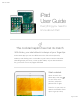
iPad User Guide iPad User Guide Everything you need to know about iPad The cocktail napkin has met its match With Notes, your sketchbook is always at your fingertips In the Notes app you can use different tools—like colored pencils, markers, and felt tip pens—to doodle to your heartʼs content. Whether sketching helps you focus, come up with ideas, or just relax and have fun, you never run out of pages with iPad. Start a sketch Open a note in the Notes app, then tap .
iPad User Guide then pinch closed when youʼre done to zoom back out. Experiment with the tools Just like real drawing tools, the marker is translucent so you can layer your strokes to vary the tone, and the pencil is great for subtle shading. To adjust the angle of the ruler, touch and hold it with two fingers, then rotate your fingers. Collaborate Whether itʼs a doodlefilled brainstorm page, a work of art, or something in between, invite a friend to contribute and see what unfolds.
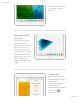
iPad User Guide Want to learn more? Check out Create a sketch. Remember when? Rediscover special moments with Memories Memories takes photos and videos from special times in your life—that crazy race with your best friend, the backpacking trip in Colorado, that blurry first year of your sonʼs life—and turns them into short movies. Get started Tap the Memories tab in the Photos app and choose a memory.
iPad User Guide Make it perfect You can add or remove specific photos and videos, change the music or title, even adjust the length of the Memory movie. Just tap a movie while itʼs playing, then tap . Remember together To share your Memory movie, tap the movie while itʼs playing, tap , then email it to a friend or send it with Messages.
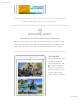
iPad User Guide watch on a big screen. All your memories are available in the Photos app on Apple TV when you use iCloud Photo Library. Want to learn more? Check out Memories in the Photos chapter. A quiet Sunday Take a break with iPad Sometimes after a busy week, you just need some down time. Curl up with iPad to enjoy a good book, watch a TV show, do some shopping, and catch up with friends.
iPad User Guide Shop with Apple Pay Use Safari to visit your favorite store online. When you find that perfect shirt, tap Apple Pay, then follow the instructions to check out with a touch of your finger—no need to hunt for your credit card. Hang out Open FaceTime, tap , then call your friend for a visit. As you chat, you can take a screenshot to capture a photo of the conversation. Press and hold the Sleep/Wake button on the top of your iPad while you press the Home button.
iPad User Guide Fall asleep with a book Reading a book is a great way to wind down as bedtime draws near. Choose a good read in iBooks, then tone down the blue light that may make it harder for you sleep. Swipe up from the bottom of the screen and turn on Night Shift . To learn more, check out Apple Pay, FaceTime, and Multitasking. Not all features are available in all areas.
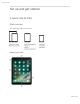
iPad User Guide Set up and get started A quick look at iPad iPad overview This guide describes iOS 10.3 for: iPad Pro (9.
iPad User Guide Page 9 of 292
iPad User Guide iPad Pro (9.
iPad User Guide iPad Pro (12.
iPad User Guide iPad Pro (12.
iPad User Guide iPad (5th generation) Page 13 of 292
iPad User Guide iPad (5th generation) features App icons Status bar FaceTime HD camera Multi-Touch display Home button/Touch ID sensor Volume buttons iSight camera Sleep/Wake button Microphones Headset jack Speakers Lightning connector Nano-SIM tray (cellular models) iPad mini 4 Page 14 of 292
iPad User Guide iPad mini 4 features App icons Status bar FaceTime HD camera Multi-Touch display Home button/Touch ID sensor Volume buttons iSight camera Microphones Sleep/Wake button Headset jack Speakers Lightning connector Nano-SIM tray (cellular models) Your features and apps may vary depending on the model of iPad you have, and on your location, language, and carrier. To learn which features are available on your iPad, go to the Compare iPad models website.
iPad User Guide go to the iOS Feature Availability website. Note: Apps and services that send or receive data over a cellular network may incur additional fees. Contact your carrier for information about your iPad service plan and fees. Sleep/Wake button Use the Sleep/Wake button to turn on or wake iPad, lock it, or turn it off. Locking iPad puts the display to sleep, saves the battery, and prevents anything from happening if you touch the screen.
iPad User Guide Tip: To unlock iPad by touching instead of pressing the Home button, go to Settings > General > Accessibility > Home Button, then turn on Rest Finger to Open (iPad Pro, iPad 5th generation, iPad Air 2, iPad mini 3 and later). You can use iPad Smart Cover, sold separately, to lock or unlock iPad (iPad 2 and later, iPad mini and later). You can use iPad Smart Case, sold separately, to lock or unlock iPad (iPad 2 and later, iPad mini 3, iPad mini 2, iPad mini).
iPad User Guide Lock the ringer and alert volumes. Go to Settings > Sounds, then turn off Change with Buttons. Note: To limit the maximum headset volume, go to Settings > Music > Volume Limit. To prevent changes to the volume limit, go to Settings > General > Restrictions > Volume Limit. Use Control Center to adjust the volume. When iPad is locked or when youʼre using another app, swipe up from the bottom edge of the screen to open Control Center, swipe left, then adjust the volume. Mute the sound.
iPad User Guide Smart Connector for iPad Pro Using the Smart Connector, you magnetically attach an accessory, such as iPad Pro Smart Keyboard, to iPad Pro. For more information about iPad Pro Smart Keyboard, see the Apple Support article Use your Smart Keyboard with iPad Pro. SIM card An Apple SIM card or an embedded Apple SIM is used for your cellular data connection. All iPad Wi-Fi + Cellular models include a SIM card tray. iPad Pro (9.
iPad User Guide Cellular data also requires a wireless data plan. See Sign up for cellular service. Important: A SIM card or an Apple SIM is required to use cellular services when connecting to GSM networks and some CDMA networks. Your iPad is subject to your wireless service providerʼs policies, which may include restrictions on switching service providers and roaming, even after conclusion of any required minimum service contract. Contact your wireless service provider for more details.
iPad User Guide iPad (Wi-Fi + Cellular models) is in range of the cellular network. If thereʼs no signal, “No service” appears. Airplane Mode Airplane Mode is on—you canʼt access the Internet, or use Bluetooth® devices. Nonwireless features are available. See Travel with iPad. LTE iPad (Wi-Fi + Cellular model) is connected to the Internet over a 4G LTE network. 4G iPad (Wi-Fi + Cellular model) is connected to the Internet over a 4G network.
iPad User Guide Bluetooth Blue or White icon: Bluetooth is on and paired with a device, such as a headset or keyboard. Gray icon: Bluetooth is on and paired with a device, but the device is out of range or turned off. See Bluetooth devices. Headphones connected iPad is paired with Bluetooth headphones that are turned on and within Bluetooth range. See Bluetooth devices. Bluetooth battery Shows the battery level of a supported paired Bluetooth device.
iPad User Guide Set up Apple ID Your Apple ID is the account you use for just about everything you do with Apple— including storing your content in iCloud; downloading apps from the App Store; streaming Apple Music content; buying music, movies, and TV shows from the iTunes Store; and purchasing books from the iBooks Store. If you already have an Apple ID, use it to sign in when you first set up iPad, and whenever you need to sign in to use an Apple service.
iPad User Guide Set up iCloud. Go to Settings > Sign in to your iPhone. Create an Apple ID if you donʼt have one, or use your existing one. Content stored in iCloud is pushed wirelessly to your other devices where youʼre signed in to iCloud with the same Apple ID. iCloud is available on devices with iOS 5 or later, on Mac computers with Mac OS X 10.7.5 or later, and on PCs with iCloud for Windows 5 or later (Windows 7 or later is required). You can also sign in to iCloud.
iPad User Guide Store your photos and videos: Use iCloud Photo Library to store all your photos and videos in iCloud. You can access them from any device with iOS 8.1 or later, a Mac with OS X 10.10.3 or later, a PC with iCloud for Windows 5 or later, and on iCloud.com when you sign in with the same Apple ID. Use iCloud Photo Sharing to share photos and videos with only the people you choose, and let them add photos, videos, and comments.
iPad User Guide a message, or erase all the data on it. Find My iPhone also includes Activation Lock, which requires your Apple ID and password to disable Find My iPhone, erase iPad, or reactivate your device. See Find your iPad. Find your friends: Use Find My Friends to share your location with friends and family. Store and access your passwords and credit card information: iCloud Keychain keeps passwords and credit card information up to date across all your designated devices.
iPad User Guide Note: If youʼre using iPad with a company or other organization, see iPad in the enterprise. If the iPad youʼre using is administered by your school, see your teacher or administrator for setup instructions. Your school may give you a passcode (to turn on or wake up iPad) and a Managed Apple ID (to access features like iCloud Drive). Some standard iPad apps and features arenʼt available to accounts with Managed Apple IDs.
iPad User Guide Move your data from Android during setup. When setting up iPad, on the Apps & Data screen, select Move Data from Android, turn on Wi-Fi on the Android device, open the Move to iOS app on the Android device, then follow the steps. Note: You can use the Move to iOS app only when you first set up iPad. If youʼve already finished setup and want to use Move to iOS, you must erase your iOS device and start over or move your data manually.
iPad User Guide You can add contacts using an LDAP or CardDAV account, if your company or organization supports it. See Add contact accounts. You can add calendars using a CalDAV calendar account, and you can subscribe to iCalendar (.ics) calendars or import them from Mail. See Use multiple calendars. Date and time The date and time are usually set for you based on your location—take a look at the Lock screen to see if theyʼre correct. Set whether iPad updates the date and time automatically.
iPad User Guide Sign up for cellular service If your iPad has an embedded Apple SIM (available on 9.7-inch iPad Pro Wi-Fi + Cellular) or an Apple SIM card (available for other iPad Wi-Fi + Cellular models with Touch ID), you can choose a carrier and sign up for cellular service right on iPad. Depending on your home carrier and your destination, you may also be able to travel abroad with iPad and sign up for cellular service with a carrier in the country youʼre visiting.
iPad User Guide Configure Wi-Fi. Go to Settings > Wi-Fi, then turn Wi-Fi on or off. (You can also turn WiFi on or off in Control Center.) Choose a network: Tap one of the listed networks, then enter the password, if required. Ask to join networks: Turn on Ask to Join Networks to be notified when a Wi-Fi network is available. Otherwise, you must manually join a network when a previously used network isnʼt available. Join a closed network: Tap Other, then enter the name of the network.
iPad User Guide iTunes, available from the iTunes download website Connect iPad to your computer. Use the included Lightning to USB Cable. Unless iPad is actively syncing with your computer, you can disconnect it at any time. Look at the top of the iTunes screen on your computer or on iPad to see if syncing is in progress. If you disconnect iPad while itʼs syncing, some data may not get synced until the next time you connect iPad to your computer.
iPad User Guide Note: If you have iCloud Music Library turned on, you can manually manage only video. Sync with iTunes Syncing with iTunes copies information from your computer to iPad, and vice versa. You can sync by connecting iPad to your computer, or you can set up iTunes to wirelessly sync music, videos, photos, and more with Wi-Fi. For help syncing iPad, open iTunes on your computer, choose Help > iTunes Help, then select “Add items to iPod, iPhone, or iPad.
iPad User Guide In the Photos pane, you can sync photos and videos from a supported app or a folder on your computer. In the Summary pane, you can set iTunes to automatically sync iPad when itʼs attached to your computer. To temporarily prevent syncing after you attach the device, press and hold Command and Option (Mac) or Shift and Control (PC) until you see iPad appear in the iTunes window. Back up iPad with iCloud Backup When you first sign in with your Apple ID, iCloud Backup turns on automatically.
iPad User Guide Stop or resume iCloud backups. Go to Settings > [your name] > iCloud, then turn iCloud Backup off or on. Back up immediately on iCloud. Go to Settings > [your name] > iCloud > iCloud Backup, then tap Back Up Now. View or remove iCloud backups. Go to Settings > [your name] > iCloud > iCloud Storage > Manage Storage. Important: Backups for music, movies, or TV show purchases arenʼt available in all countries.
iPad User Guide View or remove iTunes backups. Open iTunes on your computer, choose iTunes > Preferences, then click Devices. Encrypted backups have a lock icon in the list of backups. Encrypt iPad backup. In the Summary pane, select “Encrypt iPad backup” if you want to encrypt the information stored on your computer when iTunes makes a backup. Encrypted backups are indicated by a lock icon , and a password is required to restore the backup.
iPad User Guide If you have questions about the settings, apps, or other requirements for using iPad in your enterprise environment, contact the system administrator at your organization. For general information about using iPad in business, go to the iPad in Business website. View this user guide on iPad You can view the iPad User Guide on iPad in Safari, and in the iBooks app. View the user guide in Safari. Tap , then tap the iPad User Guide bookmark. (If you donʼt see a bookmark, go to iPad help.
iPad User Guide Whatʼs new in iOS 10 Expressive messages. Enhance your messages with bubble effects, invisible ink, fullscreen effects, handwritten messages, Digital Touch, larger emoji, iMessage apps (including stickers), and more. See Send and receive messages. Broader Siri capabilities. Siri works with many of your favorite apps from the App Store. For example, you can use Siri with an app to book a ride or send money to a friend in need. See Siri and apps. Discover TV. (iOS 10.
iPad User Guide Control your home. The Home app lets you securely control Works with Apple HomeKit accessories, such as lights, locks, thermostats, smart plugs, and more, even when youʼre away from home. You can create automations that, for example, turn on the lights at sunset or unlock your door and dial up the heat when you return home. See Home overview. Quickly find music. Music is now simpler. Enjoy the fresh design that provides greater clarity and simplicity to every aspect of Apple Music.
iPad User Guide More ways to read News. Easily find interesting stories with the all-new For You design, subscribe to your favorite publications, and get notifications about the dayʼs most important stories, right on your Lock screen. See Get started with News. A more powerful Lock screen. Interact with notifications and, with an Internet connection, catch up on news, check your reminders, and check your mail—all without unlocking iPad. See Today View and Notifications. Two tabs are better than one.
iPad User Guide Apple ID information in Settings. (iOS 10.3) See all your Apple ID information in one location. This includes your contact information, the iCloud services and features youʼre using, a list of your Apple devices, and more. See Apple ID. Type in two languages. Add a keyboard in another language, and you can type in two languages at the same time without having to switch between keyboards. See Add or change keyboards.
iPad User Guide Basics Use apps Switch between apps You can easily switch between the apps youʼre using. View open apps. Double-click the Home button to reveal your open apps in the app switcher. Swipe sideways to see more. To switch to another app, tap it. Close an app. If an app isnʼt working properly, you can force it to quit. Swipe the app up from the app switcher display, then try opening the app again. Search for apps. If you have lots of apps, you can use Search to find and open them.
iPad User Guide Drag a photo, map, or webpage in any direction to see more. To quickly jump to the top of a page, tap the status bar at the top of the screen. Zoom in or out Pinch open on a photo, webpage, or map for a close-up—then pinch closed to zoom back out. In Photos, keep pinching to see the collection or album the photoʼs in.
iPad User Guide Or double-tap a photo or webpage to zoom in, then double-tap again to zoom out. In Maps, double-tap to zoom in, then tap once with two fingers to zoom out. Gestures Use multitasking gestures on iPad to return to the Home screen, reveal the app switcher display, or switch to another app. Return to the Home screen. Pinch four or five fingers together. Reveal the app switcher. Swipe up with four or five fingers. Switch apps. Swipe left or right with four or five fingers.
iPad User Guide Lock the screen orientation. Swipe up from the bottom edge of the screen to open Control Center, then tap . The Lock Orientation icon appears in the status bar when the screen orientation is locked. On iPad models with a side switch, you can also set the Side Switch to lock the screen orientation instead of silencing sound effects and notifications. Go to Settings > General then, under “Use Side Switch to,” tap Lock Rotation. Home screen Tap an app to open it.
iPad User Guide Lock screen Press the Sleep/Wake button to see the Lock screen and quickly access the features and information you need most. You can see your most recent notifications without unlocking iPad. You can also: Swipe down from the top of the screen to see all your recent notifications at once in Notification Center. Swipe up from the bottom of the screen to open Control Center. Swipe right to see Today View and get information from your favorite apps. Swipe left to open Camera. Unlock iPad.
iPad User Guide Notifications Notifications help you keep track of whatʼs new. They let you know if you missed a call, if the date of an event moved, and more. You can customize your notifications so you just see whatʼs important to you. Respond when iPad is locked. Swipe the notification left. Open the app to respond. Swipe the notification right. Respond without leaving the current app. Pull the notification down when it appears at the top of your screen.
iPad User Guide Silence all your notifications. Go to Settings > Do Not Disturb. You can also use Siri to turn Do Not Disturb on or off. Say “Turn on Do Not Disturb” or “Turn off Do Not Disturb.” Close Notification Center. Swipe up, or press the Home button. Today View Get information from your favorite apps, at a glance. Choose from Maps Nearby, Calendar, Notes, News, Reminders, and more. Open Today View. Swipe right from the left edge of the Home screen or Lock screen.
iPad User Guide Control Center Control Center gives you instant access to the camera, AirPlay Mirroring, control and playback of currently playing audio and video, and other handy features. You can also adjust the brightness, lock the screen in portrait orientation, turn wireless services on or off, and turn on AirDrop. Open Control Center. Swipe up from the bottom edge of any screen (even the Lock screen). Control audio. Swipe Control Center left to quickly reach audio controls.
iPad User Guide Sports scores and schedules Weather forecasts Stock prices Quick conversions Calculations Places nearby Media, including music, TV shows, movies, and web videos Websites Content in apps (for supporting apps) Siri provides even more information before you start to type. Relevant people Suggested apps Places nearby Items in the news Search with iPad. Swipe down from the middle of the Home screen to show Search. Tap an item to get more information, or tap the search field.
iPad User Guide Choose what to search. Go to Settings > General > Spotlight Search, then tap to deselect apps or content. Turn off Siri Suggestions and Suggestions in Search. Go to Settings > General > Spotlight Search. Turn off Location Services for Spotlight Suggestions. Go to Settings > Privacy > Location Services. Tap System Services, then turn off Location-Based Suggestions. Search in apps. Many apps include a search field where you can type to find something within the app.
iPad User Guide Siri Make requests Siri (on iPad Pro, iPad 3rd generation and later, iPad mini and later) lets you speak to your iPad to send messages, schedule meetings, make FaceTime calls, and much more. Siri understands natural speech, so you donʼt have to learn special commands or keywords. Ask Siri anything, from “set the timer for 3 minutes” to “what movies are showing tonight?” Open apps, and turn features like Airplane Mode, Bluetooth, Do Not Disturb, and VoiceOver on or off.
iPad User Guide Get Siri hints. Ask Siri “what can you do,” or tap . The onscreen response from Siri often includes information or images that you can tap for additional detail, or to perform some other action. Change the voice gender for Siri. Go to Settings > Siri > Siri Voice (may not be available in all areas). Adjust the volume for Siri. Use the volume buttons while youʼre interacting with Siri. For voice feedback options, go to Settings > Siri > Voice Feedback.
iPad User Guide To let Siri know about a relationship, say something like “Emily Parker is my wife” or “Ailish Kimber is my mom.” Note: Siri uses Location Services when your requests require knowing your location. See Location Services. Siri and apps Siri works with many of the apps on iPad, including FaceTime, Messages, Maps, Clock, Calendar, and more. For example, you can say things like: “FaceTime Mom” “Do I have any new texts from Rick?” “Set an alarm for 8 a.m.
iPad User Guide Enter text Type and edit text Tap a text field to see the onscreen keyboard, then tap letters to type. You can also rest your fingers on the onscreen keyboard, then start typing normally. The placement of the keys invisibly adjusts based on where youʼve rested your fingers. If you stop typing, the placement of the keys resets after two seconds (iPad Pro, iPad 5th generation, iPad Air and later). Type uppercase letters. Tap Shift or touch the Shift key and slide to a letter.
iPad User Guide Quickly end a sentence with a period and a space. Double-tap the space bar. Correct spelling. If you see a word underlined in red, tap it to see suggested corrections. If the word you want doesnʼt appear, type the correction. Hide the onscreen keyboard. Tap the Keyboard key . Set options for typing or add keyboards. Go to Settings > General > Keyboard. You can also use an Apple Wireless Keyboard to enter text. See Use an Apple Wireless Keyboard. To dictate instead of typing, see Dictate.
iPad User Guide Turn your keyboard into a trackpad. Touch and hold the keyboard with two fingers until it turns light gray. Drag around the keyboard to position the insertion point. Lift, then touch and hold with two fingers to reveal the drag points. Move your fingers to select text. Tap with two fingers to select a word. Double-tap with two fingers to select a sentence. Tap three times with two fingers to select a paragraph. Use the Shortcut Bar.
iPad User Guide Undo the last edit. Use the Shortcut Bar, or shake iPad, then tap Undo. Justify text. Select the text, then tap the left or right arrow (not always available). Predictive text As you write, the keyboard predicts your next word, suggests emoji that could take the place of your word, and makes suggestions based on your recent activity and information from your apps (not available in all languages).
iPad User Guide Note: Dictation may not be available in all languages or in all areas, and features may vary. Cellular data charges may apply. See Cellular data settings. Dictate text. Tap on the iPad keyboard, then speak. When you finish, tap Done. Add text. Tap again and continue dictating. To insert text, tap to place the insertion point first. You can also replace selected text by dictating. Add punctuation or format text. Say the punctuation or format.
iPad User Guide Save keystrokes A shortcut lets you enter a word or phrase by typing just a few characters. For example, type “omw” to enter “On my way!” That oneʼs already set up for you, but you can also add your own. Create a shortcut. Go to Settings > General > Keyboard, then tap Text Replacement. Have a word or phrase you use and donʼt want it corrected? Create a shortcut, but leave the Shortcut field blank. Use iCloud to keep your personal dictionary up to date on your other devices.
iPad User Guide Change the keyboard layout. Go to Settings > General > Keyboard > Keyboards, select a keyboard, then choose a layout. For more information about your keyboard, see the Apple Support article Get help with the keyboard on your iPhone, iPad, or iPod touch. Keyboard layouts You can type with a split keyboard thatʼs at the bottom of the screen, or undocked and in the middle of the screen. Adjust the keyboard.
iPad User Guide Quickly switch between apps. Press and hold the Command key, then press Tab until you reach the app you want to open. View keyboard shortcuts. Press and hold the Command key to see shortcuts for an app. Open Search. Press Command-Space. Tip: If youʼve added a Chinese, Korean, Japanese, or Hebrew keyboard, you can use the Caps Lock key to quickly switch back and forth between Latin script and the other keyboard youʼre using.
iPad User Guide View keyboard shortcuts. Press and hold the Command key to see shortcuts for an app. Quickly switch between apps. Press and hold the Command key, then press Tab until you reach the app you want to open. Open Search. Press Command-Space. Tip: If youʼve added a Chinese, Korean, Japanese, or Hebrew keyboard, you can use the Caps Lock key to quickly switch back and forth between latin script and the other keyboard youʼre using. Save your batteries.
iPad User Guide Multitasking Multitasking with iPad Work with more than one app at the same time with Slide Over, Split View, and Picture in Picture. You can use Slide Over and Split View with many apps including Safari, Notes, Photos, Calendar, and more. You can use Picture in Picture with FaceTime, Videos, and more. Slide Over With Slide Over, you can open a second app without closing the one youʼre in.
iPad User Guide Split View Keep two apps open and active at the same time (iPad Pro, iPad 5th generation, iPad Air 2, iPad mini 4). Make both apps active. When using an app, swipe left from the right edge of the screen, then tap the middle of the app divider. Give both apps equal space. Drag the app divider to the center of the screen. Close Split View. Drag the app divider to the left or right, depending on which app you want to close. Turn Split View off.
iPad User Guide Use Picture in Picture. When watching a video or using FaceTime, press the Home button or tap . Your video screen scales down to a corner of your display so you can see the Home screen and open other apps. Resize the video window. Pinch open the small video window to make it larger. Then pinch closed to shrink it again. Move the video window. Drag the small video window to a different corner of the screen.
iPad User Guide Do Not Disturb Do Not Disturb is an easy way to silence iPad, whether youʼre going to dinner or to sleep. It keeps FaceTime calls and alerts from making any sounds or lighting up the screen. Turn on Do Not Disturb. Swipe up from the bottom edge of the screen to open Control Center, then tap . When Do Not Disturb is on, appears in the status bar. Even if Do Not Disturb is on, calls and messages from your emergency contacts in Medical ID still come through as usual, and Alarms still sound.
iPad User Guide iPad may also charge slowly when you connect it to a USB 2.0 port on your computer. If your Mac or PC doesnʼt provide enough power to charge iPad, a “Not Charging” message appears in the status bar. Important: The iPad battery may drain instead of charge if iPad is connected to a computer thatʼs turned off or is in sleep or standby mode, to a USB hub, or to the USB port on a keyboard. Show percentage of battery remaining in the status bar.
iPad User Guide Set up Apple Pay. Go to Settings > Wallet & Apple Pay, then tap Add Credit or Debit Card. The first time you add a card to Apple Pay, you may be prompted to use the card you use with iTunes. Then tap Next on the following screen, and position iPad so that your card appears in the frame. The card issuer determines if your card is eligible for Apple Pay, and may ask you for additional information to complete the verification process.
iPad User Guide You may receive a notification with the merchant name, and the amount authorized for the purchase. Your zip or postal code may be provided to the merchant to calculate tax and shipping costs. Payment information—such as billing and shipping addresses, email address, and phone number—may also be provided to the merchant once you authorize the payment with Touch ID or a passcode. View and manage the card information. Go to Settings > Wallet & Apple Pay, then tap a card.
iPad User Guide Create email and events: When you start adding people to an email or calendar event, proactive assistant suggests the people you included in previous emails or events. Leave for an event: If your calendar event includes a location, proactive assistant assesses traffic conditions and notifies you when to leave. Turn off contact suggestions. Go to Settings > Contacts, then turn off Contacts Found in Apps. Turn off event suggestions.
iPad User Guide Turn on Share My Location. Go to Settings > [your name] > iCloud > Share My Location. Share your location with a friend. Open Find Friends, then tap Add. Select a contactʼs name, or type a name in the To field. Choose how long you want to share your location. Share your location using AirDrop. Tap Add, then select a friend who appears in AirDrop. Choose how long you want to share your location. Set a notification. Select a friend, then tap Notify Me.
iPad User Guide Personalize your iPad Arrange your apps Arrange apps. Touch and hold any app on the Home screen until you see the app icons jiggle, then drag apps around. Drag an app to the edge of the screen to move it to a different Home screen, or drag it to the Dock at the bottom of the screen (you may need to remove another app first). Press the Home button to save your arrangement. Create a new Home screen. While arranging apps, drag an app to the right edge of the last Home screen.
iPad User Guide Remove apps Remove apps from the Home screen. Touch and hold an app on the Home screen until you see the app icons jiggle, then tap in the upper-left corner. When you finish, press the Home button.
iPad User Guide Restore an app you removed. Go to the App Store, search for the app, then tap . Organize with folders Create a folder. While arranging apps, drag one app onto another. Tap the name of the folder to rename it. Drag apps into or out of the folder. Press the Home button when you finish. You can have multiple pages of apps in a folder. Delete a folder. Drag out all the apps—the folder is deleted automatically.
iPad User Guide When choosing an image for new wallpaper, you may be able to tap Perspective Zoom to make your wallpaper move when you change the angle you view the screen. To turn on the Perspective Zoom option for wallpaper youʼve already set, go to Settings > Wallpaper, then tap the image of the Lock screen or Home screen. Note: Perspective Zoom doesnʼt work if Reduce Motion (in Accessibility settings) is turned on. See Reduce motion.
iPad User Guide Use Night Shift. Go to Settings > Display & Brightness > Night Shift. Turn on Night Shift manually—helpful when youʼre in a darkened room during the day, for example—or schedule it to turn on automatically. If you schedule Night Shift to turn on from sunset to sunrise, iPad uses the data from your clock and your geolocation to determine when itʼs nighttime for you.
iPad User Guide App extensions can also help you edit a photo or video in your Photos app. For example, you can download a photo-related app that lets you apply filters to photos. Install app extensions. Download the app from the App Store, open the app, then follow the onscreen instructions. Turn sharing or action options on or off. Tap , then tap More (drag options to the left if necessary). Turn off third-party sharing or action options (they're on by default). Organize sharing and action options.
iPad User Guide Turn on restrictions. Go to Settings > General > Restrictions, then tap Enable Restrictions. Youʼll be asked to define a restrictions passcode thatʼs necessary to change the settings you make. This can be different from the passcode for unlocking iPad. Important: If you forget your restrictions passcode, you must restore the iPad software. See Restore iPad.
iPad User Guide International keyboards Use international keyboards With international keyboards you can type text in many different languages, including Asian languages and languages written from right to left. For a list of supported keyboards, go to Appleʼs iPad website, choose your iPad, click Tech Specs, then scroll to Languages. Manage keyboards. Go to Settings > General > Keyboard > Keyboards. Add a keyboard: Tap Add New Keyboard, then choose a keyboard from the list. Repeat to add more keyboards.
iPad User Guide When using certain Chinese or Japanese keyboards, you can create a shortcut for word and input pairs. The shortcut is added to your personal dictionary. When you type a shortcut while using a supported keyboard, the paired word or input is substituted for the shortcut. Create shortcuts. Go to Settings > General > Keyboard > Text Replacement.
iPad User Guide the closest match at the top. When you choose a character, its likely follow-on characters appear in the list as additional choices. You can type some complex characters, such as 潚 (part of the name for the Hong Kong International Airport), by writing two or more component characters in sequence. Tap the character to replace the characters you typed. Roman characters are also recognized. Type Japanese kana. Use the Kana keypad to select syllables.
iPad User Guide Apps Messages Send and receive messages Use Messages to send and receive texts, photos, videos, and more through iMessage or SMS/MMS services. With the iMessage service, you can enhance your messages with bubble effects, invisible ink, full-screen effects, your own handwriting, Digital Touch, iMessage apps, stickers, and more. Start a conversation. Tap tap . Enter the recipientʼs phone number or email address, or and choose a contact. Tap the text field, then enter your message.
iPad User Guide To manage a group conversation, tap . You can name the conversation, add someone to the conversation, or leave the conversation. Use emoji. When typing a message, tap or to switch to the Emoji keyboard. To automatically replace text with emoji, tap the highlighted words. Hide the keyboard. Tap in the lower-right corner. Resume a conversation. Tap the conversation in the Messages list. Ask Siri.
iPad User Guide Note: You canʼt recover a deleted conversation. Set up iMessage and SMS/MMS With the Messages app, you can exchange messages with other SMS and MMS devices using your cellular connection, and with other iOS devices and Mac computers using iMessage. iMessage is an Apple service that sends messages over Wi-Fi or cellular connections to other iOS devices (with iOS 5 or later) and Mac computers (with OS X 10.8 or later). These messages donʼt count against your messaging plan.
iPad User Guide Share photos, videos, and audio With iMessage or MMS, you can send messages with photos, videos, and audio. Your carrier determines the size limit of attachments; iPad may compress photo and video attachments when necessary. Send a photo or video. Tap . You can: Quickly take a photo from within Messages: Frame the shot in the viewfinder, then tap . Choose a recent photo or video: Swipe left to browse through recent shots. Take a photo or video using Camera: Tap Camera.
iPad User Guide Note: To save space, iPad automatically deletes audio messages two minutes after you listen to them, unless you tap Keep. To always keep them, go to Settings > Messages > Expire (below Audio Messages), then tap Never. Forward a message or attachment. Touch and hold a message or attachment, tap More, select additional items if desired, then tap . Share, save, or print an attachment. Tap the attachment, then tap . Copy an attachment. Touch and hold the attachment, then tap Copy.
iPad User Guide Fireball: Touch and hold with one finger. Kiss: Tap with two fingers. Heartbeat: Touch and hold with two fingers. Heartbreak: Touch and hold with two fingers until you see a heartbeat, then drag down to break the heart. Add a Digital Touch effect to a photo or video. Tap , then tap . Tap to take a photo or to record a video. Add a Digital Touch effect, such as a sketch or kiss, to the photo or video, then tap to send.
iPad User Guide Send a saved message. After you create and send a handwritten message, the message is saved so you can use it again. Tap , then choose a saved message. Remove a saved message. Touch and hold a handwritten message until the messages jiggle, then tap in the top-left corner. When you finish, press the Home button. iMessage apps With iMessage apps, you can decorate a conversation with stickers, schedule dinner and a movie, send payments, share a song, and more—all without leaving Messages.
iPad User Guide Adjust the angle: Rotate a second finger around the finger dragging the sticker. Adjust the size: Move a second finger closer to or away from the finger dragging the sticker. You can place the sticker on top of a message bubble, put it on another sticker, or even dress up a photo. See text covered by a sticker. Double tap the sticker. See sticker details. Touch and hold a sticker, then tap Sticker Details. You can: See who sent the sticker.
iPad User Guide Tip: Want to send a personal message? When you use invisible ink, the message remains blurred until the recipient swipes to reveal it. Use a full-screen effect. After you type a message, touch and hold , then tap Screen. Swipe left or right to preview different screen effects. Tap to send.
iPad User Guide Manage message notifications and privacy Manage notifications for messages. Go to Settings > Notifications > Messages. See Notifications. Set the alert sound for messages. Go to Settings > Sounds > Text Tone. See Sounds and silence. Assign different text tones for the special people in your life. Go to Contacts, select a contact, tap Edit, then tap Text Tone. To allow alerts for messages sent by this contact even when Do Not Disturb is on, turn on Emergency Bypass.
iPad User Guide Safari Browse the web With Safari on iPad, you can browse the web, add webpages to your reading list to read later, and add page icons to the Home screen for quick access. If you sign in to iCloud with the same Apple ID on all your devices, you can see pages you have open on other devices, and keep your bookmarks, history, and reading list up to date on your other devices. Look before you leap. To see the URL of a link before you go there, touch and hold the link.
iPad User Guide Open a link in a new tab. Touch and hold the link, then tap Open in New Tab. To automatically switch to the new tab whenever you open a link in a new tab, go to Settings > Safari, then turn off Open New Tabs In Background. View two pages side-by-side. Turn iPad to landscape orientation, then do one of the following: Open a link in Split View: Touch and hold the link, then tap Open in Split View. Open a blank page in Split View: Touch and hold , then tap Open Split View.
iPad User Guide Search the web Search the web. Enter a URL or search term in the search field at the top of the page, then tap a search suggestion, or tap Go on the keyboard to search for exactly what you typed. If you donʼt want to see suggested search terms, go to Settings > Safari, then turn off Search Engine Suggestions (below Search). Quickly search a site youʼve visited before. Enter the name of the site, followed by your search term.
iPad User Guide Choose which favorites appear when you tap the search field. Go to Settings > Safari > Favorites. See your Mac bookmarks on iPad. Go to Settings > [your name] > iCloud, then turn on Safari. Bookmarks on your Mac appear in Favorites on iPad. Add an icon for the current page to your Home screen. To quickly access the page from your Home screen, tap , then tap Add to Home Screen. The icon appears only on the device where you add it.
iPad User Guide Shared links and subscriptions You can view links shared from social media, such as Twitter, and feeds youʼve subscribed to. View shared links and subscriptions. Tap , then tap . Subscribe to a feed. On a site that provides a subscription feed, tap Shared Links. Delete a subscription. Tap links, then tap Share links. Tap , tap , then tap Add to , tap Subscriptions below the list of your shared next to the subscription you want to delete. .
iPad User Guide Turn on AutoFill. Go to Settings > Safari > AutoFill. Tired of always having to sign in? When youʼre asked if you want to save the password for the site, tap Yes. The next time you visit, your user name and password are filled in for you. Choose a different identity. If you use multiple identities with a site and an incorrect identity is filled in, tap Passwords above the keyboard, then select the identity you prefer. Fill in a form. Tap a field to bring up the keyboard.
iPad User Guide Focus on content. Tap at the left end of the address field. If you donʼt see the icon, Reader isnʼt available for the page youʼre looking at. Share just the good stuff. To share just the article text and a link to it, tap while viewing the page in Reader. Return to the full page. Tap in the address field again. Privacy and security Adjust Safari settings to keep your browsing activities to yourself and protect yourself from malicious websites. Keep a low profile.
iPad User Guide Mail Write messages WARNING: For important information about avoiding distractions that could lead to dangerous situations, see Important safety information. Create a message. Tap . Touch and hold to view draft messages youʼve saved. Ask Siri. Say something like: “New email to Jonah Schmidt” “Email Simon and say I got the forms, thanks” Add attachments. Double-tap in the message body, tap Add Attachment, then select files from iCloud Drive. Insert a photo or video.
iPad User Guide Change a recipient from Cc to Bcc. After you enter recipients, you can drag them from one field to another or change their order. Mark addresses outside certain domains. When youʼre addressing a message to a recipient thatʼs not in your organizationʼs domain, Mail can color the recipientʼs name red to alert you. Go to Settings > Mail > Mark Addresses, then define the domains that you donʼt want marked. You can enter multiple domains separated by commas, such as “apple.com, example.org.
iPad User Guide Finish a message later Look at another message while youʼre writing one. Swipe down on the title bar of a message youʼre writing. When youʼre ready to return to your message, tap its title at the bottom of the screen. If you have more than one message waiting to be finished, tap the bottom of the screen to see them all. Save a draft for later. If youʼre writing a message and want to finish it later, tap Cancel, then tap Save Draft. To get it back, touch and hold . With OS X 10.
iPad User Guide Get notified of important messages. Notification Center lets you know when you receive messages in favorite mailboxes or messages from your VIPs. Go to Settings > Notifications > Mail. Ask Siri. Say something like: “Any new mail from Natalia today?” Flag a message so you can find it later. Tap while reading the message. To change the appearance of the flagged message indicator, go to Settings > Mail > Flag Style.
iPad User Guide Delete multiple messages at once. While viewing a list of messages, tap Edit, select some messages, then tap Trash. If you change your mind, shake iPad immediately to undo. Recover a deleted message. Go to the accountʼs Trash mailbox, open the message, then tap and move the message. Or, if you just deleted it, shake iPad to undo. To see deleted messages across all your accounts, add the All Trash mailbox. To add it, tap Edit in the mailboxes list, then select it in the list.
iPad User Guide Open an attachment with another app. Touch and hold the attachment until a menu appears, then tap the app you want to use to open the attachment. Some attachments automatically show a banner with buttons you can use to open other apps. See messages with attachments. Tap to turn on filtering, then tap “Filtered by” and turn on “Only Mail with Attachments.” You can also use the Attachments mailbox, which shows messages with attachments from all accounts.
iPad User Guide Manage a message with a swipe. While viewing a list of messages, swipe a message to the left to reveal a menu of actions. Swipe all the way to the left to select the first action. You can also swipe a message to the right to reveal another action. Choose the actions you want to appear in Settings > Mail > Swipe Options. Organize your mail with mailboxes. Tap Edit in the mailboxes list to create a new one, or rename or delete one. (Some built-in mailboxes canʼt be changed.
iPad User Guide Music Music overview Use the Music app to enjoy music stored on iPad as well as music streamed over the Internet. You can also listen to Beats 1 radio, which broadcasts all day, every day from studios in Los Angeles, New York, and London. With an optional Apple Music membership, you can listen to millions of tracks, recommended by music experts. Note: You need a Wi-Fi or cellular connection to stream music from Apple Music and Radio. In some cases an Apple ID is also required.
iPad User Guide Apple Music Apple Music is a streaming music service that lets you listen to millions of songs and your personal music library. As a member, you can listen any time—online or off—and get handpicked playlists, new music first, ad-free radio, and more. If youʼre not a member, you can use the Music app to listen to music stored on iPad, play and download previous iTunes purchases, and listen to Beats 1 for free. Join Apple Music.
iPad User Guide Select your favorite genres and artists. When you first tap For You, youʼre asked to tell Apple Music about your preferences. Tap the genres you like. (Double-tap those you love, and touch and hold the genres you donʼt care for.) Tap Next, then do the same with the artists that appear. To add a specific artist who isnʼt listed, tap Add an Artist, then enter the artistʼs name. Apple Music uses these preferences when recommending music to you. Update genre and artist preferences.
iPad User Guide View only music stored on iPad. Tap the Library menu, then tap Downloaded Music. Play music shared on a nearby computer. If a computer on your network shares music through iTunes Home Sharing, go to Settings > Music, then tap Sign In under Home Sharing. Return to the Music app, tap the Library tab, tap the Library menu, tap Home Sharing, then choose a shared library. Remove music from iPad. Go to Settings > Music, then turn off iCloud Music Library.
iPad User Guide Download music To play music when iPad isnʼt connected to the Internet, you must first download it. Download music from Apple Music. After adding a track, album, or playlist, tap Add Apple Music. . See Note: You must turn on iCloud Music Library to download music from Apple Music to your library (go to Settings > Music > iCloud Music Library). Always download Apple Music. Go to Settings > Music, then turn on Automatic Downloads. Songs you add are automatically downloaded to iPad.
iPad User Guide Play music Control playback. Tap a song to play it and show the player. Tap the player to show the Now Playing screen, where you can do the following: Tap to skip to the next song. Tap to return to the songʼs beginning. Double-tap to play the previous song in an album or playlist. Skip to any point in a song. Drag the playhead. Quickly navigate to the album. Tap the track, artist, or album name in Now Playing. Hide Now Playing. Tap Share music.
iPad User Guide Add a song to your library. Tap . See lyrics. Tap Show next to Lyrics; tap Hide to hide them. If iPad is in landscape orientation, swipe up to see Lyrics, then tap Show. Access additional options. Tap . See whatʼs up next. Swipe up. Tap a song to play it and the songs that follow. Drag to reorder the list. Get audio controls from the Lock screen or when using another app. Swipe up from the bottom edge of the screen to open Control Center, then swipe left. See Control Center.
iPad User Guide Tell Apple Music what you love. Touch and hold an album or playlist, then tap Love or Dislike. On the Now Playing screen, or when viewing the contents of an album or playlist, tap , then tap Love or Dislike. Telling Apple Music what you love and dislike improves future recommendations. Reorder a playlist. Play the playlist, tap the player to show the Now Playing screen, swipe up to show Up Next, then drag to rearrange the song order. Quickly identify an albumʼs most-played tracks.
iPad User Guide Browse Get recommendations for great music, music videos, playlists, and more—all tailored for your tastes. Explore new music. Tap the Browse tab, tap the Browse menu, then tap New Music. Browse playlists created by music experts. Tap the Browse menu, tap Curated Playlists, then choose a playlist, activity or mood, curator, or genre. View music videos. Tap Music Videos, then tap a video to play it. See whatʼs trending.
iPad User Guide Listen to live radio. Tap the currently playing Beats 1 program. Note: Because Beats 1 is live radio, you canʼt pause, rewind, or skip tracks. Listen to past shows and find out when your favorite shows are on. Tap Beats 1 Shows, then tap a show or DJ. Listen to your favorite music genre. Tap Radio Stations, then tap a genre or featured station. If you already listened to a station, tap a recently played station on the Radio screen. Create a station.
iPad User Guide Siri You can use Siri to control music playback. To activate Siri, press and hold the Home button. See Siri and apps. Use Siri. Siri supports a wide variety of commands, which you can use to do the following: Play an album, artist, song, playlist, or radio station: Say “play” followed by the name of the artist, album, song, playlist, or station that you want to play. If Siri doesnʼt find what you asked for, be more specific.
iPad User Guide Sound Check, EQ, and volume limit settings Turn Sound Check on or off. Go to Settings > Music > Sound Check. Sound Check normalizes the volume level of your audio. Choose an equalization (EQ) setting. Go to Settings > Music > EQ. EQ settings generally apply only to music played from the Music app, but they affect all sound output. Set a volume limit. Go to Settings > Music > Volume Limit.
iPad User Guide FaceTime Make and answer calls with FaceTime Use FaceTime to make video or audio calls to other iOS devices or computers that support FaceTime. The FaceTime camera lets you talk face-to-face; switch to the rear iSight camera (not available on all models) to share what you see around you. Note: FaceTime may not be available in all areas. With a Wi-Fi connection and an Apple ID, you can make and receive FaceTime calls (first sign in using your Apple ID, or create a new account).
iPad User Guide Leave a message. If no one answers your call, tap Leave a Message. You can also choose to cancel the call or try calling back. Want to call again? Tap FaceTime to see your call history in the left panel. Tap Audio or Video to refine your search, then tap a name or number to call again. Tap name or number in Contacts. to open the Delete a call from call history. Tap FaceTime to see your call history on the screen.
iPad User Guide Block unwanted callers. Go to Settings > FaceTime > Blocked > Add New. You wonʼt receive FaceTime calls or text messages from blocked callers. For more information about blocking calls, see the Apple Support article Block phone numbers and contacts or filter messages on your iPhone, iPad, or iPod touch.
iPad User Guide Calendar Manage calendars Ask Siri. Say something like: “Set up a meeting with Barry at 9.” “Do I have a meeting at 10?” “Where is my 3x30 meeting?” Add an event. In day view, touch and hold a time until a new event appears, then fill in the event details. If you add the address of the eventʼs location, youʼre reminded in time to leave from your current location, based on traffic conditions. Search for events. Tap , then enter text in the search field.
iPad User Guide Change your view. Tap Day, Week, Month, or Year. Tap list. In week or day view, pinch to zoom in or out. Change the color of a calendar. Tap Calendars, tap to view upcoming events as a next to the calendar, then choose a color from the list. For some calendar accounts, such as Google, the color is set by the server. Adjust an event. Touch and hold the event, then drag it to a new time, or adjust the grab points. Ask Siri.
iPad User Guide Suggest a different meeting time. You can suggest a different time for a meeting invitation youʼve received. Tap the meeting, then tap Propose New Time. Depending on the capabilities of your calendar server, the organizer will receive either a counterproposal or an email with your suggestion. Use multiple calendars Turn on iCloud, Google, Exchange, or Yahoo! calendars. Go to Settings > Calendar > Accounts, tap an account, then turn on Calendar. Subscribe to a calendar.
iPad User Guide View events sent to you in Mail messages. Tap Calendars, then tap Events Found in Apps. Move an event to another calendar. Tap the event, tap Edit, tap Calendars, then select a calendar to move it to. Share iCloud calendars With Family Sharing, a calendar shared with all the members of your family is created automatically. See Family Sharing. You can also share an iCloud calendar with other iCloud users.
iPad User Guide Photos Photos overview With the Photos app you can view, organize, share, and edit photos and videos: Taken with Camera on iPad Stored in iCloud (see iCloud Photo Library) Shared by others (see iCloud Photo Sharing) Synced from your computer (see Sync with iTunes) Saved from an email, text message, webpage, or screenshot Imported from your camera You can also have Photos create quick movies from the photos and videos in your library (see Memories).
iPad User Guide Tap Memories to view photos and videos based on related dates, places, people, and more. See Memories. Tap Shared to see photos and videos you shared with others or that others shared with you. See iCloud Photo Sharing. Tap Albums to create and view your albums. See Organize photos and videos. View photos and videos Browse your photos and videos. Tap Photos, then tap a photo. While viewing a photo, swipe the thumbnails to browse photos, then tap a thumbnail to view a photo.
iPad User Guide View photo and video details. Tap a photo or video, then tap Details, or swipe up, to see: Related memories. See Memories. People identified by Photos. See People. If available, the location where the photo or video was taken and a link to photos and videos taken nearby. See Places. Search photos. From Photos, Memories, or Albums, tap to search by date (month and year), place (city and state), category (beach or sunset, for example), or person (Addie or Jules, for example).
iPad User Guide Play a slideshow. While viewing a photo or video, tap , then tap Slideshow. To stop the slideshow, tap the screen, then tap . Tap Options to choose a slideshow theme, music, and more. To stream a slideshow or video to a TV, see AirPlay Mirroring. Organize photos and videos The Albums tab includes albums you create yourself and some albums that are created for you, depending on how you use Photos.
iPad User Guide Note: Photos or videos are hidden from Moments, Collections, Years, and Memories, but are still visible in Albums. Delete a photo or video from Photos. Tap Photos, tap the photo or video, tap , then tap Delete Photo or Delete Video. Deleted photos and videos are kept in the Recently Deleted album on iPad, with a badge showing the remaining days until the item is permanently removed from iPad.
iPad User Guide Play a Memory movie. Tap Memories, tap a memory, then tap Memory movie, then tap . . To pause, tap the Scrub through a Memory movie. Tap a Memory movie while itʼs playing to show the controls, then swipe left or right through the scrubber. View an albumʼs memory. Tap an album you created, then tap . To add it to Memories, swipe up, then tap Add to Memories. Save a memory to the Favorite Memories album. Touch and hold a memory, then tap Add to Favorite Memories.
iPad User Guide Change the mood. Tap a Memory movie while itʼs playing, then tap a mood, or swipe the moods left or right to choose a new one. (Each mood includes a distinct title, music, and editing style.) Change the duration. Tap a Memory movie while itʼs playing, then tap a duration, or swipe to choose short, medium, or long. All durations may not be available for every movie. Customize a memory.
iPad User Guide Edit the title: Tap Title, tap the title and subtitle to edit them, then choose a title style. Choose different music: Tap Music, then choose music from a soundtrack or from your music library (only music you own thatʼs stored on iPad is available). Choose a custom duration: Tap Duration. Choose photos and videos: Tap Photos & Videos, tap , then tap the photos and videos you want in the movie. Deselect photos and videos currently in the Memory movie to remove them.
iPad User Guide Add more people. Tap Albums, tap People, tap Add People, select people to add, then tap Add. Merge people. If the People album shows one person identified as two or more people, tap Select, tap each instance of the person, then tap Merge. Remove misidentified people. Tap a person in the Photos album, then tap Show All to see all photos they appear in. Tap Select, tap Show Faces, tap the misidentified face, tap , then tap Not This Person. View photos that contain a person.
iPad User Guide View a location-based Memory movie. Tap Albums, tap Places, tap a location that has several images, tap , then tap . iCloud Photo Library iCloud Photo Library automatically uploads the photos and videos you take and stores them in their original format at full resolution. You can access your photos and videos in iCloud Photo Library from any device where youʼre signed in using the same Apple ID. Use the Photos app on iOS devices and Mac computers to open and edit your photos and videos.
iPad User Guide My Photo Stream My Photo Stream automatically uploads your most recent photos to iCloud, so you can import them to devices that arenʼt using iCloud Photo Library. (My Photo Stream doesnʼt upload Live Photos or videos.) Photos in My Photo Stream donʼt count against your iCloud storage, and theyʼre kept for 30 days in iCloud (up to 1000 photos). Download photos to your computer or iOS device if you want to keep them permanently.