2. Do any of the following: Assign a photo to a contact: Tap Add Photo. You can take a photo or add one from the Photos app. Change a label: Tap the label, then select one in the list, or tap Add Custom Label to create one of your own. Add a birthday, social profile, related name, and more: Tap next to the item. Allow calls or texts from a contact to override Do Not Disturb: Tap Ringtone or Text Tone, then turn on Emergency Bypass. Add notes: Tap the Notes field.
Use your iCloud contacts Go to Settings > [your name] > iCloud, then turn on Contacts. Use your Google contacts 1. Go to Settings > Contacts > Accounts, then tap Google. 2. Sign in to your account, then turn on Contacts. Add contacts from another account 1. Go to Settings > Contacts > Accounts, then tap Add Account. 2. Choose an account, sign in to it, then turn on Contacts. Access a Microsoft Exchange Global Address List 1. Go to Settings > Contacts > Accounts, then tap Exchange. 2.
Add a contact from a directory 1. Tap Groups, then tap the GAL, CardDAV, or LDAP directory you want to search. 2. Tap Done, then enter your search. 3. Tap the personʼs name to save their info to your contacts. Show or hide a group Tap Groups, then select the groups you want to see. This button appears only if you have more than one source of contacts.
FaceTime Set up FaceTime on iPad In the FaceTime app , you can make video or audio calls to friends and family, whether theyʼre using an iPhone, iPad, iPod touch, or a Mac. With the front camera, you can talk face-to-face; switch to the rear camera to share what you see around you. To capture a moment from your conversation, take a FaceTime Live Photo. Note: FaceTime, or some FaceTime features, may not be available in all countries or regions. 1. Go to Settings > FaceTime, then turn on FaceTime. 2.
Make a FaceTime call Ask Siri. Say something like: “Make a FaceTime call” or “Call Elizaʼs mobile.” Learn how to ask Siri. 1. In FaceTime, tap at the top of the screen. 2. Type the name or number you want to call in the entry field at the top, then tap Video to make a video call or tap Audio to make a FaceTime audio call (not available in all countries or regions). You can also tap to open Contacts and start your call from there, or tap a contact in your list of FaceTime calls to quickly make a call.
Leave a message If no one answers your FaceTime call, do one of the following: Tap Leave a Message. Tap Cancel to cancel the call. Tap Call Back to try calling back. Start a FaceTime call from a Messages conversation In a Messages conversation, you can start a FaceTime call to the person youʼre chatting with. 1. In the Messages conversation, tap the profile picture, conversation. , or the name at the top of the 2. Tap FaceTime.
If youʼre on a regular call when a FaceTime call comes in, instead of Accept, you see the End & Accept option, which terminates the previous call and connects you to the incoming call. Tip: You can have Siri announce incoming calls, which you can accept or decline using your voice. Delete a call from your call history In FaceTime, swipe left over the call in your call history, then tap Delete.
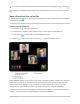
On a Group FaceTime call: Tap the tile of the person you want to photograph, tap , then tap . You both receive a notification that the photo was taken, and the Live Photo is saved in your Photos app. Make a Group FaceTime call on iPad In the FaceTime app , you can invite up to 32 participants to a Group FaceTime call (not available in all countries or regions). Start a Group FaceTime call 1. In FaceTime, tap at the top of the screen. 2.
Note: Sign language detection requires a supported model for the presenter. In addition, both the presenter and participants need iOS 14, iPadOS 14, macOS Big Sur 11, or later. Start a Group FaceTime call from a group Messages conversation In a group Messages conversation, you can initiate a Group FaceTime call with all the same people youʼre chatting with in the Messages conversation. 1. In the Messages conversation, tap the names or profile pictures at the top of the conversation. 2. Tap FaceTime.
Add camera effects in FaceTime calls on iPad On video calls using the FaceTime app , you can become your favorite Memoji or Memoji character (on models with a TrueDepth camera). On supported models, you can use a built-in filter to change your appearance and add stickers, labels, and shapes. You can take screenshots in FaceTime that include the special camera effects you add to a call.
1. During a call, tap the screen, tap , then do any of the following: Tap to add a Memoji sticker or Tap , swipe up, then tap to add an Emoji sticker. . 2. Tap a sticker to add it to the call. To see more options, swipe left. 3. Drag the sticker to place it where you want. To delete the sticker, tap it, then tap . Add shapes 1. During a call, tap the screen, then tap 2. Tap . , then tap a shape to add it to the call. To see more options, swipe up from the top of the shapes window. 3.
When youʼre on a FaceTime call, tap the screen (if you canʼt see the controls), then tap again to switch back to the front camera). (tap it Turn off the sound When youʼre on a FaceTime call, tap the screen (if you canʼt see the controls), then tap to turn the sound back on). (tap again Turn off your camera When youʼre on a FaceTime call, tap the screen (if you canʼt see the controls), swipe up from the top of the controls, then tap Camera Off (tap again to turn it back on).
Files Connect external devices or servers with Files on iPad You can use the Files app to access files stored on file servers, other cloud storage providers like Box and Dropbox, and external devices, such as USB drives and SD cards, after you connect them to your iPad. Connect to a computer or file server 1. Tap at the top of the Browse sidebar. If you donʼt see the Browse sidebar, tap Browse at the bottom of the screen. 2. Tap Connect to Server. 3.
Connect a USB drive or an SD card For information on how to connect external storage devices and SD cards, see Connect external storage devices to iPad. View files and folders in Files on iPad In the Files app , view and open your documents, images, and other files. View recently opened files Tap Recents at the bottom of the screen. Browse and open files and folders 1. Tap Browse at the bottom of the screen, then tap an item in the Browse sidebar. If you donʼt see the Browse sidebar, tap Browse again.
Change how files and folders are sorted From an open location or folder, drag down from the center of the screen, then tap Name, Date, Size, Kind, or Tags at the top of the screen. Change to icon, list, or column view From an open location or folder, drag down from the center of the screen, then do one of the following: View as icons: Tap View as a list: Tap . . View as columns: Tap . To look deeper into a folder hierarchy from the column view, tap an item in the rightmost column, then swipe left.
Hide the keyboard and see more results on the screen: Tap Start a new search: Tap . in the search field. Open a result: Tap it. Rearrange the Browse sidebar Tap at the top of the sidebar, tap Edit, then do any of the following: Hide a location: Turn the location off. Delete a tag and remove it from all items: Tap Remove an item from the Favorites list: Tap Change the order of an item: Touch and hold next to the tag. (See Tag a file or folder.) next to the item. (See Mark a folder as a favorite.
Tagged items appear below Tags in the Browse sidebar. To remove a tag, tap it again. Mark a folder as a favorite Touch and hold the folder, then tap Favorite. Favorites appear in the Browse sidebar. Send files from Files on iPad You can send a copy of any file in the Files app to others. If you have a document you want to send that isnʼt digitized, you can scan it with Files first. 1. Touch and hold the file, then tap Share. Tip: To send a smaller version of the file, tap Compress before you tap Share.
Choose which apps use iCloud Drive Go to Settings off. > [your name] > iCloud, then turn each of the apps listed under iCloud Drive on or Browse iCloud Drive 1. Tap Browse at the bottom of the screen. 2. Under Locations, tap iCloud Drive. If you donʼt see Locations, tap Browse again. If you donʼt see iCloud Drive under Locations, tap Locations. 3. To open a folder, tap it. See View files and folders in Files on iPad.
When you share a folder, only the people you invite can access the files in the shared folder by default. To invite more people to access the files, you must change the settings of the shared folder to add more participants. You canʼt select an individual file within the shared folder and add participants to it. 1. Touch and hold the folder or file. 2. Tap Share , then tap Share Folder (or File) in iCloud. 3.
3. Choose a method for sending the link, enter any other requested information, then send or post the invitation. Change access and permission settings for everyone If youʼre the owner of a shared folder or file, you can change its access at any time. However, everyone you shared the link with is affected. 1. Touch and hold the folder or file. 2. Tap Share , tap Manage Shared Folder (or File), then tap Share Options. 3. Change either or both of the options.
Play a sound: Tap Play Sound to play a sound on the unknown item to help you find it. Pause safety alerts: You can temporarily pause safety alerts for the unknown item. Tap Pause Safety Alerts, then tap Mute for Today. If the item belongs to someone in your Family Sharing group, you can also tap Indefinitely to turn off safety alerts for the item. If you change your mind, tap Enable Safety Alerts to receive alerts again.
Change the map view 1. Tap in the top-right corner of the map. 2. Under Map View, select Default, Hybrid, or Satellite. Change distance units 1. Tap in the top-right corner of the map. 2. Under Distance, select Miles or Kilometers. Home Intro to Home on iPad The Home app provides a secure way to control and automate HomeKit-enabled accessories, such as lights, locks, smart TVs, thermostats, window shades, smart plugs, and security cameras.
To control your home automatically and remotely, you must have Apple TV (4th generation or later), HomePod, or iPad (with iOS 10.3, iPadOS 13, or later) that you leave at home. You can schedule scenes to run automatically at certain times, or when you activate a particular accessory (for example, when you unlock the front door). This also lets you, and others you invite, securely control your home while youʼre away.
Organize rooms into zones Group rooms together into a zone to easily control different areas of your home with Siri. For example, if you have a two-story home, you can assign the rooms on the first floor to a downstairs zone. Then you can say something to Siri like “Turn off the lights downstairs.” 1. Tap , then tap Home Settings. 2. Tap Zone, then tap an existing zone, or tap Create New to add the room to a new zone.
The available controls depend on the type of accessory. For example, with some lightbulbs, there are controls for changing colors. With your smart TV, you can choose an input source. Control accessories in Control Center When youʼre home with your iPad, you can see the relevant scenes and accessories for that moment in Control Center. For example, a coffee maker may appear in the morning and be replaced by your bedside lamp at night.
View your home status The Home app shows you issues that might need your attention—for example, your front door is unlocked, an accessoryʼs battery is running low, or a light is on during the day. You can often address the issue with just a tap. 1. Open the Home app , then tap Home in the sidebar. 2. Tap any of the round buttons that appear just below your homeʼs name.
Make Personal Requests on HomePod Use HomePod for phone calls Use HomePod as an Intercom Note: HomePod is not available in all countries or regions. Use Home to send and receive Intercom messages 1. In the Home app, tap , then tap Home Settings. 2. Tap Intercom, then configure these settings: When you can receive Intercom messages Who is allowed to send or receive Intercom messages Which HomePod speakers can use Intercom 3. Tap Back, then tap Done. 4.
2. Swipe up or tap , then configure HomePod settings. You can assign HomePod to a different room, add an automation, create a stereo pair with two HomePod speakers in the same room, rename HomePod, turn on accessibility features, and more. Set up security cameras in Home on iPad You can use the Home app to view video activity captured from your homeʼs security cameras when a person, animal, or vehicle is detected.
Recording Options: Your camera can record when any motion is detected or when specific motion is detected. When you choose Specific Motion, video recording is triggered by the motion of people, animals, or vehicles. Tip: Choosing a specific motion, rather than any motion, results in fewer clips (and fewer clip notifications) and less video to review. For example, choose People, and your camera wonʼt capture the movement of leaves on a tree or a squirrel leaping from branch to branch.
View video 1. Tap Home in the sidebar, then tap the camera. Live video should play automatically. 2. Swipe through the timeline at the bottom of the screen to browse recorded clips. 3. Tap a clip to play it. 4. Pinch the clip open left and right to show the timeline, then drag to go forward or back through the video. 5. Tap Live to switch back to live video. When you set up the camera to detect specific motion, the timeline displays unique symbols for people, animals, and vehicles.
1. Add the accessory to the Home app. 2. In the Recognize Familiar Faces card, turn on Face Recognition, then tap Continue. 3. Choose who can access your photo library—Never, Only Me, or Everyone in this Home. Never: Only faces youʼve added from clips in the Home app are recognized. Only Me: Only the notifications you receive have the names of people in your photo library. Everyone in this Home: The notifications for everyone in your home have the names of people in your photo library. 4.
2. Tap the camera or doorbell, then tap . 3. Tap Face Recognition, tap an unidentified person listed under Recent, then tap Add Name. 4. Add the personʼs name or their relationship to you—Mom or Mail Carrier, for example. 5. Choose whether to be notified when theyʼre seen by your camera or doorbell. Set up notifications 1. Open the Home app , tap , then tap Home Settings. 2. Tap Cameras & Doorbells below Notifications. 3. Tap the camera for which youʼd like to configure notifications. 4.
3. Tap Home Settings, then tap Wi-Fi Network & Routers. 4. Tap an accessory, then choose one of these settings: No Restriction: The router allows the accessory to connect to any internet service or local device. This provides the lowest level of security. Automatic: The router allows the accessory to connect to an automatically updated list of manufacturer approved internet services and local devices. Restrict to Home: The router only allows the accessory to connect to your home hub.
Change a scene: Touch and hold a scene. You can change the sceneʼs name, test the scene, add or remove accessories, include the scene in Favorites, and delete the scene. Favorite scenes appear in the Home tab. Control your home using Siri on iPad In addition to using the Home app , you can use Siri to control your accessories and scenes.
Use automations in Home on iPad In the Home app , you can run automations based on the time of day, your location, the activation of a sensor, or the action of an accessory. You can use preconfigured automations included with the Home app, or create automations of your own. Use a preconfigured automation 1. Touch and hold an accessory, then swipe up or tap . 2. Turn on an automation. To disable an automation, return to the accessoryʼs setting screen, then turn it off. Create an automation 1.
Add a Siri shortcut To make your automation even more efficient, you can add a Siri Shortcut to it. 1. When choosing accessories to control with an automation, swipe up, then tap Convert To Shortcut. 2. Tap , then choose a shortcut. See the Shortcuts User Guide. Allow others to control accessories in your home In the Home app , you can invite other people to control your smart accessories. You and the people you invite need to be using iCloud and have iOS 11.2.5, iPadOS 13, or later.
iTunes Store Get music, movies, and TV shows in the iTunes Store on iPad Use the iTunes Store app to add music, movies, and TV shows to iPad. Note: You need an internet connection to use the iTunes Store. The availability of the iTunes Store and its features varies by country or region. See the Apple Support article Availability of Apple Media Services. Find music, movies, and TV shows 1. In the iTunes Store, tap any of the following: Music, Movies, or TV Shows: Browse by category.
Get ringtones 1. Tap Music, tap Genres, scroll to the bottom, then tap Tones. 2. Browse by category or tap Top Charts to see whatʼs popular. 3. Tap a ringtone to see more information or play a preview. 4. To buy a ringtone, tap the price. Redeem or send an App Store & iTunes Gift Card 1. Tap Music, then scroll to the bottom. 2. Tap Redeem or Send Gift. Get ringtones, text tones, and alert tones in the iTunes Store on iPad In the iTunes Store app alarms and more.
Manage your iTunes Store purchases and settings on iPad In the iTunes Store app , you can review and download music, movies, and TV shows purchased by you or other family members. You can also customize your preferences for the iTunes Store in Settings. Approve purchases with Family Sharing With Family Sharing set up, the family organizer can review and approve purchases made by other family members under a certain age. See Turn on Ask To Buy for children on iPad.
Mail Write an email in Mail on iPad With the Mail app , you can write and edit emails, and send and receive photos, videos, drawings, documents, and more. Create an email message Ask Siri. Say something like: “New email to John Bishop” or “Email Simon and say I got the forms, thanks.” Learn how to ask Siri. Or do the following: 1. Tap . 2. Tap in the email, then type your message. With the onscreen keyboard, you can tap individual keys.
Reply to an email 1. Tap in the email, tap , then tap Reply. 2. Type your response. With the onscreen keyboard, you can tap individual keys. Or pinch closed to use the smaller QuickType keyboard, then slide your finger from one letter to the next without lifting your finger. (See Enter text using the onscreen keyboard.) Quote some text when you reply to an email When you reply to an email, you can include text from the sender to clarify what youʼre responding to. 1.
3. Tap the photo or video to insert it into your email. Take a photo or video to insert into an email 1. Tap in the email where you want to insert the photo or video, then tap above the keyboard. 2. Take a new photo or video. 3. Tap Use Photo or Use Video to insert it into your email, or tap Retake if you want to reshoot it. Scan a document into an email 1. Tap in the email where you want to insert the scanned document, then tap above the keyboard. 2.
2. Choose a drawing tool and color, then write or draw with your finger. See Draw in apps with Markup on iPad. 3. When youʼre finished, tap Done, then tap Insert Drawing. To resume work on a drawing, tap the drawing in the email, then tap . Address and send email in Mail on iPad In the Mail app , you can send email from any of your email accounts, mark addresses from outside certain domains, and more. Add recipients 1. Tap in the To field, then type the names of recipients.
2. If youʼre sending a copy, tap the Cc/Bcc field. 3. Tap in the Cc field, then enter the names of people youʼre sending a copy to. 4. Tap in the Bcc field, then enter the names of people whose names you donʼt want other recipients to see. Automatically send a copy to yourself Go to Settings > Mail, then turn on Always Bcc Myself.
Send an email from a different account If you have more than one email account, you can specify which account to send email from. Tap the From field to choose an account. Mark addresses outside certain domains When youʼre addressing an email to a recipient whoʼs not in your organizationʼs domain, you can have the recipientʼs name appear in red to alert you. 1. Go to Settings > Mail > Mark Addresses. 2. Enter the domains that are in your organization—ones that you donʼt want marked in red.
Show a longer preview In your mailbox lists, Mail displays two lines of text for each email by default. You can choose to see more lines of text without opening the email. Go to Settings > Mail > Preview, then choose up to five lines. Show the whole email In the list of emails, tap the one you want to read. Show the whole conversation Go to Settings > Mail, then turn on Organize by Thread.
With OS X 10.10 or later, you can also hand off unfinished emails with your Mac. See Hand off tasks between iPad and your Mac. Look at another email while youʼre writing one 1. Swipe down on the title bar of an email youʼre writing. 2. When youʼre ready to return to your email, tap its title at the bottom of the screen. If you have more than one email waiting to be finished, tap the bottom of the screen to see them all. Flag and filter emails on iPad In the Mail app , you can flag and filter your emails.
2. To choose a color for the flag, tap a colored dot. To change or remove a flag, open the email, tap , then tap another color, or tap . Flags you add to an email appear on that email in Mail on all your Apple devices where youʼre signed in with the same Apple ID. Flag emails from your VIPs Add important people to your VIP list, so their emails appear with a VIP flag and in the VIP mailbox. 1. While viewing an email, tap the name or email address of a person in the email. 2. Tap Add to VIP.
You can create mail notifications that let you know when you receive emails in favorite mailboxes or from your VIPs. To change how notifications appear, go to Settings > Notifications > Mail, then turn on Allow Notifications. Ask Siri. Say something like: “Any new mail from Nanditha today?” Learn how to ask Siri. Mute email notifications To reduce interruptions from busy email threads, you can mute notifications of the messages in the conversations. 1. Open an email in the conversation. 2.
To turn off an active filter, deselect it or turn it off. To turn off all filters, tap the Filter button. Organize email in Mail on iPad In the Mail app , manage your email in mailboxes. Manage an email with a swipe While viewing an email list you can use a simple swipe to move individual emails to the trash, mark them as read, and more. To reveal a list of actions, slowly swipe an email to the left until you see the menu, then tap an item.
Move or mark multiple emails 1. While viewing a list of emails, tap Edit. 2. Select the emails you want to move or mark by tapping their checkboxes. To select multiple emails quickly, swipe down through the checkboxes. 3. Choose the action you want to perform on all the selected emails. If you change your mind, immediately swipe left with three fingers to undo. Show draft emails from all of your accounts 1. Tap Mailboxes in the upper-left corner. 2. Tap Edit at the top of the list. 3.
Find all flagged emails: Type “flag” in the search field, then tap “Flagged Messages” below Other. Find all emails from people in your VIP list: Type “vip” in the search field, then tap “Messages from VIPs” below Other. Find all unread emails: Type “unread” in the search field, then tap “Unread Messages” below Other. Find all email with attachments: Type “attachment” in the search field, then tap “Messages with Attachments” below Other.
Archive instead of delete Instead of deleting emails, you can archive them in the Archive mailbox. (You can still delete emails, even if you set up an Archive mailbox.) 1. Go to Settings > Mail, then tap Accounts. 2. Tap your email account, tap Mail (below Advanced), then tap Advanced. 3. In the Advanced settings, change the destination mailbox for discarded emails to Archive Mailbox. When this option is turned on, to delete an email instead of archiving it, touch and hold Trash Message.
1. Touch and hold the attachment, then tap Markup (if itʼs an attachment youʼre sending) or “Markup and Reply” (if itʼs an attachment youʼve received). 2. Use the drawing and annotation tools. See Draw in apps with Markup on iPad. On supported models, you can annotate with Apple Pencil. Open an attachment with another app 1. Touch and hold the attachment until a menu appears. 2. Tap , then choose the app you want to use to open the attachment.
You can also use the Attachments mailbox, which shows emails with attachments from all accounts. To view it, tap Mailboxes at the top left, tap Edit above the Mailboxes list, then select Attachments. Send large attachments Mail Drop is an iCloud feature you can use to send files exceeding the maximum size allowed by your email account. To use Mail Drop, tap Send when youʼre ready to send an email with large attachments, then follow the onscreen instructions. Mail must be turned on in Settings limits.
Show your current location Tap . Your position is marked in the middle of the map. The top of the map is north. To show your heading instead of north at the top, tap . To resume showing north, tap or . Choose between road, transit, and satellite views Tap , choose Map, Transit, or Satellite, then tap . If transit information is unavailable, tap View Routing Apps to use an app for public or other modes of transportation. Move, zoom, and rotate a map Move around in a map: Drag the map.
Rotate the map: Touch and hold the map with two fingers, then rotate your fingers. To show north at the top of the screen after you rotate the map, tap . View a 3D map On a 2D road or transit map: Drag two fingers up. On a 2D satellite map: Tap 3D near the upper right. While viewing a 3D map, you can do the following: Adjust the angle: Drag two fingers up or down. See buildings and other small features in 3D: Zoom in. Return to a 2D map: Tap 2D near the upper right.
You can search in different ways. For example: Intersection (“8th and Market”) Area (“Greenwich Village”) Landmark (“Guggenheim”) Zip code (“60622”) Business (“movies,” “restaurants San Francisco CA,” “Apple Inc New York”) To see all results, swipe up on the search card. To get directions to a result, tap it. Note: If you see an information card instead of the search field, tap information card.
See also Delete significant locations on iPad. Find nearby attractions and services in Maps on iPad You can use the Maps app to find nearby attractions, services, and more. Find a nearby service Ask Siri. Say something like: “Find a gas station” or “Find coffee near me.” Learn how to ask Siri. Or you can tap the search field, tap a category such as Groceries or Hotels, then do any of the following: See all results for the category: Swipe up on the information card.
3. To see a map of a different floor, tap the button showing the floor level (zoom in if you donʼt see the button). Note: Indoor maps are available for select airports and shopping malls. See the iOS and iPadOS Feature Availability website. Get information about places in Maps on iPad You can find street addresses and other information about places that appear in the Maps app .
Save information about a place Tap a location on a map or an item in a list of search results, then do any of the following: Add the place to a guide: Tap “Save to.” Scroll part way down the information card if you donʼt see “Save to.” Add the place to your favorites: Scroll to the bottom of the information card, then tap Add to Favorites. Add the place to Contacts: Scroll to the bottom of the information card, then tap Create New Contact or Add to Existing Contact.
1. Touch and hold the map until a pin marker appears. 2. To help you find the location later, you can save it to your favorites, to a guide, or to Contacts. Swipe up on the information card, then choose an option. 3. To close the information card, tap . Delete a pin marker 1. Tap the marker. 2. On the information card, tap Remove Marker. You can also touch and hold the marker, then tap Remove Marker. Share places in Maps on iPad In the Maps app , you can share places with others.
1. Swipe down from the bottom of the search card to show Favorites. 2. Tap on the right side of the row. If you donʼt see , swipe the Favorites row left. 3. Do one of the following: Choose a suggestion below the search field. Enter a place or address in the search field, then choose a search result. 4. To rename the favorite, tap the title, then enter a new name. 5. Tap Done.
3. Depending on the location, you may be able to make the following changes: Rename the favorite: Tap the title, then enter a new name. Change the address: Tap the address, then tap Open Contact Card. Change the label: Tap a label type. Delete the location from your favorites list: Tap Remove Favorite. Tell someone your ETA: (Wi-Fi + Cellular models) Tap Add Person, then choose one or more suggested contacts, or search for a contact.
Note: Guides are available for many cities worldwide, with more cities coming. See the iOS and iPadOS Feature Availability website. Organize places in My Guides in Maps on iPad In the Maps app , you can organize places into your own guides for easy reference. For example, you can add destinations for an upcoming vacation into a guide named Summer Road Trip. You can quickly get to your guides from the search card, and you can share your guides with others.
1. Swipe down from the bottom of the search card to show My Guides, then choose a guide. If you donʼt see My Guides, scroll down the search card. 2. Tap , then choose an option. Edit a guide 1. Swipe down from the bottom of the search card to show My Guides, then choose a guide. 2. Tap Edit. 3. Do any of the following: Select your own cover image: Tap , then choose a photo from your library. Rename the guide: Tap the title. Delete a place from the guide: Tap the place, then tap Delete.
Find out about the weather Zoom in on a map until the weather icon appears in the lower-right corner; the icon shows the current conditions for that area. In some regions, the air quality index also appears in the lower-right corner. To see the hourly forecast, touch and hold the weather icon. Tap the hourly forecast to see a multiday forecast in Safari.
2. To change the view, do any of the following: Pan: Drag a finger left or right. Move forward: Tap the scene. Zoom in or out: Pinch open or closed. View another point of interest: Tap elsewhere on the map. Switch to or from full-screen view: Tap or . Hide labels in full-screen view: Tap the address card at the upper left, then tap If an information card appears in the upper left, tap . to show the address card. 3. When finished, tap Done. Look Around is available in select cities.
View a city or landmark from above On supported models, move the iPad screen to seemingly fly over a city or landmark. 1. Tap the name of a city (in map or satellite view) or the name of a landmark. If you donʼt see Map or Satellite. markers for cities, zoom out, or if youʼre using transit view, tap , then choose 2. Tap Flyover on the information card. 3. Do any of the following: Change viewing direction: Point or tilt iPad in the direction you want to view. Move around: Drag a finger in any direction.
Watch an aerial 3D tour On iPad mini 4, take a Flyover tour of a city or landmark. 1. Tap the name of a city (in map or satellite view) or the name of a landmark. 2. Tap Flyover Tour on the information card. 3. To return to the map, tap . For a list of sites with Flyover, see the iOS and iPadOS Feature Availability website. Get directions Use Siri, Maps, and the Maps widget to get directions on iPad You can get travel directions in the Maps app in several ways. Ask Siri for directions Ask Siri.
Tap for directions in Maps 1. Do one of the following: Tap a destination (for example, a landmark on a map, a spot that you marked with a pin, or a search result in Maps). Touch and hold any spot on the map.