
User guide

Chapter 4 Organize and sort photos 118
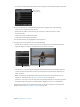
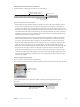
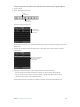
3 Type a name for the new keyword preset group, then press Return.
4 Drag keywords from the Keywords Library column to the Contents column.
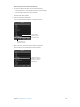
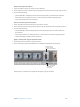
Add Keyword button
If you wish, you can select multiple keywords and drag them to the Contents column at
the same time. Hold down the Shift key while pressing the Up Arrow or Down Arrow key to
select several keywords, Shift-click to select adjacent keywords, or Command-click to select
nonadjacent keywords. If you have a large list of keywords, you can quickly locate the one
you’re looking for by typing the keyword in the search eld. You can also add new keywords to
the Keywords Library column by clicking the Add Keyword button. You can then drag the new
keywords into the Contents column.
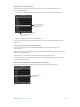
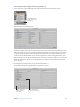
5 If you want to rearrange the order of the keywords in the Contents column, drag them into the
order you prefer.
The rst eight keywords are assigned to the keyboard shortcut key combination of Option and a
number key (1 through 8) on the keyboard. To remove a keyword from the column, select it and
press Delete, or click the Remove button (–) below the column.
6 After arranging the keywords in order, click OK.
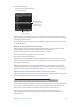
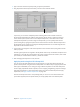
Apply keywords using the Lift & Stamp HUD
You can use the Lift and Stamp tools to quickly apply all or some of the keywords from one
photo to other photos. Using the Lift and Stamp tools is an ecient way to apply keywords and
other types of metadata, such as ratings, to large numbers of photos. The Lift and Stamp tools
can also apply adjustments made to photos, such as cropping, straightening, exposure changes,
and other adjustments. For more information about using the Lift and Stamp tools to apply
adjustments, see Apply standard adjustments on page 225.
The Lift and Stamp tools have a corresponding HUD you can use to view and remove items
you’ve lifted (copied) from one photo before you stamp (paste) them onto another photo.
67% resize factor