LL0703.CoverPDF 10/9/98 12:44 PM Page 1 AppleShare IP 6.
K Apple Computer, Inc. © 1998 Apple Computer, Inc. All rights reserved. Under the copyright laws, this manual may not be copied, in whole or in part, without the written consent of Apple. Your rights to the software are governed by the accompanying software license agreement. The Apple logo is a trademark of Apple Computer, Inc., registered in the U.S. and other countries.
LL0703GSTOC.fm Page 3 Friday, October 9, 1998 12:53 PM Contents Preface Welcome to AppleShare IP 6.
2 Setting Up AppleShare IP 31 Using AppleShare IP Easy Setup 31 Normal Setup 34 Custom Setup 36 AppleTalk Setup 42 Using AppleShare IP for the First Time 45 Registering a User for the First Time 46 Setting Up Share Points for the First Time 49 Setting Up Web Service for the First Time 52 Setting Up Windows File Sharing for the First Time 54 Setting Up Remote Administration for the First Time 56 Setting Up the Mail Server for the First Time 58 Setting Up the Print Server for the First Time 61 Getting User
LL0703CP Page 5 Friday, October 9, 1998 12:52 PM P R E F A C E Welcome to AppleShare IP 6.1 This book explains how to install and set up AppleShare IP 6.1 and Mac OS 8.5 system software. A separate book, Mac OS 8.5 Installation Manual, provides additional information on Mac OS 8.5. See that book if you need more help installing the Mac OS. AppleShare IP is a general purpose suite of server software that provides a variety of network services.
m The AppleShare IP Mail Server program provides integrated mail storage and mail forwarding services over TCP/IP and AppleTalk networks, including support for Internet Message Access Protocol (IMAPv4), Post Office Protocol (POP), and Simple Mail Transfer Protocol (SMTP). You manage mail services on your server using the Mail Admin program. Help is available onscreen in Tips and AppleShare IP Help.
After You Read This Manual After you use this book to install and set up AppleShare IP 6.1, see the AppleShare Client 3.8 User’s Manual in the AppleShare Client folder on your AppleShare IP CD (or in the Client Software 3.8.1 folder on your server’s hard disk) for instructions on installing the client software. Once you’ve installed and set up the appropriate software on your server and client computers, you can refer to the onscreen documentation for information about using the software.
Learning About AppleShare IP Your main sources of information about AppleShare IP are Tips, AppleShare IP Help, and AppleShare IP Remote Help. After you install your AppleShare IP software, you’ll also find Read Me files and other onscreen documents in the AppleShare IP folder. These documents contain late-breaking news on AppleShare IP or instructions on how to use other software that comes with AppleShare IP. For product updates and other information, visit the AppleShare IP Web site: http://www.apple.
LL0703C1 Page 9 Friday, October 9, 1998 12:54 PM C H A P T E R 1 1 Installing Your Software Whether you are upgrading from a previous version of AppleShare or installing it for the first time, you need to follow the instructions in this chapter. This chapter tells you how to m plan your AppleShare IP services m prepare your computer’s environment and software m install Mac OS 8.5 and AppleShare IP Note: Your server should already be set up and connected to your network.
Preparing Your Computer’s Environment Before you install your AppleShare IP software, you need to prepare your computer and its environment by considering security issues, system (hardware and software) requirements, and facts about upgrading. Security AppleShare IP uses share points, user authentication, and access privileges to protect data from unauthorized access over a network.
m Memory: You need 48 MB of random access memory (RAM) with virtual memory turned on to run all of the AppleShare IP server programs simultaneously. To run all of the AppleShare IP servers without turning on virtual memory, you need a minimum of 64 MB of RAM. m System software: Mac OS 8.5 is recommended and provided with your AppleShare IP software. TCP Filter software requires Mac OS 8.5; all other features require Mac OS 8.1 or later. Installation instructions for Mac OS 8.
The Mail Database If you’re upgrading your AppleShare IP 5 Mail Server, make sure your Mail Server users download all their mail before you upgrade. If you don’t empty the database before installing the new Mail Server, you’ll need to use the AppleShare IP Mail Tool 6.0 program (on the AppleShare IP 6.1 CD) to update the previous mail database to the new version after you install the new software.
Installing Mac OS 8.5 If your computer is using a version of system software earlier than Mac OS 8.1, you need to upgrade to a newer version of Mac OS before you install AppleShare IP. Mac OS 8.5 is provided with your software. Before you begin the installation, turn off disk-security software that provides password protection and At Ease software. Then follow these steps: 1 Insert the Mac OS 8.5 CD-ROM disc (which came with your AppleShare IP software) into your computer’s CD-ROM drive.
Creating Network Settings Setting Your Network Identity You need to set your network identity and password in the File Sharing control panel before you can log on to the servers and make yourself the default owner of shared disks. Note: If you used the Mac OS Setup Assistant after installing Mac OS 8.5, you can skip ahead to “Setting Up Energy Saver” on page 23. After you’ve installed AppleShare IP, you won’t be able to change your network identity in the File Sharing control panel.
Note: If you used the Mac OS Setup Assistant after installing Mac OS 8.5, you can skip ahead to “Setting Up Energy Saver” on page 23. To set up the AppleTalk control panel, follow these steps: 1 Open the AppleTalk control panel. 2 Choose the network connection type that you want AppleTalk to use from the “Connect via” pop-up menu. This setting determines the default port that your server will use to connect to your AppleTalk network.
m you have already set up your TCP/IP control panel. If you will be running any AppleShare IP services with a modem (or “dial-up”) connection to the Internet, skip ahead to “Setting Up TCP/IP and Remote Access (for Modem Access Only)” on page 17. If you won’t be using a modem connection, skip ahead to “Setting Up Energy Saver” on page 23. To set up the TCP/IP control panel, follow these steps: 1 Open the TCP/IP control panel. If TCP/IP is inactive, the following message appears. 2 Click Yes.
7 Type the IP address for your AppleShare IP server in the IP Address text box. An IP (Internet Protocol) address is a set of four numbers from 0 to 255, separated by dots (for example, 172.16.54.2). It identifies your server on the network. Your network administrator or Internet service provider should provide this address. For more information, see the TCP/IP Connections Tutorial in the Tutorials folder on your AppleShare IP CD. Each computer has a unique IP address.
If you’re using a dial-up connection, you probably have an account with an Internet service provider that assigned you one or more IP addresses. How you set up TCP/IP and Remote Access depends on whether your Internet service provider assigned your server a static or dynamic IP address. With static addressing, each computer on your network has a unique IP number. With dynamic addressing, an IP address is assigned to each computer each time it connects to your ISP.
5 Choose PPP from the “Connect via” pop-up menu. PPP stands for “Point-to-Point Protocol,” the protocol used for remote access. 6 Choose Manually from the Configure pop-up menu. 7 Type your computer’s IP address in the IP Address text box, and the IP addresses of your ISP’s domain name server in the “Name server addr” text box. Your ISP will provide the addresses. For information about these settings, see steps 7 and 10 in “Setting Up TCP/IP” on page 15.
The Remote Access control panel appears. 10 Click the Registered User button. 11 In the Name text box, type the name your ISP assigned to you. 12 In the Password text box, type the password your ISP assigned to you. 13 Select the Save Password checkbox. 14 In the Number text box, type the phone number of your ISP. 15 Choose Modem from the Remote Access menu (or the PPP menu if you’re using Mac OS 8.1). The Modem control panel appears.
If you do not see your modem listed, you need to install your modem software. See the documentation that came with your modem. 18 If you want to hear the modem when it dials, click the On button next to Sound. 19 If the telephone line that your modem uses supports tone dialing, click Tone. Otherwise, click Pulse. 20 If the modem should not wait for a dial tone before it begins dialing, select “Ignore dial tone.” 21 Close the Modem window. 22 In the Remote Access window (or PPP window in Mac OS 8.
24 Click the Connection tab. The following window appears. 25 Select “Disconnect if idle.” To change the default of 10 minutes, type a different number in the text box. Note: The Mail Server will disconnect as soon as it has completed checking for or sending mail. 26 If you are using Mac OS 8.1, select “Connect automatically when starting TCP/IP applications.” Then skip to step 29. (If you are using Mac OS 8.5, skip to step 27.
28 Select “Connect automatically when starting TCP/IP applications.” Enabling this feature allows the Mail Server to maintain an open connection with the DNS server so that it can obtain DNS information as needed (to send outgoing mail or check for incoming mail). To learn about the other items in this control panel, choose Show Balloons from the Help menu and point to the item you want to learn more about. 29 Click OK to close the Remote Access (or PPP) control panel.
4 Click the Show Details button and if necessary, deselect the “Separate timing for hard disk sleep” so it is not checked. 5 Choose Server Settings from the Preferences menu. 6 Select “Restart automatically after a power failure.” 7 Select “Never put the hard disk to sleep.” 8 Click OK. 9 Close the Energy Saver control panel. Your changes are saved and take effect immediately.
1 Open the Date & Time control panel. 2 Click the Set Time Zone button. The city list appears. 3 Choose a city in your time zone. Then click OK. 4 Make sure your computer’s date, time, and daylight-saving time settings are correct for your location. 5 If you want this server’s time to synchronize to another server’s time, select “Use a Network Time Server.” Then click the Server Options button and select the server to synchronize to and other options. 6 Close the Date & Time control panel.
m m m m m 26 Chapter 1 m AppleShare IP 6.1 Read Me contains late-breaking information that could not be included in this manual or the onscreen AppleShare IP Help. m AppleShare IP Easy Setup is a program you use after installing AppleShare IP to perform first-time setup tasks. m The AppleShare IP First Aid folder contains the AppleShare IP First Aid application for repairing key AppleShare IP data files, and the First Aid Read Me file.
m The following files and folders are installed in the Extensions folder inside the System Folder: m Apple Browser Launcher m AppleShare IP Libraries m AppleShare IP Mail Config m AppleShare IP Mail Server m AppleShare IP Print Config m AppleShare IP Print Server m AppleShare IP Registry m AppleShare IP Registry API m AppleShare IP UAM folder m AppleShare IP Web & File m AppleShare IP Web & File Config m AppleShare IP Web & File Server m MWRuntimeLib m PC Net Exchange m TCP Filter If you use the Custom Inst
5 When the following dialog box appears, click Start. If other programs are open, click Continue to quit them and begin the installation. Onscreen messages inform you of the progress of the installation. When the installation is complete, a message prompts you to restart your computer. 6 Click Restart. Your computer restarts. 7 Remove the AppleShare IP CD-ROM disc from the CD-ROM drive and store it in a safe place.
5 When the following dialog box appears, choose Customized Installation from the Installation Type pop-up menu. 6 Choose Custom from the Selection pop-up menu, then deselect the AppleShare IP software you do not want to install. Note: Click the “i” button to the right of any item to see information about that item. 7 Click OK, then click Start. If other programs are open, click Continue to quit other programs and begin the installation. Onscreen messages inform you of the progress of the installation.
9 Remove the AppleShare IP CD-ROM disc and store it in a safe place. Now that you’ve installed AppleShare IP, go to the next chapter to set up your AppleShare IP server.
LL0703C2 Page 31 Friday, October 9, 1998 12:55 PM C H A P T E R 2 2 Setting Up AppleShare IP Whether you’ve just upgraded from a previous version of AppleShare or installed it for the first time, you need to follow the instructions in this chapter before you can use AppleShare IP.
To use AppleShare IP Easy Setup, follow these steps: 1 Open the AppleShare IP folder on your startup disk and double-click the AppleShare IP Easy Setup icon. 2 Click the right arrow in the lower-right corner of the window. The screen that appears next depends on whether you’ve entered your computer’s IP address in the TCP/IP control panel. 3 If you entered your computer’s IP address in the TCP/IP control panel, click the button for a Normal or Custom setup. Then click the right arrow.
If DNS service is not available on your network, click Custom, then click the right arrow. Now skip ahead to “Custom Setup” on page 36. 4 If you did not enter an IP address for your computer in the TCP/IP control panel, select the networks over which you want to provide AppleShare IP services. Then click the right arrow. If you will provide AppleShare IP services only over AppleTalk networks, click AppleTalk. Then skip ahead to “AppleTalk Setup” on page 42.
You need to set up your TCP/IP control panel before you can provide services over TCP/IP. See the instructions in “Setting Up TCP/IP” on page 15. Then return to “Using AppleShare IP Easy Setup” on page 31. Normal Setup You should use the Normal setup option if you already have a DNS server on your network. When you choose Normal, AppleShare IP Easy Setup displays the following screen. 1 Type the AppleShare IP 6.1 serial number in the text box, then click the right arrow.
AppleShare IP Easy Setup displays the following window, summarizing the services that will be set up and the network protocols over which the services will be available. Note: If you performed a customized installation, this window will only show information for the servers that have been installed on this computer. 2 Click the Set Up Servers button. When the server setup is complete, click OK. 3 Click the right arrow. The following window appears.
4 Click the right arrow. If the Start Servers box was checked, AppleShare IP Easy Setup starts the servers and displays a progress bar. The following window appears. 5 Click the Start Manager button. The AppleShare IP Manager opens. The AppleShare IP Manager provides a convenient central point for administering the AppleShare IP server programs. Now skip ahead to “Using AppleShare IP for the First Time” on page 45.
After you choose the Custom Setup option, AppleShare IP Easy Setup displays the following window. 1 Type the AppleShare IP serial number in the text box, then click the right arrow. Note: If you are upgrading from a previous version of AppleShare or AppleShare IP, your previous serial number appears in the window. You do not need to enter a new serial number. You can find your serial number on the label of your AppleShare IP CD holder or on the sheet you received when purchasing a new serial number.
AppleShare IP Easy Setup displays the following window, summarizing the information that you need to provide. 2 Click the right arrow. The following window appears. 3 Type your organization’s domain name in the text box. This is the name by which the computers on your network are known to the DNS service on your network—for example, “yourdomain.edu.” Your network administrator (or Internet service provider) should provide you with this name.
Note: After you’ve finished setting up AppleShare IP, you can learn more about the DNS in AppleShare IP Help or in the MacDNS Administrator’s Guide in the MacDNS folder inside the AppleShare IP 6.1 folder. 4 Click the right arrow button. The following window appears. 5 Type your computer’s DNS name in the text box. The DNS name is the name that your DNS server associates with your computer’s unique IP address when communication with that address is taking place.
The following window appears. 7 Type the e-mail address of the person who should receive mail if a problem arises. 8 Click the right arrow button. The following window appears, summarizing the services that will be set up and the network protocols over which the services will be available. 9 Click the Set Up Servers button. When the server setup is complete, click OK. 10 40 Chapter 2 Click the right arrow.
The following window appears. By default, AppleShare IP Easy Setup will start the servers that are installed on your computer. If you don’t want to start the servers now, deselect the checkbox. 11 Click the right arrow. If Start Servers was checked, AppleShare IP Easy Setup starts the servers and displays a progress bar. The following window appears. 12 Click the Start Manager button. The AppleShare IP Manager opens.
13 Complete your MacDNS setup by adding the required information about each server on your network to your MacDNS configuration file. For instructions, see the MacDNS Administrator’s Guide in the MacDNS folder inside the AppleShare IP 6.1 folder on your startup disk. Note: Users will not be able to access AppleShare IP services by use of a domain name until you configure your DNS file.
AppleShare IP Easy Setup displays the following window, summarizing the services that will be set up and the network protocol over which the services will be available. Note: If you performed a customized installation, this window will only show information for the servers that have been installed on this computer. 2 Click the Set Up Servers button. When the server setup is complete, click OK. 3 Click the right arrow. The following window appears.
By default, AppleShare IP Easy Setup will start the servers that are installed on your computer. If you don’t want to start the servers now, deselect the checkbox. 4 Click the right arrow. If the Start Servers checkbox was checked, AppleShare IP Easy Setup starts the servers and displays a progress bar. The following window appears. 5 Click the Start Manager button. The AppleShare IP Manager opens.
Using AppleShare IP for the First Time If you clicked the Start Manager button at the conclusion of the AppleShare IP Easy Setup program, the AppleShare IP Manager window appears. (If you don’t see this window, open the AppleShare IP Manager by double-clicking its icon in the AppleShare IP 6.1 folder.) The AppleShare IP Manager window displays status information about the servers installed on your computer and provides an easy way to open server administration programs.
Registering a User for the First Time If this is the first time you’ve used a version of AppleShare on your computer, you need to register the users who will have access to your servers. Each registered user has a name and (optionally) a password that authenticates the user when he or she logs on. In this section, you’ll create just one user.
The Web & File Server Activity window appears. 4 Choose Show Users & Groups List from the Users menu. The Users & Groups List appears. 5 Click the New User button at the top-left side of the window to create a new user. A new user is added to the Users & Groups List, and a User window appears.
6 Type your new user’s name in the Name text box. The name can be up to 31 characters long and is not case-sensitive. The name is also used by the Mail Server to identify the user when his or her e-mail application logs on to the Mail Server. If this user will be connecting to the Web & File Server for Windows file sharing services, enter the name that the user enters to log on to his or her Windows computer. Important 7 To assign this user a password, type it in the Password text box.
10 Complete the rest of this chapter, then go to the Users & Groups section in AppleShare IP Help to register your remaining users. You can repeat steps 5–9 above to register all of your users now. However, many options and tips for quickly and efficiently setting up large numbers of users and groups are described in AppleShare IP Help.
The Disks & Share Points window appears. The names of your hard disks and any CD-ROM discs appear in the Disks & Share Points window. 4 Click the triangle to the left of an item to display its contents. 5 Select the disk, CD-ROM disc, or folder that you wish to share. If you select a disk, every folder on it (except the System Folder on a startup disk) will be available to users who log on to the Web & File Server.
The Privileges window for the selected disk or folder appears. 7 Click the button labeled “Make this a share point and set privileges.” All of the folders that a share point contains are also shared. For security reasons, it’s often better to share folders instead of entire disks. 8 Choose the appropriate access privileges for the Everyone category. As the administrator of this computer, you are the default owner of all volumes and the folders they contain.
9 Click Save. In the Disks & Share Points window, the icon for the disk, CD-ROM disc, or folder you’ve selected changes to indicate that the item is shared. Now when anyone in the Users & Groups List logs on to the Web & File Server via TCP/IP or AppleTalk, he or she will be able to access this share point to the extent of the access privileges you’ve set. 10 If you wish, repeat steps 5–9 to create more share points.
4 Select Web Folder at the root level of your AppleShare IP server’s hard disk. 5 Click the Privileges button (or double-click the Web Folder). The Privileges window for the Web Folder appears. 6 Click the button labeled “Set privileges for this item.” 7 Choose Read Only from the Everyone pop-up menu, and make sure Read & Write is selected for the Owner category. “Everyone” includes everyone listed in the Users & Groups List (including guest users).
As the administrator of this computer, you are the default owner of all volumes and the folders they contain. By default the owner has Read and Write access privileges (meaning you can open or make changes to shared items). 8 Click Save. If you have a Mac OS–only network, skip ahead to “Setting Up Remote Administration for the First Time” on page 56. If there are any Windows clients on your network, continue to the next section.
The Windows File Sharing panel appears. 4 Select the “Enable Windows File Sharing” checkbox. 5 If necessary, enter a new name for the Web & File Server in the Server Name text field. By default, the Web & File Server assigns the AppleShare IP server’s unqualified DNS name (the name before the first dot) as the Windows file sharing server name. (For example, an AppleShare IP server with the DNS name “myserver.company.com” has “myserver” as the unqualified Windows server name.
If the server is running, choose Stop Web & File Server from the Server menu. After the server stops, choose Start Web & File Server from the Server menu. 11 Make sure you’ve created at least one share point with a valid Windows folder name. The name should have fewer than 13 characters and no special characters or punctuation. For instructions on creating a share point, see “Setting Up Share Points for the First Time” on page 49.
1 Open the Web & File Admin program. Click the Web & File Admin button in the AppleShare IP Manager. Enter your name and password, then click OK. The Web & File Server Activity window appears. 2 Make sure the Web & File Server is running by checking the status line in the upper-left corner of the Web & File Server Activity window. If it’s not running, choose Start Web & File Server from the Server menu. 3 Choose Web & File Server Settings from the Server menu.
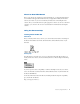
6 Select Enable Web Service. 7 Click Save. Your changes take effect immediately. To administer AppleShare IP services, type the following Remote Admin URL in any industrystandard Web browser: http:///.admin After you’ve set up your services, you can learn more about using Remote Admin in AppleShare IP Remote Help. Now go to the next section to set up the Mail Server.
3 In the Users & Groups List window, double-click the name of a user for whom you want to enable mail. The User window appears. Note: If you’re installing AppleShare IP for the first time and following the instructions in this manual, you may only have one registered user, besides yourself, in the Users & Groups List. After you’ve created your remaining users, don’t forget to set up mail for them too.
6 Click the Enable button. When mail is enabled, the user can connect to this computer for mail service. The User window shows the user’s mail account name below the Enable button. Be sure to tell this user to enter this account name and the password you assigned in the General panel when setting up his or her log-on information in a mail application. Important 7 Click Save. Mail is set up for this user.
Setting Up the Print Server for the First Time The Print Server lets you set up queues. A queue contains a list of print jobs that are being stored on the Print Server. The queue also attaches printers to those jobs and sends the jobs through one at a time. If you set up queues for printing, users can continue to work while they are waiting for a document to print.
4 Click the New Queue button at the top left of the Print Server Activity window. The New Queue dialog box appears. 5 Type a name for the queue in the Queue Name text box. The name identifies the print queue in the Print Server Activity window and (if this will be an AppleTalk print queue) in the Chooser. The name can be up to 31 characters long and can contain any character except a colon (:), Option-X (»), or an equal sign (=).
6 Click the Attached Printers tab. A list of the printers in the chosen AppleTalk zone appears. 7 To attach a printer that’s located in a different AppleTalk zone, choose a different zone from the Zone pop-up menu. If your network does not have any zones, the pop-up menu is not available. 8 To attach a printer, select it, then click the Attach Printer button to the left of the printer list. The attached printer and its AppleTalk zone appear in the Attached Printers list.
When the printer is hidden, only the queue will appear in the Chooser; it looks like any other printer name. When the printer is not hidden, both the queue and the printer appear in the Chooser, and users can choose either one. Printing directly may be useful for applications that allow the feeding of individual sheets of paper, such as envelopes. 10 Click Save. The queue appears in the Print Server Activity window. When the status line indicates that it is operating normally, the queue is ready to use.
Upgrading Mac OS Clients You can make the AppleShare Client 3.8.1 Installer available to Macintosh computers on your network via the Web & File Server. Follow these steps: 1 Make sure your client computers have system software 7.6 or later and Open Transport 1.1.2 or later installed. ( You can find out the version of Open Transport by opening the TCP/IP control panel and choosing Get Info from the File menu.) If possible, install Mac OS 8.5 on all Mac OS client computers.
Mac OS Client Services After Mac OS clients have upgraded their software, they can use AppleShare IP services as follows. Using Web & File Services To use AppleShare file sharing services, users select the AppleShare icon in the Chooser, then connect to the Web & File Server and access shared files (or volumes). To use FTP services, client users need to enter an FTP address (for example, “ftp:// myserver.company.com”) in an that supports FTP. (The Web browsers that come with Mac OS 8.
Windows File Sharing Service Windows 95, Windows 98, and Windows NT computers have built-in support for the Windows file sharing protocol, SMB, supported by AppleShare IP. Web and FTP Service Windows 3.0 and later, Windows 95, Windows 98, and Windows NT users can connect to the Web & File Server via any standard Web browser or FTP application. Mail Service Windows 3.
LL0703A1 Page 69 Friday, October 9, 1998 12:55 PM A P P E N D I X Changing the Startup Disk The AppleShare IP servers use several files located in the System Folder of your startup disk. If you change your startup disk after you install any of the AppleShare IP server programs, you need to install AppleShare IP on the new startup disk and copy certain files and folders from the old startup disk to the new startup disk.
This step is not necessary if you are adding a new startup disk and you plan to use both hard disks. 8 If you are replacing your startup disk and if your computer is being used to share data, use the Web & File Admin program’s Duplicate Folder command to copy shared folders from the startup disk to the new hard disk. Do not use the Finder to copy the folders because the folders’ access privileges will not be retained.
16 If your computer is being used to run the Mail Server, start the Mail Server. Verify that the Mail Server is using the correct mail database by checking the Mail Server log. For information, see the Mail Server section of AppleShare IP Help. 17 If your computer is being used to run the Print Server, start the Print Server. Verify that the Print Server is working correctly by checking the Print Server log. For information, see the Print Server section of AppleShare IP Help.