
Instruction Manual


Setting Up AppleShare IP Services 25
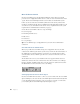
5 Choose Mail Services from the pop-up menu in the user window.
The user’s e-mail address appears below the pop-up menu. If the user has an Internet alias,
the mail server uses it in the e-mail address.
Note: If the e-mail address shows the user’s Internet alias followed by the mail server’s IP
address (for example, ethan1@172.16.54.2), then Domain Name System (DNS) service may
not be set up on your network. You need to set up DNS service if your network is connected
to the Internet or if you want your users to be able to send mail to domain names instead of
IP addresses. See “Setting Up Domain Name System (DNS) Services” on page 27 for more
information.
6 Click the Enable button.
Note: You only need to enter information in the Mail Account location text box if you’re
sharing users and groups and you want to run the mail server on a secondary server; see
AppleShare IP Help for additional instructions. If left blank, mail will be stored on the
primary server. For the easiest setup and maintenance, it’s recommended that you run the
mail server on the primary server unless there is not enough disk space for the expected mail
load.
7 Click Save.
Mail is set up for this user. He or she can configure and use any client e-mail application that
supports either the POP or IMAP protocol. For more information about these protocols or
other mail settings, see AppleShare IP Help.
8 If the mail server is not already running, press the Mail Services button and choose Start Mail
Server.
Additional Setup for Multiple Mail Servers
If you install the AppleShare IP mail server on more than one computer (which requires the
purchase of an additional copy of AppleShare IP), you need to coordinate the flow of mail
among all of the computers that provide mail service. See AppleShare IP Help for
information on mail service and mail forwarding.
Important The address in the user window is the address that others should use to send
mail to this user. Be sure to tell the user to enter this address as the return address when
setting up his or her mail application.
Important Be sure to tell the user to enter the account name and the password you
assigned when setting up his or her logon information in a mail application.