Compressor User Guide
KKApple Inc. Copyright © 2012 Apple Inc. All rights reserved. Your rights to the software are governed by the accompanying software license agreement. The owner or authorized user of a valid copy of Compressor software may reproduce this publication for the purpose of learning to use such software. No part of this publication may be reproduced or transmitted for commercial purposes, such as selling copies of this publication or for providing paid for support services.
Contents 8 8 9 10 11 12 Chapter 1: Compressor basics 14 14 15 16 Chapter 2: Compressor workflows 17 17 18 20 20 22 25 26 27 29 Chapter 3: Import source media 31 31 32 32 34 35 35 35 39 40 41 42 46 46 47 49 51 51 Chapter 4: Assign settings and preview media What is Compressor? Compressor workflow overview Compressor window overview Manage Compressor windows Compressor terms Quick and easy batch template workflow Manual batch processing workflow Custom transcoding workflow Importing overview Crea
52 52 52 57 59 Preview media Previewing overview Preview media as source or with settings applied Transcode a portion of a clip Preview window 64 64 65 65 66 70 72 72 74 74 78 83 84 84 86 89 97 99 100 100 101 102 102 103 104 104 104 105 106 106 107 107 108 109 110 112 114 114 115 116 119 Chapter 5: Custom settings and output formats Custom settings and output formats overview iTunes and Apple device output iTunes and Apple device output overview Create H.
121 121 122 123 124 130 130 130 132 132 133 134 QuickTime movie files QuickTime movie overview QuickTime video codecs QuickTime audio codecs Create QuickTime media files QuickTime Export Components files QuickTime Export Components overview Create QuickTime Export Components settings DV Stream files DV overview Create DV Stream settings Create image sequence files 137 137 137 137 138 140 142 143 145 145 146 146 147 147 151 Chapter 6: Assign destinations and submit batches Jobs, targets, and batches over
184 184 184 186 187 198 198 201 204 205 207 207 207 207 208 211 211 212 Add post-transcoding actions Post-transcoding actions overview Add setting actions Add job actions Job Action tab Use Droplets Create Droplets Use Droplets for transcoding media Droplet window Use Final Cut Pro X and Motion 5 with Compressor Use the command line to submit Compressor jobs Shell commands overview Synopsis Command options Example: Compressor commands Compressor preferences Set Compressor preferences Preferences window 21
244 244 245 245 246 247 247 249 249 250 250 253 253 254 256 Advanced rendering information Set environment variables in Apple Qmaster Manage Shake media files on a shared volume Shake plug-in dialog Generic Render dialog Use Mental Ray for Maya Use Apple Qmaster to submit UNIX commands Job segmenting and two-pass or multi-pass encoding Example: Submit After Effects batches with the Generic Render command Apple Qmaster window Apple Qmaster window Apple Qmaster Sharing window Setup pane of the Apple Qmaster
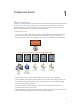
1 Compressor basics What is Compressor? Compressor is an application for converting audio and video files into professional media formats for disc, device, or web delivery. The process of converting from one file format to another is called transcoding. You can use Compressor on its own or with Final Cut Pro X and Motion to transcode audio and video files directly from those applications.
•• Apply audio filters to control dynamic range, peak levels, equalization, and audio fade-in/ fade-out effects. •• Use the Preview window to view the results of your filter settings in real time. •• Create and save output destinations, including your desktop, local disks, remote disks, and FTP locations. You can even use destination presets to specify filenaming conventions.
Each transcoding session in Compressor is known as a batch. A transcoding batch can contain multiple source media files, referred to as jobs. Each job can be transcoded into multiple formats.
•• Batch window: Import source media files and add transcoding settings and save destinations in this window. •• Settings and Destinations window: Choose settings and output destinations from the two tabs in this window. The Settings tab contains more than 30 Apple-provided settings for common media formats (for Apple devices, Blu-ray and DVD discs, web streaming, video-sharing services such as YouTube, and so on). You can add your own custom settings to this list.
Manage layouts 1 Choose Window > Manage Layouts. A dialog for managing layouts appears. 2 Do any of the following: •• To rename a layout: Double-click it and type the new name. •• To remove a layout: Select it and click the Delete (–) button. •• To save the current interface configuration as a new layout: Click the Add (+) button and enter a name for the layout. •• To choose a layout and apply it to the current Compressor interface: Choose the layout and click the Apply button.
•• Setting: A group of attributes applied to a source media file during the transcoding process. Each setting contains the following attributes (which you can modify in the Inspector window): •• Output (file) format: The encoder you choose to convert your source media file. Choose one of the following output formats based on the intended playback method: AIFF, Dolby Digital Professional, DV Stream, H.
Compressor workflows 2 Quick and easy batch template workflow If you want to transcode your source media files immediately and don’t need to create your own settings, you can use the batch template settings that are preconfigured in Compressor. The following workflow shows you a quick and easy way to use Compressor with batch templates. Stage 1: Choose a template In the Batch Template Chooser, you’ll select a template to transcode your media. For more information, see Batch window on page 29.
Manual batch processing workflow If none of the preconfigured batch settings work for your transcode but you want to use the settings and destinations that come with Compressor, you can manually build and process your batch. The following workflow shows you an easy way to manually build and process a batch in Compressor, summarizing each stage in the process and providing links to the instructions you’ll need.
Alternatively, you can view the progress of your transcode in the History window in Compressor. It contains a progress bar and, like Share Monitor, it can tell you if a submission was successfully transcoded. Custom transcoding workflow You can create your own settings and destinations, and customize other attributes such as filters, cropping, frame resizing, and actions settings to create your own custom transcoding process.
Import source media 3 Importing overview The first step in the traditional Compressor transcoding process is to import at least one source media file into the Batch window, thus creating a batch. If you’re using the batch template workflow, the first step is to choose a batch template. For more information, see Quick and easy batch template workflow on page 14.
Compressor includes a Dolby Digital decoder that it uses to play or transcode Dolby Digital audio files. This means you can verify the Dolby Digital Professional output settings of a previously encoded file on your system without using an external Dolby Digital decoder. To hear surround sound you must have an external surround sound device connected to your computer’s USB or FireWire output. The audio is mixed down to two channels if you play the audio using your system’s stereo speakers.
Create a new batch using a batch template 1 Choose File > New Batch from Template. The Batch Template Chooser appears, containing preconfigured templates and any templates you’ve created. For information about the templates in the Batch Template Chooser, see Batch window on page 29. 2 Select a batch template and click Choose. A new, untitled batch is added to the Batch window. The new batch’s tab Each tab is for a different batch.
Add source media files Add standard source media files to batches Before you add any transcoding settings to a batch, you need to import the source media files into the batch. Importing the source media files into the batch automatically creates a job. Following are the details for adding standard (not surround sound or image sequence) source media files to a batch. Add source media files to a batch 1 Open Compressor. The Batch window opens with an empty batch tab named Untitled.
•• Control-click an empty area of the batch and choose New Job With File from the shortcut menu. You can then navigate to the folder that contains your source media, select one or more source media files, and click Open. •• Open your source media file folder and drag one or more source media files into the batch. Note: You can combine the above steps by selecting all the source media files you want to transcode before opening Compressor and then dragging them to the Compressor application icon.
Change the source media file assigned to a job 1 In the Batch window, select the job whose source media file you want to change. 2 Do one of the following: •• Choose Job > Source > File, navigate to the folder that contains your source media, select one or more source media files, and click Open. •• Control-click the job and choose Source > File from the shortcut menu. You can then navigate to your source media, select one or more source media files, and click Open.
For example, to assign an AIFF file to the left surround channel, rename the file filename-Ls.aiff (where filename is the name of your file). The channel identifier codes must include the hyphen, as shown. Note: OS X may add a file extension like .aiff. This will not interfere with this channel assignment method. This procedure works only when you drag files into the Batch window. If you drag the files onto the Compressor application icon, they’ll appear as separate source files, each in its own job.
4 To include a video file, click the Add Video button and select a video file. 5 When you’ve finished adding source audio and video files to the channel assignment interface, click OK. The group of surround files appears as a single surround source media file job in the Batch window.
Add image sequences to batches You can import a sequence of still images into Compressor as a single image sequence job and then apply an output frame rate and an audio file to the job. From that point, you treat the job as you do any other Compressor source media file, adding settings, destinations, filters, and post-transcoding actions to create an output media file with the video and audio formats and characteristics you want.
4 Do any of the following: •• Confirm the selected image sequence files. To view the complete list of files, click the Info (i) button. •• Confirm the video format information in the Video section. •• Adjust the field dominance for the source files by choosing an option from the Native Field Dominance pop-up menu. •• Adjust the frame rate for the source files by choosing a standard frame rate from the Frame Rate pop-up menu.
Associate a closed caption file with a job’s source media file 1 Click the job to show the source media file’s attributes in the Inspector window. 2 Click the Additional Information tab. 3 Click Choose, locate the closed caption file (must be a Scenarist closed caption format file, usually with the file extension .scc), and click Open. Note: Closed caption data is supported by the H.264 for Apple Devices, MPEG-2, and QuickTime Movie output formats.
•• File information: This section shows the filename, location, and type of file. •• Video information: This section, when applicable, shows all video-related information about the file. This includes its frame size, frame rate, and timecode information. •• Audio information: This section, when applicable, shows all audio-related information about the file. This includes its sample size and sample rate.
Batch window The Batch window provides a central location for organizing your transcoding tasks and quickly assigning settings. When you first open Compressor, the Batch window appears with an empty, untitled batch. Think of batches as documents that can be saved, closed, and opened again. You use the toolbar at the top of the Batch window to open all other Compressor windows.
Compressor includes the following batch templates: •• Create Audio Podcast: Use this template to create an AAC audio file suitable for podcasting and add it to the iTunes library. •• Create Blu-ray disc: Use this template to create BD H.264 video and Dolby Digital Professional (.ac3) audio files and automatically burn them to a Blu-ray disc or an AVCHD disc (AVCHD discs can be played in Blu-ray Disc players that are compatible with the AVCHD format).
Assign settings and preview media 4 Settings overview A setting is a combination of transcoding attributes, such as output format, filter, and geometry settings, that you apply to the source media file as a part of the transcoding process. You need to assign at least one setting to a source media file before you can transcode it. Once you have a source media file in the current batch in the Batch window, you can either select a preexisting setting or create a customized one using the Settings tab.
Assign settings Assign settings to source media You can use a variety of methods to assign settings to a job. Some methods, such as dragging the setting from the Settings tab, are better suited to working with one job. Other methods, such as using the shortcut menu, are better for assigning the same settings to a group of jobs. You can even assign settings by dragging settings or Droplets from the Finder.
A new target is created for each setting that you added to the batch’s job. New targets are added for each setting you drag to the job. Note: You can only apply the settings to a single job when you assign them by dragging. Assign a setting to a job using the Target menu 1 Select one or more jobs in the Batch window’s current batch. 2 Choose Target > New Target With Setting. The settings selection dialog appears over the Batch window. Select the jobs in the Batch window.
Assign a setting to a job using the shortcut menu 1 Select one or more jobs in the Batch window’s current batch. 2 Control-click one of the selected jobs and choose New Target With Setting from the shortcut menu. The shortcut menu lists the settings based on their groups. You cannot directly choose a group to be assigned, but each group contains an “All” item that selects all the group’s settings. Note: You cannot select multiple individual settings with this method.
Modify an assigned setting You can edit or change any component of a setting that has already been assigned to a source media file in the Batch window (identified as Selected Target in the Inspector window). Modify a setting already assigned to a source media file in the Batch window 1 Select the target in the batch with the setting that you want to change. The setting appears in the Inspector window with Selected Target in the Name field.
Create a custom setting 1 In the Settings tab, choose an output format from the Create a New Setting (+) pop-up menu. Choose an output format for the new setting. A new setting called Untitled appears in the Custom folder of the Settings tab, appended with the selected output file format (for example, Untitled H.264 for Apple Devices). New Untitled setting The Inspector window also changes to show this setting’s parameters.
Duplicate a setting If there is a setting that contains some attributes that you want to use in another setting, you can duplicate the existing setting and make the necessary modifications to the duplicate rather than creating a new setting from scratch. Duplicating a stock Apple setting and then adjusting the duplicate to suit your needs is the most convenient way to create a custom setting. 1 In the Settings tab, select the setting that you want to duplicate. 2 Click the Duplicate Selected Setting button.
Create a group of settings 1 Click the Group button in the Settings tab. A folder called Untitled appears in the Settings tab with “0 Settings” in the Summary area. You cannot modify this field. It displays the number of settings the group contains. Enter a name for the new group. Click the Group button. A new, untitled group with 0 settings is created. 2 In the Inspector, enter a name for the group in the Name field. 3 In the Settings tab, drag the settings you want to group into the group folder.
Add the same setting to more than one group 1 Select the setting in the Settings tab. 2 To create a copy, click the Duplicate Selected Setting button. 3 Drag the duplicated setting to another group folder. You can choose to rename the setting—for example, removing the word “copy” from it. Delete a setting 1 In the Settings tab, select the setting that you want to delete. 2 Click the Delete Selected Settings (–) button, or press the Delete key on your keyboard.
About the Automatic settings Several items in the settings panes have an optional automatic mode. When the automatic mode is on, Compressor determines the optimal value for the setting. The Automatic button is dark when active, and its item is dimmed. The Automatic button is dimmed when inactive, and its item is selectable. In general, when the automatic mode is on, its item is dimmed and cannot be changed. •• If the setting has not been assigned to a source media file: The item says “Automatic.
Example: Create custom groups and settings for DVD For this example, suppose you’re working on an HD project that will eventually end up on both an HD and an SD DVD. Before that happens, though, you also need to supply SD DVDs of the dailies.
Inspector panes When you select a setting in the Settings tab or a target in a batch’s job, the Inspector shows one of six panes. Summary pane The Summary pane contains the Summary table, which describes all the settings (video and audio settings, geometry, and filter settings) associated with the setting selected in the Settings tab. Information in the Summary table is updated automatically whenever any setting is modified.
Encoder pane You use the Encoder pane to select and configure the output file format and other settings. The file format options and attributes are different for each format. •• File Format: Use this pop-up menu to choose an output file format. •• Extension: The following file extensions automatically appear in this field based on the format you choose from the File Format pop‐up menu, and if video and audio tracks are enabled.
Frame Controls pane This pane of the Inspector offers automatic and customized settings for advanced image analysis, including frame resizing, clip retiming, and deinterlacing. Frame resizing would be necessary when transcoding between a high-definition (HD) format such as 1080i and a standard-definition (SD) format such as DV-NTSC. An example of frame retiming would be when transcoding between video formats with different frame rates such as NTSC (29.97 frames per second) and PAL (25 frames per second).
Filters are applied to the source media file according to their order in the filters list. You can reorder filters by dragging them up or down in this list. Geometry pane You use the options in the Geometry pane to crop and resize the media file being compressed and set its aspect ratio.
Actions pane You use the Actions pane to turn on email notifications about completed transcodes and assign a default destination to the selected setting. •• Email Notification to: Select the checkbox to turn on email notifications, and enter the address where you want the email to go. •• Default Destination: Choose a destination from the pop‐up menu that you want this setting to use as its default. For more information, see Add setting actions on page 184.
•• Compression markers: Compression markers are also known as manual compression markers. These are markers you can add in the Compressor Preview window to indicate when Compressor should generate an MPEG I-frame during compression. For more information about I-frames, see About GOPs (groups of pictures) on page 99. These markers appear as blue in the Preview window timeline. •• Edit/cut markers: Edit/cut markers are also known as automatic compression markers.
3 To determine where the marker is to be placed, do one of the following: •• Drag the playhead to where you want to add a marker. •• Enter a timecode value in the playhead timecode field. 4 To add a marker, choose Add marker from the Marker pop-up menu (or press M). A purple chapter marker appears in the timeline. A purple marker appears under the playhead after the marker is added. 5 Choose Edit from the Marker pop-up menu (or press Command-E). A dialog for editing the marker appears.
Remove a marker from your clip 1 To move the playhead to the marker you want to remove, click either the Move to Previous Marker or Move to Next Marker control. 2 To remove the marker, choose "Remove marker" from the Marker pop-up menu (or press M). Import a chapter marker list 1 In the Preview window, choose a clip from the Batch Item pop-up menu or click the Batch Item selection button until the clip you want appears in the pop-up menu. 2 Choose Import Chapter List from the Marker pop-up menu.
4 Choose Edit from the Marker pop-up menu (or press Command-E). A dialog for editing the marker appears. 5 Choose Compression or Podcast from the Type pop-up menu. 6 in the Name field, enter a name for the marker. Note: Podcast marker names do not appear in the output. 7 To add a link, enter an Internet address in the URL field. When viewing the output, you can click the URL to open a web browser and view the URL’s website.
Plain text chapter marker lists You can create a list of timecode points that Compressor can import to create markers. The timecode values need to match the timecode of the track’s video clip. The list of timecode values must be a plain text file; you can create it with TextEdit (as long as you save the file as plain text). If you create the list with a more advanced word-processing application, be sure to save the file as a plain ASCII text file with no formatting.
Preview media Previewing overview The Preview window has two main roles. It allows you to play batch items before submitting them for transcoding and to compare versions of your clip to ensure that the quality of the output media file is acceptable. When you use the Preview window to compare the original version of the clip with the version that will be output, you can make and view real-time changes.
Preview a source media file 1 If the Preview window is not shown by default, open it by choosing Window > Preview. Tip: To open your file in the Preview window in one step, double-click the source media file in its job in the Batch window. 2 Do one of the following: •• Choose a source media file from the Batch Item pop-up menu (identified by its filename). Selects the default color bars image.
This feature is important if you’re using the Dolby Digital Professional encoder because you cannot preview the encoder’s settings in real time in the Preview window. Instead, you can add the encoded AC-3 files to a batch and play them to verify that the encoder’s settings produced good results. For information about creating a short test clip for this purpose, see Transcode a portion of a clip on page 57.
3 Click the Setting View button in the upper-right corner of the Preview window, and do any of the following to assign settings: Batch Item pop-up menu Preview Scale pop-up menu Source View and Setting View buttons Split-screen slider Cropping boundary and handles Cropping dimensions (also seen in Source Inset fields in the Geometry pane) Split-screen divider •• Choose a screen size from the Preview Scale pop-up menu, or drag the Preview window to a size you like.
•• In the Inspector, click the Filters button to view the filters list. Select the filter that you want to adjust and make changes as necessary. Click the Setting View button to see the effect of the selected filter. Selected filter settings are displayed in the Preview window. Note: To preview the effect of a filter on your media file, make sure that the checkbox for that particular filter is selected in the filters list.
•• If you want to make the display frame size of your output media file different from that of your source media file, open the Geometry pane of the Inspector window and choose a preexisting value from the Frame Size pop-up menu or enter different output size values in the Frame Size fields. Cropping dimensions (also displayed in the Inspector window when you drag cropping bars) Note: MPEG-2 is limited to preestablished display frame sizes based on MPEG-2 specifications.
Designate a portion of your media file for transcoding 1 If the Preview window is not shown by default, open it by choosing Window > Preview. 2 To set an In point, do one of the following: •• Drag the In point to the appropriate location. •• Drag the playhead to where you want transcoding to begin and click the Set In Point button. In point Playhead Out point Set In Point button Set Out Point button 3 To set an Out point, do one of the following: •• Drag the Out point to the appropriate location.
Preview window The Preview window contains the following controls: Preview Scale pop-up menu Source View and Setting View buttons Preview area Timeline controls In and Out controls Transport controls Selection and view controls You can use the Batch Item selection controls to choose specific items from the Batch window to show in the Preview window. You can also resize the Preview window and switch between Source view and Setting view.
In and Out controls After you select the batch item, you can use the In and Out controls to see and adjust the In and Out point timecode information. In point timecode Sets In point to current playhead position. •• Out point timecode Sets Out point to current playhead position. In and Out point timecode fields: The exact locations of the In and Out points are displayed here using the standard timecode format of hh:mm:ss:ff.
•• Split-screen slider: Drag the split-screen slider any distance across the top of the preview area to get a comparison view between the source media file (left side) and output media file (right side). In addition to the location of the slider at the top, the screen division is indicated by a vertical white line bisecting the image. •• Cropping boundary: The cropping boundary is available only in Source view.
•• Red: Podcast markers (named markers that are intended to be navigational chapter stops or visual artwork in the output media file) •• Green: Edit/cut markers (compression markers that are added automatically at edit points in the Final Cut Pro sequence) •• Gray bar with center dot: Poster frame (the bar indicates the frame chosen as the poster frame for this file) For more information, see Markers and poster frames overview on page 46.
Choose items from the Marker pop-up menu to add, remove, show, hide, and edit markers and poster frames. •• Import Chapter List: Opens a file import dialog that allows you to import a file containing a list of chapter marker times for the source media file. For more information, see Add compression or podcast markers on page 49. •• Add/Remove marker: The option you see changes depending on whether or not the playhead is positioned on a marker.
5 Custom settings and output formats Custom settings and output formats overview Selecting a playback platform (Apple devices, DVD, web, CD, and kiosk) is the first choice you need to make before you compress a source media file into a different output format. After you decide on the platform, you can choose the appropriate output format for that platform.
Before you can convert your existing media files to a DVD project, you must convert the video to MPEG-1 (SD projects only), MPEG-2 (SD and HD projects), or H.264 (HD projects only) files. Compressor can encode audio in the Dolby Digital Professional format (also known as AC-3). Dolby Digital Professional is a very common compressed audio format for DVD-Video discs.
Chapter and podcast markers Chapter markers created in Final Cut Pro are passed through (transferred) to other output files that can be recognized by QuickTime Player, iTunes (.m4v files), and Final Cut Pro. You can also add podcast markers to the output file. Podcast markers are similar to chapter markers (they can have a URL and artwork assigned to them); however, viewers cannot navigate to them. They are intended to provide a slideshow function to audio podcasts.
Create H.264 for Apple Devices settings 1 In the Settings tab, select a setting or create a new setting by choosing H.264 for Apple Devices from the Create a New Setting (+) pop-up menu. 2 In the Encoder pane of the Inspector window, choose H.264 for Apple Devices from the File Format pop-up menu. 3 Choose from the following Encoder pane options: •• Extension: This field displays the H.264 for Apple Devices file extension (.m4v) automatically after the H.
•• •• iPhone (Local/WiFi): This option creates video output files with a frame width of 854 pixels. •• iPhone (Cellular): This option creates video output files with a frame width of 176 pixels. •• iPad/iPhone with Retina display: This option creates video output files with a frame width of 1280 pixels. Aspect Ratio: Use this pop-up menu to choose the exact pixel dimensions of the output media file. The available options depend on which device option you chose.
•• Bit Rate: Use this slider to choose the bit rate to use for the output video, or enter a number in the text field. The available ranges depend on the Device setting. The setting you should choose depends on how the output is to be used. Higher bit rates produce better picture quality, but they also produce larger output files. •• Audio: Use this pop-up menu to choose from the four audio bit rate options listed below. •• •• None: Use this option to exclude audio from the output media file.
Create Blu-ray discs Compressor includes the ability to easily create H.264 settings specifically configured for Blu-ray and AVCHD discs. Blu-ray, also known as Blu-ray Disc (BD), is a format that was developed to enable recording, rewriting, and playback of high-definition (HD) video. The format offers more than five times the storage capacity of traditional DVDs and can hold up to 25 GB on a single-layer disc and 50 GB on a dual-layer disc.
3 To configure settings, choose from the following options: •• Extension: Displays the H.264 for Blu-ray file extension (.264) automatically after the H.264 for Blu-ray output format is chosen from the File Format pop-up menu or the Create a New Setting (+) pop-up menu in the Settings tab. •• Allow Job Segmenting: This checkbox allows you to turn off job segmenting. It’s relevant only if you’re using Compressor with distributed processing and with multi-pass encoding.
Use the Frame Rate pop-up menu to choose from the following options: •• 23.98: Used for NTSC-based video •• 25: Used for PAL-based video •• 29.97: Used for NTSC-based video •• 50: Used for PAL-based video •• 59.94: Used for NTSC-based video •• Average Bit Rate: Use the slider to choose an average bit rate to use for the output video, or enter a value in the field. Although the available range for a Blu-ray disc is between 5 Mbps and 30 Mbps, typical video bit rates with H.
For more information about creating surround sound audio files using other output formats, see Assign files to surround sound channels on page 74. Note: It’s important to understand that Compressor cannot take stereo audio files and create 5.1 surround sound from them. If you want to create a 5.1 surround sound AC-3 audio file, you must first create the six channels of audio it requires. This must be done using other applications outside Compressor.
Convert stereo audio to Dolby Digital Professional format Follow these steps to encode a stereo (2/0 L,R) Dolby Digital Professional (AC-3) stream from a stereo source media file. Encode an AC-3 stream 1 Add source audio files to the Batch window. For details, see Importing overview on page 17. 2 Save the batch by choosing File > Save As (or pressing Command-Shift-S), entering a name for the batch, selecting a location, and clicking Save.
Assign files automatically to surround channels using channel identifier codes 1 In the Finder, append the channel identifier code of the target surround channel to the filename of each source audio file using these codes: •• -L: Left front channel •• -R: Right front channel •• -C: Center front channel •• -Ls: Left surround channel •• -Rs: Right surround channel •• -S: Center surround channel •• -LFE: Low-frequency effects channel (subwoofer, LFE) For example, to assign an AIFF file to the lef
Note: You can click a channel icon in the Inspector window to change the file assigned to it. 3 To apply the appropriate Apple setting from the Dolby Digital Professional category to the source audio file’s job, do one of the following: •• Choose Target > New Target With Setting, choose a setting, and click Add. •• In the Batch window, Control-click in an empty part of the job, choose New Target With Setting from the shortcut menu, choose a setting, and click Add.
4 When you’ve finished adding source audio files to the channel assignment interface, click OK. The group of surround files appears as a single surround source media file job in the Batch window, and the icons are also shown in the Inspector window. Click a channel’s icon to change the file assigned to that channel. Note: You can click a channel icon in the Inspector window to change the file assigned to it.
Dolby Digital Professional Encoder pane This section contains detailed information about the various tabs within the Dolby Digital Professional (AC-3) Encoder pane of the Inspector window. You make your Dolby Digital Professional settings using the tabs described below, by either modifying an existing setting or creating a new setting in the Settings tab. The Dolby Digital Professional pane opens with the Audio tab on top.
•• Target System: Compressor limits available settings to those appropriate for the target system. If you’re encoding for use with DVD Studio Pro, choose DVD Video. Choose DVD Audio only if you’re encoding for use in a DVD Audio authoring application. To remove the setting limits, choose Generic AC-3. •• Audio Coding Mode: Specifies the audio channels of the encoded stream. This setting also has an Automatic button.
•• Data Rate: The choices depend on the coding mode and target system. The higher the rate, the better the quality. AC-3 streams have a constant data rate. At 448 kbps, which is the default for 5.1 encoding, one minute of AC-3 audio takes about 3.3 MB of storage space. For stereo encoding, rates of 192 kbps and 224 kbps are typical and will produce good results. •• Bit Stream Mode: Defines the purpose of the encoded audio material.
Bitstream tab These settings are stored in the finished stream for use by the playback device. Leave them at their default values unless you have a specific technical reason for changing them. •• Center Downmix, Surround Downmix: If your encoded audio has these channels, but the player does not, the channels are mixed into the stereo output at the specified level. •• Dolby Surround Mode: When encoding in 2/0 (stereo) mode, this setting specifies whether the signal uses Dolby Surround (Pro Logic).
•• Compression Preset: Specifies one of the dynamic range processing modes built into the AC-3 format. The default setting of Film Standard Compression should be used only when you’re encoding an original mix intended for cinema. In almost all cases, you should choose None. Important: It’s critical that you set Dialog Normalization correctly in the Audio tab if you intend to use any of these Compression Preset settings.
Spatial mixing options Below are additional suggestions for using the channels in a Dolby Digital Professional program. Center channel In a multichannel system, there are three ways to achieve a centrally placed sound image: •• Create a “phantom center” (mix sound to the left and right equally, as with stereo): This method is commonly used, but assumes the listener is seated exactly between the speakers (which is not possible in automobiles and not always the case in homes).
Stereo playback Even with the popularity of 5.1 systems, you should always address stereo reproduction. There are three basic ways to do this: •• Prepare a new stereo mix from the original multitrack elements (using conventional stereomixing sessions). •• Prepare a studio-adjusted downmix from the multichannel mix. This method takes advantage of the work that has gone into mixing the 5.1 version. It retains flexibility in the exact proportions of each channel represented in the final stereo mix.
HD sources and MPEG-2 Compressor has several different options and workflows for transcoding HD video source files into MPEG-2 files. •• HD on Blu-ray: Compressor can output MPEG-2 files for creating HD-resolution Blu-ray discs from either HD or SD source media. Compressor can retain the various frame sizes and frame rates of HD video when transcoding to MPEG-2. Compressor also supports the higher bit rates required by the Blu-ray format.
Create MPEG-2 files This section includes step-by-step instructions for setting your MPEG-2 attributes prior to creating MPEG-2 output files with Compressor. Make your MPEG-2 settings from the MPEG-2 Encoder pane by either modifying an existing setting or creating a new one in the Settings tab. Stage 1: Open the MPEG-2 Encoder pane and choose video format settings It’s important to match the video format, aspect ratio, and field dominance to those of your source media file.
7 If you want to use the timecode from your source video, leave the “Choose start timecode” checkbox unselected. Otherwise, select this checkbox and enter a new timecode value. 8 If you selected the “Choose start timecode” checkbox, and your video format is NTSC, select the “Drop frame” checkbox if you want to use drop frame (rather than non-drop frame) timecode.
4 If available, use the Maximum Bit Rate slider or field to set a maximum bit rate. Because SD DVD players support peak bit rates of up to 10.08 Mbps for video plus audio, you should set the maximum video bit rate between 8.0 and 8.5 Mbps if you’re using a 1.5 Mbps (two-channel AIFF) audio track. Note: For best results, make sure the maximum bit rate is at least 1 Mbps higher than the average setting. Larger differences can produce better results.
Stage 4: Choose Extras settings You can control the inclusion or exclusion of specific MPEG-2 authoring information in the Extras tab. 1 To open the Extras tab, click the Extras button in the MPEG-2 Encoder pane of the Inspector. 2 If you want Compressor to parse specific MPEG-2 authoring information rather than parse the information later in DVD Studio Pro, select the “Add DVD Studio Pro metadata” checkbox.
Basic settings •• Extension: Displays the MPEG-2 file extension (.m2v) automatically after the MPEG-2 output format is chosen from the File Format pop-up menu. •• Allow Job Segmenting: This checkbox allows you to turn off job segmenting. It’s relevant only if you’re using Compressor with distributed processing and with multi-pass encoding. For more information, see Job segmenting and two-pass or multi-pass encoding on page 249.
If you click the Video Format Automatic button, the GOP size is limited to 12 or 15 (based on whether the video is PAL or NTSC), with a closed IBBP pattern. With Automatic selected, you cannot change the frame rate setting in this tab, or the GOP settings in the GOP tab. For more information about GOPs, see About GOPs (groups of pictures) on page 99.
•• Aspect Ratio: Choose the aspect ratio of your video file. The default is 4:3. The other option of 16:9 is used for anamorphic DVD. The aspect ratio determines how the picture fills the television screen. A 16:9 (widescreen) DVD viewed on a typical 4:3 television appears in letterbox format (black bars at the top and bottom of the screen). However, a widescreen DVD displayed on a 16:9 (widescreen) TV fills the screen.
Quality tab The Quality tab allows you to set the bit rate for your video so that it can be transcoded to a suitable data size and quality. In addition to the controls, the lower-right corner shows an estimate of how many minutes of video would fit on a 4.7 GB DVD using the current settings. This time assumes a single AIFF audio stream to be used with the MPEG-2 stream. Mode pop-up menu Motion Estimation pop-up menu Time estimate for a 4.
•• •• Two pass VBR: In this mode, Compressor reads through the entire source video file twice. In the first of these passes, Compressor analyzes the entire source video stream prior to transcoding it to determine the degree of encoding difficulty of each scene. It then creates a bit rate allocation plan that gives a higher bit rate to complex scenes and a lower bit rate to easy scenes, in order to achieve the specified average bit rate without exceeding the specified maximum bit rate.
GOP tab You use the GOP (group of pictures) tab to select a GOP format, structure, and size. For more information, see About GOPs (groups of pictures) on page 99. Note: If you choose any of the HD video formats in the Video Format tab, the settings in the GOP tab cannot be changed and default to a closed IBBP GOP structure with a size of 12 (for PAL) or 15 (for NTSC).
•• GOP Size: Choose how many frames are contained within your GOP, following the format of the chosen GOP structure. The maximum GOP size you can choose within Compressor is 15 frames (NTSC) or 12 frames (PAL and 720p). The minimum GOP size for all video formats is 6 frames (closed GOP) or 7 frames (open GOP). The relationship between GOP structure and GOP size gives you GOP patterns. For more information, see About GOPs (groups of pictures) on page 99.
•• YUV 4:2:2 Color encoding (Not for DVD use): Select this checkbox to enable 4:2:2 color encoding. This option is supported in the creation of MPEG-2 elementary, program, and transport streams, but it’s available only when the Stream Usage pop-up menu is set to Generic. •• Multiplexed MPEG-1/Layer 2 Audio: Select this checkbox to create a multiplexed stream (rather than an elementary stream). You can make the output file either a transport stream or a program stream.
MPEG-2 video frame sizes and formats Because MPEG-2 uses fixed video frame sizes, Compressor enters the output frame size in the fields in the Geometry pane based on your video format selection. The video format you choose in the Video Format pop-up menu determines the options for the associated characteristics such as frame size and rate, aspect ratio, and field dominance. For more information, see MPEG-2 Encoder pane on page 89.
About GOPs (groups of pictures) A major feature of MPEG-2 encoding is its ability to remove redundancy, not only within a frame but also among a group of frames. MPEG-2 uses three frame types (I, P, and B) to represent the video. A group of pictures (GOP) setting defines the pattern of the three frame types used. These three frame types are defined in the following ways: •• Intra (I): Also known as the key frame. Every GOP contains one I-frame.
Open and closed GOPs Open GOPs are most efficient because they allow an extra B-frame in the GOP pattern. Open GOPs start with a B-frame that is able to look at the last P-frame from the preceding GOP as well as the first I-frame of its own GOP.
QuickTime audio sample sizes and rates If you have the disk space and bandwidth, it’s best to leave your audio uncompressed. Uncompressed audio normally uses 8-bit (phone quality) or 16-bit (CD quality) samples. Compressor supports up to 64 bits per sample floating point and a maximum sample rate of 192 kHz. Choosing an audio codec for distribution MPEG-4 Audio (AAC) is a good general-purpose audio delivery codec and is compatible with a wide variety of playback devices.
3 Click the Settings button in the AIFF Encoder pane. The Sound Settings dialog opens. Choose an audio codec from the Format pop-up menu. 4 Choose an audio codec from the Format pop-up menu and either accept its default settings or customize the other audio codec settings: •• Channels: Choose the type of channel output, such as mono, stereo, or some type of multichannel output, depending on the codec. •• Rate: Choose the sample rate you want to use for your media file.
Create Common Audio Formats settings When you choose Common Audio Formats as your output format, you can only create audio settings (because it’s an audio-only format). Create a Common Audio Formats setting 1 In the Settings tab, select a setting or create a new setting by choosing Common Audio Formats from the Create a New Setting (+) pop-up menu. 2 Choose an audio format from the "File type" pop-up menu in the Common Audio Formats Encoder pane of the Inspector window.
MP3 files MP3 overview MP3 is a specific type of MPEG encoding known formally as MPEG Audio Layer 3. MP3 uses perceptual audio coding and psychoacoustic compression to remove all superfluous information (specifically the redundant and irrelevant parts of a sound signal that the human ear doesn’t hear anyway). The result is that MP3 encoding shrinks the original sound data from a CD (with a data rate of 1411.
Stage 4: Add targets with an MP3 setting to each of the jobs Each of the jobs requires at least one target—in this case the jobs need targets with an MP3 setting. If there is more than one job, it’s easiest to select all the jobs by choosing Edit > Select All and then choose Target > New Target With Setting to apply the same setting to all the jobs. Stage 5: Submit the batch for transcoding To start the transcoding process, click the Submit button. For more information, see Submit a batch on page 147.
•• Use Variable Bit Rate Encoding (VBR): Select this checkbox to have Compressor vary the number of bits used to store the music depending on the complexity of the music. This can help keep file size to a minimum. •• Sample Rate: Choose the number of times per second that the music waveforms are captured digitally. The higher the sample rate, the higher the quality and the larger the file size. Don’t choose a sample rate higher than the rate used originally to store the music or you’ll waste space.
About system and elementary streams You can use Compressor to create system or elementary MPEG-1 streams. •• System streams: System streams, also known as multiplexed streams, combine the video and audio components into the same file. This type of stream is most often used in web applications. Compressor automatically creates a system stream when you enable both the Video and Audio tabs in the same setting.
Create MPEG-1 files for the web Follow these instructions to create MPEG-1 files encoded for the web. Stage 1: Open the MPEG-1 Encoder pane and choose video settings 1 In the Settings tab, choose MPEG-1 from the Create a New Setting (+) pop-up menu. The MPEG-1 Encoder pane opens in the Inspector with the Video tab displayed. 2 Name the new setting “MPEG-1 for Web.” 3 Select the Enabled checkbox. Select to enable the Video tab. Click the Automatic button or choose a frame rate.
3 Choose 44.1 kHz from the Sample Rate pop-up menu. 4 Select Stereo when using two-channel audio sources, or Mono when using one-channel audio sources. 5 Specify the bit rate to use by dragging the Bit Rate slider. Important: Set the bit rate as low as you can set it to get acceptable audio quality. Use a higher bit rate when encoding stereo. 6 To save this setting, click Save. Create MPEG-1 video for DVD Follow the instructions below to author a DVD with MPEG-1 elementary streams.
Stage 3: Make an elementary video stream In order for the output media file to be an elementary video stream, you must turn off the audio setting. 1 To open the Audio tab, click the Audio button in the MPEG-1 Encoder pane of the Inspector. 2 Deselect the Enabled checkbox. This ensures that this setting (preset) creates only an elementary video stream and sets the file extension to .m1v. Deselect to disable the Audio tab. 3 To save the MPEG-1 Video for DVD setting, click the Save button.
This ensures that this preset creates only an elementary audio stream and sets the file extension to .m1a. The file extension changes to .m1a once the Video tab is disabled. Deselect to disable the Video tab. Stage 3: Open the Audio tab and configure audio settings for DVD 1 To open the Audio tab, click the Audio button in the MPEG-1 Encoder pane of the Inspector. 2 Select the Enabled checkbox. Select to enable the Audio tab. Choose the 48 kHz sample rate. Choose the bit rate.
MPEG-1 Encoder pane This section contains detailed information about the various tabs within the MPEG-1 Encoder pane of the Inspector window. You make your MPEG-1 settings using these tabs, by either modifying an existing setting or creating a new setting in the Settings tab. The MPEG-1 Encoder pane opens with the Video tab on top and contains the following items. Basic settings •• Extension: This field displays the MPEG-1 file extension (.
Video tab You use the Video tab to make settings related to the video format. Automatic button •• Enabled: Make sure this checkbox is selected if you want the MPEG-1 output format to include the Video tab settings. •• Frame Rate: Choose the frame rate of the video you’re encoding. The Purpose buttons (Web and DVD) modify the options available in this pop-up menu: •• •• With Purpose set to Web: The Frame Rate choices are 23.976, 25 (PAL frame rate), 29.97 (NTSC frame rate), and Automatic.
Audio tab You use the Audio tab to make settings related to the audio format. •• Enabled: Make sure this checkbox is selected if you want the MPEG-1 output format to include the Audio tab settings. •• Sample Rate: Choose the sample rate of the output audio. •• •• •• 48 kHz: Required for use on DVDs. •• 44.1 kHz: Used on audio CDs. This is the most commonly supported sample rate. Channels: Select the channel valence (stereo or mono) for the output media file.
H.264, also known as MPEG-4 Part 10, is a newer technology than MPEG-4 Part 2, providing up to four times the frame size of video encoded with the MPEG-4 Part 2 codec at a given data rate. But, just as MPEG-1 and MPEG-2 are still used in the industry today, MPEG-4 Part 2 continues to be used. Note: MPEG-4 Part 2 is both a QuickTime codec (MPEG-4 Video) and an output format. This chapter discusses MPEG-4 Part 2 as an output format.
Default audio tab settings These are the default audio settings for MPEG-4 Part 2 output media files: •• Audio Enabled: Selected •• Channels: Stereo •• Sample Rate: 44.
1 In the Inspector window, click the Encoder button and choose MPEG-4 from the File Format pop-up menu. The MPEG-4 Encoder pane opens, with .mp4 in the Extension field and the Video tab open. Note: The Allow Job Segmenting checkbox allows you to turn off job segmenting. It’s relevant only if you’re using Compressor with distributed processing and with multi-pass encoding.
If you don’t want to edit any other attributes, you can assign the MPEG-4 setting to any source media file in the usual way. For more information, see Assign settings to source media on page 32. Otherwise, go to the next stage to edit MPEG-4 audio settings. Stage 2: Open the Audio tab and adjust MPEG-4 audio settings You use the Audio tab to set the audio track quality, sample rate, and bit rate of the MPEG-4 output file.
Stage 3: Open the Streaming tab and edit streaming settings You use the Streaming tab to set hints for your output file, as well as set the maximum packet size and packet duration limits of the MPEG-4 Part 2 output file. You can also set your output media file to work with an older version of QuickTime Streaming Server (version 4.1 or earlier). 1 To open the Streaming tab, click the Streaming button in the MPEG-4 Encoder pane of the Inspector.
4 To open the Audio tab, click the Audio button. 5 Select the Audio Enabled checkbox. This sets the MPEG-4 output to be an audio-only (.m4a) file. You can also specify the other settings in the Audio tab as needed. Stage 2: Configure the MPEG-4 output to include podcasting information 1 Select the “Enhanced Podcast (m4a file)” checkbox near the bottom of the MPEG-4 Encoder pane of the Inspector window. This checkbox is available only when the Video Enabled checkbox in the Video tab is deselected.
3 Choose an item from the Add Annotation pop-up menu to add it to the output media file. Choose items from this pop-up menu to include them as annotations in the output media file. The item appears in the Annotation column. 4 Double-click the item’s Value column and type the text for the annotation. 5 Repeat step 3 and 4 for each annotation item you want to add to the output media file. For more information, see Inspector window on page 27. You can use the setting you create to output an audio podcast.
QuickTime media files for the web You can play your output media files over the web with QuickTime, once the files are compressed to a data rate appropriate for the bandwidth you expect your audience to have. You can do this by making your output media files either QuickTime Fast Start movies (pre-buffered download) or QuickTime Streaming movies. You can choose different streaming options from the Streaming pop-up menu in the QuickTime Movie Encoder pane.
Video codecs can be divided into the following two types: •• Lossless codecs: Lossless codecs completely preserve the data they compress and are usually used to transfer footage from one editing suite to another. Lossless codecs can require high data rates and high-end computers with specialized hardware. Examples of lossless codecs are the Animation, 8-bit, and 10-bit uncompressed 4:2:2 codecs.
Reducing the sample rate can shrink a media file by as much as 5:1. The audio quality will be affected, but not as much as it would be if you used 8-bit sampling. The following table shows common sample rates and the audio device quality to expect at each rate. Sample rate Audio device quality 48 kHz DAT/DV/DVD 44 kHz CD 22 kHz FM radio 8 kHz Telephone Sound sample size The sound sample size determines the dynamic range of the sound.
The Extension field displays the QuickTime file extension (.mov) automatically after the QuickTime Movie output format is chosen from the File Format pop-up menu or the Create a New Setting (+) pop-up menu in the Settings tab. For more information, see Job segmenting and two-pass or multi-pass encoding on page 249.
4 Choose a QuickTime streaming option from the Streaming pop-up menu: •• None: If you choose this setting (the default), your output media file will not stream over the Internet. •• Fast Start: This option allows your output media file to be viewed even before it’s fully downloaded from its server.
If a particular setting can’t be changed, it remains dimmed. Some video codecs—such as Photo-JPEG—allow you to make additional settings. If this is the case, the Options button becomes available. 1 Click the Video Settings button in the QuickTime Movie Encoder pane of the Inspector. 2 In the Compression Settings dialog, choose a video codec from the Compression Type pop-up menu and either accept its default settings or customize the other settings (in the Motion, Data Rate, and Compressor areas).
4 If available, specify the following settings in the Motion area: •• Frame Rate: Choose a frame rate, or choose Custom to enter a frame rate manually. With this pop-up menu, you can reduce the frame rate of your original file to reduce the size of the compressed file. Higher frame rates make for smoother motion but require more bandwidth.
Stage 3: Add a QuickTime audio codec The Audio Settings button in the QuickTime Movie Encoder pane provides access to the currently installed QuickTime audio codecs. All codecs are compatible with QuickTime, but if you intend to play back the output media file using QuickTime Player, the following delivery codecs are recommended: •• AAC •• IMA 4:1 For more information about audio codecs, see QuickTime audio codecs on page 123. If a particular audio setting cannot be changed, it remains dimmed.
QuickTime Export Components files QuickTime Export Components overview You can use Compressor to output a variety of additional formats using the QuickTime component plug-in feature. Compressor and QuickTime can be extended to support additional codec options and thirdparty formats. The QuickTime component plug-in feature allows you to export exotic file formats that can play on third-party devices and operating systems, such as mobile phones.
Create a QuickTime Export Components setting 1 In the Settings tab, select a setting or create a new setting by choosing QuickTime Export Components from the Create a New Setting (+) pop-up menu. 2 Choose QuickTime Export Components from the File Format pop-up menu. Choose QuickTime Export Components. Extension field Choose an encoder plug-in. Click to see the options for the encoder plug-in.
The Settings window for that particular output file format opens. Configure settings for the QuickTime export component. Important: Use the third-party export module user interface to explicitly enter the image size and frame rate for the output file. Do not leave the Image Size and Frame Rate settings in the third-party user interface at their default values. 4 To save your settings, click OK.
Create DV Stream settings This section contains detailed information about the various settings within the DV Stream Encoder pane of the Inspector window. You make your DV settings by either modifying an existing setting or creating a new setting in the Settings tab. Create a DV Stream setting 1 In the Settings tab, select a setting or create a new setting by choosing DV Stream from the Create a New Setting (+) pop-up menu.
Create image sequence files The Image Sequence output format creates a set of still-image files representing the source video frames. Use this encoder to convert a video clip to an image sequence for use with compositing applications that aren’t compatible with QuickTime. Note: You can also use Compressor to import an image sequence. For more information, see Add image sequences to batches on page 25.
•• TARGA (Truevision Advanced Raster Graphics Adapter): TARGA, also commonly referred to as TGA, is a raster graphics format commonly used by animation and video applications. •• DPX: DPX is a common file format for digital intermediate and visual effects work and is an ANSI/SMPTE standard (268M-2003).
Adjust the pixel aspect ratio of an image sequence job before transcoding Because all still-image types require square pixels (a pixel aspect ratio of 1.0), Compressor may have to alter the pixel dimensions of an image sequence job. To view or adjust these parameters, select the target in the Batch window and click the Geometry button in the Inspector.
Assign destinations and submit batches 6 Jobs, targets, and batches overview A job consists of a source media file with at least one target—composed of a setting and a destination—assigned to it. You create the jobs by importing the source media files. For a job to be complete, and thus ready to be submitted for transcoding, you need to add one or more targets to it.
Assign destinations When you assign settings to your targets, the default destination is automatically also assigned. You can set the default destination in Compressor preferences. (Choose Compressor > Preferences.) The default destination can be one of those supplied with Compressor or a custom destination you create. For details about working with destinations, see Create and modify destinations on page 140.
Assign a destination using menu commands 1 Select all targets that you want to assign the destination to. 2 Do one of the following: •• Choose Target > Destination > [Destination]. •• Control-click one of the targets and choose Destination > [Destination] from the shortcut menu. Use the target’s shortcut menu to change the destination for the selected targets. The destination you choose appears in the destination section of each selected target.
Create and modify destinations You use the Destinations tab together with the Inspector window to create and assign a destination and to add file identifiers (placeholder filename elements such as the date or the setting name) to your output file.
Change the default destination 1 Choose Compressor > Preferences. 2 Choose a destination from the Default Destination pop-up menu. The destination you choose appears as the default destination when you import a new source file in the Batch window. Delete a destination 1 Click the Destinations tab in the Settings and Destinations window. 2 In the Destinations tab, select the destination you want to remove, and click the Delete Selected Destinations (–) button.
A copy of the destination appears. Rename the duplicate destination as appropriate. The duplicated destination If a warning triangle appears When there is a problem with your destination, a yellow warning triangle appears. You must resolve this problem before you can successfully transcode.
Destinations tab and Inspector You use the Destinations tab together with the Inspector window to create and assign a destination, and to add file identifiers to your output file. Create a New Destination button Duplicate Selected Destination button Delete Selected Destinations button Default filename identifiers Output Filename Template pop-up menu Sample filename line Destinations tab •• Destinations list: This lists destination names and pathnames.
Inspector items When you double-click or select a destination in the Destinations tab, the Inspector window opens. It contains the following items: •• Name: Use this field to modify the name of the destination preset. •• Output Filename Template: Use this pop-up menu to add file identifiers to your output media file. You can manually edit this field.
Set up targets and jobs Set up targets Targets contain three items: a setting, a destination, and an output filename. Drag the dividers to expand a target’s section and make it easier to see the entry. Target Add and Remove buttons Output filename Setting Destination You can use a variety of methods to add targets to a job. The most common is to add a setting or destination to the job.
Add and copy jobs Jobs are most often created by adding source media files to a batch. You can use several other methods to add jobs to a batch. Add an empty job to a batch mm Choose Job > New Job. Delete a job from a batch mm Select the job and press the Delete key. Copy jobs from one batch to another Do one of the following: mm Drag a batch tab out of the Batch window to view the batches in separate windows and then drag a job from one window to the other.
Submit batches Submit a batch After you’ve configured the jobs and their targets within a batch, you’re ready to submit the batch for processing. Tip: Before committing to a long transcoding session, do a quick test with a small section of the source media file. If there’s a problem (such as an incorrect setting or a reference file that can’t find the files it refers to), you can make the correction without losing a lot of time.
5 Choose a priority level for the batch from the Priority pop-up menu. 6 Click Submit or press Return to submit the batch for processing. The History window shows the batch progress. For more information about the History window, see Compressor window overview on page 10. Note: The History window opens automatically if it isn’t already open. You can also monitor the transcoding progress with Share Monitor by clicking its icon in the Batch window.
Resubmit a batch from the History window All batch submission information is stored in the History window. This information includes the details about all of the batch’s jobs and targets, including which source media files were assigned to them. You can use this information to resubmit a batch simply by dragging a particular entry from the History window back to the Batch window. For more information about the History window, see View batch information in the History window on page 151.
Transcode different clips from one source media file If you have a large source media file and you want to transcode only a few different sections of it, you can do this in one batch submission. 1 In the Batch window, add the source media file to the batch, once for each clip that you want to make. A new job is created each time you import the source media file 2 Add settings to each job. A unique identifier is applied to the output filename, so that you can easily identify each clip after it’s transcoded.
You can also press the I (In) and O (Out) keys to move the markers to the current location of the playhead. In point Out point 6 Return to the Batch window and click Submit. For more information about the Preview window, see Previewing overview on page 52. For more information about using the Batch window, see Create a batch on page 18. View batch information in the History window The History window shows the progress of a batch currently being transcoded.
View information about previously submitted batches Do any of the following: mm To view all batches submitted on a specific date: Click the disclosure triangle next to the date. Click the disclosure triangle to see the details of that day’s submissions. mm To view information about a batch: Click the disclosure triangle next to the batch name. Clicking this disclosure triangle shows the submission details. Click the Reveal in Finder button to show the encoded file in a Finder window.
Advanced functions 7 Add filters Filters overview Compressor has a variety of filters (such as color-correction, noise-removal, and edge-sharpening filters) you can use to adjust your source media file before transcoding, to improve the output quality of your video and audio. The best way to assign these filter settings is to look at, and listen to, your source media file, and then choose the most suitable filter for your output purposes.
Add and adjust filters Use the Filters pane in the Inspector to add video and audio filters to your settings. If you want to modify only a single media file, you can add filters to a setting already applied in the Batch window. If you want to modify a custom setting permanently, you can add filters to the custom setting in the Settings tab. That way, all future jobs you apply the setting to will be modified by your chosen filters. Note: In the Settings tab, filters can be applied only to custom settings.
If you applied a filter to a setting in the Batch window, you can view the results of filter adjustments in the Preview window. The viewer in this window is split into original and transcoded views of your media file so that you can see or hear the effects of your filter settings before processing the batch (as long as the checkbox for that particular filter is selected).
5 If you want to apply additional filters, repeat step 4. 6 Drag the filters up or down within the list to set the order in which you want them applied to the source media file during transcoding. Drag filters up or down to set the order in which you want them to be applied to the source media file. Because filters are processed one by one during transcoding—starting with the first item in the list—it’s important that your filters be organized in the order you want them.
Brightness and Contrast Alters the overall color and luminance values of your output media file to a brighter or darker level. Some QuickTime codecs darken your video file, so you can use this filter to compensate. Choose any number between –100 and 100, but avoid extreme settings, because they confer a very washed-out quality. The Brightness and Contrast filter contains the following controls: •• Brightness: Adjusts brightness to any number between –100 and 100.
Deinterlacing Removes the effects of interlacing. However, if you need to deinterlace video, it’s recommended that you use the controls in the Frame Controls pane, instead. The deinterlacing controls in the Frame controls pane provide better quality than this legacy filter. For more information, see About deinterlacing on page 172.
Gamma Correction Controls the overall brightness of an image as displayed on a monitor by changing the gamma amount of the media file. This filter can be used to remove detail from an underexposed clip or reduce an overexposed clip’s saturation to an acceptable level without washing out the image too much. Computers using different operating systems have different monitor settings. For cross-platform viewing, correcting the gamma will improve the image for all platforms.
Noise Removal Reduces random flecks of noise from the image. Some codecs introduce noise into the video file, which can be softened with the Noise Removal filter. You can improve image quality and spatially compress your material more efficiently by reducing its fine detail. The noise reduction filter allows you to blur areas of low contrast while leaving high-contrast edges sharp. This is known as adaptive noise reduction.
Sharpen Edge Enhances the image contrast around object edges. Some codecs blur the video image, so this filter can counteract the softening effect of noise removal or blurred source material and increase the perception of sharpness in the image. When used to an extreme, the output media file can look grainy. The Sharpen Edge filter contains a single control: •• Amount: Sets a sharpen setting between 0.0 and 100.0. Text Overlay Superimposes text onto the image.
Timecode Generator Superimposes the clip’s timecode text onto the image. You can also add a label to the timecode text. The Timecode Generator filter contains the following controls: •• Position: Positions timecode text in the image. Choose from any of 13 positions such as Center, Lower Left, Lower Left - Title Safe, and so on. •• Alpha: Sets the timecode text opacity. Choose a value between 0 and 1. A value of 0 makes the text completely transparent, and a value of 1 makes it completely opaque.
Audio filters Compressor includes the following audio filters, located in the Audio tab of the Filters pane. Important: The audio filters are not available when audio is set to “Pass-through” in QuickTime settings. For more information, see Create QuickTime media files on page 124. Dynamic Range Lets you dynamically control a clip’s audio levels by enhancing the quieter parts and lowering the louder parts. This is also referred to as audio level compression (not to be confused with video compression).
Apple: AUGraphicEQ Allows you to shape a wide variety of frequencies throughout the audible frequency range. You have the choice of a 31-band version or a 10-band version. The Apple: AUGraphicEQ filter contains the following controls: •• Options: Click this button to open the Apple: AUGraphicEQ window, a graphic equalizer control described below. •• Apple: AUGraphicEQ: Adjusts the level of each frequency band to any value between –20 dB and 20 dB.
The FadeIn/Out filter contains the following controls: •• Fade In Duration: Sets the duration of the mix from the gain value to the clip’s normal audio level at the start of the clip. •• Fade Out Duration: Sets the duration of the mix from the clip’s normal audio level to the gain value at the end of the clip. •• Fade In Gain: Sets the level that the mix starts with. A value of –100.0 is silence, whereas a level of 0.0 leaves the audio as it is.
Work with frame controls Frame controls overview Many transcoding jobs, as well as manual adjustments made in the Geometry pane of the Inspector, change the frame size (resolution) of the output video file. Frame controls in Compressor use advanced image analysis to apply the most appropriate reprocessing methods in transcoding jobs that involve a change in frame size. Frame controls can also apply deinterlacing, retiming, and other video-processing effects.
Apply frame controls to a setting Use the Frame Controls pane in the Inspector to add frame processing and retiming adjustments to a custom saved setting in the Settings tab or to a setting already applied in the Batch window. Note: In the Settings tab, frame controls can be applied only to custom settings. If you want to apply frame controls to an Apple-supplied setting in the Settings tab, you must first duplicate that setting and save it to the Custom folder.
Frame Controls pane Use the following parameter controls in the Frame Controls pane of the Inspector to manually adjust processing methods and retiming settings. Automatic button Frame Controls pop-up menu Resizing controls Retiming controls Activation controls Use the two controls at the top of the pane to turn on automatic frame controls or manual frame controls.
Resizing Control Use the controls in this area of the Frame Controls pane to choose the processing algorithm used to resize frames. •• •• Resize Filter: Choose a resizing method from this pop-up menu. This decision is a trade-off between faster processing time and higher output quality in projects that involve a change in resolution. •• Fast (Nearest pixel): Provides the fastest processing time. •• Better (Linear filter): Provides a medium trade-off between processing time and output quality.
•• Deinterlace: Choose a deinterlacing method from this pop-up menu. This decision is a tradeoff between faster processing and higher-quality deinterlacing of motion areas within the frame. In all cases, each higher-quality deinterlacing option yields the same or better results than the next lower-quality option. However, if downward resizing is also applied to the frame, improvements in quality may not be noticeable.
Retiming Control Use the controls in this area of the Frame Controls pane to choose the algorithm with which frame rates are adjusted. Note: When you use the retiming controls to change video speed, Compressor also adjusts the audio portion of the output media file so that it stays in sync with the video. The retiming controls do not affect the audio pitch. For more information about using these options, see About retiming on page 175.
•• Percent of source: Modifies the output clip’s speed by a percentage of the source clip’s speed. Type a custom percentage value in the field, or choose a preset value from the adjacent pop-up menu (with a downward arrow). These preset values are intended for use in specific situations: •• 24 @ 25: Use this setting when you have 24 fps video that you want to convert to 25 fps for PAL distribution. •• 23.98 @ 24: Use this setting when you have 23.98 fps video and want to convert it to 24 fps. •• 23.
Because interlacing creates two fields for each frame, areas with fast movement within the field become separated into alternating jagged lines. You can view your source media one frame at a time and check for horizontal stripes along the leading and trailing edges of moving objects. Interlacing creates a “comb” effect that should be removed. If your source media file needs to be converted to a frame-based format, you must deinterlace the file to remove the effects of interlacing.
Telecine is the process of converting motion picture film to the NTSC video format used in broadcast television. The most common telecine approach to converting film’s standard 24 fps frame rate to NTSC video’s 29.97 fps frame rate is to perform a 3:2 pulldown (also known as a 2:3:2:3 pulldown). If you alternate recording two fields of one film frame and then three fields of the next, the 24 frames in 1 second of film end up filling the 30 frames in 1 second of video.
Other reverse telecine issues Because the goal of reverse telecine is to output progressive 23.98 fps video, all the other options in the Frame Controls pane are disabled when you choose Reverse Telecine from the Deinterlace pop-up menu. When using the Reverse Telecine menu command, consider these issues: •• Because of the unpredictable nature of the processing when reversing the telecine, segmented encoding does not work as efficiently as it does when reverse telecine is not being used.
In all cases, if the source media file contains audio, the audio also has its speed changed, with the audio pitch corrected so that it sounds the same as the original, just at a different speed. This ensures that you’ll maintain sync between the video and audio. If you preview a setting that uses retiming controls, the video will play at its new frame rate or speed, but it won’t have been processed by Frame Controls and will be of a lower quality than the actual transcoded output file.
•• Padding scales the image to a smaller size while retaining the output image’s frame size, by filling the padded areas with black. Unlike cropping, padding does not remove any of the source image or change the overall frame size. Instead, the image is reduced and black is added to the borders of the frame to maintain the same frame size. The padding controls are located in the Output Image Inset (Padding) section of the Geometry pane.
Adjust the dimensions of a setting using the Geometry pane 1 Do one of the following: •• To adjust the dimensions of a custom setting in the Settings tab: Select a setting in the Custom folder. •• To adjust the dimensions of a setting already applied to a source media file in the Batch window: Select the setting in the target area. 2 Click the Geometry button in the Inspector. The Geometry pane opens.
As you drag, a help tag displays a numeric representation of your frame cropping dimensions. Hold down the Shift key to constrain the crop to either the source aspect ratio, the source height, or the source width. If you select a batch’s target, any resizing in the Preview window is reflected in the Geometry pane. You can also directly enter numbers into these cropping fields. Drag the red frame bars (by the handles) to adjust the output file frame size. 3 To save the changes, click Save.
Source Inset (Cropping) controls Use these controls to reframe the image with a standard aspect ratio preset or custom dimensions. •• •• Crop to: Choose a standard aspect ratio from this pop-up menu to crop the frame from the center. There are eight choices: •• Custom: Lets you manually enter values in the Left, Right, Top, and Bottom cropping fields (described below), or adjust these values by dragging the red frame bars in the Preview window.
When you adjust the cropping settings, one of two things happens to the output video file’s frame size: •• The frame size remains the same if you’ve chosen anything other than the “100% of source,” “50% of source,” and “25% of source” settings in the Frame Size pop-up menu of the “Dimensions (encoded pixels)” section of the Geometry pane. This means that the source video image is scaled larger to fill the output video file’s frame size, which results in larger pixels and overall image degradation.
•• Up to 428x240: Scales the output dimensions to not exceed a 428 x 240 frame size while maintaining the original aspect ratio. •• Up to 214x120: Scales the output dimensions to not exceed a 214 x 120 frame size while maintaining the original aspect ratio. •• 320x240: Defines an output dimension of exactly 320 x 240. •• 640x480: Defines an output dimension of exactly 640 x 480. •• 720x480: Defines an output dimension of exactly 720 x 480.
Output Image Inset (Padding) controls Use these controls to apply and adjust padding. Padding scales the image to a smaller size while retaining the output image’s frame size by filling the “padded” areas with black. Unlike cropping, padding does not remove any of the source image. Padding is useful when the source image frame size is smaller than the output image frame size and you want to prevent the source image from being scaled to the output image size.
Add post-transcoding actions Post-transcoding actions overview In Compressor, you can create automatic post-transcoding actions and apply them to jobs in the Batch window or to settings in the Settings tab. Post-transcoding actions simplify and accelerate your day-to-day workflow and make it easy to share your work with others.
1 Do one of the following: •• To apply an email notification to a setting in the Batch window: Select the setting in the Batch window (by clicking the target area). •• To apply an email notification to a custom setting in the Settings tab: Select the setting in the Custom folder. 2 Click the Actions button in the Inspector. Click the Actions button to view the Actions pane. 3 Select the “Email Notification to” checkbox and enter an email address in the accompanying field.
3 Choose a destination from the Default Destination pop-up menu. The pop-up menu lists the standard Apple destinations (Desktop, User’s Movies Folder, and so on) and any custom destinations you’ve created. 4 If you want to save this default destination to the selected setting, click Save.
3 If the Job Action tab is not active, click it. 4 Choose an item from the “When job completes” pop-up menu. For a detailed description of each job action, see Job Action tab on page 187. After you choose an action, a group of controls appears below the pop-up menu. 5 Adjust the controls to your liking, and click Submit in the Batch window. Compressor begins transcoding the job, and applies the post-transcoding job actions you selected in the Job Action tab.
Each control set in the Job Action tab is detailed below. Add to iTunes Library Use this form to automatically add output media files to iTunes. •• Playlist pop-up menu: Choose a playlist in your iTunes library to add the output media file to. Note: The first time you use this feature, this pop-up menu is empty. To populate this menu with playlists from your iTunes library, choose Refresh from the Playlist pop-up menu.
•• Layers pop-up menu: Choose the type of disc you’re making: •• Automatic: Tells Compressor to automatically detect the type of disc you insert. For this setting to work, you must insert the disc before clicking Burn. Additionally, Automatic always creates a single-layer disk image when Hard Drive is selected as the output device. •• Single-layer: Tells Compressor to identify the disc as a single-layer disc. You can use this setting to force a dual-layer disc to be treated as a single-layer disc.
You choose whether to burn a Blu-ray disc or an AVCHD disc using the Output Device pop-up menu. The setting descriptions below identify which items do not apply to AVCHD discs. •• Output Device pop-up menu: Choose the device to format to. The pop-up menu displays a list of your system’s suitable output devices, including optical drives and the computer’s hard disk. Each device also includes the words “Blu-ray” or “AVCHD” to indicate which type of disc it creates.
•• Use Chapter Marker Text as Subtitles checkbox: Select this checkbox to have marker text appear as subtitles. This setting is particularly useful for creating Blu-ray disc dailies, because it lets you line up a series of clips or scenes and identify each item with a marker text subtitle. Note: Subtitles are not supported on AVCHD discs. •• Include Loop Movie Button checkbox: Select this checkbox to add a Loop Movie button to the menu. This option is not available on all disc templates.
Open with Application Use this form to specify an application to open the output media file. •• Open With pop-up menu: Choose the application that will open the output media file. Prepare for HTTP Live streaming Use this form to create a set of files to stream audio and video to iPad, iPhone, iPod touch, and Mac, using an ordinary web server. Designed for mobility, HTTP live streaming can dynamically adjust movie playback quality to match the available speed of wired or wireless networks.
•• Choose button: Click to open a dialog for locating a destination for the HTTP live streaming assets. •• Segment Duration field: Enter a value (in seconds) to define the segment lengths for the media. This value defines how the video streams are split into segments. Segmentation governs when the web server can switch between the various video formats while streaming to a device with varying network connection speeds.
Publish to YouTube Use this form to enter information about movies you want to publish to a YouTube account on the web. Note: To upload multiple YouTube output media files in one batch, create a separate job for each output media file. Important: You must complete all fields for successful uploading. •• Username field: Enter your YouTube username. •• Password field: Enter your YouTube password. •• Title field: Enter the name of the movie you’re publishing.
Publish to Facebook Use this form to enter information about movies you want to publish to a Facebook account on the web. Note: To upload multiple Facebook output media files in one batch, create a separate job for each output media file. Important: You must complete all fields for successful uploading. •• Email field: Enter the email address for a Facebook account. •• Password field: Enter a Facebook password. •• Title field: Enter the name of the movie you’re publishing.
Publish to Vimeo Use this form to enter information about movies you want to publish to a Vimeo account on the web. Note: To upload multiple Vimeo output media files in one batch, create a separate job for each output media file. Important: You must complete all fields for successful uploading. •• Email field: Enter the email address for a Vimeo account. •• Password field: Enter a Vimeo password. •• Title field: Enter the name of the movie you’re publishing.
Publish to CNN iReport Use this form to enter information about movies you want to publish to a CNN iReport account on the web. Note: To upload multiple CNN iReport output media files in one batch, create a separate job for each output media file. •• Email field: Enter the email address for a CNN iReport account. •• Password field: Enter a CNN iReport password. •• Subject field: Enter the name of the movie you’re publishing. •• Body field: Enter a description of the movie you’re publishing.
Send Email Use this form to enter information for an email to be composed when the job is completed. This email contains the actual output file as an attachment and opens in the Mail application so that you can further edit the email’s contents and other settings. When you’re done editing the email, click Send. •• Send To field: Enter the email address you want the email to be sent to. You can enter multiple email addresses, separated by a comma.
Create a Droplet using the Save Selection as Droplet button in the Settings tab You can create a Droplet in the Settings tab by selecting one or more Apple-supplied or custom settings, and clicking the Save Selection as Droplet button. 1 In the Settings tab, select one or more settings or setting groups that you want to save as a Droplet. 2 Do either of the following: •• Click the Save Selection as Droplet button in the top-left corner of the Settings tab.
Create a Droplet using the Create Droplet command in the File menu 1 Choose File > Create Droplet. The Save dialog appears. 2 Select one or more settings or setting groups that you want to save as a Droplet. You can Shift-click or Command-click to add multiple settings or setting groups to a Droplet. In this situation, every source media file is transcoded by every setting in the Droplet.
Use Droplets for transcoding media After you create a Droplet, you can transcode source media files by dragging them to the Droplet icon. Transcode source media files using a Droplet 1 In the Finder, select one or more source media files. 2 Drag the selected files to the Droplet icon. The Droplet window appears with the media files displayed in the Source Files sidebar on the left.
5 In the submit dialog, do the following: a Enter a name for the batch in the Name field. Although you aren’t required to name the batch, doing so helps you identify it in Share Monitor. b In the Cluster pop-up menu, choose the computer or cluster to process the batch. The default Cluster setting is This Computer, which means Compressor does not involve any other computers in completing the batch. However, you can choose any other available clusters that appear in this list.
mm To adjust or apply job actions: Click the Show/Hide Details button to reveal an action drawer for the selected job, modify job actions using the controls in this drawer, and click the Show/Hide Details button to collapse the drawer. For more information about post-transcoding actions, see Add setting actions on page 184. Show/Hide Details button DVD Action drawer For detailed information about the controls in the Droplet window, see Droplet window on page 204.
4 Click Submit, and in the submit dialog that appears, click Submit again. Each source media file is processed according to the existing setting or group of settings contained within the Droplet. For example, if you submit two source media files to a Droplet containing three settings, Compressor creates six different output media files. 5 If you want to view the processing status of your source media files, open Share Monitor.
•• Setting pop-up menu (not labeled): Use this pop-up menu to select the type of output media file. The preset choices are Apple TV, Blu-ray, DVD, iPhone, iPod, MP3 file, YouTube, and Other. The Other option opens a dialog in which you can choose from a list of existing Compressor settings. •• Outputs area: The main area of the Droplet window displays all the outputs that have been added to the Droplet.
Final Cut Pro and Motion contain a Share menu with many commonly used transcoding options already configured. However, if you need a transcoding option not covered by the preconfigured Share items, or you need to customize one of the options, you can use the Send to Compressor options to open the project in Compressor, where you can configure the output options as needed. Important: Compressor 4 must be installed on the same computer as Final Cut Pro X and Motion 5 for these options to work.
Use the command line to submit Compressor jobs Shell commands overview If you are accustomed to doing your work from Terminal shells, you can run the Compressor application from the command line using the Compressor command, with a number of command-line options for submitting jobs. In the command-line descriptions below, angle brackets < > indicate a mandatory argument in a command, and brackets [ ] indicate an optional argument.
Submission command option Description ‑clusterid Optionally, you can use ‑clusterid to enter the cluster ID (IP address) and port number instead of using ‑clustername. (When you enter the cluster ID and port number, less time is required to find the cluster on the network.
Submit a job with no password The following command submits a job to a cluster identified by a name that does not have a password. /Applications/Compressor.app/Contents/MacOS/Compressor -clustername MyCluster -batchname "My First Batch" -jobpath ~/Movies/MySource.mov -settingpath ~/Library/Application\ Support/Compressor/Settings/MPEG-4.setting -destinationpath ~/Movies/MyOutput.mp4 -timeout 5 This command has the following elements: •• Identifies where Compressor is located.
This command has the following elements: •• Identifies where Compressor is located. •• Sends this job to the cluster with the IP address of tcp://192.168.1.148 at port 62995. •• Assigns the batch name My First Batch. •• Finds the MySource.mov file for the job at ~/Movies/MySource.mov. •• Uses the MPEG-4 setting at ~/Library/Application\ Support/Compressor/Settings/MPEG-4.setting. •• Writes the output file, named MyOutput.mp4, to the ~/Movies folder.
Compressor preferences Set Compressor preferences Use the Compressor Preferences window to configure a variety of Compressor settings. Open and set Compressor preferences 1 Choose Compressor > Preferences, or press Command-Comma (,). The Preferences window appears. 2 Enter your preferred settings using the fields and controls in this window. For detailed information about settings in the Preferences window, see Preferences window on page 212. 3 When you’ve finished entering your preferences, click OK.
The host address dialog appears. 3 In the host address dialog, do one of the following: •• Select Host, complete the Host Name and IP Address fields, and click Add Host. Note: You can also enter only the host name or the IP address and press the Tab key. If a corresponding host name or IP address is found, the match is entered in the field automatically. •• Select “Host IP address range,” complete the Range fields, and click Add Range.
•• Email Address field: Enter a default email address for email notification. •• Outgoing Mail Server field: Enter the mail server used by your computer for outgoing email. For more information about email notification, see Add setting actions on page 184. •• “Automatically launch Share Monitor” checkbox: Select to have Share Monitor automatically open when you submit a batch. •• “Display job thumbnails” checkbox: Select to display thumbnail images for jobs in the Batch window.
Use Apple Qmaster to set up a distributed processing system 8 What is Apple Qmaster? Apple Qmaster is used for two separate purposes: to configure service nodes and cluster controllers in a distributed processing network, and to submit jobs and batches for distributed processing. The Apple Qmaster application is one part of the larger Apple Qmaster distributed processing system, which also includes Compressor, Apple Qadministrator, and Share Monitor.
After setting up your distributed processing system, you use the Apple Qmaster window to submit distributed processing jobs and batches from applications like Compressor, Maya, and Shake. For example, you can: •• Process a batch of Shake files: Drag Shake files into the Apple Qmaster window. A default script for submitting the jobs is automatically created, and you can then adjust settings and specify details such as which cluster to use.
In general, you use the Apple Qmaster Sharing window in Compressor to configure service nodes and cluster controllers and to create service nodes for This Computer Plus clusters and QuickClusters, which provide what most users need. System administrators use Apple Qadministrator for advanced cluster creation and control. Client users use Compressor or Apple Qmaster to submit batches of jobs for processing. Finally, both administrators and client users can use Share Monitor to monitor and manage batches.
Distributed processing basics Computers that submit batches to the Apple Qmaster distributed processing system are called clients. A client computer can be any computer that has Compressor installed and is on the same network (subnet) as the cluster controller. Multiple client computers can be on the same subnet, using the same cluster to do the processing for various applications.
An Apple Qmaster cluster contains: •• Service nodes: The computers that perform the processing of batches submitted via Compressor or Apple Qmaster. A batch can include one or more jobs. The service nodes are where the processing work is done. When you assign a group of service nodes to a cluster, they function as one very powerful computer because all their resources are shared. If one service node is overloaded or otherwise inaccessible, another service node is used.
Examples of distributed processing systems The following sections provide three examples of distributed processing networks.
Example: A target distributed processing network using a local area network (LAN) For more powerful rendering, this network includes multiple client computers on a LAN that are connected to a cluster using a high-speed switch. A rack of servers plus a shared storage device, acting as the cluster, create an extremely strong rendering engine. In this example, each service node has a local copy of the relevant client application software so that it can process the rendering jobs.
•• Multiple service nodes: In general, more service nodes mean more processing power. If your workflow is mainly I/O bound, configure the number of services so that reads and writes do not exceed your network and storage capabilities. For CPU-bound workflows, set the number of services so that all available resources on the machine will be used. If the computing load, per job, is closer to the network load, having a smaller number of service nodes per cluster may be more efficient.
Rather than actually moving segments, Apple Qmaster tells the service nodes which segments to read via the network, where to find them, and what to do with them. Below is an example of how one batch might be processed in an Apple Qmaster system.
Quickly set up a service node using This Computer Plus Using This Computer Plus gives you an easy way to take advantage of the distributed processing capabilities offered by Apple Qmaster without requiring a lot of knowledge about how clusters are configured, how to set up file sharing, and so on. Note: Before following the steps below, confirm that each computer you configure is using the same versions of Compressor, QuickTime, and OS X.
Set up a cluster controller using QuickClusters QuickClusters offer a simple and automated way to create and configure clusters, as well as an alternative to creating and configuring clusters manually with Apple Qadministrator. QuickClusters with enabled unmanaged services automatically configure themselves and use any available unmanaged services on the same local network (subnet). QuickClusters listen for unmanaged service advertisements and may mark or remember any of them for later use.
A QuickCluster is created with this computer as its controller and one instance of processing services. For information about multiple service instances, see Use virtual clusters to make the most of multicore computers on page 230. Stage 2: Add a service node computer to a cluster 1 In Compressor, choose Apple Qmaster > Share This Computer. The Apple Qmaster Sharing window appears. 2 In the Setup pane, select “Share this computer” and “as Services only.
Configure an intermediary service node to run Apple Qmaster commands on extended nodes Before you begin, be sure that the computer that will be the intermediary service node has Compressor installed and that the computers that will be the extended nodes have a UNIXbased operating system and have SSH enabled. 1 In Compressor, choose Apple Qmaster > Share This Computer. If this intermediary node will be part of a mixed cluster, with a different computer acting as the cluster controller, skip to step 5.
6 In the dialog that appears, add an instance for each extended node you want this intermediary node to send commands to by doing the following: a Choose SSH from the Add (+) pop-up menu. b Edit the Host name, Username, and (if applicable) Password columns so that they describe each computer you want to use as an extended node, and click OK. Edit the Host name, Username, and Password columns to specify the extended nodes you’re adding. 7 In the Apple Qmaster Sharing window, click OK.
Enable managed and unmanaged services When you configure processing services, you can choose to make them either managed services or unmanaged services (the default). Managed services can be assigned to serve one particular cluster controller. Once assigned, managed services remain exclusively dedicated to that cluster until they’re removed with Apple Qadministrator. QuickClusters can’t use managed services from other nodes, except in the case of extended node clusters.
Set managed processing services 1 In Compressor, choose Apple Qmaster > Share This Computer. 2 Do one of the following: •• To use this computer only in managed clusters: Select “Require these services to only be used in managed clusters.” •• To use this computer in unmanaged as well as managed clusters: Deselect “Require these services to only be used in managed clusters.” 3 Click OK.
•• On: This setting indicates that the services are available for all 24 hours of that particular day. (This is the default setting for all seven days of the week.) •• Off: Makes the service unavailable on that day of the week. •• On Between: Allows you to enter the period of time the service will be available. •• Off Between: Allows you to enter the period of time the service will not be available. 3 Enter any constraining time periods in the appropriate start time and end time fields.
Turn cluster controller services on or off You can easily turn a specific computer’s cluster controller services on or off. Turn on cluster controller services 1 In Compressor, choose Apple Qmaster > Share This Computer. 2 Select the “Share this computer” checkbox and do one of the following: •• To create an “instant” cluster with unmanaged services: Select “as QuickCluster with services.” •• To build a cluster in Apple Qadministrator: Select “as Services and cluster controller.
3 In the dialog that appears, enter and verify a password, and click OK. 4 To apply this change, click OK in the Apple Qmaster Sharing window. Important: If you’re making changes to existing settings and this computer is already providing processing services, clicking OK immediately resets this computer’s services. If this computer is also the cluster controller, any current jobs are terminated.
Change cluster storage settings 1 On the cluster controller, open Compressor and choose Apple Qmaster > Share This Computer. 2 To open the Advanced pane, click Advanced. 3 Do any of the following: •• To change the cluster storage location: Click the “Storage location” Set button, navigate to the folder in the dialog, and click Choose.
Rendering services and shared storage setup Here are some tips for setting up an Apple Qmaster “render farm.” Change the number of rendering service instances By default, Apple Qmaster enables one rendering service per core. On a dual-core system, you’ll have two rendering services enabled by default. That means, for example, that two copies of Shake will be running at the same time on a dual-core system. You may need to disable a rendering service.
Stage 3: Mount the media storage volumes Follow the instructions below so that all the computers in the cluster are mounting all the media volumes in the cluster. 1 On each computer, log in as the administrator. (The first user account you create when you set up OS X is an administrator account.) 2 On each computer in the group, use the Connect to Server command from the Finder’s Go menu to mount each media volume. 3 Enter another computer’s name in the Connect to Server dialog and click Connect.
Failure notifications There are two ways that the Apple Qmaster distributed processing system can provide information about a problem. •• Email notification: When a processing service stops unexpectedly, Apple Qmaster sends a notification email to the address that was entered in the Apple Qadministrator Cluster Preferences dialog for that cluster. If no address was entered there, the email is sent to the address in the Internet settings of the computer on which the cluster controller is enabled.
When using Compressor to submit a batch of files, you can use the Cluster pop-up menu in the Batch window to choose a cluster to process the batch. For more information, see Submit a batch of files from Compressor on page 237. You can use Apple Qmaster to submit a batch of Shake or Maya files, or use the Generic Render command to render a batch of projects from other frame-based rendering applications (such as After Effects and LightWave). •• For Shake: Install a copy of Shake on every node in the cluster.
3 Click Submit. Compressor and Apple Qmaster coordinate the distribution of the processing tasks between the available computers and deposit the resulting output files at the location or locations you designated in Compressor. You can view the status of the batch in the Share Monitor window. For more information about Share Monitor, see Share Monitor Help.
5 If you want, edit the available values and settings to customize the command. Each setting corresponds to a commonly used Shake command, with the exception of the Minimum setting. For more information, see Shake plug-in dialog on page 245 and the Shake documentation. Except for Minimum, each setting corresponds to a commonly used Shake command or option. 6 If you want, add other command-line options to the Options field.
8 To add more jobs to this batch, repeat steps 3 through 7. 9 To make changes to the batch before submitting, do either of the following: •• To edit a command in the list: Double-click the job and make changes in the dialog that appears. •• To remove a job from this batch (before you submit the batch): Select the job, and click the Remove (–) button. 10 To set options for this batch, specify the following settings: •• Submit To: Choose a cluster to process this batch.
Submit a batch of Maya files 1 In Compressor, choose Apple Qmaster > Create Rendering Jobs. Apple Qmaster opens. 2 In the Apple Qmaster window, enter a name for the batch in the “Batch name” field. (This is the name that appears in Share Monitor after you submit the batch.) 3 Choose Maya from the Command pop-up menu, and click the Add (+) button. Note: You can also drag the Maya file to the Batch table (the middle area of the Apple Qmaster window).
8 To submit the batch for processing, click Submit. Important: By default, Apple Qmaster ignores Maya error messages. You can view errors in Share Monitor. If you use Maya plug-ins, you can change this by removing or renaming Users/ username/Library/Application\ Support/Apple\ Qmaster/MayaCommandPlugin.commandPlugin/ Contents/Resources/mayascript. Advanced users can customize MayaScript to suit their environment and workflow.
7 In the Command Template section, do one of the following: •• Use the Default Template as is, or adjust it by adding command elements from the pop-up menu. •• To create an additional template, click the Add (+) button and adjust by adding command elements from the pop-up menu. •• To change the order of the command elements, drag them left or right.
Advanced rendering information Set environment variables in Apple Qmaster Environment variables are settings within a shell, from which commands are issued that affect the way a program operates. People who regularly execute commands from a Terminal shell, or write shell scripts, are usually familiar with environment variables. For example, the environment variable called PATH tells the shell where to look for commands that are entered.
Manage Shake media files on a shared volume It may be necessary to relink your Shake assets once you move your project to the shared volume. This varies depending on the types of files, plug-ins, fonts, and environmental requirements. Things that commonly need to be changed are the FileIn and FileOut paths, and env variables such as NR_INCLUDE_PATH and NR_FONT_PATH. UNC should be disabled, as these paths are typically not resolvable to nodes in the cluster when arbitrary host names are used.
•• Proxies: Select the checkbox to make the proxy settings available. Although the four default proxy settings are identical in both Shake and Apple Qmaster, they have slightly different names in each application. The list below indicates the corresponding names. The Apple Qmaster button name is in italics, followed by the corresponding Shake name: •• P1: Base •• P2: P1 •• P3: P2 •• P4: P3 •• Scale pop-up menu: Refer to the Shake documentation for more information.
•• Executable: This field shows the path to your command-line render. •• Input: This field is a generic field that you can use as necessary. •• Item: This field is a generic field that you can use as necessary. •• Frames (Start, End, Steps): These fields set the start and end frame for the job. Refer to the Maya documentation for more information about the Steps field.
3 Choose Shell from the Command pop-up menu. Choose Shell from this pop-up menu. 4 For each job you want to add to the batch, click the Add (+) button, and type the UNIX command in the Command column. The UNIX command might specify, for example, the application, an output destination, and a couple of command-line options. Type the command in the Command column.
Job segmenting and two-pass or multi-pass encoding If you choose the two-pass or the multi-pass mode, and you have distributed processing enabled, you may have to choose between speedier processing and ensuring the highest possible quality. The Apple Qmaster distributed processing system speeds up processing by distributing work to multiple processing nodes (computers). One way it does this is by dividing up the total number of frames in a job into smaller segments.
Here are additional tips for using the Generic Render plug-in to render After Effects projects: •• After Effects makes good use of multiprocessor systems, but on projects that are not processor-bound, two rendering services per node give you better results. •• After Effects custom template information is stored in Users/username/Library/Preferences/ Adobe After Effects 6.5/Prefs/.
Toolbar The Apple Qmaster toolbar contains the following buttons. •• History: Opens the History drawer, where you can view a full log of all the dates and names of batches submitted from your computer and check the current status of all processing batches. The Progress column is updated every 5 seconds. Additionally, you can drag previously submitted batches to the batch list in the Apple Qmaster window to add a copy of them to a batch you’re creating.
You can choose one of the following types of jobs. •• •• Generic Render: For more information, see Submit a batch of files using the Generic Render command in Apple Qmaster on page 242. •• Maya: For more information, see Submit a batch of Maya files using Apple Qmaster on page 240. •• Shake: For more information, see Submit a batch of Shake files using Apple Qmaster on page 238. •• Shell: For more information, see Use Apple Qmaster to submit UNIX commands on page 247.
•• Delay: Enter values in these fields to set a delay in hours (left field) or minutes (right field) for any job in the batch. Click the arrows to change the values in increments of 1 hour (if the hours field is active) or 5 minutes (if the minutes field is active). •• Submit: Click this button to process the batch using the parameters set in the Apple Qmaster window.
Services settings •• Rendering: Use this checkbox to enable or disable the Rendering service. Click its Options button to open a dialog in which you can adjust the number of instances of a processing service. For more information, see Use virtual clusters to make the most of multicore computers on page 230. •• Compressor: Use this checkbox to enable or disable the Compressor service. Click its Options button to open a dialog in which you can adjust the number of instances of a processing service.
Advanced Service Settings Use these options to schedule service restarts and service availability. •• Restart all services every 24 hours: Selecting this checkbox ensures a robust distributed processing system. Refreshing the services periodically prevents increased virtual memory sizes and memory leaks in third-party software.
Set Apple Qmaster preferences You use the Apple Qmaster Preferences window to adjust how Apple Qmaster works with remote computers. Enter IP addresses or ranges for remote service host computers 1 Choose Apple Qmaster > Preferences. 2 Click the Add (+) button. 3 In the dialog that appears, do one of the following: •• Select Host, complete the Host Name and IP Address fields, and click Add Host. •• Select “Host IP address range,” complete the Range fields, and click Add Range.
Use Apple Qadministrator to create and modify clusters 9 What is Apple Qadministrator? The Apple Qadministrator application is used to administer a distributed processing system built with Apple Qmaster. You can use the Apple Qadministrator application to manually create and modify Apple Qmaster clusters. Apple Qadministrator can be used on any computer that is on the same network as the cluster you want to administer.
The Apple Qadministrator window appears. If a password was created for the currently selected cluster, you will not be able to see or modify the cluster until you click the Lock button and then enter the password in the dialog that appears. Create and modify a cluster After you configure managed service nodes or cluster controllers in Apple Qmaster, you can view them in Apple Qadministrator. Next, you’ll use Apple Qadministrator to create and modify Apple Qmaster clusters.
The cluster name you create will also appear in the cluster pop-up menus in Compressor, Share Monitor, Apple Qmaster, Final Cut Pro, and Motion. ... then rename the Untitled Cluster. Click the Add button... 3 In the Controller pop-up menu, choose a cluster controller from those available on the network. Use this pop-up menu to choose a cluster controller. Note: If a password was created for the cluster controller in the Apple Qmaster Sharing window, a password authentication window appears.
If a closed lock icon appears next to a computer name, click the lock and enter the password that was assigned to it in the Apple Qmaster Sharing window in Compressor. Otherwise, you won’t be able to drag that service node to the cluster. Service nodes that are already assigned to another cluster are not shown. Drag nodes to this list from the Service Browser list. Clicking this disclosure triangle displays each instance of the services set in the Apple Qmaster Sharing window for this node.
Modify a cluster 1 In the Cluster list on the left side of the Apple Qadministrator window, select the cluster you want to change. If the cluster’s service nodes (in the Services tab) doesn’t already display individual services, click the disclosure triangle in the Name column. Do any of the following: •• To temporarily turn off the processing services on a computer in the cluster: Deselect the Active checkbox for that service node.
Monitor cluster activity You can use Apple Qadministrator to find out what’s happening within a cluster by examining details (such as processor usage, which batch is being processed, disk space usage, and data activity) about each node in the cluster. You can also view log information for a selected service or cluster. This information is useful for troubleshooting distributed processing issues, and it can be saved to a file and processed with XML tools and UNIX scripts.
4 To configure queue preferences in Apple Qadministrator, specify any of the following settings: •• Maximum number of jobs in queue: Enter the maximum number of batches that can be queued up at one time for this cluster. If the maximum number is reached, the cluster doesn’t accept new batches until there’s an opening in the queue. •• Keep job history for: Set how long batches are listed in the History table of Share Monitor.
3 In the host address dialog, do one of the following: •• To enter the IP address of a specific computer: Select Host, complete the Host Name and IP Address fields, and click Add Host. •• To enter a range of IP addresses: Select “Host IP address range,” complete the Range fields, and click Add Range. The hosts or host ranges appear in the Host table in the main Preferences window. 4 When you’re done adding or removing IP addresses, click OK in the Preferences window.
10 Keyboard shortcuts Compressor keyboard shortcuts You can use keyboard shortcuts to quickly accomplish many tasks in Compressor. To use a keyboard shortcut, press all the keys in the shortcut at the same time. Shortcuts for common commands are listed in the table below.
Action Shortcut Navigate through text fields in all panes Press the Tab key Open the Mount Cluster Storage dialog Command-Shift-M Open Compressor Help Command-Shift-Slash (/) Preview window keyboard shortcuts Action Shortcut Start fast reverse motion J Start fast forward motion L Go to the previous frame Press the Left Arrow key Go to the next frame Press the Right Arrow key Start or stop clip playback Press the Space bar Add or remove a marker at the current frame M When the playhead