
User Manual

Chapter 7 Advanced functions 162
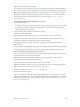
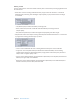
Timecode Generator
Superimposes the clip’s timecode text onto the image. You can also add a label to the
timecode text.
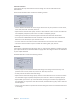
The Timecode Generator lter contains the following controls:
•
Position: Positions timecode text in the image. Choose from any of 13 positions such as Center,
Lower Left, Lower Left - Title Safe, and so on.
•
Alpha: Sets the timecode text opacity. Choose a value between 0 and 1. A value of 0 makes the
text completely transparent, and a value of 1 makes it completely opaque.
•
Label: Type any text that you want to appear to the left of the timecode number here.
•
Start Timecode at 00:00:00:00: Select this checkbox to have the timecode start at 00:00:00:00.
When this is not selected, the clip’s timecode is used.
•
Text Color: Click this color well to choose a timecode text color from the Colors window.
•
Select Font: Click this button to open a window for selecting font, style, and size.
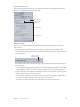
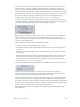
Watermark
Superimposes a watermark onto the image. This is a useful tool for stamping a suitable logo onto
your output media le. The watermark lter can apply either still images or movies as watermarks
on your output media le.
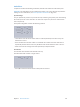
The Watermark lter contains the following controls:
•
Position pop-up menu: Positions the watermark image in the image. Choose from any of 13
positions such as Center, Lower Left, Lower Left - Title Safe, and so on.
•
Scale By: Sets the size of the watermark image.
•
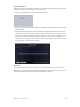
Alpha: Sets the watermark image opacity. Choose a value between 0 and 1. A value of 0 makes
the watermark image completely transparent, and a value of 1 makes it completely opaque.
•
Repeat: When you choose a clip as the watermark, selecting this checkbox loops playback of
the watermark clip. If you don’t select this checkbox, the watermark clip plays until its end and
then disappears.
•
Choose: Click this button to open the le-selection dialog and select a stored watermark movie
or still image.