
2
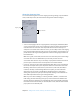


Table Of Contents
- Compressor User Manual
- Contents
- An Introduction to Compressor
- Getting Started Quickly
- The Basic Transcoding Workflow
- The Compressor Interface
- Importing Source Media Files
- Creating, Previewing, and Modifying Settings
- Creating Jobs and Submitting Batches
- Assigning Settings to Source Media Files
- Assigning Destinations to Source Media Files
- Submitting a Batch
- About the History Drawer
- Resubmitting a Batch
- Saving and Opening a Batch File
- Submitting a Final Cut Pro Project for Transcoding
- Resubmitting a Final Cut Pro Project
- Transcoding Different Clips From One Source Media File
- Creating Dolby Digital Professional Output Files
- Creating H.264 DVD Output Files
- Creating MPEG-1 Output Files
- Creating MPEG-2 Output Files
- Creating MPEG-4 Output Files
- Creating QuickTime Movie Output Files
- Creating QuickTime Export Component, AIFF, and TIFF Files
- Adding Filters to a Setting
- Adding Frame Controls, Geometry, and Actions to a Setting
- Using the Preview Window
- Creating and Changing Destinations
- Using Droplets
- Customer Support
- Command-Line Usage
- Index

Chapter 15 Adding Frame Controls, Geometry, and Actions to a Setting 201
About the Geometry Pane
You use the Geometry pane to choose cropping and sizing settings, output media file
sizes, and the aspect ratio (the ratio between image frame width and height):
 Source inset (Cropping): The four cropping fields (Left, Top, Right, and Bottom) allow
you to crop the frame of your source media file in pixel increments. Most broadcast
video files have overscan areas. If the output file will be shown exclusively on a
computer screen rather than a television screen, you can safely remove some edging
from your file without impacting the picture area. The numbers give the distance (in
pixels) between the edge of the original frame and the resulting cropped frame. All
fields default to 0.
Note: The regular (“action safe”) overscan area is the outer five percent of the image
on all four sides. Cut in an additional five percent and you have the more
conservative “title safe” area. So you can safely crop anywhere between five and ten
percent of your outer frame area and still preserve the essential material.
 Frame size: This pop-up menu and associated text fields allow you to customize the
frame size and aspect ratio of your output file’s frame size. Choose from one of the
following: 100% of source, 50% of source, 25% of source, 320 x 240, 640 x 480, or
Custom (a manually created setting). With this last option, you enter whichever
dimensions suit your needs in the Width and Height fields. This is useful when
dealing with square/non-square pixel discrepancies. Resizing a 720 x 480 frame to
640 x 480 compensates for this type of image distortion.
Note: If you are either modifying or creating an MPEG-1, MPEG-2, or H.264 for HD
DVD setting, all of the Geometry pane pop-up menus and fields are dimmed. The
relevant output size dimensions are automatically entered in the Width and Height
fields based on the video format you selected (NTSC or PAL) from the Video Format
pop-up menu in the Encoder pane.
Cropping fields
Output size fields