
User Guide


234 Chapter 7 Creating Menus Using the Standard Method
The overlay typically provides the art only for each button’s selected and activated
states. It can also provide the art for the normal state, but this state is most often
incorporated into the background, allowing for very nice-looking, 24-bit resolution
buttons. An advanced overlay’s four-color limit, and especially a simple overlay’s
one-color limit, greatly restrict the visual quality of normal-state buttons.
The four colors used in an advanced overlay depend on the mapping type used for
the overlay:
• Chroma: The overlay must use the colors black, red, blue, and white, with white
typically being the background color.
• Grayscale: The overlay must use the colors black, dark gray, light gray, and white.
White is usually used as the background color.
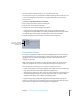
The Mapping Type setting in the Menu Inspector’s Colors tab indicates the type of
overlay you are using.
If colors other than those specified are present in the overlay, they are mapped to their
closest equivalents, which can produce surprising results. Use care to include only the
specified colors when creating your overlays. See “Creating Overlays” on page 86 for
details on creating overlay graphics, including the color values used by the chroma and
grayscale mapping types.
It is important to understand that the actual colors used in the overlay, whether you
use the chroma or grayscale method, are not what appear as the highlights in the
menu. They only identify where the actual highlight colors should appear.
DVD Studio Pro uses color mapping to set the highlight colors.
See “Understanding Color Mapping” on page 236 to learn more about color mapping.
Assigning an Overlay to a Menu
There are several ways to assign an overlay to a menu. Use the method that you feel
most comfortable with. In all cases, these methods also replace an existing overlay.
Assigning a Menu Overlay Using the Inspector
You can assign a menu overlay using the Inspector. With this method, you can only
choose from assets already imported into DVD Studio Pro.
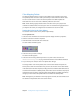
To assign a menu overlay using the Inspector:
1 Select the menu and make sure the Menu Inspector displays the menu properties.
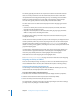
2 Click the General tab in the Menu Inspector (if it’s not already visible).
3 Choose an overlay from the Overlay File pop-up menu.
The selected file is assigned as the menu overlay. Depending on other menu settings,
you may not see any changes in the Menu Editor.