42886.
Apple Computer, Inc. © 2005 Apple Computer, Inc. All rights reserved. Under the copyright laws, this manual may not be copied, in whole or in part, without the written consent of Apple. Your rights to the software are governed by the accompanying software license agreement. The Apple logo is a trademark of Apple Computer, Inc., registered in the U.S. and other countries.
1 Contents Preface 7 7 8 12 12 An Introduction to Final Cut Express HD What Is Final Cut Express HD? Editing Your Movie With Final Cut Express HD Final Cut Express HD Onscreen Help Apple Websites Chapter 1 13 13 14 16 Setting Up Final Cut Express HD Connecting Your Camera Choosing Your Initial Settings Tip for Optimizing Performance Chapter 2 17 18 21 25 28 32 Getting to Know Your Editing Environment Organizing Your Clips in the Browser Working With Clips in the Viewer Working With Clips in the Ca
68 Most Commonly Used Edits Chapter 5 75 75 76 79 82 86 Editing With Audio About Linked Clips Resyncing Clips Adding Music Using the Voice Over Tool Editing With Audio Tips Chapter 6 89 89 90 91 94 96 99 Fine-Tuning Your Edit Where You Can Perform Trim Edits About the Tool Palette Doing a Ripple Edit Doing a Ripple Delete Doing a Roll Edit Tips on Editing Chapter 7 109 109 111 114 115 115 Adding Transitions About Adding Transitions Adding a Transition to the Center of a Cut Adjusting a Transiti
Appendix C 143 Preparing for Your Next Project Appendix D 145 145 150 Solutions to Common Problems and Customer Support Solutions to Common Problems AppleCare Support Glossary 151 Index 155 Contents 5
Preface An Introduction to Final Cut Express HD Final Cut Express HD provides a professional-level environment in which to edit video, mix audio, and add effects together to create any kind of video program you can imagine. The last few years have seen a revolution in the use of personal computers for editing video. Until recently, editing video projects would have required an array of professional editing equipment.
Editing Your Movie With Final Cut Express HD If you’re just beginning to learn how to edit video with Final Cut Express HD, the following flow chart illustrates the basic workflow of desktop video editing. There are five main steps to video editing–shooting, capturing, editing, adding effects, and sharing. This book describes how to do the last four.
Step 1: Shoot Making good videos begins with good camera work. Although this book does not teach the finer points of shooting video, you need to be aware of some basic issues while shooting your footage and recording your audio. Final Cut Express HD is a robust and powerful digital video editing tool; however, it is not designed to correct video that was improperly shot or audio that was improperly recorded. The following list is a series of tips on shooting good video: • Use a tripod.
Step 2: Set up Thanks to the development of FireWire, setting up Final Cut Express HD is easy. You simply connect your camera (via FireWire) to your computer, turn on your camera, set it to VTR mode, and open Final Cut Express HD. When you open Final Cut Express HD, the application recognizes the type of camera you have and knows how to control it. Unless you upgrade your system or change components, such as the DV camcorder, you should only have to set up your system once.
Moving From iMovie to Final Cut Express HD The Apple entry-level DV editing application is iMovie. It allows you to create simple edited digital movies with some of the most popular features found in Hollywoodstyle releases, without having to know any technical details about the process. The interface and feature set are configured to make the process nearly foolproof. Eventually, however, you’ll find yourself requiring features beyond those that iMovie offers.
Final Cut Express HD Onscreen Help Final Cut Express HD Help is a comprehensive resource for information about Final Cut Express HD. It allows you to access information directly onscreen while you’re working in Final Cut Express HD. Background information, details, and steps are described at greater length in Final Cut Express HD Help than they are in this book. Throughout this book, you will see references to Final Cut Express HD Help for additional detailed information.
1 Setting Up Final Cut Express HD 1 Setting up Final Cut Express HD is as simple as connecting your DV camcorder to your computer with a FireWire cable. The following sections describe how to connect your camera and the initial settings you need to specify so you can begin working in Final Cut Express HD.
Choosing Your Initial Settings The first time you open Final Cut Express HD after installing the software, you’re prompted to choose an Easy Setup and a scratch disk (where you’ll store your media). Choosing an Easy Setup Final Cut Express HD comes with several predefined Easy Setups based on the most commonly used settings, such as DV-NTSC and DV-PAL. Depending on where you live, you will choose one of these two options.
The Differences Between NTSC and PAL NTSC and PAL are standards for video. NTSC, or National Television Systems Committee, is the television and video standard used in most of the Americas, Taiwan, Japan, and Korea. PAL, or Phase Alternating Line, is the television and video standard used in most of Europe, Brazil, Algeria, and China. (SECAM, a video standard based on PAL and used in France, Poland, Haiti, and Vietnam, is not supported by Final Cut Express HD.
m To specify one or more scratch disks and associated settings: Choose Final Cut Express HD > System Settings, then click the Scratch Disks tab. For additional information about scratch disks, see Final Cut Express Help, Chapter 4, “Specifying User Preferences, System Settings, and Easy Setups.” Tip for Optimizing Performance In most cases, the default values set in Final Cut Express HD System Preferences will be sufficient for your needs.
2 Getting to Know Your Editing Environment 2 There are four main windows in Final Cut Express HD: the Browser, Viewer, Canvas, and Timeline. Each window plays an important role in the editing process. If you want to get familiar with the windows and tools in Final Cut Express HD, read through this chapter. If you’d rather jump right in and begin editing, move on to Chapter 4, “Basic Editing,” on page 49, and refer back to this chapter as needed.
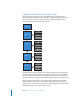
Organizing Your Clips in the Browser The Browser is the central storage area where you organize all of the source material you’ll use in your project. To organize your media so you can work efficiently, you need to understand the basic organizational elements of Final Cut Express HD—projects, sequences, clips, and bins—and how they relate to the Browser. Project Sequence Clip Bin What Is a Project? A project contains all the clips, sequences, and file references you use while editing your movie.
What Is a Clip? A clip is the basic unit of media that you use to create sequences in Final Cut Express HD. Clips can be movies, still images, generators, and audio files. A clip is not the actual media file, but a reference to the media file stored on your computer’s hard disk. Clips are the building blocks from which all sequences are created.
Selecting a Browser View There are two ways to view your media in the Browser: icon view and list view. Icon view allows you to view your media as thumbnails. There are three icon views: Small, Medium, and Large. In list view, the Browser’s scrollable columns provide information about your files in an easy-to-access hierarchy. List view also allows you to sort and search for items within the Browser.
Working With Clips in the Viewer To view a clip, you select it in the Browser, then open it into the Viewer by doubleclicking. The Video tab of the Viewer acts as your “source” monitor; there, you watch your selected clip and mark the In and Out edit points, which define how much of the clip you want to edit into your sequence. Viewer Controls There are many controls in the Viewer. (Some of these appear in other areas of the interface, as well; for example, the playhead controls also appear in the Canvas.
The following is a quick summary of the Viewer controls: • Tabs: There are five tabs in the Viewer: Video, Audio, Filters, Motion, and Controls. Each • • • • • • • • • 22 tab in the Viewer provides certain editing functions. The Video and Audio tabs appear only if the clip currently opened in the Viewer contains video or audio media. For example, you only see the Audio tab when you open an audio clip or a video clip that includes audio.
Opening Clips Into the Viewer You can open clips into the Viewer from either the Browser or the Timeline. Clips appear in the Viewer with the last selected Viewer tab displayed. If you’re opening an audio-only clip, the Video tab disappears and the Audio tab is displayed. Although the Viewer can display only one clip at a time, you can open multiple selected clips into the Viewer, and they will appear in the Recent Clips pop-up menu.
Playing Clips in the Viewer You use the transport controls in the Viewer to play clips forward, backward, between In and Out points, one frame at a time, and looped. Previous Edit Next Edit Play In to Out Play Around Current Play To play a clip in the Viewer: 1 Double-click the clip in the Browser to open it into the Viewer. 2 Do one of the following: • • • • Click the Play button. Press the Space bar. Press L. Choose Mark > Play > Forward.
Working With Clips in the Canvas The Canvas is the Final Cut Express HD record monitor, showing what your edited sequence will look like when it’s played. There are many controls and displays in the Canvas. Before working with the Canvas, make sure it’s the currently selected window. Otherwise, your keyboard shortcuts might trigger the wrong actions. m To select the Canvas window: Click in the Canvas (or press Command-2).
Canvas Controls The following is a list of controls in the Canvas. • Tabs: Each tab in the Canvas represents an open sequence. Each tab in the Canvas has a corresponding tab in the Timeline. • Image display area: This is the area of the Canvas where you can see the video from your sequence play back. • Playhead and scrubber bar: These controls let you locate and jump to different parts of your sequence quickly and easily. • Transport controls: These controls are used to play back your edited sequence.
Edit Overlay The Edit Overlay appears when you drag clips from the Browser or Viewer to the image area of the Canvas. The Overlay appears translucently over the image currently in the Canvas. Drag a clip to the image area of the Canvas. The Edit Overlay appears with its seven sections. There are seven sections in the Edit Overlay, one for each of the seven types of edits that Final Cut Express HD can perform.
Working With Clips in the Timeline The Timeline displays a chronological view of an open sequence. In addition to showing a sequence’s tracks and the clips edited into them, the Timeline contains numerous controls for displaying and manipulating clips. All these controls are specific to the sequence in which they’re used; each sequence open in the Timeline can have its own set of controls. Before working with the Timeline, make sure it’s the currently selected window.
Track Display and Organization The following is a list of controls that affect the way your sequence and clips are displayed in the Timeline. • Tabs: Each tab represents a sequence. You can have multiple sequences open simultaneously, each with its own tab. Controls in Final Cut Express HD only affect the sequence whose tab is in front. Clicking another sequence’s tab brings it to the front, along with that sequence’s tab in the Canvas.
Timeline Navigation The following is a list of controls that allow you to navigate through your sequence in the Timeline. Playhead Ruler Drag the slider to scroll through your sequence. • Ruler: The ruler along the top of the Timeline represents the total duration of your edited sequence, from the first frame to the last. The ruler can be used for reference, to see the timecode corresponding to the location of clips in the Timeline.
Timeline Editing Controls The following controls determine how your clips are edited into the Timeline tracks. Track Visibility controls Lock Track control Source control Destination control Auto Select control Mute control Solo control Locked tracks are cross-hatched. • Source and Destination controls: Use these controls to designate which video and audio tracks from source clips in the Viewer are edited into which video and audio destination tracks in the Timeline.
Tool Palette The Tool palette contains tools for editing, zooming, cropping, and distorting items in the Timeline. m To view the Tool palette: Choose Window > Tools. To select a tool: 1 Select a tool in the Tool palette. 2 Choose the tool you want from the pop-up menu. For detailed information on various tools, see Final Cut Express Help, Chapter 11, “Working With Clips and the Viewer.
3 Capturing Your Video 3 Capturing is the process of transferring the video images from your camcorder or deck to your computer. Before you begin editing with Final Cut Express HD, you need to transfer the content of your DV tape (the source media) to your computer. This process is called capturing, and you do most of your capturing in the Final Cut Express HD Capture window. Making a New Project and Saving It The media you capture appears in the Browser.
m To make a new project: Choose File > New Project (or press Command-E). A new, untitled project appears in the Browser with an empty sequence. You can name the project when you save it. This is your new project. A new sequence is automatically created when you create a new project. As you work on your project, it’s important to get in the habit of saving often. m To save a project: Click the project’s tab in the Browser, then choose File > Save Project (or press Command-S).
Working in the Capture Window When device control is enabled (proper communication between Final Cut Express HD and your camera), the controls in the Capture window control the playback of your attached camcorder or deck. You use the controls in this window to determine how to capture your media. m To open the Capture window: Choose File > Capture (or press Command-8).
Transport and Marking Controls The transport and marking controls appear below the Preview area. The Preview area of the Capture window lets you view video as you capture it. If your camcorder or deck is not on or there is no tape inserted, you’ll see color bars or black. The following controls and fields appear if a device-controllable camcorder or deck is connected, and there is communication between the computer and camcorder.
Marking controls You use these buttons to set the start and end frames (the In and Out points) to select a part of your tape for capture. Go to In Point Clip In Point timecode Mark In • Mark In: Click this button, or press I, to set the starting frame (the In point) of your tape for capture. • Clip In Point timecode: Displays the timecode location of the current In point. • Go to In Point: Click this button, or press Shift-I, to cue the tape to the current In point.
Logging Tab The Logging tab in the Capture window is where you enter all of the descriptive information about clips you are capturing. You can use this information later to help you while you’re editing. • Reel: The reel affects which clips are captured from which source tapes, so it must correspond to the actual tape for the source media the clip is on. The name for each clip becomes the captured clip’s filename on your computer’s hard disk; therefore, all clip names must be unique.
Determining How Much Disk Space You Need Before you begin capturing, it’s a good idea to make sure you have enough disk space on your computer. The amount of disk space you need depends on the length of your captured video and the length of your finished project. Use the table below to estimate how much space you need. DV data transfer rates 30 sec. 1 min. 5 min. 10 min. 30 min. 60 min. 3.6 MB/sec., DV-format video 108 MB 216 MB 1.08 GB 2.16 GB 6.
Capturing There are three different ways to capture clips in Final Cut Express HD: Capture Now, Capture Clip, and Capture Project. • Capture Now: Using Capture Now, you can capture live video, DV from camcorders or decks that lack device control, or DV from a device-controllable camcorder or deck. If you use Capture Now with a device that’s supplying timecode, that timecode will be accurately captured along with your clip.
Make Sure Your Camera Is Properly Connected and Turned On Before you begin capturing, you need to make sure your camera is properly connected and turned on. To make sure your camera is on and ready for capturing: 1 Verify your FireWire cable is securely connected to your camera and computer. 2 Make sure your camera is on and set to VCR (sometimes labeled VTR) mode. When your camera is properly connected, Final Cut Express HD displays VTR OK at the bottom of the Capture window.
4 Choose File > Capture (or press Command-8). 5 In the Capture window, enter any appropriate information in the Logging tab. In particular, make sure that the reel number and name is properly set to reflect the reel number and name on the label of your current DV tape. For more information, see “Logging Tab” on page 38. 6 Play your tape and mark the clip you want to capture by doing one of the following: • Click the Mark In and Mark Out buttons to set In and Out points.
7 Click the Capture Clip button. Click here to capture a clip. Tip: Press Esc on your keyboard if you need to abort capturing. Final Cut Express HD captures the clip. The newly captured clip is automatically saved to the scratch disk, and is placed in the log bin of the Browser. The new clip appears in the Browser assigned to your project. 8 Save your project by clicking the project’s tab in the Browser, then choosing File > Save Project (or pressing Command-S).
Capturing an Entire Tape or a Group of Clips If you want to capture an entire tape or group of clips, use the Capture Now button. Important: Make sure you have adequate disk space for the length of your DV tape. See “Determining How Much Disk Space You Need” on page 39. To capture your tape: 1 Make sure your video equipment is properly connected and turned on. See “Make Sure Your Camera Is Properly Connected and Turned On” on page 41. 2 Insert a tape that includes the clips you want to capture.
5 Do one of the following: • Rewind the tape to the beginning using the camcorder or deck’s controls. • Locate the footage you want to capture using the camcorder or deck’s controls. If you’re not rewinding the tape to the beginning, rewind the tape about ten seconds prior to the material you want to capture. This will give the camcorder or deck enough time to remove slack in the tape. 6 When you’re ready to begin recording, press the Play button on your equipment.
Can I Use iMovie to Capture DV Clips Automatically? iMovie and Final Cut Express HD capture DV-format video in different ways. When iMovie captures DV clips, one at a time or by automatically capturing an entire tape and breaking each shot into its own clip, all video and audio is saved on the computer as DV Stream files. When Final Cut Express HD captures DV clips, they are saved as QuickTime video files using the DV-NTSC or DV-PAL codec.
To rename clips and sequences within Final Cut Express HD: 1 Select the clip or sequence in the Browser. 2 Click the item’s name, then type a new name. Select the item you want to rename. Type the new name.
The item’s name changes, but the source media is unaffected. If you rename a file in the Finder that is used by Final Cut Express HD, the clip goes offline because Final Cut Express HD loses the link to that file. To make sure renamed files are online, you need to relink the source media and the files in your project. A red slash indicates the media is offline. For more information, see Final Cut Express Help, Chapter 7, “Using the Browser and Managing Projects and Clips.
4 4 Basic Editing Now that you’ve seen how the Browser, Viewer, Canvas, and Timeline work together, and you’ve learned how to capture your media, it’s time to begin editing. This chapter explains the basics of editing simple sequences using the different types of Final Cut Express HD edits.
Before You Begin Before you add the first clip to your sequence, there are two important tasks you should know how to do: use the Undo command, and set In and Out points. Once you are comfortable with these procedures, you can begin an efficient editing session. You Can Always Undo When you’re first learning to work in Final Cut Express HD, it can be comforting to know that if you make a change you don’t like or didn’t mean to make, it can usually be undone.
Setting In and Out Points The first step to assembling an edit is deciding which portion of a clip you want to add to your sequence. You do this by viewing your clip over and over again to determine the section of the clip that is usable or the part you like the most. You define the usable region of the clip with editing points called In and Out points. The In point determines the first frame of the clip you want to use; the Out point determines the last frame.
You can mark In and Out points while you’re playing a clip or when it’s stopped. Sometimes it’s easier to set edit points while the clip is playing, so you can set the In or Out point immediately when you hear or see the frame you want. Set the In point on the frame you want your clip to start with. Set the Out point on the frame you want your clip to end with.
J,K, and L Keys Use the J, K, and L keys to quickly play through your clip. J cycles through various speeds in reverse, K stops playback, and L cycles through a variety of speeds going forward. When you’ve identified your In and Out points, press I to mark the In point and press O to mark the Out point. m To check the In and Out points of your clip: Click the Play In to Out button. Play In to Out Moving In and Out Points You can change In and Out points in the Viewer as often as you like.
Removing In and Out Points After setting In and Out points, you may want to use a different part of the clip, or you may just want to start over. m To remove In and Out points, do one of the following: Choose Mark > Clear In and Out. m Control-click the scrubber bar, then choose Clear In and Out. m Select an In or Out point, drag up or down until the edit point disappears, then release the mouse button. Opening Your Project If you closed your project after capturing your video, reopen it.
Adding a Clip to Your Sequence Now that you know how to set In and Out points, you’re ready to add a clip to your sequence. If you’ve already set In and Out points, jump to step 3; otherwise, start at step 1. To add a clip to your sequence: 1 Double-click a clip in the Browser to open it into the Viewer. This is your source clip. 2 Specify In and Out points for your source clip in the Viewer. See “Setting In and Out Points” on page 51.
To add additional clips to your sequence: 1 Double-click a clip in the Browser to open it into the Viewer. This is your source clip. 2 Specify In and Out points for your source clip in the Viewer. See “Setting In and Out Points” on page 51. 3 In the Timeline, move the playhead to the location in your sequence where you want the clip to start (the end of the first clip). 4 Drag the clip from the preview area of the Viewer to the Timeline.
Adding a Storyboard of Clips to a Sequence It’s often a good idea to arrange your clips in the Browser to get an idea or preview of what the movie will look like once you’ve finished editing. This “storyboard” can provide a visual representation of your finished movie, and can save you time before you start editing clips into a sequence and meticulously trimming them later only to discover you prefer clips in a different order.
To add your storyboard to a sequence: 1 Click in the Browser or press Command-4 to make it the active window, if it’s not already. 2 Make sure your clips are organized sequentially. 3 Drag a marquee around all of the storyboard clips to select them. Drag a marquee around your storyboard clips to select them. Note: The Browser is set to View as Small Icons for this example. 4 Drag the selected clips from the Browser to the Timeline. Drag your storyboard clips from the Browser to the Timeline.
Locking Tracks Any track in the Timeline can be locked using the Lock Track control. Items on a locked track cannot be modified. Additionally, no new clips can be added to a locked track. This lets you protect the track from any accidental changes. Clips on locked tracks still play back in the sequence, and will still be rendered and output to tape. All new tracks in a sequence are unlocked by default. m To lock a track: Click the Lock Track control of the track you want to lock.
Using the Razor Blade Tool The simplest form of an edit is a cut. The simplest tool to perform this edit with is the Razor Blade tool found in the Tool palette. m To activate the Razor Blade tool: Select the Razor Blade tool in the Tool palette (or press B). Razor Blade tool Razor Blade All tool You can use the Razor Blade tool to add an edit point to your sequence by cutting a single clip, along with any items linked to it in the Timeline, into two pieces.
This can be useful for quickly rearranging pieces of your sequence, for deleting a section of a clip, for applying an effect to a specific part of a clip, or for moving a piece of a clip to the same location on another track. Position the playhead where you want to make the cut, then press the mouse button. The clip is separated into two clips at the position of the playhead. Note: Linked audio clips are cut at the position of the playhead as well.
Deleting Clips From a Sequence As you edit, you can delete items from your sequence at any time, provided that the track you want to remove them from is not locked. There are two ways to delete items from a sequence—a lift delete and a ripple delete. Important: Removing clips from a sequence does not delete the original master clips from the Browser, nor does it delete source media from your computer. Doing a Lift Edit A lift edit removes any selected items from the sequence and leaves a gap.
To perform a lift edit: 1 Do one of the following: • Select the item or range of items you want to remove using one of the selection tools in the Tool palette. See “About the Tool Palette” on page 90. • Set In and Out points in the Canvas or Timeline, then make sure the Timeline is active. 2 Do one of the following: • Choose Sequence > Lift. • Choose Edit > Cut (or press Command-X) to cut the material, if you want to paste it somewhere else. • Press Delete.
What Are Gaps? How Do I Get Rid of Them? As you edit, cut, paste, and move items around in Final Cut Express HD, empty spaces may be left between clips in your sequence. These are called gaps. Sometimes they are extremely small (one or two frames), which makes them difficult to see in the Timeline. When a sequence with gaps plays back in the Canvas, however, even tiny gaps are apparent as black flashes. There are two types of gaps: • Track gaps: These are empty spaces between two clips in the same track.
m To close a gap, do one of the following: Position the playhead anywhere within the gap, then choose Sequence > Close Gap. m Control-click anywhere within a gap, then choose Close Gap from the shortcut menu. m Select the gap by clicking it, then press Delete. All clips to the right of the gap move left to close the gap. Because this command shifts all clips to the right of the gap toward the left, the command is not available if another clip on another track overlaps this gap.
Assigning Destination Tracks Many operations in Final Cut Express HD require you to use the Source controls to assign destination tracks to determine where edited, duplicated, or moved clips appear in the Timeline. Source and Destination controls are located in the Timeline patch panel, at the left of the Timeline window.
Disconnecting Source and Destination Controls Destination tracks can be disconnected in order to omit the video or audio portion of a clip when it’s edited into a sequence. For example, if you disconnect the video Source control prior to making an edit, only the audio portion of the clip is edited into the Timeline. Disconnected Source controls remain disconnected even when you open a clip into the Viewer consisting of a different number of video and audio items than the previously opened clip contained.
Resetting Source Controls You can reset Source controls to their default state after you’ve reassigned or disconnected them. When you reset Source controls, all available Source controls are assigned to the base video and audio tracks, and reconnected to the accompanying Destination controls. For example, the a1 Source control is reconnected to the A1 Destination control, the a2 Source control is reconnected to the A2 Destination control, and so on.
Overwrite edit Before edit D After edit A B C A D C To do an overwrite edit: 1 Specify the necessary In and Out points and destination tracks. 2 Drag the clip from the Viewer to the Overwrite section of the Edit Overlay (or press F10).
The clip overwrites all items on the destination tracks from the playhead position through the duration of your edit. No items are moved. Before an overwrite edit After an overwrite edit New clip overwrites existing clips 3 Save your project.
Insert Edits An insert edit places the source clip into your sequence so that all items after the insertion point in your sequence are moved forward in the Timeline, to make room for the clip being added. No clips are removed from your sequence. You can perform an insert edit with one or more clips.
After the edit, all clips on all unlocked tracks (including non-destination tracks) are moved forward in time, from the playhead position to the right, to make room for the clip or clips being inserted. Before an insert edit After an insert edit New clip inserted 3 Save your project. Superimpose Edits Superimpose edits are used to overlay titles and text onto video, as well as to create other compositing effects.
If you perform several superimpose edits in the same location, all new source clips are edited into the video track directly above the current destination track, and all other previously superimposed video clips are moved up one track to make room. If your superimposed clip contains audio, the source audio will be similarly placed on new audio tracks immediately below any occupied audio destination tracks already in your sequence.
3 Drag the clip from the Viewer to the Superimpose section of the Edit Overlay in the Canvas (or press F12). Superimpose section of the Edit Overlay in the Canvas The clip in the Viewer is placed on the track above the destination track, starting at the beginning of the clip that intersects the Timeline playhead, or at the sequence In point. If there is no track above the destination track, one is created. Before a superimpose edit After a superimpose edit 4 Save your project.
5 Editing With Audio 5 Final Cut Express HD lets you mix up to 32 tracks of audio with the flexibility to add music or your own voice. As long as you pay attention to the principles of linked clips and sync relationships, adding music or narration is easy. About Linked Clips When you capture video and audio together, they’re linked by default, appearing in your sequence as linked items.
Resyncing Clips Even when linked selection is turned off, Final Cut Express HD keeps track of the relationship between the audio and video items constituting a single clip. If you move the audio or video item of a clip independently of the other items it’s linked to, Final Cut Express HD keeps track of the resulting offset, displaying it as a timecode duration in a small red box at the head of each clip. This box is called an out-of-sync indicator.
A red out-of-sync indicator appears whenever the following conditions occur: • Audio and video items from the same source clip have been moved out of sync but still overlap in the Timeline. • Audio and video items that have been linked together in the Timeline have been moved out of sync but still overlap. Important: Final Cut Express HD always knows the proper sync between audio and video items from the same media file on your computer (unless you’ve changed this with the Mark in Sync command).
m To move a linked item into sync: In the Timeline, Control-click the item’s out-of-sync indicator, then choose Move into Sync from the shortcut menu. If the item is an anchor item, it moves into sync with the topmost out-of-sync audio item in the group, starting on track A1 and going down. (When you first link multiple audio items to a video item in the Timeline, that video item is considered the “anchor” item to which the sync of all other linked audio items is compared.
Adding Music The quality of audio is crucial to the success of your movie. An easy way to add highquality sound to your movie is to import audio tracks directly from a CD. Note: If you are using a music track with a copyright, make sure you are only using it for personal use. Importing Audio Files There are two kinds of audio files you can import into Final Cut Express HD.
5 Drag the audio file or files you want to import to the desktop. Drag the CD audio file to the desktop. 6 In the Dock, click the Final Cut Express HD icon to display the application. 7 Select the Browser to make it active, then choose File > Import > Files (or press Command-I). 8 In the Choose a File dialog, select the audio file or files you dragged to the desktop. The CD audio file appears in the Browser as an AIFF audio file.
Using iTunes to Convert Audio to the Right Format and Rate Final Cut Express HD does not currently support variable bit rate audio files such as MP3. If you want to use an MP3 audio file, convert it to an AIFF file (which has a constant bit rate) using iTunes, and then import the AIFF file into Final Cut Express HD. To convert an MP3 file to an AIFF file using iTunes: 1 Open iTunes. 2 If you haven’t already done so, add the MP3 file you want to convert to your iTunes Library.
6 In the AIFF Encoder dialog, choose the following settings, then click OK. • Sample Rate: 48.000 kHz • Sample Size: 16 bit • Channels: Stereo 7 In the Importing dialog, click OK. 8 In the iTunes Library, select the MP3 file you want to convert. 9 Choose Advanced > Convert Selection to AIFF. You now have an AIFF copy of your MP3 file that you can import into Final Cut Express HD.
Controls in the Voice Over Tool The Voice Over tool appears as a tab in the Tool Bench window. m To open the Voice Over tool: Choose Tools > Voice Over. The Tool Bench appears with the Voice Over tab. Record/Stop button Status area Preview button Discard button Audio destination track and audio clip name Input area Headphone area Defining the Recording Duration Before using the Voice Over tool, you need to specify the duration you’re recording.
m If no In point is set, the position of the playhead defines the In point, and recording continues to the Out point. m If no Out point is set, the end of the sequence is used, defined by the end of the last clip in the Timeline. If Final Cut Express HD doesn’t have enough available memory to record the duration specified, a message appears when you click the Record button in the Voice Over tab, prompting you to set a shorter recording duration.
Recording Your Voiceover After you’ve defined the duration and destination track for your voiceover clip, you’re ready to record. To record a voiceover: 1 Choose Tools > Voice Over. In the Voice Over tab, the status area is green and displays Ready to Record. Note: To prevent the recording microphone from picking up audio from your program, use a pair of headphones to monitor your program’s audio when using the Voice Over tool. Otherwise, set the Volume slider to –60 and deselect the Sound Cues checkbox.
Editing With Audio Tips When editing with audio, it is common to create additional tracks that you will want to remove later on. Deleting Tracks You can delete tracks from any sequence at any time. You can delete tracks one at a time, or you can delete multiple video and audio tracks at once. If you delete tracks with video that’s linked to audio, the video is deleted along with the video track, but the associated audio is left alone, and vice versa.
To delete multiple tracks from a sequence: 1 Choose Sequence > Delete Tracks. 2 Choose your options for deleting tracks, then click OK. • Track type: Select the appropriate checkbox to delete audio tracks, video tracks, or both. • Tracks to delete: Specify the type of tracks you want to delete. • All Empty Tracks: Deletes all tracks in your sequence in the Timeline that don’t have any clips edited into them.
6 Fine-Tuning Your Edit 6 Once you are happy with the clips edited into your sequence, you can fine-tune your edits with a process called trimming. Trimming can involve moving an individual clip’s In or Out point, changing the location of an edit point between two clips, or simply moving a clip to a new location. Each trim edit has a name: resize, ripple, ripple delete, lift, roll, slip, slide, extend, and swap.
• Trim Edit window: This window provides very precise control while trimming. It displays both sides of an edit, the outgoing clip before the edit point, and the incoming clip that appears after, allowing you to adjust your edit as finely as necessary. You can also use this window to trim a group of edits in multiple tracks (only one edit per track) at once. For information on using the Trim Edit window, see Final Cut Express Help, Chapter 19, “Advanced Editing and Trimming Techniques.
To select a tool from a group: 1 Move the pointer over a tool in the Tool palette, then press and hold down the mouse button. A pop-up menu shows the other tools associated with this function. Tip: Keep the pointer over the tool for a few seconds to see its name; otherwise known as a tooltip. 2 Move the pointer to the tool you want to select, then release the mouse button. Press and hold to choose additional tools.
To do a ripple edit in the Timeline: 1 Select the Ripple tool in the Tool palette (or press the R key twice). Ripple edits are done using the Ripple tool. 2 Select an edit point by clicking near the edge of the clip. If linked selection is on, the edit points of linked clips are also selected. 3 Do one of the following: • Type + or – followed by the number of frames to add or subtract from the current edit, then press Return. • Drag the edit point to lengthen or shorten the clip in the sequence.
At the same time, the Canvas shows a two-up display with the Out point of the outgoing clip on the left and the In point of the incoming clip on the right. Indicates the In point of the incoming clip Indicates the Out point of the outgoing clip The clips in your sequence after the edit point you’ve rippled all move either left or right to accommodate the new duration of your rippled clip.
Doing a Ripple Delete You can also delete an item or items so that all items to the right of the deleted item move to the left, filling in the gap. This is called a ripple delete. Ripple deletes can be performed using any of the selection tools in the Tool palette to select one or more clips or using In and Out points in the Timeline or Canvas to specify a range. A ripple delete removes one or more items from the Timeline. All clips in unlocked tracks that follow the deleted item move to the left.
2 Do one of the following: • • • • Choose Sequence > Ripple Delete. Press Shift-Delete. Press the Forward Delete key. Control-click the item or region you want to delete, then choose Ripple Delete from the shortcut menu. Note: Control-clicking only works when you’ve selected items with the mouse. It doesn’t work on a region defined by In and Out points. • Press Shift-X to remove the selected clips from your sequence to the Clipboard. This clip moves back to fill the gap. These clips are unaffected.
Doing a Roll Edit A roll edit moves the edit point where two clips in your sequence meet. Both the Out point of the outgoing clip (to the left) and the In point of the incoming clip (to the right) of the selected edit point move simultaneously. Before edit A B After edit A B C C A roll edit changes the duration of the two adjacent clips as the edit point is moved, but the overall duration of your sequence stays the same.
To do a roll edit in the Timeline: 1 Select the Roll tool in the Tool palette (or press the R key). Before 2 Select an edit point between two clips. If linked selection is on, the edit points of linked items are also selected. 3 Do one of the following: • Drag the edit point left or right. As you drag, the Canvas shows the two-up display with the Out point of the outgoing clip on the left and the In point of the incoming clip on the right.
To roll multiple tracks simultaneously: 1 Do one of the following: • Press the Command key while clicking to select multiple edit points. • Select the Edit Selection tool in the Tool palette (or press the G key), then drag to select the desired edit points. 2 Use the Roll tool to perform the roll edit across all of the tracks. Edit being rolled After 3 Save your project. For more information about roll edits, see Final Cut Express Help, Chapter 19, “Advanced Editing and Trimming Techniques.
Tips on Editing In Final Cut Express HD, there are many methods you can use to perform the same task. Many of these methods have more steps than others, and many functions can be performed with a single keystroke. There are also many features in Final Cut Express HD that are designed to enhance your editing. Moving the Playhead to Edit Points The playhead in the Timeline is locked to the playhead in the Canvas, and both windows mirror each other.
m To move the playhead to the beginning of your sequence: Press Home on your keyboard. m To move the playhead to the end of your sequence: Press End on your keyboard. For additional tips and information on navigating between edit points, see Final Cut Express Help, Chapter 14, “Working in the Timeline.” Copying and Pasting Clips It’s easy to duplicate clips in a sequence in the Timeline by either dragging, or selecting a clip and using the Copy and Paste commands (or their keyboard equivalents).
Changing a Clip’s Speed You can use the Final Cut Express HD speed options to speed up or slow down a clip in your sequence to create fast or slow motion effects. Changes to a clip’s speed that are under 100 percent produce slow motion. Changes to a clip’s speed that are over 100 percent produce fast motion. For example, if you set a 10-second clip to play back at 50 percent, Final Cut Express HD duplicates its frames so that the clip becomes 20 seconds long, playing back more slowly.
To change the playback speed of a clip: 1 Select a clip in the Timeline. 2 Do one of the following: • Choose Modify > Speed (or press Command-J). • Control-click a clip, then choose Speed from the shortcut menu. 3 Select speed options for the effect you want to create, then click OK. Changing the clip’s speed or duration automatically changes the other value. • Duration and Speed fields: You can modify the clip’s marked duration or speed percentage. Unmodified clips have a clip speed of 100 percent.
Making Life Easier With Three-Point Editing When you set up a series of In and Out points to prepare for performing an edit, Final Cut Express HD follows the principles of three-point editing. To set up an edit, you don’t need to specify both In and Out points for your clip in the Viewer, and In and Out points for that clip’s destination in the Canvas or Timeline. All you have to do is to set up any three of the four needed edit points, and Final Cut Express HD calculates the fourth one.
3 In the Timeline, move the playhead to the location in your sequence where you want the clip to start (the sequence In point). If you don’t define any In and Out points in your sequence, the Canvas or Timeline playhead will serve as the edit point. Move the playhead to the location in the sequence where you want the clip to start. 4 Now, if you do an overwrite edit, you’ll see that the duration of your clip, defined by the In and Out points in the Viewer, has been edited into the sequence.
Example: Editing a Clip Into a Gap in Your Sequence You can also do the reverse of the previous edit. For example, you might have a space in your edited sequence and you want to fill it up entirely with a new clip. You know where you want the source clip to start, and you don’t particularly care where it ends. You can specify an In point only in the Viewer, and specify both In and Out points in the Timeline to cover the gap: 1 Open a clip into the Viewer. This is your source clip.
4 Choose Mark > Mark Clip (or press X) to set In and Out points around the gap. Note: The gap must be within the destination track. Set In and Out points. 5 If you do an overwrite edit, you’ll see that your clip, defined by the In and Out points in your sequence, has been edited into the sequence. The new clip fills the gap.
Three-Point Editing Rules in Final Cut Express HD Final Cut Express HD uses the following rules to determine what constitutes an edit point: If no edit points are specified: • If no edit points have been set in the Viewer, the In and Out points used are the beginning and end of the clip. • If no edit points have been set in the Canvas or the Timeline, the playhead location in the Canvas is used as the sequence In point.
7 Adding Transitions 7 A transition is a visual effect used to change from one clip in your edited sequence to the next. Most movies and TV shows use two types of transitions. The most common is the dissolve, in which one shot gently fades into the next. The second most common is the wipe, in which the screen splits, moving from one side of the image to the other to gradually reveal the next shot.
Adding a Transition in the Timeline You add transitions to clips in the Timeline after they’ve been edited into a sequence. You can place a transition so that it starts on, centers on, or ends on the edit point. For the instructional purposes of this book, only applying transitions to the center of a cut will be discussed. For more information on applying transitions to the beginning and end of a cut, see Final Cut Express Help, Chapter 18, “Adding and Editing Transition Effects.
If one clip or both clips have overlapping frames, but not enough for the entire duration of the transition, Final Cut Express HD shortens the transition that’s added. The duration changes to fit that of the available frames. For example, you might have a one-second overlap to the left of the edit point, but only seven frames of overlap to the right, like this: Incoming overlap Incoming clip Outgoing clip Outgoing overlap In this case, your transition will be shortened to a total duration of 14 frames.
To add a transition from the Effects menu: 1 Do one of the following: • Select an edit point between two clips in your sequence. • Position the Canvas or Timeline playhead at the edit point or on a transition that’s already been edited into your sequence. Select an edit point where you want to add a transition. 2 Do one of the following: • To add a video transition: Choose Effects > Video Transitions, choose the type of transition, then choose the desired transition from the submenu.
m To add a transition from the Effects tab in the Browser: Drag a transition from the Effects tab in the Browser to an edit point in the Timeline. Depending on the number of overlapping frames between the two clips, you can drag the transition to start on, center on, or end on an edit point.
Adjusting a Transition You can perform some simple trimming operations on transitions in the Timeline to make them longer or shorter. If the transition is centered on the edit point, changes in duration extend in both directions. To graphically change a transition’s duration in the Timeline: 1 Choose the Selection tool, then move the pointer to the beginning or the end of the transition in the Timeline. The pointer changes to the Resize pointer. 2 Drag the transition’s edit point to the new duration.
Deleting a Transition If you’ve applied a transition and don’t like the effect, removing the transition is simple. m To delete a transition from a sequence: Select the transition you want to remove from the Timeline, then do one of the following: • Press Delete. • Choose Edit > Clear. • Control-click the transition, then choose Cut from the shortcut menu.
8 8 Adding Effects Effects are ways of enhancing and processing your video and audio media. Most of the effects you’ll create in Final Cut Express HD are done by using filters. Filters can be applied individually or in groups to any video clip. You can add as many filters as you like to a clip; the order in which they’re applied determines the final result. For example, if you apply a blur filter and then a pond ripple filter to a clip, the clip is blurred first, and then the blurred image is rippled.
Applying a Filter to a Clip and a Range of Clips You can apply filters to clips in a sequence or to clips in the Browser. m To apply a filter to a clip in a sequence, use one of the following methods: Select one or more clips in the Timeline, then drag a filter from the Effects tab of the Browser to one of the selected clips in the Timeline. Drag the filter from the Browser... ... to a clip in the Timeline.
Rendering a Sequence Depending on the filter you applied to your clips, a red render bar may have appeared at the top of the Timeline above the ruler. This indicates the effects in your sequence need to be rendered before playback. Rendering your sequence processes the video and audio with any applied effects, such as transitions or filters. Once rendered, your sequence can be played in real time.
Controls in the Filters Tab of the Viewer There are various controls you can use to manipulate filters in Final Cut Express HD. While each filter has its own individual settings and controls, all filters have some controls in common.
Disabling a Filter You can turn a filter on or off without removing it from a clip. This is useful for previewing different combinations of filters without having to repeatedly apply and delete them. To turn individual filters off: 1 Click the Filters tab in the Viewer. 2 Select the checkbox next to the filter’s name to remove the checkmark. Deselect this checkbox to turn the filter off. Select the checkbox again to turn the filter back on.
Filter Tips Final Cut Express HD makes it easy to apply the filter parameters in one clip to other clips in your project. Copying and Pasting a Clip’s Filters When you copy a clip from the Timeline, you also copy all of that clip’s settings, including filters applied to that clip. Instead of pasting duplicates of the clip you’ve copied, you can paste only that clip’s filters into other clips by using the Paste Attributes command in the Edit menu.
9 Creating Titles and Credits 9 You can add the finishing touch to your movie by creating titles and credits. In Final Cut Express HD, you create titles and credits using video generators. Unlike filters, video generators are not effects that you apply to clips in your project. Instead, video generators are synthesized clips created by Final Cut Express HD. You superimpose your created title clips over the existing video clips in the Timeline.
Creating Opening Titles Your opening titles provide viewers with their first impression of your movie. Therefore, it’s important to take your time and try different fonts, colors, and styles, until you’re satisfied with the result. Make Sure Your Titles Fit on a TV Screen Before you begin creating your titles, you want to ensure the titles fit on a television screen. The title safe boundary is 20 percent smaller than the overall size of the frame, whether you’re using NTSC or PAL.
• • • • • • • • • • • Text: Enter your title text in this field. Font: Choose a font from the Font pop-up menu. Size: Change the font size by entering a value or dragging the slider to the left or right. Alignment: Choose the alignment of your title on the screen from this pop-up menu. Your choices are Left, Center, and Right.
Creating Title Text You use the Text generator to create the text for the title clips in your movie. To create text: 1 Open the Generator pop-up menu, choose Text, then Text again to open the Text generator. 2 Click the Controls tab in the Viewer to view the Text generator’s controls. 3 Enter the text for your title in the Text field, then specify your settings in the Controls tab. Enter title text in this field. Parameter controls for the Text generator 4 Save your project.
Adding a Title to a Sequence You add a title to your sequence the same way in which you add a clip. To add your title to a sequence: 1 In the Timeline, set your Destination track to V3 by dragging the V1 Source control to the Destination control on track V3. Drag the Source control to destination track V3. 2 Set the In and Out points where you want your title to begin and end by pressing I where you want the title to start in your sequence and O where you want the title to end.
6 Perform an Overwrite edit by dragging the title clip from the Viewer to the Overwrite section of the Edit Overlay in the Canvas. The title track appears in track V3. Your new title appears in track V3 over your video. 7 Save your project. Using Lower-Thirds When you’re watching the news and the reporter’s name is displayed at the bottom of the screen, that’s an example of lower-thirds. Lower-thirds provide information about a person or location displayed on the screen.
To open the Lower 3rd text generator: 1 Open the Generator pop-up menu at the bottom-right corner of the Viewer. Generator pop-up menu 2 Choose Text, then Lower 3rd from the submenu. 3 Click the Controls tab in the Viewer to access the generator’s controls. The controls are similar to those of the Text generator except that there are two text fields. Text 1 corresponds to the top line, and Text 2 corresponds to the bottom line. Enter text in this field for the top line.
Creating Rolling Credits You can use the Scrolling Text generator to create text that scrolls up the screen, like credits at the end of a movie. The controls in the Scrolling Text generator are similar to those of the Text generator; however, the duration of the clip you set with In and Out points determines how fast the text scrolls up the screen. Press the Return key while entering text in the Text field to break up the text so it flows nicely on the screen.
3 Click the Controls tab in the Viewer to access the generator’s controls. The controls are similar to those of the Text generator except that the Direction pop-up menu allows you to choose whether you want the text to scroll up or down. You can also have your credits fade at the top and bottom of the screen by adjusting the Fade Size slider. Enter scrolling credit text in this field. Press the Return key to add a new line on the screen.
Tips for Making Terrific-Looking Titles DV was designed for real-world images that blend together, and it is not optimized for the rigid lines of text. Therefore, apply the tips below to achieve better-looking fonts. • Only use san serif fonts, such as: • Arial • Futura • Gill Sans • Helvetica • Impact • Use the bold font style. • Do not use white or black as a font color. • Do not use a font smaller than 25 point. • Reduce opacity of the text clip to 90%.
10 Sharing Your Movie 10 When your video and audio are ready for playback, it’s time to make your movie available to others. There are three easy ways to share a Final Cut Express HD project: export it for use on a DVD, distribute it over the web, or make a videotape. Exporting for DVD Preparing your Final Cut Express HD movie for use in a DVD authoring tool such as iDVD is easy. Final Cut Express HD uses the QuickTime .mov file format and feature set for export.
4 Choose a location and enter a name for the file. Tip: To easily find your movie when exporting is finished, it’s a good idea to choose the Desktop for the location. It’s also a good idea to verify you have enough disk space before exporting your movie. See “Determining How Much Disk Space You Need” on page 39. 5 Choose Audio and Video from the Include pop-up menu. 6 Choose Chapter Markers from the Markers pop-up menu.
Exporting for the Web If you want to stream your movie on the web, use QuickTime to create an MPEG-4 movie. MPEG-4 is an open standard video format intended for cross-platform, Internet, and multimedia delivery of video and audio content. For more information about MPEG-4, see Final Cut Express Help, Chapter 37, “QuickTime Export of Video, Images, and Sound.” To export a QuickTime movie for the web: 1 Select a clip or sequence in the Browser or open a sequence in the Timeline.
Making a Videotape You can export your Final Cut Express HD movie back to mini-DV and share it with others that way. The Print to Video command allows you to include elements in your program such as color bars and tone, a countdown, a slate, and a black trailer. These elements are then created and recorded to video, along with your sequence or clip, without being included in the Timeline.
6 The duration calculator displays the total duration of the program you are outputting, including all of the selected elements and their durations. Make sure there is sufficient time on your tape before proceeding. 7 When you’re finished setting options, click OK. Transitions and effects that require rendering, along with any added elements, are rendered automatically prior to output. 8 When a message tells you to start recording, press Record on your camcorder or deck.
Importing an iMovie Project A Appendix A You can open and edit projects created with iMovie using Final Cut Express HD. To open an iMovie project in the Browser: 1 In Final Cut Express HD, choose File > Open. 2 In the dialog that appears, select the iMovie project you want to open. The iMovie project opens in the Browser and contains the sequence and clips as they appeared in the iMovie Clips pane. 3 Save your project.
Importing Stills B Appendix B In addition to capturing video and audio clips from tape, you can import a variety of digital video and audio file types into your Final Cut Express HD projects. Imported files appear as clips in the Browser and, like video and audio clips, are references to the corresponding source files on your computer’s hard disk.
To import a still image: 1 Select the Browser to make it active. 2 Choose File > Import > Files (or press Command-I). 3 Locate the file, then click Choose. The still image appears in the Browser. The still image appears in your project in the Browser. 4 Save your project.
Preparing for Your Next Project C Appendix C By the time you finish your project, your computer’s hard disk should be full. Preparing your hard disk for your next Final Cut Express HD project is essential.
Solutions to Common Problems and Customer Support D Appendix D If you run into problems while working with Final Cut Express HD, there are several resources you can use to find a solution. • This Appendix: This appendix includes information about some of the most frequent issues users encounter. Problems are grouped by category. • Final Cut Express HD Help: Final Cut Express HD Help provides comprehensive information about each topic covered in this book.
• Quit Final Cut Express HD, shut down your computer, turn your camcorder or deck off and on, and then restart your computer. You can’t control certain functions of your camcorder or deck. • Make sure your device control cable is properly connected. • If your deck has a Local/Remote switch, make sure it’s set to Remote. Problems During Playback This section deals with issues encountered during video playback and their resolutions. Video is not visible on an external NTSC or PAL monitor.
• Another reason could be that you’re using Mac OS X version 10.3 and FileVault. Dropped frames can occur if you’re capturing or playing back video to a FileVault encrypted directory. FileVault can be turned off in the Accounts pane of System Preferences. For more information, see Mac Help. • The hard disk drive you’re capturing to is inadequate for capturing video. This could be caused by slow hard disks, incompatible drivers, or configuration issues.
An error message appears during capture reporting a “Break in the Timecode.” • When capturing clips for your program from source tapes that were shot in the field, or from old source tapes that have been played to the point of wearing the media, timecode breaks may appear, disrupting the computer’s ability to read a continuous stream of timecode.
Your camcorder or deck doesn’t go to the specified timecode or won’t perform a command. • Try changing the protocol to Apple FireWire Basic in the Easy Setup window. For more information, see Final Cut Express Help, Chapter 4, “Specifying User Preferences, System Settings, and Easy Setups.” General Performance Issues Try the following suggestion to increase the performance of Final Cut Express HD. Final Cut Express HD seems to be working slowly.
Problems Playing a Reference Movie This section deals with issues encountered while playing a reference movie and the solution to these issues. You’re having problems playing a reference movie. • If you encounter playback problems with a reference movie, export the media as a selfcontained movie (which includes all its media files), and not as a QuickTime reference movie. To do this, make sure there is a checkmark in the Make Movie Self-Contained checkbox in the Export dialog.
Glossary Glossary audio clip A media clip containing audio samples. Auto Render A feature that allows Final Cut Express HD to render open sequences whenever a specified number of idle minutes has passed. batch capture A process in which information stored in clips is used to control the deck or camcorder to automatically capture, or digitize, the video or audio material that corresponds to each clip. bin A folder inside of the Browser that can contain clips, transitions, effects, and generators.
edit point (1) Defines what part of a clip you want to use in an edited sequence. Edit points include In points, which specify the beginning of a section of a clip or sequence, and Out points, which specify the end of a section of a clip or sequence. (2) The point in the Timeline of an edited sequence where the Out point of one clip meets the In point of the next clip. This edit point can be selected for various operations. generators Clips that are synthesized by Final Cut Express HD.
outgoing clip The clip a transition segues from. out-of-sync indicator In the Timeline, the symbol that appears at the beginning of a clip when the video moves out of sync with its associated audio. If the selected clip is ahead of its associated video or audio, a + (plus) and a number appear, indicating the number of frames they’re out of sync relative to one another. If behind, a – (minus) and a number appear. output Video and audio that is ready for playback and distribution.
scratch disk The disk or disk space you allocate in Final Cut Express HD for digital video capture and editing, as well as for the storage of a project’s render files. sequence A structured collection of video, audio, and graphics clips, edit information, and effects. sequence clip A clip that has been edited into a sequence. Compare to master clip. snapping A setting in the Timeline that affects the movement of the playhead.
A AIFF files 81–82 anchor items 78 animation 125 AppleCare Knowledge Base 145 AppleCare Support 12, 145, 150 Apple FireWire.
duration of 96, 102 editing into sequence gaps 105–106 editing into sequences 103–104 filters for. See filters head 152 incoming 152 linked 75–78, 152 master 152 offline 48, 152 opening from Browser 23 opening from Timeline 23 opening into Viewer 23 organizing in Browser 18–20 outgoing 153 pasting 100 playing. See playback resyncing 76–78 subclips 19 tail 154 transitions. See transitions types of 19 video.
real-time 153 Effects menu 112 Effects tab 113 errors “Break in the Timecode” 148 “Servo Can’t Lock” 148 exporting items canceling export 134 for DVD 133–134 to videotape 136–137 for web 135 F file formats 133, 141 See also specific formats files AIFF 81–82 audio 79–80 .
file formats for 141 iMovie projects 139 still images 141–142 In points checking 53 clearing 133 described 51, 152 moving 53, 91–93 removing 54 roll edits 96–97 setting 51–53 insert edits 71–72 interlaced video 152 iTunes 79, 81 J JFIF format 141 jog control Canvas 26 Viewer 22 JPEG format 141 K kerning 125 L leading 125 lift edits 62–63 lighting 9 linked clips 75–78, 152 list view 20 locking tracks 59 Lock Track control 59, 65 Log and Capture window 151 Logging tab 35, 38 Lower 3rd text generator 129 lo
in Viewer 24 playhead moving to edit points 99–100 moving to sequence beginning/end 100 snapping 56 Timeline 30 Viewer 22 PNG format 141 PNTG format 141 pre-roll 45, 85 Preview area 35, 36 Print to Video command 136 projects described 18, 153 iMovie 139 making new 33–34 opening 54 preparing hard disk for 143 removing items from 20 saving 34 sharing 10, 133–137 updating 54 PSD format 141 Q QTIF (QuickTime Image File) format 141 QuickTime files 46 QuickTime format 133 QuickTime Image File (QTIF) 141 QuickTim
source media files 18, 20 spacing, text 125 speakers 149 still images 141–142 storyboard adding to sequence 58 creating 57 described 57 streaming movies 135 subclips 19 subpixels 125 superimpose edits 72–74 Support, Apple 12, 145 synchronization 146–147 T tail clips 154 tape.
trimming 89–90 tripods 9 troubleshooting 145–150 audio problems 146–149 “Break in the Timecode” error 148 performance problems 149 playback problems 146–149 reference movies 150 “Servo Can’t Lock” error 148 sync problems 146–147 video devices 145–146 U Undo command 50 V variable bit rates 81 VCR mode 41 video capturing. See video capture editing.