
Manual


210 Part IV Capturing and Importing
HDV Apple Intermediate Codec Editing Workflow
When you edit using footage encoded with the Apple Intermediate Codec, you don’t need
to worry about making cuts on GOP patterns or re-encoding. You can edit just as you
would with any other I-frame–only encoded footage, such as DV or uncompressed video.
The main drawbacks to using the Apple Intermediate Codec for editing HDV footage
are that the required disk space is significantly larger and conforming your media for
output back to tape can be very time-consuming.
Step 1: Connect your HDV camcorder to your computer via FireWire
Step 2: Choose the appropriate Apple Intermediate Codec HDV Easy Setup
Step 3: Capture your footage to disk
Step 4: Edit your HDV clips into a sequence
Step 5: Re-encode and output back to tape, or export to a QuickTime movie
Connecting an HDV Device to Your Computer
Once you have HDV footage on tape, you can connect your camcorder or VTR to your
computer to capture.
To connect your HDV camcorder or VTR to your computer:
1 Turn on your VTR or camcorder and switch it to VCR (or VTR) mode.
Note: On some camcorders, this mode may be labeled “Play.”
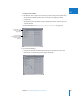
2 Connect the 4-pin connector on one end of your FireWire cable to the 4-pin FireWire
port on your camcorder.
3 Connect the 6-pin connector on the other end of your FireWire cable to a FireWire 400
port on your computer.
4 Make sure your camcorder is in HDV mode, not DV mode.
For more information, see the documentation that came with your HDV device.