
Manual

358 Part VI Rough Editing
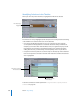
The following cannot be selected in the Timeline:
 Filter and motion bars and their keyframes: You can double-click a bar directly in the
Timeline to view filter or motion details in the Viewer. Even though you can’t select
the keyframes, you can move them by dragging them.
 Tracks: Tracks themselves can’t be selected, although the contents of tracks can be
selected using the track selection tools.
An Introduction to the Selection Tools
Several tools in the Tool palette can be used to select items.
Note: Remember that if you select an item that’s linked to another item, the linked
item is selected as well, unless you disable the Linked Selection option. (See “Linking
and Unlinking Video and Audio Clip Items in the Timeline” on page 402.)
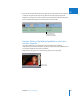
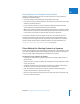
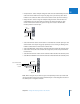
To select a tool:
1 Move the pointer over a tool in the Tool palette, then press and hold down the
mouse button.
All of the related tools appear.
2 Move the pointer to the tool you want to select, then release the mouse button.
The selected tool becomes the current tool in the Tool palette for that group of tools.
These are the selection tools, in order of appearance:
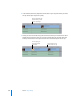
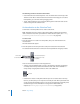
 Selection: Selects individual items, such as a clip, transition, edit point, or keyframe,
or multiple items if they’re linked. The functions of this tool can be modified in a
variety of ways using keyboard shortcuts. This is the default tool.
 Edit Selection: Selects an edit point between clips. You can select edits on as many
tracks as you want, but you can only select one edit per track. When you double-click
an edit, the Trim Edit window appears so you can precisely modify several edit points
simultaneously. (For more information on using the Trim Edit window, see
Chapter 34, “Trimming Clips Using the Trim Edit Window,” on page 493.)
The selected tool becomes
the default shown in the
Tool palette.
Click to select
the desired tool.
Selection