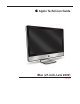
Apple Technician Guide iMac (27-inch, Late 2009) 2009-12-15
Apple Inc. © 2009 Apple Inc. All rights reserved. Under the copyright laws, this document may not be copied, in whole or in part, without the written consent of Apple. Every effort has been made to ensure that the information in this document is accurate. Apple is not responsible for printing or clerical errors. Apple 1 Infinite Loop Cupertino, CA 95014-2084 USA + 1 408 996 1010 www.apple.com Apple, the Apple logo, Mac, and Macintosh are trademarks of Apple Inc., registered in the U.S.
iMac (27-inch, Late 2009) Contents About This Guide Updates 10 15 December 2009 10 20 November 2009 10 11 November 2009 10 28 October 2009 11 27 October 2009 11 Apple Technician Guide introduced 20 October 2009 11 Feedback 11 Basics Overview 13 Identifying Features 14 Product Configurations 14 Wireless Troubleshooting 14 Safety Precautions 15 Serial Number Location 16 Troubleshooting General Troubleshooting 18 Wireless Troubleshooting 18 Update System Software & Firmware 18 Troubleshooting Theory 18
Block Diagram 29 Symptom Charts 30 Startup and Power 30 No Power, Dead Unit 30 Won’t Start Up 32 Intermittent Shutdown 34 Kernel Panic, System Crashes 36 No Video 38 Corrupted Video 40 Burnt Smell/Odor 43 Uncategorized Symptoms 44 Display 45 Backlight Issue/No Backlight 45 Noise / Unstable Flickering 47 LCD Image Issues 49 Incorrect/Missing Colors 50 Distorted/Blurred Image 51 Pixel Anomalies 53 Vertical/Horizontal Lines 54 Non-Uniform Brightness 56 Cosmetic Defects 57 Uncategorized Symptoms 57 Mass
FireWire Device Not Recognized 88 USB Device Not Recognized 90 Wired Keyboard Does Not Function Properly 92 Keyboard: Specific Keys Do Not Respond 94 Wired Keyboard/Mouse Not Recognized 94 Uncategorized Symptoms 96 Mechanical 97 Noise/Hum/Vibration 97 Fan Failures / Thermal Issues 100 Stand/Hinge Issues 101 Physical Damage 102 Uncategorized Symptoms 102 Take Apart General Information 104 Opening the Unit 104 Required Tools 104 Cleaning & Handling the Glass Panel 106 Do’s and Don’ts 106 Handling a Broken
Audio Ports and Cable Bluetooth Antenna 136 AirPort Antenna 138 Bluetooth Board 140 AirPort Card 134 142 AirPort Cable 144 AirPort Carrier Board 146 LED Backlight Board 148 Power Supply 150 Removal 151 Reassembly 152 Backlight Pressure Wall 153 Power Supply/Hard drive Pressure Wall Removal 156 Reassembly 156 Hard Drive 158 Removal 159 Reassembly 160 Hard Drive Sensor Cable Removal 162 Reassembly 162 Optical Drive 163 Removal 164 Reassembly 166 Optical Sensor Cable Optical Drive Fan
Reassembly Video Card 183 187 Hard Drive Data Cable Removal 190 191 Optical Drive Data Cable Removal Battery 193 194 195 Removal 196 Reassembly 196 Optical Pressure Wall Right Speaker 197 199 CPU Fan 201 Removal 202 Reassembly 203 Ambient Temp Sensor 204 Removal 205 Reassembly 205 Left Speaker 206 Removal 207 Reassembly 207 Hard Drive Fan 209 Mechanism Cover 211 Mechanism 213 Bluetooth Cable 215 Cable, AC/DC Power/Backlight/SATA Camera Cable 219 Microphone Cable Rear Housing Stand
Views Exploded Views 234 Exploded View #1 Exploded View #2 Exploded View #3 External Views 234 235 236 237 Rear View 237 Ports 238 Internal Views 239 Components Below LCD 239 Inside Rear Housing 239 Logic Board, Top Side 240 Logic Board, Bottom Side 240 Screw Chart 241
Apple Technician Guide About This Guide iMac (27-inch, Late 2009) © 2009 Apple Inc. All rights reserved.
Updates 15 December 2009 Troubleshooting: • General Troubleshooting: Updated Apple Service Diagnostic and Apple Hardware Test version numbers, updated Apple Hardware Test error code table. • Startup Power and Display chapters: Updated Flickering/No Video/ Backlight Issue/ Corrupted Video topics to alert technicians to check: • Mac OS X version installed is the build version supported on the hardware. See kBase #TS3101: Mac (Late 2009): Using the correct Mac OS X system software.
28 October 2009 Take Apart: Added backlight cable to list of items included with replacement panel 27 October 2009 • • Formatting changes throughout manual Troubleshooting: added new LED Location graphic on page 22 Apple Technician Guide introduced 20 October 2009 Feedback We want your feedback to help improve this and future Technician Guides! Please email any comments to smfeedback2@ apple.
Apple Technician Guide Basics iMac (27-inch, Late 2009) © 2009 Apple Inc. All rights reserved.
Overview Introducing the iMac (27-inch, Late 2009) with a new edge-to-edge glass design and seamless all aluminum enclosure. The new iMac line is the fastest ever with Intel Core 2 Duo processors starting at 3.06 GHz, and Core i5 and i7 quad-core processors for up to twice the performance.
Identifying Features The iMac (27-inch, Late 2009) computer features include: • LED-backlit 27-inch display • Increased processor speeds: • 3.06GHz and 3.33GHz Intel Core 2 Duo • 2.66GHz quad-core Intel Core i5 • 2.
Safety Precautions WARNING: HIGH VOLTAGE: The AC/DC power supply PCB remains powered up whenever the system is plugged in, whether or not the system has been turned on. Use extreme caution when troubleshooting the system with the front bezel removed. WARNING: If the computer is shut down by removing the power cord, allow the power supply a good 2-3 minutes to discharge the capacitors before handling it.
Serial Number Location The iMac (27-inch, Late 2009) serial number is located on the base of the stand. When replacing a stand, transfer the serial number to the new stand.
Apple Technician Guide Troubleshooting iMac (27-inch, Late 2009) © 2009 Apple Inc. All rights reserved.
General Troubleshooting Wireless Troubleshooting If you’re having issues with Bluetooth and wireless connectivity issues, refer to the following Knowledge Base articles: • Desktop computers: Troubleshooting wireless mouse and keyboard issues http://support. apple.com/kb/TS3048 • AirPort and Bluetooth: Potential sources of interference http://support.apple.com/kb/ HT1365 • Apple Wireless Keyboard and Mouse: How to install batteries http://support.apple.
Hardware vs.
Resetting Parameter RAM (PRAM) PRAM stores certain system and device settings in a location that Mac OS X can access quickly. Exactly which settings are stored in the computer’s PRAM varies depending on the type of computer as well as the types of devices and drives connected. To reset PRAM: 1. Shut down the computer. 2. Locate the following keys on keyboard: Command, Option, P, and R. You will need to hold these keys down simultaneously in Step 4.
Diagnostics Run Apple Service Diagnostic version 3S135 to determine if any thermal sensors or blowers are malfunctioning. If ASD is not available, run Apple Hardware Test version 3A188 by holding down the D key during startup. When a test reports an error, reseat appropriate connections. If issue persists, replace the corresponding part (sensor, blower, logic board, video card, or power supply).
2009-12-16 AHT Error code Suspected part and Location Suggested Action Notes 4SNS/1/40000000 TC0H CPU temp sensor located on back side of logic board; this sensor is not available as a service part Check CPU sensor cable connection to logic board. It requires removal of the logic board. If the sensor is disconnected, the CPU fan will run at full speed.
Diagnostic LEDs The iMac (27-inch, Late 2009) computer has four built-in diagnostic LEDs on the main logic board that can help you to troubleshoot the computer. The LEDs are located on the bottom left edge of the logic board (under a piece of black mylar tape) and can only be seen when looking through the lower vents of the enclosure. Refer to the next page for a close up graphic of the troubleshooting LEDs.
Location of Diagnostic LEDs The LEDs are located under the mylar tape, on the bottom, left corner of the logic board. They can only be seen when looking through lower vents of rear housing. LED Functions LED #1 • Indicates that the trickle voltage from the power supply has been detected by the main logic board. This LED will remain ON whenever the iMac is connected to a working AC power source. The LED will remain on even when the computer has been shut down or put to sleep.
LED #2 • Indicates that the main logic board has detected proper power from the power supply when the computer is turned on and that logic board voltage regulators are functioning properly. This LED will be ON when the computer is turned on and the power supply is working correctly. LED #3 • Indicates that the computer and the video card are communicating. This LED will be ON when the computer is communicating properly with the video card.
LED Startup Sequence LED #1 = Power available. If no LED is visible: • Verify AC source • Verify known-good AC cable is connected • Verify cable connection between AC inlet and power supply • Verify cable connection between power supply and logic board • Verify power supply LED #1 + LED #2 = Power available, and system is powered on.
Logic Board Test Points Some test points are accessible on the logic board when the LCD panel is removed. The test points are defined below.
Sensor and Fan Connector Locations Ambient temp sensors and fans connectors locations are shown below. Ensure cables are correctly routed and the sensors and fans are properly connected. If a sensor or fan is faulty or not connected, Apple Hardware Test and Apple Service Diagnostic will generate an error code.
Block Diagram K22/K23 System Block Diagram Refer to this diagram to see how modules are interrelated. 09/01/2009 David Cox Apple Confidential AC Inlet Optical Drive Backlight Controller Hard Drive AC/DC Temperature Sensor Temperature Sensor MXM Display Camera Temp Sensor IR Sensor SD Card Reader Microphone MLB Fan Fan Fan Bluetooth Antenna Speakers 802.
Symptom Charts Follow steps in the order indicated below. If an action resolves the issue, retest system to verify. Startup and Power No Power, Dead Unit Unlikely cause: speakers Quick Check Symptoms Quick Check No Power, Dead Unit • No power • No fan spin • No startup chime • No image on external display • No hard drive or optical drive activity • Caps Lock LED on wired keyboard doesn’t light when pressed. 1. Verify power source. 2. Verify power cable. 3.
3. Press power button while monitoring diagnostic LEDs. Verify if LED #2 turns ON and remain ON after pressing the power button. You may alternately check for a power request signal between pin 12 and pin 1 of logic board. Yes Power supply functioning and logic board detects supply voltages. Go to Won’t Start Up symptom flow. No Go to step 4. 4.
Won’t Start Up Quick Check Symptoms Quick Check Won’t Start Up • No startup chime. • Error tones during startup. • Grey screen with fan noise, or other noise. • Will not progress beyond Apple logo or spinning gear. 1. Isolate OS by starting up from original install media for this computer, from a same-model computer in Target Disk Mode, or from a compatible known-good OS on an external drive. Both AirPort and Bluetooth services are available when booted from the Install disk. 2.
3. Wait 15 seconds after computer was powered down and disconnect AirPort cable from logic board. Verify if computer starts up properly now. Yes Go to AirPort Card Kernel Panic symptom flow. No Go to step 4. 4. Disconnect hard drive SATA cable and startup from Install DVD in the optical drive, or from an external bootable volume. Verify if computer starts up properly now. Yes Go to Hard Drive Not Recognized symptom flow. No Go to step 5. 5.
Intermittent Shutdown Quick Check Symptoms Quick Check Intermittent Shutdown • Powers off during startup. • Powers off during desktop use. • Computer restarts spontaneously. • Powers off when waking from sleep. 1. Make sure that power cord is securely attached to the back of computer, and is not hindered by a desk or other furniture. 2. Plug computer directly into an AC outlet to test if a surge protector or UPS is causing issue. 3.
2009-12-16 2. With known-good AC power cord and AC outlet, Verify if system continues to restart or shutdown Yes Go to step 3. No AC power cord / outlet issue. Issue resolved. 3. Disconnect hard drive power cable from hard drive and startup the computer from other bootable media (like Install DVD, a same model computer in Target Disk Mode, or a compatible known-good OS on an external drive). Verify if system continues to restart or shutdown. Yes Go to step 4.
Kernel Panic, System Crashes Quick Check Symptoms Quick Check Kernel Panic, System Crashes • Kernel Panic on startup or desktop use. • System freeze during use. • System freeze upon wake from sleep. 1. Isolate OS by starting up from original install media for this computer, from a same model computer in Target Disk Mode, or from a compatible known-good OS on an external drive. Both AirPort and Bluetooth services are available when booted from the Install disk. 2.
3. Use known-good SDRAM in the system. Verify if system start without kernel panic now. 2009-12-16 Yes Install user’s SDRAM one by one and test. If kernel panic repeats, replace affected SDRAM. Verify if correct SDRAM specification is being used. No Go to step 4. 4. Wait for 20 seconds after shutdown and disconnect AirPort cable on logic board. Verify if system starts without kernel panic now. Yes Go to AirPort Card Kernel Panic symptom flow. No Go to step 5. 5.
No Video Unlikely cause: hard drive, optical drive, speakers, camera, microphone Quick Check Symptoms Quick Check No Video • No image. • Backlight failure. 1. Check brightness setting. 2. For no-video issues, connect an external display to Verify if iMac video circuitry is functioning. If image appears on external display go to Backlight Issue/No Backlight symptom flow. 3. Reset SMC. Deep Dive Check Result 1. Verify boot chime present and fans running when system powered ON.
4. Pivot enclosure to access lower intake vent, and locate diagnostic LEDs on edge of logic board. Verify if LED #3 turns on shortly after system powers on. Yes Logic board communicating with video card. Go to step 5. No If LED #3 does not turn ON reseat video card and retest, then replace video card and repeat step 4. If issue persists, replace logic board. 5. Locate diagnostic LEDs on logic board. Verify if LED #4 turns on shortly after system powers on.
Corrupted Video Unlikely cause: power supply, hard drive, optical drive, fans, speakers, camera, microphone Quick Check Symptoms Quick Check Corrupted Video • Text and graphics appear fuzzy • Image corrupted 1. Verify Mac OS X version installed is the build number supported on the hardware. Make sure customer didn’t migrate over their old version of Mac OS. See kBase #TS3101: Mac (Late 2009): Using the correct Mac OS X system software. 2. Set System Preferences > Displays to native resolution of LCD.
Deep Dive Check Result Code 1. Boot from Install DVD and Verify if issue is still visible. Yes Go to step 2. No Issue likely caused by software or driver issue. Troubleshoot for software issues. Make sure all software updates have been installed. 2. Verify if issue is visible on an external display. Yes Issue is NOT caused by internal LCD display. Go to step 3. No Go to step 6. 3. For systems without a separate video card, go to step 4.
2009-12-16 7. Disconnect DisplayPort cable between LCD display and logic board, and verify if there is damage to cable or connectors. Repeat with vertical sync cable connected between LCD panel and LED backlight board. Yes Replace DisplayPort cable or any other damaged part/ module. No Reinstall DisplayPort cable and vertical sync cable. Go to step 8. 8. Verify if issue is still visible after reinstalling/replacing DisplayPort cable and vertical sync cable.
Burnt Smell/Odor Unlikely cause: speakers, microphone, rear housing Quick Check Symptoms Quick Check Burnt Smell/Odor • Burning smell • Unusual odor 1. Verify that computer is the source of the odor. 2. If system is new, see kBase #TA22044: New Equipment: Odors May Be Present Short-Term. 3. Disconnect all third-party devices and check to see if any external device is the source of odor. 4. Inspect air intake and air outlets for obstructions.
3. Verify if source of odor can be located using your nose. Yes Replace affected module(s) and retest system. No Contact Apple for assistance if you feel that there is a possible safety issue with computer that has not been resolved in previous steps. P08 Uncategorized Symptoms Quick Check Symptoms Quick Check Uncategorized Symptoms • Unable to locate appropriate symptom code. 1. Make sure system is plugged into a known-good outlet. 2.
Display Backlight Issue/No Backlight Unlikely cause: hard drive, optical drive, speakers, camera, microphone Quick Check Symptoms Quick Check Backlight Issue/No Backlight • No image • Partial backlight failure • Backlight flickers • Display dim 1. Check for Software Update. 2. Verify that System Preferences > Displays > Brightness control setting is above minimum. 3. If no image on built-in display, connect external display to verify if iMac video circuitry is functioning.
5. Shine bright (low heat) flashlight onto front of LCD. With computer powered ON verify if a faint image is visible. Yes LCD panel functional but backlight is missing or dim. Remove LCD panel and inspect and reseat the following cable connections: X03 -Backlight power cable between backlight board and LCD panel. -Vertical sync cable between backlight board and LCD panel. -DC power cable to backlight board and power supply. Replace any damaged cable. Reinstall LCD panel and go to step 6.
Noise / Unstable Flickering Unlikely cause: camera, microphone Quick Check Symptoms Quick Check Noise / Unstable Flickering • Unstable image • Flickering image • Humming noise from display • High frequency noise from display 1. Check for Software Update. 2. Verify Mac OS X version installed is the build version supported on the hardware. Make sure customer didn’t migrate over their old version of Mac OS. See kBase #TS3101: Mac (Late 2009): Using the correct Mac OS X system software. 3.
5. Shine bright (low heat) flashlight into front of LCD. Verify if an image is being displayed when flickering issue is occurring. Image present but backlight is flickering. Replace vertical sync cable (between LCD panel and backlight board) and retest. X03 No Replace internal DisplayPort cable (between logic board and LCD panel), and retest. X03 Yes Noise seems to be generated by vertical sync cable. Inspect and replace. X03 No Noise is from another source. Go to step 7. 7.
LCD Image Issues Unlikely cause: power supply, hard drive, optical drive, fans, speakers, camera, microphone Quick Check Symptom Quick Check LCD Issues • Incorrect/missing colors • Distorted/blurred image • Pixel anomalies • Vertical/horizontal lines • Non-uniform brightness • Flickering 1. Check for Software Update. 2. Verify Mac OS X version installed is the build version supported on the hardware. Make sure customer didn’t migrate over their old version of Mac OS.
Incorrect/Missing Colors Unlikely cause: power supply, hard drive, optical drive, fans, speakers, camera, microphone Quick Check Symptoms Quick Check Incorrect/Missing Colors • Wrong color display • Color/contrast issues 1. Allow display to reach normal operating temperature for about 15 minutes before evaluating front-of-screen performance. 2. Verify if System Preferences > Display settings are configured to use default display profile. 3.
Distorted/Blurred Image Unlikely cause: power supply, hard drive, optical drive, fans, speakers, camera, microphone Quick Check Symptoms Quick Check Distorted/Blurred Image • Text and graphics appear fuzzy • Image corrupted 1. Check for Software Update. 2. Verify Mac OS X version installed is the build version supported on the hardware. Make sure customer didn’t migrate over their old version of Mac OS. See kBase #TS3101: Mac (Late 2009): Using the correct Mac OS X system software. 3.
4. Verify if issue is still visible after reinstalling internal DisplayPort cable and vertical sync cable. Yes Replace LCD panel. If issue still present go to step 5. No Issue resolved. 5. Remove video card, inspect connector for damage or corrosion then reinstall. Verify if issue still occurs. Yes Replace video card. No Issue likely caused by poor video card connection. 6. Verify if distorted/blurred image issue is still present. Yes Replace logic board. Go to step 7. No Issue resolved. 7.
Pixel Anomalies Unlikely cause: logic board, power supply, hard drive, optical drive, fans, speakers, camera, microphone Quick Check Symptoms Quick Check Pixel Anomalies • Dark dot anomalies • Bright dot anomalies • Debris on inside surface of glass panel • Debris on surface of LCD panel 1. Clean outside surface of glass panel. 2. See kBase #HT1721: About LCD display pixel anomalies. Deep Dive Check 1. Determine if “defects” are dust/ debris on surface of glass panel or LCD.
Vertical/Horizontal Lines Unlikely cause: power supply, hard drive, optical drive, fans, speakers, camera, microphone Quick Check Symptoms Quick Check Vertical/Horizontal Lines • Vertical lines • Horizontal lines 1. Boot from install DVD to determine if potential software issue exists. 2. Verify if issue is visible on an external display. Deep Dive Check 2009-12-16 Result Action 1. Boot from Install DVD and verify if issue is still visible. Yes Go to step 2.
6. Isolate with only one memory module installed, then with the other one. Test with knowngood memory. Verify if issue only happens with specific RAM module(s). Yes Replace affected RAM module. No Go to step 7. 7. Isolate with one known-good memory module installed in one memory slot. Repeat by testing in other memory slots Verify if issue only happens with specific memory slot of logic board. Yes Replace logic board and retest. No Go to step 8. 8.
Non-Uniform Brightness Unlikely cause: power supply, hard drive, optical drive, fans, speakers, camera, microphone Quick Check Symptoms Quick Check Non-Uniform Brightness • Brightness not uniform • Color not-uniform 1. Verify System Preferences > Displays > Brightness slider is set above minimum. 2. Allow 15 minutes for backlight to reach normal operating temperature and output before evaluating display. 3. Visually inspect glass panel for presence of dust, cigarette smoke, or other contaminants.
Cosmetic Defects Symptoms Quick Check Cosmetic Defects to LCD • Cracked glass panel • Cracked LCD • Scratched LCD polarizer • Scorched or melted LCD • LCD impact damage • Foreign material on LCD or back side of glass panel. 1. Replace glass panel. Refer to Take Apart/General Information/How to Remove a Broken Glass Panel 2. Determine if damage was caused by user environment, accidental damage, or abuse.
Mass Storage Hard Drive Not Recognized Unlikely cause: LCD panel, power supply, fans, speakers, camera, microphone Quick Check Symptoms Quick Check Drive Not Recognized Drive No Boot • Flashing Question Mark • Boots to Grey Screen • Boots to Blue Screen • Boots to Prohibitory Symbol (Review kBase #HT2674: Intelbased Mac: Startup sequence and error codes, symbols) 1. Use a known-good mouse. A stuck mouse button will not allow boot. 2. Boot from Install DVD. Use Disk Utility to verify S.M.A.R.T.
2009-12-16 6. Reseat hard drive SATA cable at logic board and hard drive connections, and verify if computer starts up. Yes Go to step 8. No Replace SATA cable. Go to step 8. 7. Test with known-good bootable hard drive. Verify if system boots successfully and that Disk Utility “Verify” function reports no errors. Yes Install user’s hard drive. Go to step 9. No SATA cable verified or replaced and known-good hard drive installed. Replace logic board. Go to step 1. 8. Reboot computer.
Hard Drive Read/Write Errors Unlikely cause: LCD panel, power supply, fans, speakers, camera, microphone Quick Check Symptoms Quick Check Drive Read/Write Error Drive Bad Sector/Defective Drive Formatting Issues • Cannot save documents • Read/write error message • Hang when accessing or saving data 1. Boot from Install DVD. Use Disk Utility to verify S.M.A.R.T. status of hard drive. 2. Use Disk Utility to repair disk. 3.
7. Test with known-good hard drive. Verify if system boots successfully and Disk Utility “Verify” function reports no errors. Yes Reinstall user’s hard drive, go to step 8. No SATA cable verified or replaced and known-good hard drive installed. Replace logic board. 8. Reboot computer. Verify if system boots successfully and that Disk Utility “Verify” function reports no errors. Yes Issue resolved. No User’s hard drive appears to be defective. Go to step 9. 9. Replace user’s hard drive.
2009-12-16 3. Restart the computer. Verify if the noise is still present. Yes Go to step 4. No Issue resolved. Return system to user. 4. With user’s permission, erase hard drive and reinstall Mac OS. Verify if installation process completes. Yes Go to step 3. No Replace hard drive. Go to step 5. 5. With replacement hard drive installed, reboot computer. Verify if noise is still present. Yes Replacement hard drive did not resolve issue. Go to step 6. No Issue resolved by replacing hard drive.
Optical Drive Not Recognized Unlikely cause: LCD panel, power supply, fans, speakers, camera, microphone Quick Check Symptoms Quick Check Drive Not Recognized/Mount • Discs inject and eject, but do not appear in Finder 1. Use System Profiler Serial-ATA section to see if optical drive appears. 2. System Profiler Serial-ATA section will show any media inserted. 3. Check Finder Preferences and make sure “CD’s, DVD’s and iPods” is checked under “Show these items on the desktop” in the General section.
5. Connect original optical drive to known-good SATA cable. Verify if both CD and DVD media are read reliably. Yes SATA cable issue. Replace SATA cable. Go to step 6. X03 No Replace optical drive. J03 6. Test read compatible knowngood CD and DVD media (Install DVD). Verify if media is recognized and reads reliably. Yes Issue resolved. No Replace optical drive.
4. With known-good optical drive installed, test for media inject/ eject. Verify if drive accepts and ejects known-good media. Yes Known-good optical drive resolved inject/eject issue. Replace optical drive. J03 No Go to step 7. 5. Inspect optical drive slot during disc insert/eject. Verify if discs can be inserted easily. Yes Go to step 6. No Verify correct optical drive bezel alignment with enclosure. Reseat optical drive then retest. If issue persists, replace optical drive. 6.
Deep Dive Check Result Action 1. Verify if media is free to spin without optical drive scraping edge or surface of media. Yes Go to step 2. No Replace optical drive. 2. Test both CD and DVD media. Verify if drive can read both CD and DVD media. Yes Go to step 6. No If both types of media fail, check that Finder Preferences are set to “show CD’s and DVD’s”, then go to step 3. Code J05 J03 If only one type of media fails, drive has a laser pickup issue. Replace optical drive. 3.
Optical Drive Not Performing to Specifications Unlikely cause: LCD panel, power supply, fans, speakers, camera, microphone Quick Check Symptoms Quick Check Optical Drive Not Performing to Specifications • Read or write speeds slower than expected 1. Test optical media in another computer of the same type to rule out media issue. 2. For write issues, check with known-good media that performs well in another computer and drive of the same type. Deep Dive Check 1. Test both CD and DVD media.
6. Media that is out of balance may not perform well at higher speeds even though higher speeds may be supported by the optical drive. Verify if slowing requested burn speed allows discs to be written reliably. Yes Media issue. No repair necessary. No Go to step 7. 7. Test write data to compatible CD and DVD media. Verify burned media is recognized and reads reliably. Yes Issue resolved.
2. Reseat optical drive in enclosure. Does noise issue remain? Yes Go to step 3. No Issue resolved by reseating drive in enclosure. 3. Install known-good optical drive in enclosure. Does noise issue remain? Yes Go to step 4. No Replace optical drive. 4. Compare system with similar model for optical drive noise in operation and verify that noise level is similar. Yes Noise level of optical drive appears to be within specification. Return system to user.
3. Verify if SD card now ejects and inserts without issue. Yes Issue resolved by SD board alignment. No Replace SD board. M17 SD Card Not Recognized Unlikely cause: LCD panel, logic board, optical drive, hard drive Quick Check Symptom Quick Check SD Card Not Recognized • Card does not show up on desktop or in System Profiler 1. Insert user’s SD card into a known-good system and verify that it functions properly. If card cannot be read, contact card manufacturer for support options. 2.
4. Run System Profiler and verify if SD card reader is now listed in USB devices. Yes Go to step 5. No Reseat SD cable at SD board and logic board If issue persists, replace SD cable. M17 M17 M17 If issue persists, replace SD board. If issue persists, replace logic board. 5. Verify if a known-good unlocked SD card can now be correctly read and written. Yes Go to step 6. No Replace SD board. 6. Lock the user’s SD card and verify if it can’t be written. Yes Issue resolved. No Replace SD board.
Communications AirPort/Bluetooth Issues Quick Check Symptoms Quick Check AirPort/Bluetooth Issues • Unable to join networks or pair devices • AirPort card not available • Intermittent device or connection dropouts • Limited wireless range 1. Verify that AirPort or Bluetooth is turned ON, and for AirPort issues make sure that a network is selected. 2. For AirPort, check if the wireless access point requires special connection and encryption protocols. 3.
2009-12-16 3. After cable has been replaced, verify if AirPort card is now listed in Apple System Profiler. Yes Issue resolved by replacing AirPort cable. X03 No Replace AirPort card carrier board and re-test. If issue persists (card not seen on bus), replace AirPort card. M11 4. Enable AirPort and verify if known local AirPort networks are available, or create a computer-to-computer network with another Macintosh computer using AirPort. See http://docs. info.apple.com/article. html?path=AirPort/5.
AirPort Card Kernel Panic Quick Check Symptoms Quick Check AirPort Card Kernel Panic • Kernel Panic on startup • Kernel Panic or freezing while attempting to connect to WiFi networks • Kernel Panic while transferring data on WiFi networks 1. Isolate OS by starting up from original Install media for this computer, a same-model computer in Target Disk Mode, or compatible known-good OS on an external drive. AirPort and Bluetooth services are available when booted from the Install disk. 2.
Ethernet Port/Device Issue Unlikely cause: LCD display, power supply, hard drive, optical drive, fans Quick Check Symptoms Quick Check Ethernet Port/Device Issue • No Ethernet device present • Unable to access network resources • Ethernet device shows no connection • Ethernet device unable to an IP address • Slow network performance 1. Check Ethernet cable for damage. Try a known good Ethernet cable – CAT5 or better recommended for 100Mbps+ connections. 2.
4. Check for speed and duplex issues on network. Open System Preference > Network; click the Advanced button, then the Ethernet tab. Verify if the speed and duplex reported are what is expected. Yes Go to step 5. No Change speed and duplex settings. See article http:// docs.info.apple.com/article. html?path=Mac/10.5/ en/8711.html. Go to step 6. 5. Check for MTU (Maximum Transmission Unit) issues. See kBase #HT2532: Mac OS X: How to change the MTU for troubleshooting purposes.
Deep Dive Check 2009-12-16 Result Action 1. Without any wired input devices connected, and with a wireless mouse in discoverable mode, startup the computer. Verify if computer shows the Bluetooth Mouse Setup Assistant. Yes Bluetooth hardware is active. Go to step 6. No Go to step 2. 2. Connect a wired mouse and run Apple System Profiler. Verify if Bluetooth interface is listed under USB in System Profiler. Yes Bluetooth hardware is present. Go to step 6.
8. With wireless mouse paired, verify if the mouse stays connected. Yes Issue resolved. No Inspect and reseat Bluetooth antenna cable. Replace a damaged antenna cable, or Bluetooth board if its antenna connector is damaged. Go to step 9. 9. With wireless mouse paired, verify if the mouse stays connected. Yes Antenna issue. Issue resolved. No Go to Wireless Input Device Loses Connection symptom flow.
2009-12-16 2. Make sure device is on. In System Preferences > Bluetooth, select device and from the Action menu (gear) choose “Connect”. Verify if device connects successfully. Yes Go to step 7. No Delete pairing in System Preferences. Go to step 3. 3. With the device on, run Bluetooth Setup Assistant. Verify if you can successfully pair the device. Yes Go to step 7. No Restart computer. Go to step 4. 4. With device on, run Bluetooth Setup Assistant. Verify if you can successfully pair device.
Uncategorized Symptoms Quick Check Symptoms Quick Check Uncategorized Symptoms • Unable to locate appropriate symptom code. 1. Verify System Preferences/Network settings are configured appropriately to support communication method. 2. For Ethernet connection issues verify that cable being used functions when used with another known-good system. 3. For wireless connection issues review user environment to determine whether possible interference from other 2.
Input/Output Devices Apple Remote Inoperable Unlikely cause: LCD display, power supply, hard drive, optical drive, fans Quick Check Symptoms Quick Check Apple Remote Inoperable • Apple Remote doesn’t bring up Front Row • Apple Remote doesn’t control iTunes • Apple Remote doesn’t control computer volume 1. Make sure Apple Remote is within 30 ft. of computer, and has an unobstructed line-of-sight to computer. 2. Make sure lens end of Apple Remote is pointing directly at front of computer. 3.
2009-12-16 4. After clicking “Unpair”, verify if the computer now responds to the Apple Remote. Yes Pairing issue. Issue resolved. No Possible IR board issue. Go to step 5. 5. Open Apple System Profiler. Verify if “IR Receiver” is listed in USB list of devices. Yes IR board reporting on USB bus. Check for lens block. Go to step 6. No Inspect and reseat IR cable connection to logic board. Go to step 7. 6.
Audio: Microphone Unlikely cause: LCD display, power supply, hard drive, optical drive, fans Quick Check Symptoms Quick Check Audio: Microphone • Microphone not working • Microphone audio garbled • No sound 1. Verify that no tape, sticky notes, or other objects are blocking microphone located on top of computer near camera. Microscopic perforations on top of computer must be free of obstructions in order for microphone to function. 2. Go to System Preferences > Sound > Input.
5. Inspect microphone cable routing and verify if cable is pinched or damaged. 6. Record sound sample using GarageBand or iMovie. Verify if sound quality of sound sample is normal during playback. Yes Replace rear housing (microphone cable not available separately). No Go to step 6. Yes Microphone circuitry OK. Return system to user. No Replace logic board.
3. Connect external speakers or headphones to audio-out port and play a known-good sound file. Verify if sound quality is acceptable. Yes Suspect bad speaker. Go to step 4. No Audio CODEC or amplifier issue suspected. Replace logic board and retest. M09 4. Inspect LEFT and RIGHT speaker cones and speaker connection cable for damage. Verify if speakers have visible damage. Yes Replace damaged speaker. Retest. L11 No Go to step 5. 5.
2. Make sure no cables are connected to external sound input/output ports. Go to System Preferences > Sound > Output and verify that “Internal speakers” is an available option. Yes Go to step 3. No If “Headphones” is the only available sound output device, replace audio cable. If “Digital output” is the only available sound output device, reseat audio cable to logic board. If issue persists, replace audio cable. L11 L11 M09 If issue persists, replace logic board. 2009-12-16 3.
Camera Issues Unlikely cause: LCD display, power supply, hard drive, optical drive, fans, speakers, microphone Quick Check Symptoms Quick Check Camera Issues • Camera not detected • No green LED for camera • Excessive blooming • Poor White Balance • Poor Focus • Green image • Image distortion 1. Launch Apple System Profiler and confirm that system’s USB hub and built-in camera are visible. 2. Verify camera lens and glass panel are clean and free of contaminants. Clean glass panel if needed. 3.
FireWire Device Not Recognized Unlikely cause: LCD display, power supply, hard drive, optical drive, fans Quick Check Symptoms Quick Check FireWire Device Not Recognized • FireWire hard drive not recognized • FireWire optical drive not recognized • FireWire camera not recognized • FireWire printer not recognized 1. For external FireWire drives, make sure any external power source is plugged in and operating to isolate a power issue with the device. 2.
2009-12-16 4. Verify if FireWire device is recognized with a knowngood FireWire cable on user’s computer. Yes FireWire cable issue. Issue resolved. No FireWire device may need additional power. Go to step 5. 5. Using a powered FireWire hub, and having installed any software or firmware updates for the device, verify if FireWire device is now recognized. Yes Device recognized. Required additional power from hub or update. Issue resolved.
USB Device Not Recognized Unlikely cause: LCD display, power supply, hard drive, optical drive, fans Quick Check Symptoms Quick Check USB Device Not Recognized • USB wired keyboard/mouse not recognized • USB external drive not recognized • USB camera not recognized • USB printer not recognized 1. Reset SMC. 2. For printers and external USB drives, make sure any external power source is plugged in and operating to isolate a power issue with device. 3. The iMac has 4 USB ports on rear of computer.
3. Verify if a known-good USB keyboard and mouse are recognized. 2009-12-16 Yes Test original USB mouse and keyboard. Replace if still not recognized. Go to step 5. No External USB ports not functioning. Replace logic board. 4. With no USB devices connected, restart computer. Verify if Bluetooth Mouse Setup assistant launches after startup. Yes Bluetooth detected. Go to step 3. No Bluetooth not recognized. Internal and external USB not functioning. Replace logic board. M15 5.
Wired Keyboard Does Not Function Properly Unlikely cause: LCD display, power supply, hard drive, optical drive, fans Quick Check Symptoms Quick Check Wired Keyboard Does Not Function Properly • Some or all keys on the keyboard don’t work • Eject key or Caps Lock key doesn’t seem to work • Some keys don’t work as expected 1. Reset SMC 2. Open System Preferences > Universal Access > Mouse & Trackpad and verify that Mouse Keys is turned OFF.
4. Open System Preferences > Speech. Verify if the “Speak selected text when the key is pressed” checkbox is selected. 2009-12-16 Yes The key combination to speak text cannot be used for any other purpose. Either disable, or change to a more rare key combination (including Shift, Command, Option and Control). No Go to step 6. 5. With optical media in the drive, hold the media Eject key. Verify if the eject symbol appears on screen and that optical media is ejected if present.
Keyboard: Specific Keys Do Not Respond Unlikely cause: LCD display, power supply, hard drive, optical drive, fans Quick Check Symptoms Quick Check Keyboard: Specific Keys Do Not Respond • One or more keys do not respond when pressed • Key sticks • Keycap missing 1. If wireless keyboard is being used verify that it is properly paired with computer. Go to Wireless Input Device Doesn’t Pair symptom flow to resolve pairing issues. 2.
Deep Dive Check Result 1. Verify if computer recognizes keyboard or mouse when plugged into rear USB ports on back of iMac. Yes Action Test device in all USB ports to ensure all other USB ports are working as expected. Replace logic board if any USB port on rear fails. Replace keyboard if any USB port on keyboard fails. Code M15 K11 Go to step 2. 2009-12-16 No Go to USB Device Not Recognized symptom flow. 2. Verify if keyboard is working as expected. Yes Go to step 3.
Uncategorized Symptoms Quick Check Symptoms Quick Check Uncategorized Symptoms • Unable to locate appropriate symptom code. 1. Reset SMC. 2. Verify that external I/O device (where applicable) works on a known-good, same-model computer. 3. For third party I/O devices, make sure necessary software is installed and up-to-date, and that device is supported with user’s system. Deep Dive Check Result 1. Verify if existing symptom code applies to issue reported by user.
Mechanical Noise/Hum/Vibration Unlikely cause: LCD panel, glass panel, enclosure, cables Quick Check Symptoms Quick Check Noise/Hum/Vibration • Buzzing noise • Rattling noise • Ticking noise • Squeaking noise 1. Verify that the vents on the bottom and back of the system are free of dust and other obstructions that might inhibit proper airflow through the system. 2. Launch Applications/Utilities/Activity Monitor. Determine whether an application or process is consuming a high percentage of CPU bandwidth.
Deep Dive Check 1. Verify if any tape, gasket, cable label, or cable is touching the fan blades and causing a ticking noise. Action Yes Secure the material so it doesn’t touch fan blades. If tape adhesive has lost its stickiness, replace that section of tape. No Go to step 2. Yes Go to ASD Error Codes table to decode error. Follow instructions in table for resolving error, then retest. No Go to step 3. Yes Reset SMC by disconnecting power cord for ~15 seconds then retest.
2009-12-16 8. Reinstall fans while carefully ensuring that there are no cables routed under or near fan assembly that might cause interference with fan blades. After reassembling system verify if noise issue is resolved. Yes Noise issue resolved. Suspect issue caused by interference from wiring or possible distortion or fan housing when installed in system. No Go to step 9. 9. Temporarily remove LCD display then power ON system. Verify if source of noise can be located.
Fan Failures / Thermal Issues Unlikely cause: speakers Quick Check Symptoms Quick Check Fan Failures / Thermal Issues • System feels very hot • Fan(s) not operating • Fan(s) running fast • System is noisy 1. Verify that vents on bottom and back of system are free of dust and other obstructions that might inhibit proper airflow through the system. 2. Verify that computer is not exposed to direct sunlight which may heat up enclosure, making it feel hot to the touch. 3.
3. Verify if any tape, gasket, cable label, or cable is touching the fan blades and causing a ticking noise Yes Secure the material so it doesn’t touch fan blades. If tape adhesive has lost its stickiness, replace that section of tape No Go to step 4. 4. Remove fans and rotate blades. Check for any dust that could be clogging the fans. Verify if fan blades spin smoothly without interference from fan housing and fan blades are all intact. Yes Go to step 5. No Replace affected fan(s). 5.
Physical Damage Symptoms Quick Check Physical Damage • Broken glass • Bent stand • Broken hinge • Stripped screw/head • Stripped screw boss • Dent or scratch to chassis 1. Verify if damage caused by user environment, accidental damage, or abuse. If applicable inform the user that Apple does not warrant damage caused by accident, abuse, misuse, flood, fire, earthquake, or other external causes. For more information refer to: http://www.apple.com/legal/warranty Uncategorized Symptoms Check 1.
Service Source Take Apart iMac (27-inch, Late 2009) © 2009 Apple Inc. All rights reserved.
General Information Opening the Unit • • • The iMac (27-inch, Late 2009) has a glass panel that attaches to the front, which must be removed prior to replacing any module on the unit. Important: The glass panel should only be removed by Apple-authorized technicians. Read and follow all of the cleaning and handling recommendations to prevent damaging the glass and LCD panel. Follow ESD precautions when the front bezel and the LCD display are removed.
Required Special Tools for Glass Panel Special tools are required to remove, handle and clean glass panel. • 922-8252 – Suction cups, Pkg of 2 • 922-8253 – Gloves, lint-free, anti-static, Pkg of 2 • 922-8258 – ESD bags, 24”x20”, Pkg of 5. To prevent buildup of static charges which may attract dust particles, store LCD panel in an ESD bag when it is removed from unit.
Cleaning & Handling the Glass Panel Follow the cleaning procedures in this manual to ensure the glass panel is free of dust and other particles before returning the computer to the customer. • The glass panel is not tempered and will break into sharp pieces of mishandled. A scratched or broken glass panel is not covered under warranty. • Removing the glass panel requires special tools such as lint-free gloves, rubber suction cups, microfoam storage bags, and the iKlear cleaning solution.
Handling a Broken Glass Panel The glass panel is not tempered and will break into sharp pieces if mishandled. If the glass is broken it must be carefully removed from the unit to prevent irreparable damage to the front surface of the LCD. If the front surface of the LCD is scratched by broken glass, the LCD may need to be replaced. How to Remove a Broken Glass Panel A shattered panel can be removed using safety glasses, packing tape, and leather gloves. 1. Put on safety glasses and leather gloves. 2.
3. Peel protective covering off the front of the glass. Remove and discard any large pieces of broken glass. 4. Apply a strip of packing tape horizontally across the top and bottom of the glass panel. Next, apply the tape diagonally, across the broken glass panel, forming an “X.
5. Continue applying tape horizontally, thoroughly covering the broken glass. Most of the glass will still be attached to the steel ring that runs around the perimeter of the glass panel. 6. Use a black stick to pry the glass panel off the magnets on the rear housing.
7. Lift the entire glass panel off the housing. 8. Place the broken glass inside a large box, label the box, and dispose of it properly.
9. Using a whisk broom, clean the work surface of tiny glass particles. 10. Stand the iMac up and use a lint free cloth to carefully brush any of the particles off of the iMac onto the table. Clean the work surface again. 11. When the repair is finished the cloth should be disposed of immediately. 12. Use a broom and dustpan to sweep up as much of the broken glass as possible. Glass fragments may have traveled several feet from the location of the glass panel, so be sure to thoroughly clean the entire area.
Safety Warning: HIGH VOLTAGE: The AC/DC power supply PCB remains powered up whenever the system is plugged in, whether or not the system has been turned on. Use extreme caution when troubleshooting the system with the front bezel removed. • Don’t work alone. In the event of an electrical shock it is important to have another individual present who can provide assistance. • Keep one hand in your pocket when working on any iMac system that is plugged in.
Logic Board Handling IMPORTANT: Always use two hands to support the logic board, video card and heatsinks. Handling the board incorrectly could flex the board and damage the chips and circuitry. Never handle the board by the heatsink or video card. Reassembly Steps When there are no replacement steps listed, replace parts in the exact reverse order of the Removal procedure.
Access Door First Steps • • Shut down the computer Place the computer on a clean, flat surface Tools • • ESD mat and wrist strap Phillips #2 screwdriver 2009-12-16 iMac (27-inch, Late 2009) Take Apart — Access Door 114
Removal 1 Raise the stand and loosen 3 captive screws. 2 Remove the access door. Important: To ensure proper cooling, the iMac should not be operated without access door installed.
Memory First Steps Remove • Access door Tools • ESD mat and wrist strap 2009-12-16 iMac (27-inch, Late 2009) Take Apart — Memory 116
Removal 1 Untuck tabs in the memory compartment. 2 Pull tab to eject the installed memory module. Reassembly 1 Orient notch on memory with notch in the memory compartment. 2 Press memory firmly into slot until you hear a click. 3 Tuck black plastic tabs into memory compartment. 4 Replace access door and tighten 3 screws. Important: To ensure proper cooling, the iMac should not be operated without access door installed.
Glass Panel First Steps • • • • Shut down unit. Wait 10 minutes. Unplug all cables. Put on ESD strap. Caution: The glass panel is not tempered and will break into sharp pieces if mishandled. A scratched or broken glass panel is not covered by warranty. Important: This procedure requires special tools, which are offered individually or as part of a cleaning kit.
Removal Glass panel is held in place by 14 magnets on the front bezel. 1 Lay computer on its back and press clean suction cups in opposite corners on glass panel. 2 Lift panel toward you, being careful of tabs along bottom of glass. 3 Carefully lift glass up and off rear housing. Apple strongly recommends wearing clean, lint-free gloves whenever handling the glass panel, to reduce cleaning required on reassembly. 4 Remove suction cups and slide glass into protective microfoam bag.
Reassembly 1 Remove protective covering from silicone roller and sticky sheet. 2 Clean silicone roller by rolling it back and forth a few times on sticky sheet. If sticky sheet looks dirty, use a new one. If roller is no longer tacky, wash it in warm soapy water. If tackiness does not return, replace silicone roller. 3 Wearing clean gloves, set display in upright position to minimize settling of dust.
5 Remove glass panel from microfoam bag. 6 Clean INSIDE of glass panel with the silicone roller to remove dust. Note: If fingerprints or oils are on inside of glass, clean first with isopropyl alcohol. 7 Notice tabs along bottom of glass panel that align with rear housing.
8 Wearing clean gloves, place glass directly onto unit, aligning tabs along the bottom with notches in rear housing. Magnets will catch it and hold it in place. Make sure the glass is flush with the rear housing after it is reinstalled. 9 Clean outside of glass panel with a clean microfiber cloth. If necessary, use a small amount of iKlear polish. Wipe glass until there is no longer any residue or haze. 10 Inspect glass for any remaining dust, fingerprints, or a hazy residue.
Camera First Steps Remove • Glass panel Tools • • Magnetized Torx T10 screwdriver ESD-wrist strap and mat 2009-12-16 iMac (27-inch, Late 2009) Take Apart — Camera 123
Removal 1 • Remove 2 T10 screws: 922-9239 2 Lift bracket out of rear housing. 3 Disconnect camera cable from camera board.
LCD Panel First Steps Remove • Glass panel Important: To prevent buildup of static charges which may attract dust particles to the surface of the display, store LCD panel in an anti-static bag whenever it has been removed from the computer.
Removal 1 Remove 8 T10 screws: 922-9246 2 With a black stick, gently pry the LCD panel forward slightly to access cables inside.
3 Disconnect the vertical sync cable from the backlight board. Pull cable straight up & out of connector. 4 Pull panel forward a few inches.
5 Lift the LCD panel off housing. Replacement Note: If installing a new LCD panel, disconnect the DisplayPort cable and the vertical sync cable and transfer to new panel. Secure with black mylar tape included with new LCD panel.
Note: A replacement LCD panel includes: • display temp sensor and retaining clip • backlight power cable • mylar tape Reassembly 1 The panel is heavy! Set panel on a box or something equivalent to easily connect DisplayPort cable to logic board. Note: To avoid scratching the enclosure, protect it with antistatic bag / cloth.
2 Lean panel toward logic board and connect DisplayPort cable. 3 Carefully lift panel up and off box and into channel on rear housing. Note: To avoid scratching the enclosure, protect it with antistatic bag / cloth. 4 • • • Connect 3 display cables: backlight power display temp sensor vertical sync cable 5 Replace 8 screws.
Vertical Sync Cable First Steps Remove • Glass panel • LCD panel Tools No tools are required. Removal 1 Peel back any black mylar securing cable to LCD panel. 2 Pull cable straight out of connector.
LCD Temp Sensor Cable First Steps Remove • Glass panel • LCD panel Tools No tools are required for this procedure. Removal Peel back black foam gasket and remove temp sensor cable from sensor clip. Note: The LCD temp sensor is included with a replacement panel.
DisplayPort Cable First Steps Remove • Glass panel • LCD panel Tools No tools are required for this procedure. Removal 1 Peel back any mylar tape securing cable to LCD panel. 2 Press in on side release clips and then gently pull down to disconnect DisplayPort cable.
Audio Ports and Cable First Steps Remove • Glass panel • LCD panel Tools • • Torx T10 screwdriver ESD mat and wrist strap 2009-12-16 iMac (27-inch, Late 2009) Take Apart — Audio Ports and Cable 134
Removal 1 • 2 Disconnect audio cable from logic board and remove 2 T10 screws. 922-9245 Wiggle ports out of rear housing.
Bluetooth Antenna First Steps Remove • Glass panel • LCD panel Tools • • Magnetized Torx T8 screwdriver ESD-wrist strap and mat 2009-12-16 iMac (27-inch, Late 2009) Take Apart — Bluetooth Antenna 136
Removal 1 Disconnect the blue antenna. 2 Remove 2 T8 screws on antenna board: 922-4723 • 3 Remove antenna from housing.
AirPort Antenna First Steps Remove • Glass panel • LCD panel Tools • • Magnetized Torx T8 screwdriver ESD-wrist strap and mat 2009-12-16 iMac (27-inch, Late 2009) Take Apart — AirPort Antenna 138
Removal 1 Disconnect black antenna cable from AirPort card. The other AirPort antenna is part of the rear housing. WARNING: Be careful not to damage AirPort antenna connectors as it may induce antenna or rear housing replacement (lower antenna is part of rear housing). 2 • 3 Remove 2 T8 antenna screws: 922-4723 Remove antenna from housing.
Bluetooth Board First Steps Remove • Glass panel • LCD panel Tools • • Magnetized Torx T8 screwdriver ESD-wrist strap and mat 2009-12-16 iMac (27-inch, Late 2009) Take Apart — Bluetooth Board 140
Removal 1 • • 2 • Disconnect 2 cables: Bluetooth antenna (blue) Bluetooth data cable Remove 1 T8 screw: 922-9247 2009-12-16 iMac (27-inch, Late 2009) Take Apart — Bluetooth Board 141
AirPort Card First Steps Remove • Glass panel • LCD panel Tools • • Magnetized Torx T6 screwdriver ESD-wrist strap and mat 2009-12-16 iMac (27-inch, Late 2009) Take Apart — AirPort Card 142
Removal 1 • 2 Remove 1 T6 screw. 922-8579 Disconnect 2 AirPort antenna cables. WARNING: Be careful not to damage AirPort antenna connectors as it may induce antenna or rear housing replacement (lower antenna is part of rear housing). 3 Hold the AirPort card by edges and pull it out of the AirPort card carrier slot.
AirPort Cable First Steps Remove • Glass panel • LCD panel Tools • ESD-wrist strap and matt 2009-12-16 iMac (27-inch, Late 2009) Take Apart — AirPort Cable 144
Removal With a black stick, carefully pry AirPort cable straight up and off AirPort carrier board and logic board.
AirPort Carrier Board First Steps Remove • Glass panel • LCD panel • AirPort card Tools • • Magnetized Torx T10 screwdriver ESD-wrist strap and mat 2009-12-16 iMac (27-inch, Late 2009) Take Apart — AirPort Carrier Board 146
Removal 1 • • Disconnect 3 cables: 2 AirPort antennas 1 AirPort cable WARNING: Be careful not to damage AirPort antenna connectors as it may induce antenna or rear housing replacement (lower antenna is part of rear housing).
LED Backlight Board First Steps Remove • Glass panel • LCD panel Warning: HIGH VOLTAGE Use extreme caution when working around the capacitors in the top right corner of the backlight board, which contain high-voltage that may remain charged for several minutes even when computer is unplugged. Never touch the leads on the top side of the backlight board.
Removal Warning: HIGH VOLTAGE If the computer is shut down by removing the power cord, allow the backlight board a good 2-3 minutes to discharge the capacitors before handling it. However, if you select “Shut Down” via the Apple menu, the computer will discharge the capacitors almost immediately. 1 • 2 Remove 4 T10 screws. 922-6850 Turn over board and disconnect backlight power cable.
Power Supply First Steps Remove • Glass panel • LCD panel WARNING: HIGH VOLTAGE Use extreme caution when working around the power supply, which contains a high-voltage capacitor that may remain charged for several minutes even when the computer is unplugged. Never touch the leads on the top side of the power supply, especially those near the warning sign.
Removal WARNING: HIGH VOLTAGE If the computer is shut down by removing the power cord, allow the power supply a good 2-3 minutes to discharge the capacitors before handling it. However, if you select “Shut Down” via the Apple menu, the computer will discharge the power supply capacitor almost immediately. 1 • Remove 4 T10 screws.
2 • • 3 Disconnect 2 cables: DC power AC power inlet Lift power supply out of rear housing. Reassembly 1 Route AC power inlet cable over power supply pressure wall. 2 Connect AC power cable and tuck edge of connector under logic board. 3 Press cable into notches on pressure wall. 4 Replace screws.
Backlight Pressure Wall First Steps Remove • Glass panel • LCD panel • Power supply Tools • ESD mat and wrist strap 2009-12-16 iMac (27-inch, Late 2009) Take Apart — Backlight Pressure Wall 153
Removal 1 Lift pressure wall off posts in the rear housing.
Power Supply/Hard drive Pressure Wall First Steps Remove • Glass panel • LCD panel • Power supply Tools • ESD mat and wrist strap 2009-12-16 iMac (27-inch, Late 2009) Take Apart — Power Supply/Hard drive Pressure Wall 155
Removal Lift pressure wall off posts in the rear housing. Reassembly 1 Note: Make sure the camera and AC power cables are routed correctly around the pressure wall. 2 The camera cable runs along the right side of the pressure wall, next to hard drive, and through bottom notch in pressure wall.
3 Connect AC inlet cable and then press cable into notches on top of the pressure wall.
Hard Drive First Steps Remove • Glass panel • LCD panel Tools • • Magnetized Torx T10 screwdriver ESD-wrist strap and mat 2009-12-16 iMac (27-inch, Late 2009) Take Apart — Hard Drive 158
Removal 1 • 2 • • • Remove 2 T10 screws from mounting bracket: 922-6850 Disconnect 3 cables: HD power cable HD data cable HD temp sensor 3 Slide hard drive up slightly to lift mounting pins out of 2 rubber grommets 4 Replacement Note: If installing a replacement hard drive, disconnect hard drive sensor cable from top of logic board. Do not reuse the temp sensor cable. Each drive vendor includes a sensor cable with their replacement drive.
Reassembly 1 • • If you are installing a replacement hard drive, transfer the following: hard drive bracket 2 bracket screws 922-9136 • 2 screw pins 922-7001 2 Note: Each hard drive vendor has a unique sensor cable. Do not mix and match temp sensor cables.
Hard Drive Sensor Cable First Steps Remove • Glass panel • LCD panel • Hard drive Tools • ESD-wrist strap and mat 2009-12-16 iMac (27-inch, Late 2009) Take Apart — Hard Drive Sensor Cable 161
Removal 1 Disconnect hard drive sensor cable from top of top of logic board and from side of hard drive. Note: Do not reuse temp sensor cable. A new sensor cable is included with each replacement drive. Each hard drive manufacturer has a unique sensor cable.
Optical Drive First Steps Remove • Glass panel • LCD panel Important: When servicing the optical drive, handle it by the edges only. Pressing elsewhere on the drive could damage the internal mechanism.
Removal 1 • 2 Remove 4 T10 screws. 922-6850 Disconnect optical sensor cable from connector on logic board.
3 Lift optical drive slightly and wiggle optical drive cable off optical drive. A black stick may be helpful. Pull optical away from slot opening in housing.
Reassembly 1 If installing a replacement optical drive, a temp sensor/ cable is included with each replacement optical drive. 2 Install optical drive by aligning pins on bezel with holes on optical drive. Check the felt on the optical drive opening. Damaged or wrinkled felt across the opening could impair installation.
3 Replace screws in order shown.
Optical Sensor Cable First Steps Remove • Glass panel • LCD panel • Optical drive Important: When servicing the optical drive, handle it by the edges only. Pressing elsewhere on the drive could damage the internal mechanism.
Removal 1 Disconnect optical sensor cable from logic board. 2 Peel up foam gasket to release sensor end of cable. Replacement Note: The optical sensor cable is included with replacement optical drive.
Optical Drive Fan First Steps Remove • Glass panel • LCD panel • Optical drive Tools • Torx T10 screwdriver • ESD-wrist strap and mat 2009-12-16 iMac (27-inch, Late 2009) Take Apart — Optical Drive Fan 170
Removal 1 • Remove 1 T10 screw. 922-9236 2 Disconnect fan cable from logic board. 3 Lift fan off 2 guide posts in rear housing.
SD Board First Steps Remove • Glass panel • LCD panel Tools • Torx T8 screwdriver • ESD-wrist strap and mat 2009-12-16 iMac (27-inch, Late 2009) Take Apart — SD Board 172
Removal 1 • 2 Remove 1 T8 screw: 922-9241 Disconnect SD cable from card, pry card up, and lift out of rear housing.
SD Card Cable First Steps Remove • Glass panel • LCD panel • Optical drive • Optical drive fan Tools • ESD-wrist strap and mat 2009-12-16 iMac (27-inch, Late 2009) Take Apart — SD Card Cable 174
1 Peel back EMI tape that covers the exposed portion of the SD cable. 2 Disconnect cable from SD board and logic board.
IR Board First Steps Remove • Glass panel • LCD panel Tools • ESD-wrist strap and mat 2009-12-16 iMac (27-inch, Late 2009) Take Apart — IR Board 176
Removal 1 Disconnect IR cable from logic board. Pull cable straight down to release. Note: The cable is part of the IR assembly. 2 With two fingers, wiggle IR mounting bracket up and off mounting post. Replacement Note: With your finger, pull front housing out a bit to slide IR mounting bracket onto IR mounting post.
Logic Board First Steps Remove • Glass panel • LCD panel • Optical drive • Optical fan • Power supply • IR board Note: The iMac (27inch, Quad-Core, Late 2009) logic board has an additional cable connection to the logic board, otherwise the take apart procedure is similar.
Removal Note: iMac (27-inch, Late 2009) logic board cables shown: See the next page for iMac (27-inch, Quad Core, Late 2009) logic board cables. 1 Carefully disconnect 13 cables from the logic board.
2 iMac (27-inch, QuadCore, Late 2009): Carefully disconnect 14 cables from the logic board. (1) power button (2) CPU fan (3) skin temp sensor (4) hard drive temp sensor (5) hard drive fan (6) camera (7) Bluetooth (8) ambient temp sensor (9) AirPort (10) microphone (11) secure digital (SD) (12) audio ports (13) right speaker (14) left speaker 3 Tape cables out of the way as you disconnect them.
4 Remove 8 T10 screws, 2 short (S), 2 medium (M), 4 long (L) 922-6800, (S) 922-9237, medium 20mm (M) 922-9243, long 24mm (L) 5 • • 6 Gently pull board forward and disconnect 2 cables from underside: DC power cable hard drive data cable Lift board up and out of rear housing.
7 • • • Important: Always use 2 hands to support board and heatsink. Handling board incorrectly could flex board and damage chips and circuits. Never handle board by heatsink or metal frame.
Reassembly 1 For easier installation, remove the backlight pressure wall. 2 Lower board into rear housing.
3 Check that the video card cable is connected, in case it was disconnected. 4 Make sure optical data cable: routes over top of DC power cable extends out to side to connect to the optical drive.
5 As you lower board, position DC power cable and hard drive cable into lower notch on pressure wall. Note: You can install the logic board either laying down (as shown) or with the computer in the vertical position. 6 Connect power button cable (circled). Install the board into housing, lining up board with edge of CPU fan and screw standoffs.
7 Connect cables. Note: This graphic shows the iMac (27-inch, Late 2009) board. The iMac 27-inch, Quad Core logic board has an additional connector in the top left corner of the board.
Video Card First Steps Remove • Glass panel • LCD panel • Optical drive • Optical fan • Power supply • IR board • Logic board Note: Video card attaches to back side of logic board.
Removal Note: There are 2 different video cards; however, the removal procedure is identical. 1 • Remove 3 screws attaching video card to bracket. (1) 922-7971, T10 • (2) 922-4723, T8 2 Disconnect video card temp sensor from logic board. 3 Support video card as you wiggle card out of slot. Replacement Note: If you replace the logic board, transfer video card and video card bracket to replacement logic board. Refer to the next page for procedure.
4 • 5 Remove 3 T8 screws on top side of logic board. 922-4723 Carefully wiggle video bracket off logic board. Be careful not to bump DisplayPort connector (on top side of board) as you slide the bracket off.
Hard Drive Data Cable First Steps Remove • Glass panel • LCD panel • Optical drive • Optical fan • Power supply • IR board • Logic board Note: One end of hard drive data cable attaches to back side of logic board.
Removal 1 Disconnect hard drive data cable from side of hard drive. 2 Disconnect other end from back side of logic board.
Replacement Note: As you lower logic board, route DC power cable and hard drive cable into lower notch on pressure wall.
Optical Drive Data Cable First Steps Remove • Glass panel • LCD panel • Optical drive • Optical fan • Power supply • IR board • Logic board Note: Optical drive data cable attaches to back side of logic board.
Removal Disconnect optical data cable from back side of logic board. Replacement Note: Hold the optical cable with your thumb as you lower the logic board into rear housing.
Battery First Steps Remove • Glass panel • LCD panel • Optical drive • Optical fan • Power supply • IR board • Logic board Tools • • Black stick ESD mat and wrist strap 2009-12-16 iMac (27-inch, Late 2009) Take Apart — Battery 195
Removal 1 Use a black stick to pry battery from battery socket on logic board. Reassembly 1 Make sure battery socket is open and free of dust. 2 Press battery (9228892) into socket with engraved markings (+ side) facing up.
Optical Pressure Wall First Steps Remove • Glass panel • LCD panel • Optical drive • Optical fan • Power supply • IR board • Logic board Tools • Torx T10 screwdriver • ESD-wrist strap and mat 2009-12-16 iMac (27-inch, Late 2009) Take Apart — Optical Pressure Wall 197
Removal 1 • 2 Remove 1 T8 screw on pressure wall. 922-9241 Lift pressure wall up and off two posts in rear housing. Take note of Bluetooth and microphone cable routing over pressure wall.
Right Speaker First Steps Remove • Glass panel • LCD panel • Optical drive • Optical fan • Audio ports • IR board • Logic board Tools • Torx T10 screwdriver • ESD-wrist strap and mat 2009-12-16 iMac (27-inch, Late 2009) Take Apart — Right Speaker 199
Removal 1 • 2 Remove 1 T10 screw. 922-9242 Rotate fan up and to the left to remove from rear housing.
CPU Fan First Steps Remove • Glass panel • LCD panel • Optical drive • Optical fan • Power supply • IR board • Logic board Tools • Torx T10 screwdriver • ESD-wrist strap and mat 2009-12-16 iMac (27-inch, Late 2009) Take Apart — CPU Fan 201
Removal 1 • Remove 2 T10 shoulder screws. 922-9236 2 Lift fan up slightly. 3 With black stick, open cable clips and remove: ambient temp sensor left speaker cable • • Replacement Note: Transfer ambient temp sensor to replacement fan.
Reassembly 1 Route sensor cable through clip on the bottom of fan. 2 Route ambient sensor cable under fan and along with fan cable, route through stickon clip on the side of fan.
Ambient Temp Sensor First Steps Remove • Glass panel • LCD panel • Optical drive • Optical fan • Power supply • IR board • Logic board • CPU fan Tools • • Black stick ESD-wrist strap and mat 2009-12-16 iMac (27-inch, Late 2009) Take Apart — Ambient Temp Sensor 204
Removal 1 Release sensor cable from 2 cable clips on CPU fan. Replacement Note: If you are replacing CPU fan, transfer sensor cable to replacement CPU fan. Reassembly Route ambient sensor cable under fan and along with fan cable, route them through stick-on clip on the side of fan.
Left Speaker First Steps Remove • Glass panel • LCD panel • Optical drive • Optical fan • Power supply • IR board • Logic board • CPU fan Tools • • Magnetized Torx T10 screwdriver ESD-wrist strap and mat 2009-12-16 iMac (27-inch, Late 2009) Take Apart — Left Speaker 206
Removal 1 • Remove 1 T10 screw. 922-8249 2 Lift out speaker. Reassembly 1 Route speaker cable around bottom of CPU fan and through stick-on clip on side of fan.
2 Continue routing speaker cable above AC power inlet and toward right speaker. Tuck speaker cable under black cable clips in rear housing.
Hard Drive Fan First Steps Remove • Glass panel • LCD panel • Optical drive • Optical fan • Power supply • IR board • Logic board Tools • • Magnetized Torx T10 screwdriver ESD-wrist strap and mat 2009-12-16 iMac (27-inch, Late 2009) Take Apart — Hard Drive Fan 209
Removal 1 • 2 Remove 1 T10 screw. 922-9236 Pull the fan straight up and off the guide posts.
Mechanism Cover First Steps Remove • Glass panel • LCD panel • Optical drive • Optical fan • Power supply • IR board • Logic board • Hard drive fan • Optical pressure wall Tools • • • ESD-wrist strap and mat Magnetized Torx T10 screwdriver 2009-12-16 iMac (27-inch, Late 2009) Take Apart — Mechanism Cover 211
Removal 1 Peel up EMI tape. 2 Remove 4 T10 screws; two at the top (bigger screws) and two at the bottom. • (2) 922-6800 • (2) 922-9238 3 Pry cover off mechanism.
Mechanism First Steps Remove • Glass panel • LCD panel • Optical drive • Optical fan • Power supply • IR board • Logic board • Hard drive fan • Optical pressure wall • Mechanism cover • Stand Tools • • Magnetized Torx T10 screwdriver ESD-wrist strap and mat 2009-12-16 iMac (27-inch, Late 2009) Take Apart — Mechanism 213
Removal 1 • 2 Remove 6 T10 screws: 922-9238 Lift mechanism off rear housing.
Bluetooth Cable First Steps Remove • Glass panel • LCD panel • Backlight board • Power supply • AirPort carrier card • Optical drive • Optical fan • IR board • Logic board Tools • ESD-wrist strap and mat 2009-12-16 iMac (27-inch, Late 2009) Take Apart — Bluetooth Cable 215
Removal 1 Disconnect the black Bluetooth cable from Bluetooth board 2 Follow cable along to the right. To the right of the mechanism, peel back EMI tape securing Bluetooth cable to rear housing. 3 Lift cable from rear housing. Replacement Note: The cable routes over the notch of the optical pressure wall and connects to the top of the logic board.
Cable, AC/DC Power/Backlight/ SATA First Steps Remove • Glass panel • LCD panel • Backlight board • Power supply • AirPort carrier card • Hard drive • Optical drive • Optical fan • IR board • Logic board Tools • ESD-wrist strap and mat 2009-12-16 iMac (27-inch, Late 2009) Take Apart — iMac (27-inch, Late 2009) 217
Removal 1 Release cable from black cable clips and lift out of rear housing. Observe cable routing for reassembly. Replacement Note: The cable rests in the lower notch on the optical pressure wall.
Camera Cable First Steps Remove • Glass panel • LCD panel • Camera • Hard drive • Power supply • Power supply pressure wall Tools • ESD-wrist strap and mat 2009-12-16 iMac (27-inch, Late 2009) Take Apart — Camera Cable 219
Removal 1 Disconnect camera cable from camera board at top of rear housing. 2 Disconnect camera cable (#5) from the top of logic board.
3 Remove EMI tape at top of camera cable. Lift pressure wall to remove camera cable from rear housing. Replacement Note: The camera cable runs along the right side of the pressure wall, next to the hard drive and through the lower notch in the pressure wall.
Microphone Cable First Steps The microphone cable is part of the rear housing and is not available as a separate part. Follow the rear housing procedure if the microphone needs to be replaced.
Rear Housing First Steps With all other modules removed (except the parts mentioned below), the rear housing is the remaining assembly.
Stand First Steps No preliminary steps are required to remove the stand.
Removal 1 Place the computer face down on a table so that the base of the stand extends over the table edge. 2 Press the stand down and insert an access card into the slot between the top of the stand and the rear housing. 3 Insert the card as far as it will go, and press the stand down until you hear a click—the audible cue that tells you that the stand is locked into place. 4 Remove the access card.
5 • 6 Remove 8 T10 screws. 922-8174 Separate the stand from the clutch mechanism. Reassembly 1 Align the pin on the clutch mechanism to the central hole in the stand. 2 Replace 8 T10 screws. 3 Place the computer face down on a table so that the base of the stand extends over the table edge. Press the stand down and insert an access card into the slot between the top of the stand and the rear housing.
4 Insert the access card as far as it will go. Gently lift the stand approximately two inches to unlock the clutch mechanism, and then remove the access card. The clutch mechanism should now be unlocked. 5 Stand the computer upright.
Service Source Additional Procedures iMac (27-inch, Late 2009) © 2009 Apple Inc. All rights reserved.
Retrieving Mechanism Overview Without a stand or VESA mount installed, the mechanism can retract inside the computer if an access card trips the latch that locks the mechanism. In the rare event that retrieving the mechanism is necessary, follow this procedure. Note: You may notice small differences in appearance between the images in this procedure and the computer you are servicing. Although the appearance may differ, the steps and sequence are the same unless noted.
Removal 1 Place computer face down on a clean, soft surface. 2 Peer into stand slot to see recessed latch. Latch is a shiny metal spring clip located above mechanism that is almost as wide as stand slot. 3 Cut access card in half vertically, into two equal halves. 4 Insert half of access card into one end of stand slot and push latch away to get a sense of how latch moves.
5 Notice shape of retrieval tool. When inserting retrieval tool, make sure curved end of tool is down, as shown. 6 The small hole on end of retrieval tool will hook onto pin on recessed mechanism. 7 Hold access card so latch is pushed as far as possible. 8 Align retrieval tool over pin on mechanism. 9 Have an assistant hold computer down firmly as you simultaneously push latch away and pull mechanism towards you.
10When you can pull up mechanism and see it emerge through slot, maintain pull force on retrieval tool, but remove access card. 11 Pull up mechanism until it clicks or locks into place. 12 Mechanism is now ready to accept installation of stand or VESA mount.
Service Source Views iMac (27-inch, Late 2009) © 2009 Apple Inc. All rights reserved.
Exploded Views Exploded View #1 2009-12-16 iMac (27-inch, Late 2009) Views — Exploded Views 234
Exploded View #2 2009-12-16 iMac (27-inch, Late 2009) Views — Exploded Views 235
Exploded View #3 2009-12-16 iMac (27-inch, Late 2009) Views — Exploded Views 236
External Views Rear View 2009-12-16 iMac (27-inch, Late 2009) Views — External Views 237
Ports 1 - Headphone out/optical digital audio out port 2 - Audio in/optical digital audio in port 3 - USB 2.
Internal Views Components Below LCD Inside Rear Housing 2009-12-16 iMac (27-inch, Late 2009) Take Apart — Internal Views 239
Logic Board, Top Side Logic Board, Bottom Side 2009-12-16 iMac (27-inch, Late 2009) Take Apart — Internal Views 240
Screw Chart Note: Screws are not to scale.
922-9236 T10 922-6800 T10 922-9237 T10 Optical fan (1), CPU fan (2), Hard drive fan (1) Logic board, short (2), Mechanism cover, small (2) Logic board, medium 20mm (2) 922-7971 T10 922-9242 T10 922-9238 T10 Video card bracket (1) Right speaker (1), Left speaker (1) Mechanism cover (2), Mechanism (6) 922-8174 T10 Stand (8) 2009-12-14 iMac (27-inch, Late 2009) Views — Screw Chart 242