iPod nano User Guide
Contents 2 5 5 5 6 7 Chapter 1: iPod nano at a Glance 8 8 Chapter 2: Getting started 10 10 12 12 13 15 16 Chapter 3: Basics 17 17 17 19 Chapter 4: Syncing with iTunes 20 20 22 24 25 28 Chapter 5: Music and Other Audio 29 29 30 31 32 32 Chapter 6: FM Radio 34 35 36 37 38 Chapter 7: Fitness iPod nano overview Accessories The Home screen Status icons Setting up iPod nano Using Multi-Touch Getting information about iPod nano Connecting and disconnecting iPod nano About the battery Setting
40 40 42 Chapter 8: Photos 44 44 46 47 48 Chapter 9: Other Features 49 49 49 51 51 Chapter 10: Accessibility 52 52 56 Chapter 11: Tips and Troubleshooting 57 57 Chapter 12: Safety and Cleaning 60 Chapter 13: Learning More, Service, and Support 61 Regulatory Compliance Information 63 Index Syncing photos Viewing photos on iPod nano Tracking time Recording voice memos Using iPod nano as an external disk Using the Apple Earphones with Remote and Mic Universal Access features VoiceOver Mon
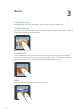
1 iPod nano at a Glance iPod nano overview Volume Down Sleep/Wake Volume Up Status bar Menu and app icons Multi-Touch screen Dock connector Earphone port Clip To Do this Turn the screen on or off while you listen to music or other audio Press the Sleep/Wake button. Turn iPod nano off completely, or to turn it back on Hold down the Sleep/Wake button for a few seconds. Adjust the volume while listening to songs or other media Press the Volume Up or Volume Down button.
The Home screen When you turn on iPod nano, you see the Home screen. Each icon on the Home screen represents choices for listening to music or podcasts, or for using features like recording voice memos or viewing photos. Tap an icon to open it, then use gestures to navigate (see “Using Multi-Touch” on page 10). You’ll see these Home screen icons when you first turn on iPod nano: Icon 6 Function Now Playing Provides quick access to the currently playing audio.
You can add these icons to your Home screen by turning them on in Settings: Icon Function Genius Mixes Lists the Genius Mixes synced from your iTunes library. Playlists Lists the playlists synced from your iTunes library or created on iPod nano. Artists Lists songs synced from your iTunes library, organized by artist. Albums Lists albums synced from your iTunes library, in alphabetical order. Songs Lists songs synced from your iTunes library, in alphabetical order.
Getting started · 2 WARNING: To avoid injury, read all operating instructions and safety information in this guide before using iPod nano. Setting up iPod nano Before you can use iPod nano, you must set it up in iTunes. During setup, you can create an iTunes Store account or specify an existing account. (The iTunes Store may not be available in all countries or regions.) iTunes also displays and records the serial number of your iPod nano when it’s connected, in case you need it.
5 Disconnect the cable from iPod nano when you’re ready to use it. Don’t disconnect iPod nano if you see the “Connected” or “Synchronizing” message. To avoid damaging files on iPod nano, eject iPod nano before disconnecting. For more information about safely disconnecting iPod nano, see “Disconnecting iPod nano from your computer” on page 13.
Basics 3 Using Multi-Touch The Multi-Touch screen and simple finger gestures make it easy to use iPod nano. Tap and double-tap Tap an icon to open it, or to select an item in a menu or list. Tap a photo twice quickly to zoom in, then double-tap again to quickly zoom out. Touch and hold Touch and hold anywhere on the screen (except on an icon or control) to return to the Home screen.
Drag Drag over scrubber bars or sliders to move their controls. Drag icons to rearrange them. Flick Flick your finger quickly up or down to scroll rapidly. You can wait for scrolling to stop, or touch anywhere on the screen to stop it immediately. Touching the screen won’t choose or activate anything. In some lists, such as Playlists, you can flick down to show editing controls at the top. Rotate You can rotate the screen so it’s easier to see when you clip iPod nano to something.
To Do this Reset iPod nano (if it isn’t responding) Press and hold the Sleep/Wake button and the Volume Down button until the screen goes dark. The Apple logo appears after a few seconds, and then the Home screen. Choose an item Tap the item. Go to the previous screen Swipe right. Go to the next screen Swipe left. Go to the top of a list Tap the status bar at the top of the screen. See all of a song, artist, or album name Swipe left across the name.
Disconnecting iPod nano from your computer It’s safe to disconnect iPod nano if you see the Home screen on iPod nano, or a message that says it’s OK to disconnect. If the backlight is off, press the Sleep/Wake button to turn on the backlight, so you can see if it’s safe to disconnect. Disconnect iPod nano: mm Disconnect the cable from iPod nano, or, if iPod nano is in the dock, remove iPod nano from the dock. Don’t disconnect iPod nano if you see the “Connected” or “Synchronizing” message.
Charge the battery using the Apple USB Power Adapter: 1 Connect the Dock Connector to USB Cable to the Apple USB Power Adapter. 2 Connect the other end of the Dock Connector to USB Cable to iPod nano. 3 Plug the Apple USB Power Adapter into a working electrical outlet.
Turning iPod nano off: ÂÂ Stops music or other audio that’s playing ÂÂ Clears paused radio ÂÂ Stops a slideshow if one is playing ÂÂ Saves a voice memo if one is being recorded ÂÂ Stops counting steps ÂÂ Stops and saves Nike+ workout data While iPod nano is turned off, you won’t hear any alarm if a timer expires. When you turn iPod nano on again, alarms that haven’t expired will occur as scheduled. You must be using iPod software version 1.1 or later to use this feature.
Use this preference To do this Volume Limit Set a maximum volume limit on iPod nano, and assign a passcode to prevent the setting from being changed without your knowledge. Audio Crossfade Automatically fade out at the end and fade in at the beginning of each song. Group Compilations Group together songs from compilations. Compilations are shown as subcategories under Artists and specific Genres, in Music.
Syncing with iTunes 4 Syncing the first time iTunes is the free software application you use to sync music, audiobooks, podcasts, photos, and iTunes U collections between your computer and iPod nano, and to send workouts to the Nike+ website. If you don’t already have content in iTunes, you can preview and download content from the iTunes Store (available in selected countries) to iTunes on your computer. To learn about iTunes and the iTunes Store, open iTunes and choose Help > iTunes Help.
Important: The first time you connect iPod nano to a computer that it’s not synced with, a message asks if you want to sync songs automatically. If you accept, all songs, audiobooks, and other content are erased from iPod nano and replaced with songs and other items from that computer. You can prevent iPod nano from syncing when you connect it to a computer other than the one you usually sync with.
Transferring purchased content to another computer Content that you purchase in iTunes on one computer can be transferred from iPod nano to an iTunes library on another computer. The other computer must be authorized to play content from your iTunes Store account. Authorize another computer: mm Open iTunes on the other computer and choose Store > Authorize This Computer. Transfer purchased content to another computer: 1 Open iTunes on the other computer and choose Store > Authorize This Computer.
Music and Other Audio 5 Playing music iPod nano makes it easy to find and listen to songs. You can repeat songs, fast-forward, shuffle, and create playlists using the Multi-Touch screen. To play a song, do one of the following: mm Tap Music on the Home screen, tap a category (Playlists, Albums, or another grouping), and then tap a song. mm On the Home screen, tap Now Playing to play shuffled songs or resume a paused song. mm Give iPod nano a quick shake to play shuffled songs.
Controlling playback with song controls The album artwork for the song that’s playing appears on the Now Playing screen. Tap the screen once to show the song controls, and then swipe left to see additional controls and song lyrics (if you added them in iTunes). The dots at the bottom of the screen indicate the number of screens available. Here’s what you can do with the iPod nano song controls: To Do this Pause a song Tap Play a paused song Tap .
Shuffling songs You can play songs, albums, or playlists in random order, and set iPod nano to shuffle songs when you give it a quick shake. The table below describes different ways to shuffle your music: To Do this Shuffle and play all your songs Tap Shuffle at the top of the Songs list. iPod nano begins playing songs from your iPod nano music library in random order, skipping audiobooks, podcasts, and iTunes U collections. You can also tap Now Playing on the Home screen when no music is playing.
You can purchase and download audiobooks from the iTunes Store and listen to them on iPod nano. When you listen to audiobooks purchased from the iTunes Store or audible.com, you can adjust the playback speed to be faster or slower than normal. Play podcasts, audiobooks, and iTunes U Collections: 1 On the Home screen, tap Podcasts (or Audiobooks, or iTunes U), and then tap a show or title. Podcasts, Audiobooks, and iTunes U are also listed in Music. 2 Tap an episode or chapter to play it.
Controlling the volume The volume buttons are on the top of iPod nano. Press Volume Up or Volume Down to adjust the volume as you listen. The following sections describe other adjustments you can make to limit the maximum volume and enhance audio quality. Setting the maximum volume limit You can set a limit for the maximum volume on iPod nano, and assign a passcode to prevent the setting from being changed without your knowledge.
Set songs to play at the same volume level: 1 In iTunes, choose iTunes > Preferences if you’re using a Mac, or choose Edit > Preferences if you’re using a Windows PC. 2 Click Playback and select Sound Check, and then click OK. 3 On the iPod nano Home screen, tap Settings. 4 Tap Music. 5 Tap next to Sound Check to turn it on. If you haven’t turned on Sound Check in iTunes, setting it on iPod nano has no effect.
Don’t tap Done until you’ve added everything you want to include in the playlist. 4 Swipe left to continue adding content. You can add content from any category. For example, you can mix podcasts with songs in a single playlist. 5 When you finish, tap Done. The new playlist is named New Playlist 1 (or New Playlist 2, and so on). The next time you sync, you can change the title in iTunes. When you sync again, the playlist title on iPod nano is updated.
Creating Genius playlists A Genius playlist is a collection of songs that go with a song you choose from your library. You can create Genius playlists on iPod nano, and sync Genius playlists you create with iTunes. Genius is a free service, but you need an iTunes Store account to use it. To learn how to set up Genius in iTunes, open iTunes and choose Help > iTunes Help. Create a Genius playlist on iPod nano: 1 Play a song, and then tap the album artwork on the Now Playing screen.
Using Apple earphones WARNING: Permanent hearing loss may occur if the earbuds or headphones are used at high volume. Use only compatible earbuds or headphones with iPod nano. Turn on the audio and check the volume before inserting anything in your ear. You can adapt over time to a higher volume of sound that may sound normal but can be damaging to your hearing. If you experience ringing in your ears or muffled speech, stop listening and have your hearing checked.
6 FM Radio Listening to FM radio iPod nano uses the earphone or headphone cord as an antenna, so you must connect earphones or headphones to iPod nano in order to receive a radio signal. When you tune to a station that supports RDS (Radio Data System), the song title, artist name, and station information appear in the display. Important: Radio frequencies shown in this chapter are for illustration purposes only, and are not available in all areas.
Remove an FM station from favorites Tune in to the station and then tap on any radio screen. Pause and resume live radio Tap Now Playing or Radio, swipe left across the top of the screen, and then tap . Tap to resume playing. Changing the radio station clears paused radio. to listen to the last thirty seconds of paused radio. Tap Switch between the radio tuner and the Live Pause screen Swipe left across the top or middle of the screen. Tag a song on the radio on the Now Playing screen.
Pausing live radio You can pause a radio broadcast and resume playing it from the same point up to 15 minutes later. Drag the progress bar to resume listening at any point in the paused broadcast, or to quickly catch up to the live broadcast. The progress bar is completely filled when Live Pause reaches the 15-minute limit. Anything earlier than 15 minutes is cleared to make room for the continuing broadcast. Paused radio is cleared automatically if: ÂÂ You change stations. ÂÂ You turn off iPod nano.
Tagging songs to sync to iTunes If a radio station supports iTunes Tagging, you can tag a song you hear, so you can preview and purchase it later in the iTunes Store. Songs that can be tagged are marked with a tag icon on the Now Playing screen. Tag a song: mm Tap in the lower-left corner of the Now Playing screen. Your tagged songs appear in the Radio menu under Tagged Songs. The next time you sync iPod nano to iTunes, your tagged songs are synced and removed from iPod nano.
Important: iPod nano is intended for the reception of public broadcasts only. Listening to transmissions that are not intended for the public is illegal in some countries and violators may be prosecuted. Check and obey the laws and regulations in the areas where you plan to use iPod nano. The following table specifies the radio frequency range of each region in the Radio Regions menu, along with the increments between stations (indicated by a ± sign).
7 Fitness iPod nano comes with built-in features to help you make the most of your fitness routines: ÂÂ Set a Daily Step Goal and let iPod nano count your steps while you walk, and track your progress and calories burned over time. ÂÂ Create Run workouts set to your favorite music and track your time, pace, and distance with real time motivational feedback. ÂÂ Connect iPod nano to Nike + iPod compatible gym equipment and track your progress from one workout to the next.
Using iPod nano to count steps iPod nano counts steps in the background, so you can listen to music or use iPod nano for other things at the same time. The Walk icon ( ) appears in the status bar while steps are being counted. Starting at midnight, any steps you take are automatically tracked for the day, so you don’t need to do anything to get an accurate daily count. Use iPod nano to count steps for a walk: 1 On the Home screen, tap Fitness, and then tap Walk.
Creating workouts with music You can create workouts on iPod nano to reach fitness goals of distance, time, or calories burned. Then add the music, podcast, audiobook, or radio station that gets you moving. iPod nano keeps a record of all your workout data, which you can upload to the Nike+ website if you wish. While you’re working out, iPod nano gives spoken feedback when you pause or resume your workout. Set up a Run workout: 1 On the Home screen, tap Fitness.
Set the Sleep/Wake button to pause a workout: 1 On the Home screen, tap Settings. 2 Tap Music, and then tap Sleep/Wake Button. 3 Tap to turn it On. 4 Tap Play/Pause. The table below describes how to control iPod nano during a workout: To Do this Pause a workout Tap the screen, then tap (if the screen is dark, click the Sleep/Wake button first). Double-click the Sleep/Wake Button if you set the preference to Play/Pause.
Reset calibration: 1 On the Home screen, tap Settings. 2 Tap Fitness, and then swipe up. 3 Tap Reset Calibration, and then tap Walk Calibration or Run Calibration. Choose the option that best reflects which pace you want to recalibrate. For example, if you mostly walked during calibration, choose that option. 4 Tap Reset Calibration again, or tap Cancel if you change your mind. 5 Start a Run workout and tap the Calibrate button when it appears.
Clear workout data from iPod nano: 1 On the Home screen, tap Fitness, and then tap History. 2 Tap the month you want to clear. 3 Flick down, and then tap Clear. A dialog asks if you want to clear the workout history for the month. 4 Tap Delete All, or tap Cancel if you change your mind. You can use iTunes to upload your steps and other workout information to the Nike+ website. You need a Nike+ account, which you can set up the first time you sync workout data in iTunes.
Photos 8 Syncing photos iPod nano lets you carry photos with you, so you can share them with your family, friends, and associates. You can sync photos from your computer, and view them as a slideshow on iPod nano or on your TV. Adding photos from your computer If you have a Mac and iPhoto 8.0 (part of iLife ’09) or later, you can view your photos by events and faces you’ve identified. If you have a PC or Mac, you can also add photos to iPod nano from a folder on your hard disk.
Adding full-resolution image files to iPod nano When you add photos to iPod nano, iTunes optimizes the photos for viewing. Full-resolution image files aren’t transferred by default. Adding full-resolution image files is useful if you want to move them from one computer to another, but it isn’t necessary for viewing the images on iPod nano. Add full-resolution image files to iPod nano: 1 In iTunes, select iPod nano in the device list and click the Photos tab. 2 Select “Include full-resolution photos.
Delete selected photos: 1 In iTunes, select iPod nano in the device list and click the Photos tab. 2 Select “Selected albums, events, and faces …” 3 Deselect the items you want to remove from iPod nano, and then click Apply. Viewing photos on iPod nano You can view photos on iPod nano individually, or as a slideshow. Viewing individual photos Your photos are grouped into albums for easy browsing on iPod nano. If you use iPhoto, you can also sync Events and Faces, and then view photos this way.
Here are ways you can view and manipulate your photos: To Do this Quickly find a photo in the thumbnail view Flick up or down. View a photo thumbnail at full size Tap the photo thumbnail. See the next or previous photo in an album Tap the photo in the album, swipe left or right across the photo, and then tap or . Quickly enlarge or reduce a photo Double-tap the full size photo to zoom in. Double-tap again to zoom out. If you use Faces in iPhoto, double-tapping zooms in on the subject’s face.
9 Other Features Tracking time You can use the clock on iPod nano to keep track of time, count down to an event, or set an alarm. Changing the clock face iPod nano comes with different clock faces that change the function or style of the clock. Some clock faces even reflect the color of your iPod nano case. Change the clock face: 1 On the Home screen, tap Settings. 2 Tap General, and then tap Date & Time. 3 Tap Clock Face, and then flick down to see more choices. 4 Tap a clock face, and then tap Set.
Using the stopwatch iPod nano has a stopwatch for timing events and tracking intervals, such as laps. You can play music or other audio while you use the stopwatch. Use the stopwatch: 1 On the Home screen, tap Clock. 2 Swipe left to see the stopwatch controls. 3 Tap Start. ÂÂ To record laps, tap Lap after each lap. ÂÂ To pause the stopwatch, tap Stop, and then tap Start to resume. 4 Tap Stop when you finish, and then tap next to the time in the status bar, to review lap times.
Delete an alarm: 1 On the Home screen, tap Clock. 2 Swipe left twice to see the timer controls. 3 Tap Stop. You can set a sleep timer to turn off iPod nano automatically after playing music or other content for a specified period of time. Set the sleep timer: 1 On the Home screen, tap Clock. 2 Swipe left twice to see the timer controls. 3 Flick to set the hours and minutes, and then tap . 4 Tap Sleep iPod, and then tap Set. 5 Tap Start when you’re ready.
Your saved recordings are listed by date and time, but you can label recordings to help you identify them. Label a recording: 1 On the Voice Memos screen, tap . 2 Tap a recording in the list. 3 Tap Label, and then tap one of the choices. You can choose Memo, Podcast, Interview, Lecture, Idea, or Meeting. The recording appears in the list with the label you chose, along with the date and time of the recording. Delete a recording: 1 Tap on the Voice Memos screen. 2 Tap Edit.
If you use iPod nano primarily as an external disk, you might want to keep iTunes from opening automatically when you connect iPod nano to your computer. Prevent iTunes from opening automatically when you connect iPod nano to your computer: 1 In iTunes, select iPod nano in the device list and click the Summary tab. 2 In the Options section, deselect “Open iTunes when this iPod is connected.” 3 Click Apply.
Accessibility 10 Universal Access features Accessibility features make it easier for users with visual, auditory, or other physical disabilities to use iPod nano. These features include: ÂÂ VoiceOver ÂÂ Mono Audio ÂÂ White on Black You can turn these features on or off on iPod nano, or in iTunes. Turn on accessibility features in iTunes: 1 In iTunes, select iPod nano in the device list and click the Summary tab. 2 In the Options section, select Configure Universal Access.
4 Tap VoiceOver, then flick up to set any of these options: ÂÂ Speak Hints: Explains how to interact with the item in the VoiceOver cursor. You may want to turn this on to help you learn how to use iPod nano, and turn it off later. ÂÂ Speaking Rate: Increases or decreases the rate of speech for VoiceOver. This does not affect the speech rate for audiobooks or podcasts. ÂÂ Language: Sets the language for VoiceOver. It should match the language set for iPod nano.
VoiceOver gestures When VoiceOver is turned on, use the following gestures to control iPod nano: To Do This Read the screen starting at the top Flick up with two fingers. Read the screen from the current selection Flick down with two fingers. Pause or continue speech when reading dialogs and other text Tap the screen with one finger. Select the item in the VoiceOver cursor Tap the screen with one finger. Activate the item in the VoiceOver cursor Double-tap with one finger.
Tips and Troubleshooting 11 Most problems with iPod nano can be solved quickly by following the advice in this chapter. The 5 Rs: Reset, Retry, Restart, Reinstall, Restore Remember these five basic suggestions if you have a problem with iPod nano. Try these steps one at a time until your issue is resolved. If one of the following doesn’t help, read on for solutions to specific problems. ÂÂ Reset iPod nano. See “General suggestions,” below.
mm If iPod nano doesn’t disappear from the device list in iTunes, drag the iPod nano icon from the desktop to the Trash if you’re using a Mac. If you’re using a Windows PC, eject the device in My Computer or click the Safely Remove Hardware icon in the system tray and select iPod nano. If you still see the “Connected” or “Sync in Progress” message, restart your computer and eject iPod nano again. If iPod nano isn’t playing music mm Make sure the earphone or headphone connector is pushed in all the way.
If iPod nano displays a “Use iTunes to restore” message mm Make sure you have the latest version of iTunes on your computer (download it from www.itunes.com/downloads). mm Connect iPod nano to your computer. When iTunes opens, follow the onscreen prompts to restore iPod nano. mm If restoring iPod nano doesn’t solve the problem, iPod nano may need to be repaired. You can arrange for service at the iPod Service & Support website at www.apple.com/support/ipod.
mm You can also reset all settings (your synced content isn’t deleted or modified). Tap Settings, then tap the last item in the menu (Reset Settings), and then tap the red button (Reset). mm If you can’t recognize the Reset Settings menu item, you can restore iPod nano to its original state and choose a language. See “Updating and restoring iPod software” on page 56.
Updating and restoring iPod software You can use iTunes to update or restore iPod software. You should update iPod nano to use the latest software. You can also restore the software, which puts iPod nano back to its original state. ÂÂ If you choose to update, the software is updated, but your settings and songs aren’t affected. ÂÂ If you choose to restore, all data is erased from iPod nano, including songs, videos, files, photos, and any other data.
Safety and Cleaning · 12 WARNING: To avoid injury, read all operating instructions and safety information in this guide before using iPod nano. Keep this safety information and the iPod nano User Guide handy for future reference. For downloadable versions of the iPod nano User Guide and the latest safety information, visit support.apple.com/manuals/ipod.
Keeping the outside of iPod nano clean Clean iPod nano immediately if it comes into contact with any contaminants that may cause stains, for example, ink, dyes, makeup, dirt, food, oils, and lotions. To clean iPod nano, unplug all cables and turn off iPod nano (press and hold the Sleep/Wake button). Then use a soft, slightly damp, lint-free cloth. Avoid getting moisture in openings. Don't use window cleaners, household cleaners, aerosol sprays, solvents, alcohol, ammonia, or abrasives to clean iPod nano.
Exercising Before starting any exercise program, you should consult with a physician and have a complete physical examination. Do a warmup or stretching exercise before beginning any workout. Be careful and attentive while exercising. Slow down, if necessary, before adjusting your device while running. Stop exercising immediately if you feel pain, or feel faint, dizzy, exhausted, or short of breath.
Learning More, Service, and Support 13 Look here for iPod-related software and service information. 60 To learn about Do this Service and support, discussions, tutorials, and Apple software downloads Go to: www.apple.com/support/ipodnano Using iTunes Open iTunes and choose Help > iTunes Help. For an online iTunes tutorial (available in some areas only), go to: www.apple.com/support/itunes Using iPhoto (on Mac OS X) Open iPhoto and choose Help > iPhoto Help.
Regulatory Compliance Information FCC Compliance Statement Industry Canada Statement This device complies with part 15 of the FCC rules. Operation is subject to the following two conditions: (1) This device may not cause harmful interference, and (2) this device must accept any interference received, including interference that may cause undesired operation. See instructions if interference to radio or TV reception is suspected. This device complies with Industry Canada license- exempt RSS standard(s).
China Battery Statement Taiwan Battery Statement Turkiye: EEE yönetmeliğine (Elektrikli ve Elektronik Eşyalarda Bazı Zararlı Maddelerin Kullanımının Sınırlandırılmasına Dair Yönetmelik) uygundur. European Union—Disposal Information: This symbol means that according to local laws and regulations your product should be disposed of separately from household waste. When this product reaches its end of life, take it to a collection point designated by local authorities.
A accessibility Mono Audio 15, 51 VoiceOver 15, 49 White on Black 15, 16, 51 adding music from more than one computer 17 manually 18 methods 17 tutorial 60 adding photos about 40 all or selected photos 40 from computer to iPod 40 from iPod to computer 41 full-resolution images 41 alarms deleting 46 setting 45 sleep timer 46 albums viewing songs from 21 Apple USB Power Adapter charging the battery 13 safety 58 audiobooks adding to iPod 17 playback controls 23 rating 23 automatic syncing
G Genius Mixes playing 7, 27 Genius playlist creating 21, 27 saving 27 using on iPod 27 gestures double-tap 10 flick 11 rotate 11 swipe 10 tap 10 touch and hold 10 getting help 57, 60 getting started with iPod 55 glass screen 57 H handling information 57 hearing loss warning 28, 58 height setting 35 help, getting 57, 60 Home screen about 6 customizing 15, 16 icons 6, 15 navigating 6 returning to 12 I iPhoto getting help 60 recommended version 55 iPod Dock 12 iPod Updater applic
service and support 57, 60 sets of songs.
KKApple Inc. © 2011 Apple Inc. All rights reserved. Apple, the Apple logo, Finder, iLife, iPhoto, iPod, iPod nano, iTunes, Mac, Macintosh, Mac OS, the Made for iPod logo, and QuickTime are trademarks of Apple Inc., registered in the U.S. and other countries. Multi-Touch and Shuffle are trademarks of Apple Inc. iTunes Store is a service mark of Apple Inc., registered in the U.S. and other countries. NIKE and the Swoosh design are trademarks of NIKE, Inc. and its affiliates and are used under license.