
for iOS 6.1 software

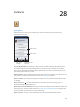


Table Of Contents
- iPod touch User Guide
- Contents
- Chapter 1: iPod touch at a Glance
- Chapter 2: Getting Started
- Chapter 3: Basics
- Chapter 4: Siri
- Chapter 5: Music
- Chapter 6: Videos
- Chapter 7: Messages
- Chapter 8: FaceTime
- Chapter 9: Camera
- Chapter 10: Photos
- Chapter 11: Game Center
- Chapter 12: Mail
- Chapter 13: Passbook
- Chapter 14: Reminders
- Chapter 15: Safari
- Chapter 16: Newsstand
- Chapter 17: Calendar
- Chapter 18: Stocks
- Chapter 19: Maps
- Chapter 20: Weather
- Chapter 21: Notes
- Chapter 22: Clock
- Chapter 23: Calculator
- Chapter 24: Voice Memos
- Chapter 25: iTunes Store
- Chapter 26: App Store
- Chapter 27: Settings
- Chapter 28: Contacts
- Chapter 29: Nike + iPod
- Chapter 30: iBooks
- Chapter 31: Podcasts
- Chapter 32: Accessibility
- Appendix A: International Keyboards
- Appendix B: Safety, Handling, & Support
- Important safety information
- Important handling information
- iPod touch Support
- Restarting and resetting iPod touch
- “Wrong Passcode” or “iPod touch is disabled” appears
- “This accessory is not supported by iPod touch” appears
- Can’t view email attachments
- Backing up iPod touch
- Updating and restoring iPod touch software
- Learning more, service, and support
- Disposal and recycling information
- Apple and the environment

Chapter 28 Contacts 103
Edit a contact: Choose a contact, then tap Edit. You can:
•
Add a new eld: Tap , then choose or enter a label for the eld.
•
Change a eld label: Tap the label and choose a dierent one. To add a new eld, tap Add
Custom Label.
•
Change the ringtone or text tone for the contact: Tap the ringtone or text tone eld, then choose
a new sound. To change the default tone for contacts, go to Settings > Sounds.
•
Assign a photo to the contact: Tap Add Photo. You can take a photo with the camera or use an
existing photo.
•
Update contact info using Twitter: Go to Settings > Twitter > Update Contacts. Contacts are
matched using email addresses. For friends that you’re following, their contact card is updated
with their Twitter user name and photo.
•
Update contact info using Facebook: Go to Settings > Facebook > Update Contacts. Contacts
are matched using email addresses. For each match in your friend list, their contact card is
updated with their Facebook user name and photo.
•
Enter a pause in a telephone number: Tap , then tap Pause or Wait. Each pause lasts two
seconds. Each wait stops dialing until you tap Dial again. Use these to automate dialing of an
extension or passcode, for example, when using Contacts on iPod touch.
Adding contacts
In addition to entering contacts, you can:
•
Use your iCloud contacts: Go to Settings > iCloud, then turn on Contacts.
•
Import your Facebook Friends: Go to Settings > Facebook, then turn on Contacts in the “Allow
These Apps to Use Your Accounts” list. This creates a Facebook group in Contacts.
•
Access a Microsoft Exchange Global Address List: Go to Settings > Mail, Contacts, Calendars, then
tap your Exchange account and turn on Contacts.
•
Set up an LDAP or CardDAV account to access business or school directories: Go to Settings > Mail,
Contacts, Calendars > Add Account > Other. Then tap “Add LDAP Account” or “Add CardDAV
Account” and enter the account information.
•
Sync contacts from your computer, Yahoo!, or Google: In iTunes on your computer, turn on
contact syncing in the device info pane. For information, see iTunes Help.
•
Import contacts from a vCard: Tap a .vcf attachment in an email or message, or on a webpage.
Search a GAL, CardDAV, or LDAP server: Tap Groups, tap the directory you want to search, then
enter your search.
Save contact information from a GAL, LDAP, or CardDAV server: Search for the contact you
want to add, then tap Add Contact.
Show or hide a group: Tap Groups, then select the groups you want to see. This button only
appears if you have more than one source of contacts.
When you have contacts from multiple sources, you might have multiple entries for the same
person. To keep redundant contacts from appearing in the All Contacts list, contacts from
dierent sources that have the same name are linked and displayed as a single unied contact.
When you view a unied contact, the title Unied Info appears at the top of the screen.
Link a contact: Edit a contact, then tap Link Contact and choose a contact.
Linked contacts aren’t merged. If you change or add information in a unied contact, the
changes are copied to each source account where that information already exists.