
User Manual


Chapter 8 Viewing, Printing, and Exporting Your Slideshow 169
4 To export images to iPhoto 5 or later, select “Export images into iPhoto,” name the
new album, and click OK.
5 Choose an option from the Format pop-up menu to specify the image quality you
want.
The better the quality, the larger the file size. If you choose “Variable quality” (JPEG
only), use the Quality slider to specify a percentage between low and high quality.
6 Click Next, type a name, specify a location for the image files, and click Export.
The files will use your typed name with a sequential number appended at the end
(filename.001, filename.002, and so on).
Flash
You can turn your slideshow into a Flash document that can be viewed with the Flash
viewer.
To convert your slideshow to a Flash document:
1 Choose File > Export, and then click Flash.
2 If you don’t want to include the slideshow’s soundtrack, deselect “Include the
slideshow audio file (soundtrack).” This option is on by default.
3 Click Next, type a name, and choose a location for the file.
4 Click Export.
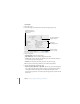
iDVD
You can export a slideshow as an iDVD project that can be viewed and edited with
iDVD 6 or later.
To export slides to iDVD format:
1 Choose File > Export.
2 Select iDVD and specify the video size.
 Standard: Exports the slides for viewing on a standard video display.
 Widescreen: Exports the slides for viewing on a widescreen video display.
3 Choose the quality you want from the Video Quality pop-up menu.
4 Type the number of seconds you want for slide and build durations.
5 Click Next, type a name, specify a location for the exported file, and click Export.