
User`s guide


40 Chapter 3
You can also apply a new master slide layout by clicking the Masters button in the toolbar and
choosing a master slide from the pop-up menu.
If none of the available master slide layouts meet your needs, you can apply a blank master to
the current slide and then place title and body text boxes on it, positioning them as you
prefer on the slide canvas.
To place a title or body text box on the slide canvas:
m Select the Show Title checkbox or Show Body checkbox in the Slide Inspector. A title or
body text box appears on the slide.
To learn how to design your own master slide layouts, see Chapter 9, “Designing Your Own
Master Slides and Themes.”
Resizing, Moving, and Layering Text or Graphic Objects
Once text and graphics are on the slide canvas, they behave very much the same. They can
be moved in front or in back of one another, and formatted or manipulated in similar ways.
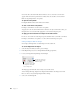
To move an object in front or in back of another object on the slide canvas:
1 Select the object you want to move.
2 Choose Arrange > Bring Forward or Send Backward (or click Front or Back in the toolbar).
3 Repeat step 2 to continue moving the object to the front or back until it occupies the layer
where you want it to appear.
4 If you want to move an object to the very bottom or top of the stack, choose Arrange >
Bring to Front or Send to Back.
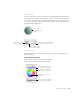
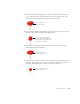
To resize an object:
1 Select the object to make the selection handles appear. For a body text box, click one of the
edges of its container box. If the text in a text box is selected, press Command-Return.
2 Move the pointer close to a selection handle until it changes to a double-headed arrow.
3 Drag the selection handle to expand or shrink the object in the direction of your drag. Hold
down the Option key as you drag to resize the object from its center. Hold down the Shift
key as you drag to constrain the object’s proportions as it enlarges or shrinks.
To move an object:
1 Click outside the object and then click inside it to make the selection handles appear.