
Setup guide

UNCLASSIFIED
UNCLASSIFIED
28
Chapter 4 –
Configuring System Settings
At this point, FileVault may now be activated for any user or administrative
account. Enabling FileVault for individual users is addressed in Chapter 5.
To enable FileVault for the current administrative account:
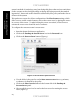
1. Click Turn on FileVault. A window will open asking for the user’s
password. Since this is the administrator’s account, this password will be
the administrator’s password.
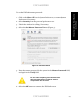
2. Read the warning message that appears. To continue, click Turn on
FileVault in the dialog, or click Cancel to stop. It is recommended that
FileVault be enabled at this time; however, realize that this may take a
while, depending on how much space is currently being used in the
administrator’s account, since everything currently in the account will now
have to be encrypted. Also, the system will require all users to log out
during the conversion process, except the user for whom FileVault is being
enabled.
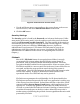
3. Before beginning the conversion process, the system will log the user out
of the system. Once the machine is done encrypting the user’s home
folder, log back into the administrator’s account to continue configuring
the machine.
Additional Security Settings
The first setting in the bottom section of the Security panel, “Require
password to wake this computer from sleep or screen saver,” affects
only the account currently logged in, and can be changed by any user for his
own account. The remaining settings in that section of the panel affect all
user accounts on the computer. These settings should be configured as
follows:
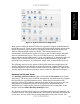
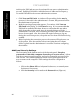
1. Click on the Show All icon in System Preferences, or restart System
Preferences if necessary.
2. Click the Security icon located on the Personal row (Figure 6).