Mac OS X Server Installation & Setup Worksheet For Version 10.
K Apple Inc. © 2007 Apple Inc. All rights reserved. The owner or authorized user of a valid copy of Mac OS X Server software may reproduce this publication for the purpose of learning to use such software. No part of this publication may be reproduced or transmitted for commercial purposes, such as selling copies of this publication or for providing paid-for support services. Every effort has been made to ensure that the information in this manual is accurate.
1 4 5 6 9 13 13 15 22 Contents Installation & Setup Worksheets Installation Worksheet Setup Worksheet TCP/IP Connection Worksheet Instructions for the Installation & Setup Worksheets Instructions for the Installation Worksheet Instructions for the Setup Worksheet Instructions for the TCP/IP Connection Settings Worksheet 3
1 Installation & Setup Worksheets Complete these worksheets to help you install Mac OS X Server version 10.5 Leopard and set up your server. Â For information about the settings in these worksheets, see “Instructions for the Installation & Setup Worksheets” on page 13. Â For installation and setup instructions, see Chapter 2, “Installing Mac OS X Server,” and Chapter 3, “Setting Up Mac OS X Server,” of the Getting Started guide included with Leopard Server.
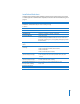
Installation Worksheet Complete this worksheet before installing Leopard Server locally (on the server itself ) or remotely (from an administrator computer). Instructions for this worksheet begin on page 13.
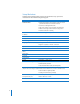
Setup Worksheet Complete this worksheet before using Server Assistant to set up your server. Instructions for this worksheet begin on page 15.
Setup item Your information TCP/IP connection (skip this if the server will get a static IP address automatically and has only one Ethernet port) Use “TCP/IP Connection Worksheet” on page 9.
Setup item Your information Add new user accounts (skip this if you want to add all new accounts after setup or if your server will connect to a directory server) Name, short name, password, and picture: Use a separate sheet to list each user’s name, short name, password (if not the user’s short name), and source of picture (if not automatic).
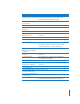
TCP/IP Connection Worksheet Complete a form in this worksheet before setup if any of the following apply:  Your network doesn’t have a DHCP server, such as an Internet router configured to automatically assign IP addresses to computers on the network  The DHCP server isn’t configured to assign the server a static (fixed) IP address and you want to set the server’s IP address manually  The server has multiple Ethernet ports  Your ISP requires making a PPPoE connection to access the Internet Complete the
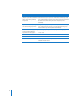
TCP/IP: Configure Manually Use this form if your network doesn’t have a DHCP server, or if you need to specify all TCP/IP connection settings manually for some other reason.
TCP/IP: Configure Using PPPoE with Manual IP Address Use this form if your ISP requires making a PPPoE connection to access the Internet, and your ISP gave you a static IP address for your account.
TCP/IP: Configure Lights-out Management (LOM) Use this form if your server is an Xserve with a lights-out management (LOM) interface, TCP/IP connection setting Your information for channel 1 Your information for channel 2 IP address: Subnet mask: Router: Lights-out management administrator Name: Password: TCP/IP: Configure IPv6 Use this form if you don’t want the server to configure IPv6 addressing automatically.
1 Instructions for the Installation & Setup Worksheets Use these instructions for help filling out the installation and setup worksheets that start on page 5. These instructions cover installing and setting up a standard configuration or a workgroup configuration of Leopard Server. For information about setting up an advanced configuration, see Server Administration, which is available from the Mac OS X Server documentation website at: www.apple.
Target volume If the server has more than one disk or partition, you need to know the name of the one on which you want Leopard Server installed. If you’re installing locally and will have the Installer erase the target volume before installing Leopard Server, you can select either of the first two disk formats listed in the worksheet. If you’re installing remotely and will have Server Assistant erase the target disk before installing, it uses the Mac OS Extended (Journaled) format only.
Instructions for the Setup Worksheet These instructions explain the settings in the worksheet that begins on page 6. Network services Before installing a standard or workgroup configuration of Leopard Server, prepare network services: Â AirPort Base Station or other Internet router has a secure password and doesn’t use a default IP subnet If you have an AirPort Base Station, configure it to use a secure password instead of the preset administration password, which is public.
Destination—remote server (Skip these settings unless you’re setting up remotely.) Server Assistant lists servers on the local network (IP subnet) that have Mac OS X Server newly installed and are ready for setup. Each of these computers is identified by its IP address and DNS name. You can specify an unlisted server by entering its IP address or DNS name. To begin remote setup, you must enter the remote server’s preset password.
Administrator account You set up the primary administrator account for the server by specifying: Â Name: The full name you want used for the primary administrator account—for example, Server Administrator. This name can contain as many as 255 characters (from 255 Roman characters to as few as 85 Japanese characters). It can include spaces. It can’t be the same as any predefined user name, such as System Administrator. Â Short Name: This is an abbreviation of the full name.
Network interfaces (Skip these settings if the server has only one Ethernet port.) If the server has more than one Ethernet port, identify which one you want to be the primary Ethernet port and list the other ports that you want to be active. During setup, you’ll select the active ports from a list of all the server’s Ethernet ports, and you’ll make sure the primary port is at the top of the list.
Mail service You can enable or disable mail service. If you enable it, you can also set additional options: Â Relay outgoing mail through: Some Internet service providers or organizations require routing all outgoing mail through a relay server. If this applies to your network, you need to specify the relay server’s DNS name. Use a relay server only if your ISP or organization requires one.
Users and authentication (Workgroup configuration only) A workgroup configuration is designed to integrate with a directory server in your organization. If your server’s users already have user accounts on your organization’s Open Directory server or Active Directory server, your server can import the existing accounts. Your server uses the account name, password, and other attributes that already exist on your organization’s directory server.
Invitation email (Workgroup configuration only; skip this if you aren’t importing users during setup.) If you’re importing existing user accounts from your organization’s directory server during setup, the server can send an email inviting the imported users to connect their computers to the server. The standard message specifies the server’s DNS name, and it explains the services that the server provides. Recipients who have Mac OS X v10.
Instructions for the TCP/IP Connection Settings Worksheet These instructions explain the settings in the worksheet that begins on page 9. IP address Enter the unique numeric address that identifies the server on the network. It’s written as four numbers separated by periods (for example, 192.0.2.123).
Lights-out management administrator (Skip these settings unless your server is an Xserve with a lights-out management (LOM) port.) Give the LOM interface its own IP address. Don’t use the same address that you assigned to built-in Ethernet 1, even though it uses the same physical connector (port 1) on the back of the Xserve.