
User Guide

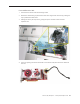
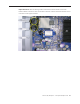
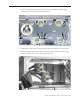
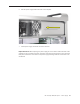
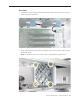
Table Of Contents
- Mac Pro (8x)
- Contents
- Basics
- Take Apart
- General Information
- Opening the Computer
- Hard Drives
- Optical Drive Carrier and Optical Drives
- Memory (FB-DIMMs) and Memory Riser Cards
- PCI Express/Graphics Card
- Power Supply
- Power Supply Fan
- AirPort Extreme Card
- Bluetooth Card
- Battery
- Processor Heatsink Cover
- Front Fan Assembly
- Mac Pro RAID Card and Battery
- Memory Cage with Rear Fan
- Processor Heatsinks
- Processors
- Speaker Assembly
- USB Cable
- Logic Board
- Front Panel Board
- Power Button
- AirPort Antenna Board with Cables
- Optical Drive Power Cable
- Optical Drive Data (Ribbon) Cable
- Ambient Board
- Ambient Board Cable
- Bluetooth Antenna Board and Cable
- Hard Drive Cable Harness
- Hard Drive Temperature Sensor Cable
- Hard Drive Temperature Sensor
- Power Cable Harness
- Troubleshooting
- Upgrades
- Views
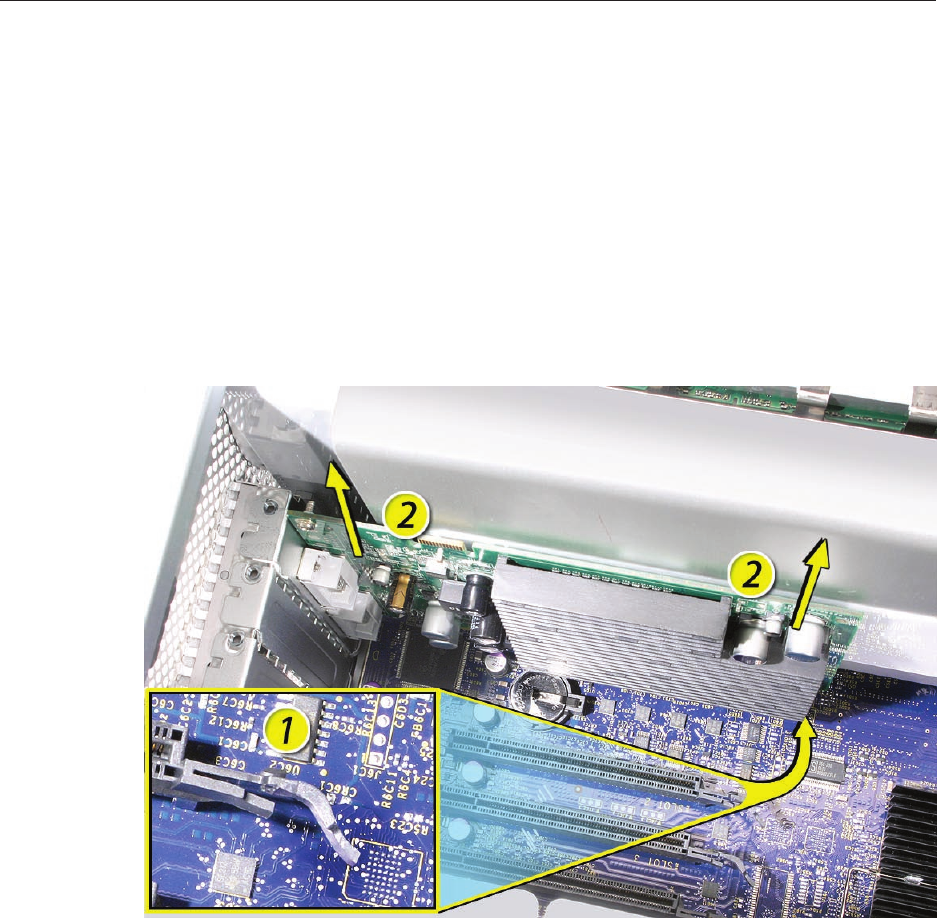
Mac Pro (8x) Take Apart — PCI Express/Graphics Card 31
Warning: When removing or installing a card, handle it only by the edges. Do not touch its
connectors or any of the components on the card. Lift the card straight out from the connector
to remove it, and insert it straight into the connector to install it. Do not rock the card from side
to side and don’t force the card into the slot. Once the replacement card is installed, pull on it
gently to check that it is properly connected.
Standard Card
Release the small locking clip at the front of the card’s logic board connector by pushing the 1.
clip up toward the media shelf.
Holding the card by the top corners, pull up the card and remove it from its expansion slot.2.
Replacement Note: Align the card’s connector with the expansion slot and press until the
connector is inserted all the way into the slot. If you’re installing a 12-inch card, make sure the
card engages the appropriate slot in the PCI card guide.
Don’t rock the card from side to side; instead, press the card straight into the slot. •
Don’t force the card. If you meet a lot of resistance, pull the card out. Check the connector •
and the slot for damage or obstructions, then try inserting the card again.
Pull the card gently to see if it is properly connected. If it resists and stays in place and its •
gold connectors are barely visible, the card is connected.