
User Manual


Table Of Contents
- MainStage User Manual
- Contents
- An Introduction to MainStage
- Setting Up Your System
- The MainStage Interface
- Getting Started With MainStage
- Before You Begin
- Choosing a Concert Template
- Selecting and Playing Patches
- Adding a Patch
- Renaming a Patch
- Adding a Channel Strip to a Patch
- Changing a Channel Strip Setting
- Learning Controller Assignments
- Mapping Screen Controls to Parameters
- Trying Out Full Screen and Perform Modes
- Customizing the MainStage Window
- Working With Concerts
- Working in Edit Mode
- Working With Patches in Edit Mode
- Working With Channel Strips in Edit Mode
- Selecting Channel Strips
- Choosing Channel Strip Settings
- Resetting a Channel Strip
- Editing Channel Strips in MainStage
- Renaming a Channel Strip
- Choosing the Channel Strip Color
- Changing the Channel Strip Icon
- Showing Signal Flow Channel Strips
- Creating Keyboard Layers and Splits
- Setting the Velocity Range and Offset
- Creating Controller Transforms
- Filtering MIDI Messages
- Deleting Channel Strips
- Mapping Screen Controls
- Working With Sets in Edit Mode
- Working at the Set Level
- Overriding Concert- and Set-Level Mappings
- Sharing Patches and Sets Between Concerts
- Working in Layout Mode
- Performing Live With MainStage
- Key Commands
- Setting MainStage Preferences
- Index
Chapter 6 Working in Edit Mode 61
Mapping Screen Controls to Actions
You can also map screen controls to MainStage-specific actions and to AppleScript
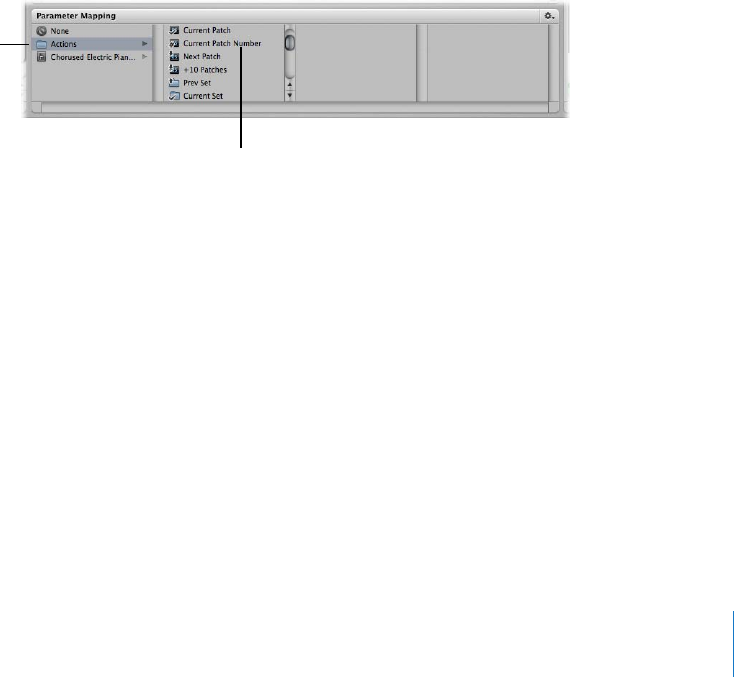
scripts. The Actions folder, which appears in the Parameter Mapping browser along
with available parameters, contains actions for selecting patches and sets, showing the
Tuner, activating tap tempo, Master Mute, or Panic, and others. The Actions folder also
contains an AppleScript subfolder with useful scripts.
You can map button screen controls to actions for selecting different patches and use
physical buttons on your MIDI device to select patches when you perform. You can also
map buttons to actions for selecting different sets or selecting the concert. For
information about assigning buttons, see “Assigning Buttons” on page 77.
To map a screen controls to an action:
1 In the workspace, click the screen control you want to map.
The Screen Control Inspector appears below the Patch List, showing the settings for the
selected screen control. The Actions folder is available in the Parameter Mapping
browser.
2 In the column on the left of the Parameter Mapping browser, click the Actions folder.
The available actions appear in the second column of the browser.
3 Select the action you want to map.
Mapping Screen Controls to All Channel Strips in a Patch
When you map a screen control to a channel strip parameter such as volume or pan,
you can map it to control the same parameter in all the channel strips in the patch. This
is particularly useful when you want to control the overall volume of a layered sound,
even if the different layers are played across multiple keyboards.
To map a screen control to all channel strips in the patch:
1 Map the screen control following the instructions in the preceding sections.
2 In the Screen Control Inspector, select the “Send to all Channel Strips” checkbox.
Click the Actions menu to
see available actions.
Click the action you
want to map from
the submenu.