
2


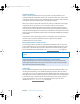

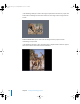


Table Of Contents
- Motion User Manual
- Contents
- Motion 2 Documentation and Resources
- Getting To Know Motion
- Creating and Managing Projects
- Creating New Projects
- Managing Projects
- Editing Project Properties
- Browsing Media Files in Motion
- File Types Supported by Motion
- Adding Media to Your Project
- Managing Objects in Your Project
- Deleting Objects From a Project
- Exchanging Media in a Project
- Object Media Tab Parameters
- Using Media in the Library
- Organizing Layers and Objects in Motion
- The Background of Your Project
- Selecting Objects and Layers in the Layers Tab
- Reorganizing Objects in the Layers Tab
- Nesting Layers Inside Other Layers
- Grouping and Ungrouping Objects
- Showing and Hiding Layers and Objects
- Fixing the Size of a Layer
- Locking Layers and Objects
- Collapsing and Uncollapsing Layer Hierarchies
- Renaming Layers
- Searching for Layers and Objects
- Sorting Layers and Objects in the Media Tab
- Customizing and Creating New Templates
- Basic Compositing
- Using the Timeline
- Using Behaviors
- Keyframes and Curves
- Using Text
- Working With Particles
- The Anatomy of a Particle System
- Using Particle Systems
- Creating Graphics and Animations for Particle Systems
- Advanced Particle System Controls
- Animating Objects in Particle Systems
- Using Behaviors With Particle Systems
- Applying Filters to Particle Systems
- Particle System Examples
- Saving Custom Particle Effects to the Library
- Using the Replicator
- The Difference Between the Replicator and a Particle System
- The Anatomy of the Replicator
- Using the Replicator
- Advanced Replicator Controls
- Animating Replicator Parameters
- Using the Sequence Replicator Behavior
- Using Behaviors With Replicators
- Applying Filters to Replicators
- Saving Custom Replicators to the Library
- Using Filters
- About Filters
- Working With Filters
- An Introduction to Filters
- Working With Filters
- Enabling, Renaming, and Locking Filters
- Copying, Pasting, and Moving Filters
- Reordering Filters
- Changing Filter Timing
- Blur Filters
- A Fun Effect That Can Be Used With All the Blur Filters
- Border Filters
- Color Correction Filters
- Distortion Filters
- Glow Filters
- Keying Filters
- Matte Filters
- Sharpen Filters
- Stylize Filters
- Tiling Filters
- Working With Third-Party Filters
- Working With Generators
- Using Shapes and Masks
- Working With Audio
- Exporting Motion Projects
- Keyboard Shortcuts
- Video and File Formats
- Supported File Formats
- Standard Definition vs. High Definition Video Formats
- Popular Video Codecs for File Exchange
- What Is Field Order?
- Using Square or Nonsquare Pixels When Creating Graphics
- Differences in Color Between Computer and Video Graphics
- Using Fonts and Creating Line Art for Video
- Scaling Imported High-Resolution Graphics
- Creating Graphics for HD Projects
- Integration With Final Cut Pro
- Using Gestures
- Index

Chapter 2 Creating and Managing Projects 165
Using High Resolution Still Images
A common and effective use of still images in motion graphics work is the animation of
high resolution files. The DPI of image files as defined in programs like Photoshop does
not apply to video, as the dimensions of each imported still image are defined simply
by the number of pixels. If the current dimensions of an image are larger than the
frame size of your project, the image appears to be much larger, and by default it
appears to be “zoomed in” to its maximum size. You can change the scale of the image
to shrink it down to fit within the project’s frame size, but you can also animate the
scale to zoom into or out of the image, or animate the image’s position to pan around
within it, creating all kinds of motion-control effects.
Because Motion is graphics-card dependent, you may have different file-size import
limitations. When importing an image that is too large, an alert sheet appears which
states “This media is too large to render at full resolution, and will be shown at a lower
quality.” Click OK to import the image at a lower quality. For more information, visit the
Motion site at
http://www.apple.com/Motion.
When importing large still images, you can set a preference that tells Motion to import
the file at its original size, to change the resolution of the image to fit the Canvas size,
or to scale the image down to fit the Canvas size.
To set the large still image import preference:
1 Choose Motion > Preferences ( or press Command+,).
2 In the Still Images & Objects group of the Project Preferences, choose a setting from
the Large Stills pop-up menu.
Do Nothing: Imports the image at its original size.
Click to choose large still
import preference.
01112.book Page 165 Sunday, March 13, 2005 10:36 PM