
User`s guide


Chapter 8 Creating Tables 177
To hide a cell border:
1 Select a cell border or set of cell borders.
2 In the Graphic Inspector, choose None from the Stroke pop-up menu.
To create a table with no outside border:
1 Select the table.
2 Click Inspector in the toolbar (or choose View > Show Inspector), and then click the
Table Inspector button.
3 In the Table pane, click the second Borders button to select the outside borders.
4 Click the Graphic Inspector button, and choose None from the Stroke pop-up menu.
Adding Images or Background Colors
You add graphics or color to a table cell using the Fill pop-up menu in the Graphic
Inspector. You can add images or color to individual table cells, or to the entire table.
To add an image to a table cell:
1 Select a table cell, a group of cells, or the whole table (for more information, see
“Using Table Cells and Borders” on page 167).
2 Click Inspector in the toolbar (or choose View > Show Inspector), and then click the
Graphic Inspector button.
3 Choose Image Fill from the Fill pop-up menu. (If there’s already an image in the cell,
click Choose.)
4 Select an image and click Open.
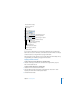
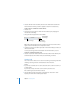
5 Use the Scale pop-up menu to fill the cell the way you want.
Set the scale of the image
within the cell or table.
Drag a new image to the
well to change it, or click
Choose.
Choose an image fill, color fill, tinted
image fill, or gradient fill for any cell
or the whole table.