
User Guide
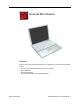


Table Of Contents
- PowerBook G4 (12-inch)
- Take Apart
- General Information
- Battery
- Feet
- Memory Door and Memory Card
- AirPort Extreme Card
- Keyboard
- Top Case
- Reed Switch Board and Cable: PowerBook G4 (12-inch)
- Hall Effect Sensor Board and Cable: PowerBook G4 (12-inch DVI)
- Hard Drive
- Modem
- DC-to-DC Board
- Heatsink and Fan Assembly: PowerBook G4 (12-inch)
- Heatsink: PowerBook G4 (12-inch DVI)
- Inner Frame: PowerBook G4 (12-inch)
- Inner Frame: PowerBook G4 (12-inch DVI)
- RJ11 Modem Board and Cable: PowerBook G4 (12-inch)
- RJ11 Modem Board and Cable: PowerBook G4 (12-inch DVI)
- Fan: PowerBook G4 (12-inch DVI)
- Sleep Light
- Logic Board
- DC-In Board
- Optical Drive
- How to Remove a Stuck Disc from the Slot-Load Drive
- Bluetooth
- Subwoofer
- Display Module
- Bottom Case
- Display Housing
- LCD Panel
- Inverter Board (and Antenna Cable Assembly)
- Hinges with Bezel Brace
- Display Bezel
- Troubleshooting
- Views

PowerBook G4 (12-inch) Take Apart -
3
General Information
Tools
Most of the tools required for taking apart these computers are the same as for earlier
notebook models; however, there are three new tools:
• 1.5 mm hex driver (small hex head screwdriver) for the top case and display housing
• 14 mm socket wrench or needlenose pliers for the DC-to-DC board
• tweezers or needlenose pliers (for replacing a foot or for routing thin cables such as
the AirPort antenna cable)
The following tools are recommended for these computers:
• Coin
• ESD wriststrap and mat
• Small soft cloth
• Black stick (or other nonconductive nylon or plastic flat-blade tool)
• #0 Phillips screwdriver (magnetized)
• #1 Phillips screwdriver (magnetized)
• Jeweler’s flat-blade screwdriver
• 1.5 mm hex driver
• 14 mm socket wrench or needlenose pliers
Important:
To organize the screws you remove from the computer, use a tray with divided
compartments (such as a plastic ice cube tray). If doing a complete disassembly, note the
screws removed from each location in the computer.
Warning:
Check the screw lengths before installing the screws. Installing a longer
screw in the wrong place can permanently damage the housing or an internal part.
Pictures in this Chapter
Because in some cases the computer was photographed at a pre-release stage, some of
the images pictured in this chapter show boards that are red, rather than green. However,
production models include green boards.