Apple Qmaster 3 User Manual
K Apple Inc. Copyright © 2007 Apple Inc. All rights reserved. Your rights to the software are governed by the accompanying software license agreement. The owner or authorized user of a valid copy of Final Cut Studio software may reproduce this publication for the purpose of learning to use such software. No part of this publication may be reproduced or transmitted for commercial purposes, such as selling copies of this publication or for providing paid for support services.
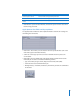
1 Using Apple Qmaster 3 The Apple Qmaster system provides automated work distribution and processing for high-volume projects created with Shake and other digital visual effects software packages. This document describes the Apple Qmaster application, one of several applications in the Apple Qmaster distributed processing system. The complete system includes controls for configuring clusters of processing computers and to monitor, pause, resume, or cancel work that has been submitted.
The Apple Qmaster Distributed Processing System Computers that submit batches to Apple Qmaster are called clients. An Apple Qmaster job is a processing task in the form of a Shake file, or other file or commands, that uses UNIX commands to specify settings such as rendering instructions and file locations and destinations. Network Batch of processing jobs Client computer Jobs are submitted. Processed files Apple Qmaster cluster Processing is performed by cluster.
Clusters When a client sends batches to the Apple Qmaster system, all the processing and subsequent moving of any output files is performed by a group of Apple Qmaster– configured computers called a cluster. To set up Apple Qmaster services, you use the Apple Qadministrator application to create one or more clusters of service nodes, with one cluster controller included in each cluster. Each computer in the cluster is connected to the other computers in the cluster through a network connection.
The Apple Qmaster Interface The Apple Qmaster application described in this document is one part of the larger distributed processing system described above. The Apple Qmaster application is the client software you use to submit jobs and batches to the system. Both this application and the larger system are known by the same name (Apple Qmaster).
Processing service type Notification label Local Compressor service servicecontroller:com.apple.stomp.transcoder Distributed Compressor service servicecontroller:com.apple.stomp.transcoderx Distributed Apple Qmaster service servicecontroller:com.apple.qmaster.executor  Batch Monitor: Opens the Batch Monitor, which allows you to view the status of all batches being processed.
 Command menu: Use this pop-up menu to create commands. You can choose one of the following types of jobs:  Generic Render Command  Maya Command  Shake Command  Shell Command Use the Add ( + ) button to enter a job (with the selected job type) into the Batch table. Use the Remove ( – ) button to delete the selected job from the Batch table. Use the Duplicate button to duplicate the selected job in the Batch table.
Installing Apple Qmaster, Shake, and Other Applications Each rendering application has a slightly different installation procedure. See the Distributed Processing Setup guide for information on installing the Apple Qmaster suite of applications. To use Apple Qmaster with Shake, or other frame-based rendering applications, you must follow these installation and licensing guidelines: Â To submit batches for Shake, a copy of Shake must be installed on every node in the cluster.
Shared Volumes All the nodes in the cluster must have a common volume to work from; otherwise they will not know where to find assets needed for any given batch. There are many ways to set up file sharing. The following is a quick tutorial on NFS export and mounting. NFS is not required, as you can also use AFP or SMB. If you already have an NFS server, such as your cluster controller, simply add another export in /etc/exports or netinfo and send a -HUP (-1) to mountd.
Shared Volume Media Management with Shake It maybe necessary to relink your assets once you move your project to the shared volume. This varies depending on the types of files, plug-ins, fonts, and environmental requirements. Something that commonly needs to be changed is the FileIn and FileOut paths, and env variables such as NR_INCLUDE_PATH and NR_FONT_PATH. UNC should be disabled, as these paths are typically not resolvable to nodes in the cluster when arbitrary host names are used.
The plug-ins automatically set some default parameters for the job. They also provide a dialog for you to adjust these parameters to your needs, and to add more command-line options to each job. Â To submit batches for Shake, see “Submitting Shake Batches,” below. Â To submit batches for Maya, see “Submitting Maya Batches” on page 16. Â To submit batches for other frame-based rendering applications, see “Submitting Batches with the Generic Render Command” on page 18.
Motion Blur checkbox The Motion Blur checkbox contains the following options:  Default for script  Off  On The “Default for script” option provides greater control by allowing you to retain custom motion blur settings from the original Shake script. Shake Jobs and Non-Zero Exit Status The “Ignore script failures” checkbox allows you to determine whether Apple Qmaster should continue rendering all the frames of the script in the event that Shake returns a non-zero UNIX command result.
With the exception of the Minimum setting, each setting in the dialog corresponds to a commonly used Shake command or option. Refer to the Shake documentation for more information. Â You can change the value in the Minimum field to change the minimum number of frames in each Apple Qmaster segment. For example, with a minimum value of 10 (the default), Apple Qmaster would divide a 100-frame job into at least 10 segments of 10 frames each.
d Click OK when you have finished with this dialog. The Shake job appears in the window. The job appears in the window 5 To add more jobs to this batch, repeat steps 3 and 4. Â To edit a command in the list, double-click the job. The command dialog in step 4 appears. Â To delete a job from this batch (before you submit the batch), select the job you want to delete and click the Remove ( – ) button. 6 As needed, set the following options for this batch: Â Submit To: Choose a cluster to process this batch.
Saving Time with Apple Qmaster The Apple Qmaster interface includes some additional features that you may find convenient. Â Duplicating jobs: To duplicate a job, select it and click the Duplicate button, which is next to the Remove ( – ) button. This is especially useful if you want to submit similar jobs. You can make copies of the same job and then edit values in Apple Qmaster as needed.
Some fields and settings in this dialog are optional, but the following are required: Â The Maya field displays the default location for the Maya application—make sure it is correct. Â Use the Choose buttons to navigate to and choose the location of the Maya project and scene files for this job. Â In the Frames region, enter a Start and End frame for the job. The available settings correspond to commonly used Maya command options. You can also type additional command options in the Options field.
Mental Ray for Maya Submissions and Other Options: To use Mental Ray for Maya renderer, add -r mr to the options field. You must have a licensed copy of Maya on each node in the cluster to use the Mental Ray renderer. Apple Qmaster does not use Maya Satellite, so in this regard, there is no difference in Maya Complete vs. Maya Unlimited, except for the plug-ins that ship with Unlimited. If the node in question has only one CPU, the number of satellite CPUs does not apply to Apple Qmaster.
To submit a batch of files for processing using the Generic Render command: 1 In the Apple Qmaster window, choose Generic Render from the pop-up menu, then click the Add ( + ) button to add a job. 2 In the dialog that appears, enter the relevant information in the required and optional fields. The full command is displayed here.
4 If necessary, add command-line instructions into the Options field. Any text entered here will be appended at the end of the command. 5 Verify the full command in the Command text box and click OK. You can further customize the batch instructions by adding command-line options here. The full command is displayed here. 6 To add more jobs to this batch, repeat steps 1 through 4.
Submitting After Effects Batches with the Generic Render Command: The following template is a good starting point for using the Generic Render plug-in to render After Effects projects: [EXECUTABLE] -project [INPUT] -comp "Comp 1" -RStemplate "Multi-Machine Settings" -OMtemplate "Multi-Machine Sequence" -s [START FRAME] -e [END FRAME] -output [ITEM]/strategies[####].psd Where: [EXECUTABLE] = /Applications/Adobe\ After\ Effects\ 6.5/aerender [INPUT] = /SHARED_VOLUME/Projects/AEProjs/Wine_Country/QMproject.
Optionally, you can use Notification and Set Environment before you submit. Notification is email notification: Enter an email address and SMTP server, and you will be notified when your batch finishes, and what the status was. Use Set Environment to define variables on a per-batch basis. For more information, see “Setting Environment Variables in Apple Qmaster” on page 26. Note: Apple Qmaster does not currently support SMTP servers that require authentication.
4 For each job you want to add to the batch, click the Add (+) button, then type the UNIX command in the Command column. The UNIX command might specify, for example, the application, an output destination, and a couple of command-line options. Type the command in the Command column. Note: If you need to delete a job from this batch (before you submit the batch), select the job you want to delete and click the Remove (–) button.
Will Your Cluster Include Only Extended Nodes or Be Mixed? If all the nodes in the cluster will be extended nodes (nodes that do not have Apple Qmaster installed), the cluster needs one intermediary node that also acts as the cluster controller. There is no need to use the Apple Qadministrator application at all if you are creating a cluster that contains only an intermediary node and extended nodes.
3 Make sure the Managed checkbox for the Rendering service is selected in the Services section, and that its checkbox in the Share column is checked. 4 Click the “Options for selected service” button in the Services pane. Note: The Service Options button is not available if the Rendering service is already on. If the service is on, click the Stop Sharing button so that you can access the “Options for selected service” button.
6 In the Apple Qmaster Preferences Pane, click Start Sharing. Start Sharing button If you configured this intermediary node as the cluster controller, your work is done and the extended node cluster is ready to start receiving and processing batches submitted by Apple Qmaster. If, instead, you want the extended nodes to be part of a cluster that includes regular service nodes, use Apple Qadministrator to add this intermediary node to that cluster.
What’s an Environment Variable? Environment variables are settings within a shell, from which commands are issued that affect the way a program operates. People who regularly execute commands from a Terminal shell, or write shell scripts, are usually familiar with environment variables. For example, the environment variable called PATH tells the shell where to look for commands that are entered. The PATH that is specified becomes the search path that is used when locating a program.
Command-Line Usage in Apple Qmaster If you are accustomed to doing your work from Terminal shells, and need or prefer to run Apple Qmaster from the command line with minimal use of application interfaces, this section is for you. Installing Apple Qmaster from the Command Line Follow these steps to install Apple Qmaster software on each computer you want to use for distributed processing. (All computers must be on the same subnet.) 1 Copy the standalone installer package (AppleQmasterNode.
Command options This table provides information about each of the enabling and disabling service-node and cluster-controlling services on a computer. Preference command option Description [-cluster] Turns cluster-controlling services on or off. [timeout min] [servername name] [quickcluster on | off ] [unmanagedservices on | off ] [unmanagedmulticapturethreshold sec] [networkinterface allinterfaces | ] [-service Rendering]
Command options This table provides information about each of the command options for submitting jobs. 30 Submission command option Description [-clustername ] Use to specify the name of the cluster to which you want to send the job. Using the cluster name, Apple Qmaster looks for the cluster on the network in order to use it. [-batchname ] Use to specify a name for the batch so that you can easily recognize it in the Batch Monitor.
Example of Shake Command XML The code below is an example of XML code for submitting a Shake command. Notice that because it needs to be entered as one command line, every character after -options that isn’t alphanumeric must be preceded with a backslash (\). /Applications/Apple\ Qmaster.app/Contents/MacOS/Apple\ Qmaster -clustername elvis -command "Shake" -options \
Command options This table provides information about each of the command options for monitoring batches. Monitoring command option Description [-clustername ] Use to specify the name of the cluster to which the job was sent. [-clusterid ] Optionally, you can use -clusterid to enter the cluster ID and port number instead of using -clustername.
Using Scripts to Run Apple Qmaster, Compressor, and Batch Monitor To simplify your use of the command line, you can add command-line-friendly scripts to /usr/bin. Each script sets an ENV variable for location, then executes the binary. Using the following scripts would be useful if you frequently use the command line for submissions or automated submissions. You do not need to specify the full path and you can add frequently used ENV variables and options to speed up the submission process.
Batch Monitor Script Example #!/bin/csh -f # # set env var, BATCHMONITOR_LOCATION if not set # if ${?BATCHMONITOR_LOCATION} == 0 then pushd `dirname $0` >& /dev/null setenv BATCHMONITOR_LOCATION "/Applications/Utilities/Batch Monitor.