Introducing the Apple Remote Access MultiPort Server This chapter provides a basic introduction to the Apple Remote Access MultiPort Server, including all hardware, software, and network requirements. This chapter also describes the role of a remote access server on your network.
About the Remote Access MultiPort Server and Remote Access Manager The Remote Access MultiPort Server is a product that turns a computer running the Mac OS into a remote access server supporting up to 16 lines for remote connection by users. Remote Access Manager is the application for configuring ports and controlling user access to the server. Remote Access allows users to use network services, such as file sharing, electronic mail, and print servers, that are available on an AppleTalk local area network.
Users can access their offices from home or on the road. The administrator uses Remote Access Manager software to set up and administer the server.
Requirements for using the Remote Access MultiPort Server The following sections list the minimum hardware, software, and network requirements for using the server. You will need additional RAM to run other applications or services. Also, the more powerful the computer, the better the performance.
Network requirements Connect your Remote Access MultiPort Server to an AppleTalk network using the same type of networking software and cable as used with other devices on your network. Any AppleTalk network is capable of supporting a Remote Access MultiPort Server. The most common network choices are LocalTalk, Ethernet, and token ring. IMPORTANT This guide assumes that you are adding the Remote Access MultiPort Server to an existing network.
SNMP AppleTalk Transport v.1.0 is not compatible with the MultiPort Server. If you have SNMP AppleTalk Transport v.1.0 installed, remove it. If you intend to use SNMP network management with either the Internet Router or the MultiPort Server, install SNMP AppleTalk Transport v. 1.1 after installing the Internet Router and before installing the MultiPort Server. AppleShare The Apple Remote Access MultiPort Server and AppleShare v. 4.0.1 or later can run concurrently on the same Mac OS computer.
2 Getting Started This chapter provides step-by-step instructions for getting your Apple Remote Access MultiPort Server ready to work, from preparing the server computer to installing the Remote Access Manager software. During the setup process you may need to consult the manuals that came with your computer, expansion cards, and serial communications devices for general information, installation instructions, and troubleshooting.
Preparing the server computer Set up the server computer exactly as you would any other computer running the Mac OS, giving extra consideration to the server’s physical security. If you have any concerns about physical security, you should consider putting the server computer in a separate room with controlled access. Physical security is your first line of defense for server security. For information about other types of security, refer to Chapter 3.
Make sure the AppleTalk Active button is selected. Installing expansion cards The number of expansion cards that you can install in the server computer depends upon the number of slots available in the computer. For example, if you are using an Apple Workgroup Server 8150 as the server computer, you can install a maximum of three 6-port serial cards, resulting in sixteen possible ports, with two left over.
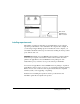
Attaching the serial devices Use the Smart Serial 6 cable included with your expansion card to attach all serial devices. Attach a telephone line to each device, following the installation instructions provided with the device. Installing the software The CD-ROM disc included in your Remote Access MultiPort Server package contains all the software you need to run the Remote Access Manager application and the server.
3 Click OK. The Easy Install screen appears. 4 Click Install. Note: Be sure to use Easy Install. Clicking Customize allows you to install the software elements individually. However, all the software elements are required for successful installation, so use of the Customize option is not recommended. After installation is complete, a dialog box appears informing you that installation was successful. 5 Click Restart.
3 Setting Up the Server This chapter provides information about and instructions for setting up basic remote access service—including setting server preferences, configuring the ports, and registering users. This chapter also provides information about the different types of security you can establish for the server using the Remote Access Manager application.
About server security You can establish and control server security through a number of features in the Remote Access Manager software: m user registration m password and callback options m zone access m Security Zone m external security Guests and registered users Guest user is a generic account for guest users of remote access service. Anyone on the network can be a guest; a guest is not assigned a password and generally has limited network access.
Requiring a callback number for users further ensures security because users can only connect to the server using a telephone number that they have provided to you. When a user successfully logs in, he or she is immediately disconnected from the server. The server then attempts to make a connection at the callback number listed for that user. If the telephone number is valid, a connection is made. To maintain a high level of security for your network, you should require all users to supply callback numbers.
Security Zone The Security Zone feature prevents individuals from setting up an Apple Remote Access MultiPort Server or Apple Remote Access Personal Server without an authorizing password. Security Zone software is provided in the Apple Remote Access MultiPort Server Toolkit folder included on the installation CD-ROM disc. For instructions on how to implement this feature, see the Read Me file provided with the software in the Apple Remote Access Security folder.
Note: Example screens throughout this manual display “Third-Party Security” as the security module. This name does not refer to a specific product, but is intended for illustration purposes only. See your Apple-authorized reseller or representative for specific product recommendations. Starting the Remote Access Manager software The Remote Access Manager application does not have to be running for the server to be active; however, you must run Remote Access Manager once to start up the server.
2 Click Continue. The Server Preferences dialog box appears. If you have installed the Remote Access manager software on the same computer as an AppleShare server, or if you have named your computer, the server or computer name appears in the Server/Macintosh Name text box. If these circumstances do not apply, “Apple Remote Access Server” appears in the name box.
IMPORTANT Replacing an Administrative Password is difficult. If you record your administrative password, guard it carefully. If you lose or forget it, see “The Administrative Password Has Been Lost” in the Appendix, “Troubleshooting.” 4 Select password options by clicking the appropriate checkboxes and entering a value when required in the text box. The password options in the Server Preferences dialog box allow you to control server security at the password level.
m Number of Password Attempts Before User Disabled The number of times a user can attempt to log in to the server without success before the user’s account is disabled. This number should be greater than the Maximum Number Password Attempts Before Disconnect. A count of consecutive bad password attempts is kept. When it equals the Number of Password Attempts Before User Disabled, the user’s access is disabled. Access must be reenabled by the administrator before the user can connect again.
5 If you have installed a third-party external security module and want to implement it, choose its name from the Module pop-up menu. External security provides an additional layer of security for your server and is applicable for current users and users you register in the future. You can determine whether this type of security is required for all users or only for selected users. Regardless of your choice, a checkbox with the name of the security module will appear in each User information window.
7 Click OK when you have finished entering information and selecting security options. If you do not enter an Administrative Password, the following warning appears: 8 Click OK to confirm that you do not want to enter an Administrative Password, or click Cancel to enter an Administrative Password. Note: To change the Server Preferences at any time, choose Set Server Preferences from the Server menu.
Dial-in Access allows dial-in and callback access on the same port. With this method, a user who does not have callback enabled is able to dial in and remain connected. This is useful if you have a number of users who are on the road and cannot provide you with a callback number. If the user has callback enabled, when the user dials in, the server checks that the user name and password are correct. If they are correct, the user is disconnected, and the server calls him or her back on the same port.
To configure the serial ports: 1 Choose Configure Ports from the Server menu. The Port Configuration window appears. This window contains information about services installed on the server computer and the configuration of each port.
2 Click the triangle next to Modem Service (or double-click the line) to display all port groupings. The two types of grouping are the ports on an expansion card or the computer’s internal ports themselves.
3 Click the triangle next to the port grouping (or double-click the line) to display the name, status, and configuration of each port. The port name is determined by the slot in the computer in which the card is installed and the number of the port on the card. For example, SS6 C1 Port #1 means that a Smart Serial 6 card is installed in Slot 1 in the server computer and that Port 1 on the card is selected.
4 Select the port you want to configure by clicking it. The Open button becomes active. Initially ports are turned off; that is, they are inactive. Once you configure a port, you can turn it on to make it active.
5 Click the Open button. The Port window appears for the port you selected. The name of the port appears in the title bar. Note: You can also double-click the port name to open the Port window. 6 Enter text in the Port Info text box, such as the name of the modem connected to the port and the telephone number of the line connected to the modem. 7 From the Port Access pop-up menu, select one of the following options: Dial-in Access, Dial-in and Transfer, or Callback Only.
9 Turn the modem speaker on or off by clicking the On or Off button. When the modem speaker is on, you can hear when the modem is making a connection with another modem. However, if modem noise is a concern, you can turn off the modem speaker. 10 Select Tone or Pulse for the dialing capability of your telephone line. Select Tone if the telephone line to which the modem is connected supports touch-tone dialing.
13 Click the close box to close the Port window. The Port Configuration window is still visible. Now that you’ve configured the port, you must turn it on to make it active for receiving and making calls. 14 Select the port and click the Turn On button to turn on the port. Note: If you are using the Security Zone software, you will be required to enter a password at this point. You will only be required to enter this password the first time you turn on a port.
The status of each port is indicated as On, Off, or Error. If Error appears, a configuration problem exists, and you should refer to the server activity log for a description of the error. For more information about the server activity log, refer to Chapter 5. The Info column contains the text from the Port Info text box in the Port window. The Configuration column contains the access selected in the Port Access pop-up menu in the Port window.
Registering users Once you have configured the ports, you should register users and select dial-in and callback options for them. There are several ways in which you can register users.
IMPORTANT Since AppleShare Admin and Remote Access Manager use the same user database, you cannot run both applications at the same time. However, if you lock Remote Access Manager, you can run the AppleShare Admin application. To lock Remote Access Manager, choose Lock Server Manager from the Server menu. Displaying the User List The User List displays all users you’ve registered for using the server.
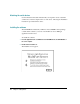
The following table shows the meanings of the icons that appear on the User List. Icon Meaning A new user created in Apple Remote Access User converted from Users & Groups Data File who has never been modified Guest access (Guest User only) Access only to a server running the Mac OS Access to a selected group of zones Access to the entire network Note: A dimmed icon indicates that dial-in access has not been set for that user.
2 Enter the user’s name. For sorting to work properly, enter user names first name first (for example, Joe User). 3 Type a password in the Password text box. The user must enter this password when calling the server. Make sure to inform the user of the exact password, including capitalization. Note: You determine the minimum length of a password in the Server Preferences dialog box. 4 Use the Remarks text box to enter information about the user, such as a department or project name.
9 If you want to require callbacks, click the Call Back at # checkbox and type in the callback number. The callback number is the telephone number provided to you by a user for remote access. Selecting this option means that when the user calls the server, the server computer will temporarily disconnect the user, then immediately call the user at the number you’ve entered. The callback feature is optional; it provides an extra level of security, because the user must call from a specific phone number.
10 If you selected an external security module in the Server Preferences dialog box, the name of the module appears in this dialog box with a checkbox next to it. Click the checkbox to enable the security feature for this user. Note: If you selected the External Security Required for All Users option in the Server Preferences dialog box, the security option will already be selected. The name of the module will be dimmed, and you will not be able to deselect this option.
If you want to limit zone access, select Only Zones Listed or All Zones Except Listed. If you choose Only Zones Listed or All Zones Except Listed, a dialog box appears from which you select which zones will appear on the user’s Zone List. The zone in which the server computer is located appears in italics.
13 Select one or more zones and click Add to add these zones to the Zone List in the User information window. You can change the contents of a user’s Zone List by adding or removing zones. For more information, refer to Chapter 4. 14 Click Save. Saving the information you entered in the New User information window registers the user; the user’s name appears in the User List. For information about changing user settings, refer to Chapter 4.
Creating a user with another user’s settings To save time, you can create one or more users with the same settings, based on a user that you have previously created. For example, if you want to create five users, all with the same settings, you can create the first one, save the settings, and then create the others based on the first user. To create a user with another user’s settings: 1 Select the user in the User List that you want to use as a model.
To set Guest User access options: 1 Display the User List by choosing Show User List from the Users menu. 2 Select Guest User in the User List and click the Open button. The Guest User information window appears.
3 Click the Dial-In Access Enabled checkbox. If you want to revoke Guest access at a later time, you can deselect this option. Note: If you want to provide AppleShare access, make sure that you select the Login Enabled option in the AppleShare Guest User information window. 4 Click the “Maximum connection time” checkbox and enter a time in minutes if you want to limit the amount of time for which a Guest User can connect to the server. The default time is 60 minutes.
If you choose the Only Zones Listed option, a dialog box appears from which you can select the one zone to which guests will have access. 6 If necessary, select a zone and click Add. The zone you selected is added to the Zone List. Note that the zone in which the server is located is also included in the Zone List in italics; this zone cannot be removed.
7 Click Save. The guest account now includes basic security attributes. For information about changing zone access, refer to Chapter 4. 8 Click the close box to close the Guest User information window. Getting users ready to use the Remote Access MultiPort Server Make sure that you provide Apple Remote Access Client version 2.0 (or later) software and documentation to all registered Remote Access users. Installation instructions are provided with the Apple Remote Access Client User’s Guide.
4 Managing the User List This chapter provides all the information you need for managing the User List. The topics covered include exporting and importing a User List, displaying and changing settings for a single user, changing settings for multiple users, and deleting users from the User List.
Exporting a User List You can export the User List into a tab-delimited text file, which you can then import to another server. To export the User List: 1 Make sure that the User List window is active. 2 Choose Export User List from the Users menu. A directory dialog box appears in which you can name the exported User List and save it. 3 Enter a name and click Save. The exported list is saved. You can view the list in any application that accepts tab-delimited data.
The following is a list of the headers included in the export file and their meanings. Header Meaning Name Password Remark Enabled Connect User name. User password. Not exported. Remarks from the User information window. Indicates whether dial-in access is enabled. The default value is True. The number of minutes for maximum connection time. A -1 indicates unlimited connection time. The default value is 60 minutes. Indicates whether the Change Password option is enabled. The default value is True.
Importing User List information You can create a tab-delimited text file containing user information, such as names, passwords, and login access, and then import the information into Remote Access Manager to create a new User List or to add users to the current User List. Note: You cannot import zone information or external security settings. The first record in the imported file is a header record that contains the names of the fields that are to be imported.
To import the information in this sample file to the current User List, use the Import User List command from the File menu. Once you begin the import operation, a dialog box appears containing the following four options: Merge, Replace, Ignore, Cancel. Select one of these options to determine how the information will be imported. If new records exist in the imported file but do not exist in the User List, they are added to the User List.
Ignore When Ignore is selected, any record in the imported file that matches an existing record in the User List is skipped, and import continues with the next record in the file. No values in the existing record are changed. Cancel Cancels the operation. IMPORTANT When you import User List information, you change your current Users & Groups Data File. Make sure that you back up this file by duplicating and renaming it in the Preferences folder.
Opening a User information window You can access a User information window from the User List window or by using the Open User command in the Users menu. You can also display multiple User information windows at one time. To open a User information window: 1 Select the user name from the User List.
2 Click the Open button in the User List window or choose Open User from the Users menu. The User information window appears. Note: You can also double-click on a user’s name in the User List to open the User information window. Changing settings for a single user The previous chapter described the process of creating users and setting basic security options. The following sections describe how to change settings for a user.
To change login options: 1 Select a user from the User List. 2 Click the Open button in the User List window or choose Open User from the Users menu. The User information window appears. 3 Enable or disable any of the following login options by clicking the option’s checkbox. m Dial-In Access Enabled Enabling this option allows the user to dial in to the Remote Access server. Disabling this option revokes dial-in access.
m Maximum connection time Enabling this option allows you to enter a maximum time (in minutes) for which the user can be connected to the server. The default connection time is 60 minutes. You can enter a maximum of 99,999 minutes (do not enter the comma). Disabling this option provides the user with access to the server for an unlimited amount of time. 4 Click Save to save these changes.
Changing security options Security options include a callback number and an external security module. Recall that users must have a client security module installed on their computer to use external security. To change security options for a single user: 1 Select a user from the User List. 2 Click the Open button in the User List window or choose Open User from the Users menu. The User information window appears.
m Third-Party Security Enabling external, third-party security requires that the user be validated by the security module on the server each time he or she tries to log in. Once this option is enabled, the Configure button becomes active. 4 If you selected Third-Party Security and want to configure the security settings, click the Configure button. A dialog box appears in which you can enter configuration information. Refer to the security provider’s documentation for more information.
Changing zone access The section “Creating a New User” in Chapter 3 describes the different types of zone access you can select for users. Zone access determines which zones on your network a user can access. This section describes how to change a user’s zone access by removing zones from the Zone List in the User information window.
3 Select one or more zones in the Zone List. 4 Click the Remove button. The zone is removed from the user’s zone list. 5 58 Click Save.
Changing settings for multiple users The previous sections describe how to change settings for a single user by opening the User information window and changing the options directly. You can easily change settings for multiple users by selecting users in the User List and choosing a command from the Users menu.
Allowing users to change their passwords You can decide whether or not selected users can change their passwords for accessing the server. To enable or disable users changing passwords: 1 Select the users from the User List. 2 Choose Set Password Change from the Users menu. A dialog box appears in which you can enable or disable the option allowing users to change their passwords. Allow User to Change Password is selected by default.
Requiring a new password at login time As an added security measure, you may want to require that some users change their passwords at the time they log in to the server. The Set New Password on Login command enables you to change the setting of the Require New Password on Next Login option. Make sure that you have selected the Change Password Enabled option in each user’s information window. To change the requirement for entering a new password at login time: 1 Select the users from the User List.
Changing the maximum connection time Using the Set Max Connection Time command, you can change the setting of the Maximum Connection Time option in the User information window. To set the amount of connection time for multiple users: 1 Select the users from the User List. 2 Choose Set Max Connection Time from the Users menu. A dialog box appears in which you can use the already set limits, select a new maximum connection time, or provide the selected users with unlimited connection time.
Changing callback access Setting callback options allows you to provide an additional layer of security. The server must be able to access the telephone number listed in each User information window. If you have already entered a callback telephone number for selected users, you can easily enable or disable the Callback option. To change callback access for multiple users: 1 Select the users from the User List. 2 Choose Set Callback from the Users menu.
Enabling or disabling external security You determine the type of external security by selecting the module in the Server Preferences dialog box. You can quickly enable or disable external security for multiple users by selecting the users and choosing the Set External Security command. To enable or disable external security for multiple users: 1 Select the users from the User List. 2 Choose Set External Security from the Users menu.
5 Click OK to save the new external security setting for the selected users. If you selected the “Open selected users” option, each selected User information window is opened. The Third-Party Security option reflects the setting you selected. Adding zone access You can give a set of users access to a specified zone or set of zones using the Add Zone Access command in the Users menu. To add zone access for multiple users: 1 Select the users from the User List.
Removing zone access You can remove access to a zone or set of zones for a set of users with the Remove Zone Access command in the Users menu. To remove zone access for multiple users: 1 Select the users from the User List. 2 Choose Remove Zone Access from the Users menu. The Remove Selected Zones dialog box appears. 3 Select the zones and click Remove. Access to the selected zones is removed for each user you selected in the User List.
Deleting users from the User List You can delete users either through the User List window or by using the Delete User command in the Users menu. To delete users from the User List: 1 Select the users you want to remove from the User List. 2 Click the Delete button in the User List window or choose Delete User from the Users menu. A dialog box appears, asking you to confirm your choice. 3 Click Delete. The users are deleted from the User List.
5 Managing the Server This chapter provides all the information you need for managing the server. The following topics are covered: working with the server activity log, displaying port activity, working with the Zone List, sending information to users, locking the server, disconnecting users from the server, and shutting down the server.
Working with the server activity log The server activity log records all activity on the server. You can use this log to document the users who connect to the server, the date and time of the activity, and any pertinent information regarding the activity, such as the type of activity and errors. The server activity log can also be used for accounting purposes, for example to charge connection costs back to departments or projects. It can be exported to a tab-delimited text file.
2 Click the Destination button to enter a name for the log and a location in which to archive the log. The default filename is Remote Access Log, but you can enter another filename, for example, Dial-in Server Log. The maximum length of the filename is 20 characters, because the export date is added to the end of the filename when the log file is created. 3 Click Set. The dialog box disappears, returning you to the Log Preferences dialog box.
5 Choose a time interval from the pop-up menu: Day, Week, or Month. At the interval you select, the contents of the server activity log are exported to a text file and saved on the hard disk. At the time of export, the activity log is cleared. If you select Day, the contents of the server activity log are exported each day at midnight. If you select Week, the contents of the log are exported at midnight on Sunday.
To display the server activity log: 1 Choose Show Server Log from the Server menu. The server log appears in its own window. Errors are indicated by an exclamation point (!). 2 Click the close box to close the window. Copying the server activity log To make a copy of the server activity log without affecting the current archiving schedule, choose Copy Log File As from the File menu. Use this option if you want to print a copy of the server activity log.
Printing the archived log file Follow these instructions for best results when printing a log file that you have saved on a disk. 1 Open the file using SimpleText or a word-processing application. 2 Choose Page Setup from the File menu. 3 Click the Landscape icon (the icon indicating horizontal format) in the Orientation section of the dialog box. 4 Enter 70 in the Enlarge or Reduce box. 5 Click OK.
To display port activity: 1 Choose Show Port Activity from the Server menu. The Port Activity window appears. This window contains a list of all ports, the status of each port, port information, and the users who are connected to each port. Using the buttons in the window, you can open User information windows, send a message to users, and disconnect users.
2 Select a port for which you want to display information. The buttons at the top of the window become active. If you select a port to which no users are connected, only the Open Port button becomes active. If you select a port to which a user is connected, all the buttons become active. 3 To display the Setup Port dialog box, click the Open Port button. You can make changes to the port information at this time; however, any changes you make may affect the connected user.
Working with the Zone List In Chapters 3 and 4 you learned how to add and remove zone access using the User information window, the User List, and the Add Zones and Remove Zones commands in the Users menu. This section describes how to work with zones using the Zone List and Zones menu commands. Displaying Zone and User Lists The Zone List displays all zones that are available on your network. Once you display the Zone List, you can “open” a zone to display a list of all users who have access to that zone.
2 Select a zone from the Zone List. The Open button becomes active. 3 Click the Open button in the Zone List window, double-click the zone name, or choose Open Zone from the Zones menu. The User List for the zone appears. 4 78 Click the close box to close the window.
Adding users to a zone To provide users with access to a zone on your network, you must add them to the User List for that zone. This method is an alternative to adding zones to the user’s Zone List in the User information window. To add users to a zone: 1 Choose Zone List from the Zones menu. The Zone List appears.
2 Select the zone to which you want to add users and click Open. The Zone window appears. 3 Click the Add button in the Zone list or choose Add Users from the Zones menu. The User List appears. 4 Select the users you want to add to the selected zone. You can select any users on the list, regardless of their zone access. The Add button becomes active.
Note: If you add users who have This Macintosh Only selected in their User information windows to the list, their zone access automatically changes to Only Zones Listed. 5 Click the Add button. The window disappears, returning you to the Zone window. The users you selected now appear in the User List for the zone. The Save and Revert buttons become active in the Zone window. 6 Click Save to save the User List for the zone.
Removing users from a zone To remove users from a zone on your network, you must remove the users’ names from the zone’s User List. This method is an alternative to removing zones from the user’s Zone List in the User information window. To remove users from a zone: 1 Choose Show Zone List from the Zones menu. The Zone List appears.
2 Select the zone from which you want to remove users and click Open or choose Open Zone from the Zones menu. The User List for the zone appears. 3 Select the users you want to remove from the zone. The Remove button becomes active.
4 Click the Remove button or choose Remove Users from the Zones menu. The users are deleted from the User List for the zone. The Save and Revert buttons become active in the Zone window. 5 84 Click Save to save the revised User List for the zone.
Sending information to users You can send information to users in two ways: using the server’s greeting or sending a message directly to connected users. The server’s greeting usually provides general information and appears only at login time. Sending a message to connected users through the Port Activity window allows you to send a specific message to selected users at any time while they are connected to the server.
Sending a message to connected users When displaying the Port Activity window, you can send a message to selected users. To send a message to connected users: 1 Choose Show Port Activity from the Server menu. The Port Activity window appears.
2 Select a port that has users connected. The buttons at the top of the window become active. 3 Click the Send Message button. A dialog box appears in which you can enter and send a message. 4 Enter the message and click OK. The message appears on the monitors of users connected to the ports you selected.
Locking the server Locking the server prevents unauthorized individuals from accessing most server windows or menus by closing all windows but leaving the server running. IMPORTANT Before locking the server, you must know the Administrative Password. You will be required to enter this information before you can unlock the server. For more information about the Administrative Password, refer to Chapter 3. To lock the server: 1 Choose Lock Server Admin from the Server menu.
Disconnecting users from the server You can disconnect users through the Port Activity window only. To disconnect users from the server: 1 Choose Show Port Activity from the Server menu. The Port Activity window appears.
2 Select the ports from which you want to disconnect users. The buttons at the top of the window become active. 3 Click the Disconnect User button. The Disconnect Users dialog box appears in which you can enter the amount of time until the users will be disconnected and send a message to the users.
4 Enter the number of minutes until the users will be disconnected. If you do not enter a number, but leave the default value, 0, and click OK, the selected users are disconnected immediately. 5 Enter any message to the users, such as when the server will again be available. 6 Click OK to send the message and begin the countdown for disconnection. The message appears on the users’ monitors.
Shutting down the server You can easily notify users of a shutdown and then shut down the server using the Shut Down Server command. Note: If possible, you should give users ample time to finish their work and close their connections to the server. To shut down the server: 1 Choose Shut Down Server from the Server menu. If no users are connected, a message appears asking you to confirm that you want to shut down the server immediately. Click OK to shut down the server.
3 Enter a message to users, such as when the server will again be available or the reason for the shutdown. 4 Click OK. The message is sent to all connected users, and the server is shut down after the time limit you specified. The following status display appears on your monitor: Note: The Shut Down Server command becomes the Start Server command after the server shuts down. To restart the server, simply choose the Start Server command from the Server menu.
Appendix Troubleshooting This appendix discusses problems you may encounter while using the Apple Remote Access MultiPort Server and offers suggestions for solving these problems. Note: If you think you are having trouble with your expansion card, see the troubleshooting section of the card guide that accompanies the product. You may find additional helpful information on Apple’s World Wide Web site at www.info.apple.com.
Server activity log error messages Whenever you’re troubleshooting, check the server activity log for errors, which are indicated by an exclamation point (!). The server activity log records the most significant events that occur on the server, including errors. This section presents the most common errors that may appear in the server activity log. Callback attempt failed: phone number is busy. The client’s phone was busy when the server tried to call the client back.
Connection attempt failed: incorrect password. After a number of attempts, the user making the call did not enter a correct password. Listen error occurred on this port. The modem could not be made to listen for an incoming phone call. First check to see if the modem is on. If it is on, try switching the modem off and then on again. Then turn the port off and then on again in the Port Configuration window. Check the modem cable; it may be loose.
Information displayed by Remote Access Manager appears to be incorrect. For instance, a User information window shows that the user has access but he or she does not. m Close and reopen the Remote Access Manager window to be sure it is up to date. A user you previously registered has disappeared, and you are running AppleShare File Server software on the same machine as the Remote Access MultiPort Server. m The AppleShare Admin application and Remote Access Manager both use the same user list.
Clients are unexpectedly disconnected. m Contact the device manufacturer to be sure that the most current scripts are being used by both client and server. If the serial device supports firmware upgrades, contact the device manufacturer to be sure that the most current firmware is installed. Check that a proper high-speed modem cable is being used. The Administrative Password has been lost. m The Administrative Password is equivalent to the AppleShare Admin Key.
Index A, B activity log. See server activity log adding users to zone 79–81 Add Users command 80 Add Zone Access command 65.
commands Add Users 80 Add Zone Access 65 Configure Ports 24 Copy Log File As 73 Create User As ‘User Name’ 40 Delete User 67 Export User List 46 Import User List 49, 50 Lock Server Admin 88 Lock Server Manager 33 Open User 51, 53, 55, 57 Open Zone 79, 83 Remove Users 84 Remove Zone Access 66 Set Callback 63 Set Dial-In Access 59 Set External Security 64 Set Greeting 85 Set Log Preferences 70 Set Max Connection Time 62 Set New Password on Login 61 Set Password Change 60 Set Server Preferences 22 Set Server S
external security.
opening User information window 51–52 Open Port button 76 “Open selected users” option 59, 61, 62, 63 Open User command 51, 53, 55, 57 Open Zone command 78, 83 P, Q password Administrative 18, 22, 88 changing, by user 60 imported files and 49 new, required at login time 61 options 19–20 server security and 14–15 user 35, 40 Password header 46–47 pause in dialing 36 pop-up menus “Allow Access to” 37, 42 Modem 28 Module 21 Port Access 28, 31 Port Access pop-up menu 28, 31 Port Activity window 74–75, 86, 89 P
security 14–16, 21 setting up 13–44 shutting down 92–93 starting 17–22 zone of 38, 43, 66 server activity log archived 73 copying 73 default filename for 71 displaying 72–73 error messages 31, 96–97 setting preferences for 70–72 time interval of 72 Server menu.
user (continued) creating 34–44 deleting, from User List 67 disconnecting, from server 89–91 guest 14, 40–44 logging in on server and 44 multiple, changing settings for 59–66 new password at login time and 61 other user’s settings and 40 password change and 60 registered 14, 21 registering 32–44 removing from zone 39, 82–84 roving access and 15 sending information to 85–87 single, changing settings for 52–58 third-party, external security access and 37, 44 unauthorized, protection against 18 User List and 3
Apple RemoteAccess MultiPort Server Administrator’s Guide
K Apple Computer, Inc. © 1996 Apple Computer, Inc. All rights reserved. Under the copyright laws, this manual may not be copied, in whole or in part, without the written consent of Apple. Your rights to the software are governed by the accompanying software license agreement. The Apple logo is a trademark of Apple Computer, Inc., registered in the U.S. and other countries.
Contents Preface / vii 1 Introducing the Apple Remote Access MultiPort Server / 1 About the Remote Access MultiPort Server and Remote Access Manager / 2 Requirements for using the Remote Access MultiPort Server / 4 Hardware requirements / 4 Software requirements / 4 Network requirements / 5 Client software requirements / 5 Using the Remote Access MultiPort Server with other networking software / 5 2 Getting Started / 7 Preparing the server computer / 8 Installing expansion cards / 9 Attaching the serial d
Starting the Remote Access Manager software / 17 Configuring the modem ports / 22 Registering users / 32 Sharing user database information with AppleShare / 32 Displaying the User List / 33 Creating a new user / 34 Creating a user with another user’s settings / 40 Setting Guest access options / 40 Getting users ready to use the Remote Access MultiPort Server / 44 4 Managing the User List / 45 Exporting a User List / 46 Importing User List information / 48 Opening a User information window / 51 Changing se
5 Managing the Server / 69 Working with the server activity log / 70 Setting server activity log preferences / 70 Displaying the server activity log / 72 Copying the server activity log / 73 Displaying the archived log file / 73 Printing the archived log file / 74 Displaying port activity / 74 Working with the Zone List / 76 Displaying Zone and User Lists / 77 Adding users to a zone / 79 Removing users from a zone / 82 Sending information to users / 85 Setting the server’s greeting / 85 Sending a message
Preface This guide provides all the information you need to set up and administer an Apple Remote Access MultiPort Server on an AppleTalk network. Using Apple Remote Access Personal Server or Apple Remote Access Client software, users can access file servers, printers, and other computers running the Macintosh operating system (Mac OS) on an AppleTalk network. As a network/remote access administrator, you can use the Remote Access Manager application to control all aspects of remote access use.
m Chapter 5, “Managing the Server,” describes how to manage all aspects of the Remote Access MultiPort Server through the Remote Access Manager application, including working with the server activity log, displaying information about ports, sending messages to users, and locking and shutting down the server. m The Appendix, “Troubleshooting,” discusses potential problems you may encounter while using the Remote Access MultiPort Server and offers suggestions for solving these problems.