
Manual


38 Chapter 3
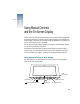
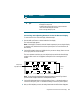
5 When you’re finished with the On-Screen Display, press the OSD on/off button.
The On-Screen Display window disappears.
The controls for each mode—computer (Windows-based computer) and video—are slightly
different. If you’re using the display in computer mode, see “Using the On-Screen Display in
Computer Mode” on page 38. If you’re using the display for video playback or to display
images, see “Using the On-Screen Display in Video Mode” on page 40.
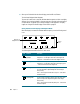
Using the On-Screen Display in Computer Mode
When the display is connected to a Windows-based computer, you see the following control
icons.
The following table describes the function of each control.
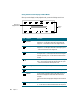
Control
icons
Description of
highlighted control
Icon Control Function
Horizontal
position
Use this control to adjust the horizontal position of the screen
image. Press + on the right to move the screen image to the
right; press – on the left to move the screen image to the left.
Vertical position Use this control to adjust the vertical position of the screen
image. Press + on the right to move the screen image up; press
– on the left to move the screen image down.
Tracking-Coarse Use this control to adjust the pixel frequency, also known as the
clock. You may need to adjust tracking if the screen image is
blurry or wavy.
Press + on the right to increase the clock; press – on the left to
decrease the clock.
Tracking-Fine Use this control to adjust the subclock range, also known as the
phase. You may need to adjust tracking if the screen image is
blurry or wavy.
Press + on the right to increase the phase; press – on the left to
decrease the phase.