USER MANUAL
Information in this manual is subject to change without notice and does not represent a commitment on the part of Applied Acoustics Systems DVM Inc. The software described in this manual is furnished under a license agreement. The software may be used only in accordance of the terms of this license agreement. It is against the law to copy this software on any medium except as specifically allowed in the license agreement.
Contents 1 Introduction 8 1.1 System requirements . . . . . . . . . . . . . . . . . . . . . . . . . . . . . . . . . 8 1.2 Installation . . . . . . . . . . . . . . . . . . . . . . . . . . . . . . . . . . . . . . 9 1.3 Authorization and Registration . . . . . . . . . . . . . . . . . . . . . . . . . . . . 9 1.3.1 Step 1: Generating the challenge key . . . . . . . . . . . . . . . . . . . . 10 1.3.2 Step 2: Generating the Response key and Registering your Product . . . . 10 1.3.
CONTENTS 3 4 4 2.5.6 Locating a Preset in the Browser . . . . . . . . . . . . . . . . . . . . . . . 22 2.5.7 Resizing the Browser . . . . . . . . . . . . . . . . . . . . . . . . . . . . . 23 2.6 MIDI maps . . . . . . . . . . . . . . . . . . . . . . . . . . . . . . . . . . . . . . 23 2.7 Exporting and Importing Presets and MIDI maps . . . . . . . . . . . . . . . . . . 23 2.8 Backuping Presets and MIDI maps . . . . . . . . . . . . . . . . . . . . . . . . . . 23 2.
CONTENTS 5 4.3.6 Filter Drive . . . . . . . . . . . . . . . . . . . . . . . . . . . . . . . . . . 36 4.3.7 Slave Filter 2 . . . . . . . . . . . . . . . . . . . . . . . . . . . . . . . . . 37 4.3.8 Series/Parallel . . . . . . . . . . . . . . . . . . . . . . . . . . . . . . . . 37 4.4 The Amplifier Module . . . . . . . . . . . . . . . . . . . . . . . . . . . . . . . . 38 4.5 The Noise Generator Module . . . . . . . . . . . . . . . . . . . . . . . . . . . . . 39 4.6 The LFO Module . . . . . .
CONTENTS 5 6 50 4.12.7 The Recorder Module . . . . . . . . . . . . . . . . . . . . . . . . . . . . 50 51 5.1 Program Display . . . . . . . . . . . . . . . . . . . . . . . . . . . . . . . . . . . 51 5.2 MIDI map . . . . . . . . . . . . . . . . . . . . . . . . . . . . . . . . . . . . . . . 51 5.3 CPU meter . . . . . . . . . . . . . . . . . . . . . . . . . . . . . . . . . . . . . . 51 5.4 Value Display . . . . . . . . . . . . . . . . . . . . . . . . . . . . . . . . . . . . .
CONTENTS 9 Appendix 10 License Agreement 7 64 65
Introduction 1 Introduction The Ultra Analog VA is a virtual analog synthesizer. With this product, we have not attempted to emulate a specific vintage analog synthesizer but rather to combine into a modern instrument, different features of legendary vintage synthesizers. The Ultra Analog VA generates sound by simulating the different components of the synthesizer through physical modeling. This technology uses the laws of physics to reproduce how an object or system produces sound.
1.2 Installation 1.2 Installation Mac OS Insert the Ultra Analog VA program disc into your CD-ROM drive. Open the CD icon once it appears on your desktop. Click on the Ultra Analog VA Install icon and follow the instructions of the installer. If you purchased this software online, simply double-click on the installer file that you have downloaded and follow the instructions of the installer. Windows Insert the Ultra Analog VA program disc into your CD-ROM drive.
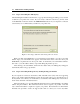
1.3 1.3.1 Authorization and Registration 10 Step 1: Generating the challenge key After launching the installer for the first time, a pop-up window will appear asking you if you wish to authorize your product now or later. If you are ready to authorize Ultra Analog VA now, click on the Next button otherwise click on the Authorize Later button. If your computer is connected to the internet, we recommend that you authorize your product now. Figure 1: Choosing to authorize Ultra Analog VA now or later.
1.3 Authorization and Registration 11 Figure 2: Enter your serial number in the pop-up window. Figure 3: Challenge key appears automatically after entering the serial number. support issues, and notify you of product updates promptly. This information is kept completely confidential. Registration of your product will entitle you to receive support and download updates when available, as well as take advantage of special upgrade prices offered from time to time to registered A|A|S users.
1.3 Authorization and Registration 12 Figure 4: Enter your registration information on the A|A|S webserver. key will appear on-screen. Figure 5: Generation of the response key on the A|A|S server. If your computer is not connected to the internet, take note of your serial number and challenge key and proceed to an internet connected computer. Launch your browser and go to the unlock page of the A|A|S website at: http://www.applied-acoustics.com/unlock.
1.3 Authorization and Registration 1.3.3 13 Step 3: Completing the unlock process The response key corresponding to your serial number and challenge key will be printed in your browser window. In order to complete the unlock process, copy the response key and paste it into the corresponding field of the installer window of Ultra Analog VA. If you obtained your response key from another computer, type the response key by hand in the installer window. Figure 6: Final step of the unlock process.
1.4 Getting started 14 Figure 7: Authorization has been successful. 1.3.4 Obtaining your response key and registering by fax or over the phone: Should you not have access to the internet, A|A|S support representatives are available to assist you in the unlock and registration process Monday to Friday, 9am to 6pm EST. You may contact us by phone at: • North America Toll-free number: 1-888-441-8277 • Outside North America: 1-514-871-8100 • Fax Number: 1-514-845-1875 • Email: support@applied-acoustics.
1.4 Getting started 15 • Mac OS - Double-click on the Ultra Analog VA icon located in the Applications folder. Before you start exploring the factory presets, take a moment to set up you audio and MIDI configuration as explained below. Audio Configuration Audio configuration tools are available from the Audio menu. The Audio Settings function allows you to select an audio output device from a list, organized by driver type, of those available on your computer.
1.5 Getting help 16 application for the first time, this “tree view” will include a destination folder for imported presets as well as a Library folder. To open a folder, click on the “+” symbol on Windows or I symbol on Mac OS which will reveal the folder content. The preset library is different from the program list and can be viewed as a repository containing all the presets available to the application.
1.6 Forum and User Library 17 • Worldwide: 1-514-871-8100 • Fax: 1-514-845-1875 • Email: support@applied-acoustics.com Our online support pages contain downloads of the most recent product updates, and answers to frequently asked questions on all A|A|S products. The support pages are located at: www.applied-acoustics.com/faq.htm 1.6 Forum and User Library The A|A|S community site contains the Ultra Analog VA user forum, a place to meet other users and get answers to your questions.
Presets and MIDI maps 2 18 Presets and MIDI maps Ultra Analog VA comes with several factory presets covering a wide range of sounds. This collection of presets lets you play and familiarize yourself with this synthesizer without having to tweak a single knob. Soon, however, you will be experimenting and creating your own sounds and projects that you will need to archive or exchange with other users. You may also want to control the parameters of Ultra Analog VA with a specific MIDI controller.
2.2 Playing and Changing Presets 19 list should be viewed as temporary or as a ‘working copy” of the preset whereas the version in the library should be viewed as permanent or as the ‘reference version”. When you start the application for the first time, the program list contains a selection of presets from the factory preset library. At that point, the presets in the program list are identical to their version in the library. 2.
2.3 Editing and Saving Presets 20 program has changed. The 128 programs can therefore be customized by selecting different program numbers (by using the ‘+” and ‘−” buttons from the toolbar or selecting programs from the program list) and loading presets from the library. 2.3 Editing and Saving Presets Moving the different controls on the Ultra Analog VA interface modifies the preset loaded in the current program.
2.4 Saving the Program List 21 from the View menu, or the Ctrl-L/Apple-L shortcut and double click on its icon in order to reload this version into the current program. Ultra Analog VA will make sure that you do not loose modifications to a preset. In the case where a program holds a modified version of a preset and when trying to load a new preset from the library into this program, the application will ask you if you want to save the modified preset in the library.
2.5 Organizing the Preset Library 22 between two presets, click on the first one and then on the second one while keeping the Shift key depressed. Once a group of items has been selected, use the Copy and Paste functions as explained above. 2.5.3 Renaming Presets and folders On Windows systems, to rename a preset or folder, click a first time on the corresponding icon in the browser in order to select it. Then click a second time to enter in name edition mode.
2.6 2.5.7 MIDI maps 23 Resizing the Browser In standalone mode, the browser can be resized. In order to change the size of the browser, position the mouse cursor on the line separating the browser from the Ultra Analog VA control panel. When the cursor changes to a double-headed arrow, click-hold and move the mouse to the left or right as desired. In order to hide the browser completely, move the double-headed arrow cursor fully to the left.
2.9 Restoring the Factory Presets and MIDI Links 24 The second backup method will enable you to archive the entire material present in the browser. The content of the browser, including presets, MIDI maps and folders is saved into a database file. This second backup method simply consists in archiving this file. The database file location is different whether you are working on a Mac OS or Windows system.
Architecture of the Ultra Analog 3 25 Architecture of the Ultra Analog The Ultra Analog is a very adaptable and versatile two-oscillator synthesizer. The different control elements of the synthesizer have been grouped into three sections in the graphical user interface shown in Figure 8. Figure 8: Graphical user interface of the Ultra Analog Synthesizer.
3.1 General Signal Flow 26 together, as well as the multiple signal paths available. 3.1 General Signal Flow Filter 1 Oscillator 1 Amp 1 L R LFO 1 Oscillator 2 LFO 2 Pre Filter Mix LFO 1 Filter Env 1 Amp Env 1 Filter 2 Amp 2 Filter Env 2 Amp Env 2 L R Output Effect Stage The general signal flow of Ultra Analog is shown in Figure 9 and in a more detailed schematic in Figure 22 of the Appendix to this manual.
3.2 Modulation Sources 3.2 Modulation Sources 27 The two rows of the main section of Ultra Analog are equipped with multiple modulation sources illustrated by dotted lines in Figure 9. On each line, one finds a low-frequency oscillator (LFO), used as a modulation source for its respective oscillator, filter and amplifier module, and two loopable and velocity-sensitive envelope generators connected to the filter and amplifier module respectively.
Parameters 4 28 Parameters The Ultra Analog is based on two similar module rows each containing an oscillator, a multi-mode filter, an amplifier, a low-frequency oscillator and two envelope generators. Except for very slight differences, the modules on each line are identical and so the description of the modules, unless otherwise stated, is assumed to apply to the modules on each line. 4.1 General Functioning of the Interface 4.1.
4.1 General Functioning of the Interface 29 for the control. Adjustment of the control is obtained by clicking on a selection or using the up and down arrows and the Enter key of the computer keyboard. The other controls represented by a display, such as the Tempo control of the Clock module, are adjusted by click-holding on them and dragging the mouse upward or downward. Selection of these controls is possible when the mouse is positioned on the display and a double pointing arrow appears. 4.1.
4.2 The Oscillator Module 30 4.2 The Oscillator Module The Oscillator module offers the features of the most reputed analog oscillators. It provides a fine control on the pitch, standard waveforms, a sub-oscillator, and a hard sync. The Oscillator module is implemented using precise modeling algorithms rather than wave tables providing alias free sources with clean pulse width modulation and synchronization. 4.2.
4.2 The Oscillator Module 31 slightly detune the oscillator. When the Detune knob is in its center position, there is no detune while turning it clockwise or anti-clockwise increases or decreases the pitch respectively. The pitch of the Oscillators module and can be modulated by the signal from the Keyboard module and/or the LFO module. The amount of modulation from these sources is adjusted by using the Kbd and the LFO gain knobs.
4.2 The Oscillator Module 32 the original signal can also be modulated with the signal coming from the LFO module which is controlled with the LFO knob located just below the Kbd knob. Note that the sync mode is only effective when the waveform is set to rectangular or saw tooth and that in this mode the sub-oscillator is disabled. Also, when the oscillator is in Sync mode, the Time and Amount knobs, instead of acting on the pitch of the master clock, act on the pitch of oscillator.
4.3 The Filter Module 4.3 The Filter Module 33 Ultra Analog is equipped with two multi-mode filters. The filters are patched in a flexible way in order to allow their use in parallel, in series or any combination of both. For even more flexibility, the cutoff frequency of the Filter 2 can also be locked to that of Filter 1. Each of the multi-mode filters include a resonant low-pass, band-pass, high-pass, notch and a formant filter which can be selected using the Type drop-down menu.
4.3 The Filter Module 34 Q=10 Amplitude (dB) Q=4 Q=2 0dB −3dB Q=1 Slope (dB/Oct) Frequency (Hz) Cutoff Frequency Figure 12: Frequency response of the low-pass filter. 4.3.2 Resonant High-Pass Filter Q=10 Amplitude (dB) Q=4 0dB −3dB Q=2 Q=1 Slope (dB/Oct) Cutoff Frequency Frequency (Hz) Figure 13: Frequency response of the high-pass filter.
4.3 The Filter Module 35 Amplitude (dB) Q=10 0dB −3dB Q=4 Q=2 Q=1 Frequency (Hz) Center Frequency Band Width (Q=1) Figure 14: Frequency response of the band-pass filter. both sides of the center frequency. For a second order filter the slope is -6dB/Oct while for a fourth order filter it is -12dB/Oct. 4.3.4 Notch Filter Q=10 Q=4 Amplitude (dB) Q=2 Q=1 0dB −3dB Center Frequency Frequency (Hz) Band Width (Q=1) Figure 15: Frequency response of the notch filter.
4.3 The Filter Module 36 as shown in Figure 15. The Cutoff knob is used adjust the center frequency and the Q knob sets the bandwidth of the notch. Note that the center frequency is totally removed from the spectrum of the output signal of the filter. 4.3.5 Formant Filter Amplitude (dB) Male Voice Female Voice F1 F2 F3 Frequency (Hz) Formant Frequencies Figure 16: Frequency response of the formant filter. The formant filter reproduces the filtering effect of the vocal tract in the human voice.
4.3 The Filter Module 37 saturation patterns implemented, the three first being symmetrical, meaning that the saturation is the same for positive and negative values of the signal while for the three remaining the distortion pattern applied is not the same for positive and negative values of the signal.
4.4 The Amplifier Module 38 in series, this knob must be fully turned to the right and the level of the Amp 1 set to zero as the output of the first filter is hard wired into the input of the Amp 1 module. In this way, the output signal will only come out from the second amplifier after going through the two filters. 4.4 The Amplifier Module After filtering, the signal is routed to an amplifier in order to add an amplitude envelope and panning effect to the sound.
4.5 The Noise Generator Module 39 position notes depending on their pitch, low notes to the left and high notes to the right where the middle C is the reference note positioned at the location determined by the Pan knob. 4.5 The Noise Generator Module The Noise module generates white noise and is followed by a -6dB/Oct low-pass filter used to adjust the frequency content of the noise. The Color knob is used to vary the cutoff frequency of the built-in low-pass filter.
4.6 The LFO Module 40 frequency of the oscillator is fixed relative to the frequency (tempo) of the master clock (see 4.12.1) and the value displayed in the Sync control. Sync values range from 1/8 of a quarter note (a thirtysecond note) to 16 quarter notes (4 whole notes) where the duration of the whole note is determined by the value (in BPM) appearing in the Tempo display of the Clock module. The LFO module can also be synced to a triplet (t) or a dotted note (d).
4.7 The Envelope Module 41 seconds, as determined by the Delay knob. Note that this knob is effective even if the Fade value is adjusted to zero. In this case, the signal from the LFO module will simply be delayed. Amplitude Time Delay Fade in Figure 18: Fade in feature of the LFO. 4.7 The Envelope Module Each row of the Ultra Analog is equipped with two envelope generators, the Filter Env and Amp Env modules which are used to modulate the Filter and Amp modules.
4.7 The Envelope Module 42 The envelope modules generate a four segment envelope: attack, decay, sustain, release. The attack time is adjusted using the A knob. The attack time can also be modulated with the velocity signal received from the Keyboard in such a way that that the higher the velocity signal the shorter the attack time will be, the intensity of this effect being controlled using the V slider on the left of the A knob.
4.7 The Envelope Module 43 a legato effect. The default strategy is the first one while the second one will be applied when the Legato button is depressed (green light on). Note that when the Keyboard is in polyphonic mode and the envelope generator in legato mode, the envelope generator behaves in a monophonic manner, reacting to a logical OR between all the gates signal from the different notes played on the keyboard.
4.8 The Keyboard Module 4.8 The Keyboard Module 44 The Keyboard module controls how the synthesizer voices respond to the events coming from an external MIDI keyboard or from a MIDI sequencer. The first row of controls (Tuning, Octave, Semi) is used to fix the pitch of the keyboard, and transpose the overall keyboard by octaves or semi-tones. The Stretch and Error knobs, on the bottom row, allow one to stretch the octaves and/or add a random error on each note played.
4.9 The Portamento Module 45 reached. Note that since this parameter determines the note priority, the stolen note will be the opposite of what appears in the control display. 4.8.3 Unison The unison mode allows one to stack voices, in other words, play two or four voices for each note played on the keyboard. This mode creates the impression that several instruments are playing the same note together, adding depth to the sound.
4.11 The Arpeggiator Module 46 knob clockwise increases the amount of pitch variation. The Mod gain knob is used to determine the effect of the keyboard modulation wheel on the depth of the vibrato. When this knob is fully turned to the left, the modulation wheel has no effect but when it is turned clockwise the depth of the vibrato will increase when the modulation wheel is used. The increase is always relative to the position of the Amount knob and will be greater as the Mod knob is turned clockwise.
4.12 The Output Effect Section 47 not be repeated when switching direction but in RnR inclusive mode these notes will be repeated. Finally, in Chord mode, all the notes are played at once. 4.11.2 Rhythmic Patterns The rhythmic pattern is shown on the Pattern display. Different rhythmic presets are available through the utility menu. Notes will be played as the 16-step display is scanned and the corresponding step is selected (green button on).
4.12 4.12.1 The Output Effect Section 48 The Clock Module This module is used to control the tempo of the different effects of the output section as well as that of the LFO and Arpeggiator modules. The Source drop down menu is used to determine if the sync signal comes from an external source or from the internal clock of the module. The Tempo display indicates the value of the tempo in BPM (beats per minute).
4.12 The Output Effect Section 49 1/8 of a quarter note (a thirty-second note) to 16 quarter notes (4 whole notes) where the duration of the whole note is determined by the value (in BPM) appearing in the Tempo display of the Clock module. The effect can also be synced to a triplet (t) or dotted note (d). The different delay algorithms can be controlled with the three knobs appearing at the bottom of the module.
4.12 The Output Effect Section 50 by the Delay, then by the Chorus and the Reverb module. In the third and fourth configurations, a different effect is applied after the Amp module at the end of the two module rows, mixing occurs and the resulting signal is fed to the Reverb module. In the third configuration, the Chorus and Delay modules are applied to the first and second row respectively while in the fourth configuration the order is reversed.
Toolbar 5 51 Toolbar The toolbar at the top of the Ultra Analog VA interface allows you to monitor important information related to your current set-up. 5.1 Program Display Displays the number and name of the program currently loaded in the synthesis engine. The + and − buttons on the left of the program number, or alternatively the + and − keys on the computer keyboard, are used to navigate upwards and downwards in the program list.
Audio and MIDI Settings 6 52 Audio and MIDI Settings This chapter explains how to select the audio and MIDI devices used by Ultra Analog VA as well as how to create and edit MIDI links and MIDI maps. When referring to commands that are different on Windows and Mac OS systems, the commands are listed in the following order: Windows command/Mac OS command. 6.1 Audio Settings 6.1.
6.2 MIDI Settings 6.2.2 53 Creating MIDI Links Every control on the Ultra Analog VA interface can be manipulated by an external MIDI controller. In most cases this is much more convenient than using the mouse, especially if you want to move many controllers at once. For example, you can map the motion of a knob on the interface to a real knob on a knob box or to the modulation wheel from your keyboard.
6.2 MIDI Settings 54 • Note that the range of a knob can be inverted by setting the value of Maximum Value to a smaller value than that of Minimum Value. • Click on the OK button and the link appears in the list of controllers linked to the control. • Click on the OK button again to confirm the change and to leave the MIDI Links window.
6.3 Latency Settings 6.2.7 55 MIDI Program Changes MIDI program changes can be used to switch between programs while playing. Ultra Analog VA will change the number of the current program used by the synthesis engine to the number corresponding to the MIDI program change received by the application. 6.
Using the Ultra Analog VA as a Plug-In 7 56 Using the Ultra Analog VA as a Plug-In Ultra Analog VA is available in VST, DXi, AudioUnit and RTAS (for Mac OS only) formats and integrates seamlessly into the industry most popular multi-track recording and sequencing environments as a virtual instrument plug-in. The plug-in versions will work exactly the same way as the standalone version, except for the audio, MIDI, and latency configurations that will be taken care of by the host sequencer.
7.6 MIDI channel 7.6 MIDI channel 57 Make sure that the MIDI controller, sequencer and Ultra Analog VA all use the same MIDI channel. If you are not certain of the channel used by your controller or sequencer, set the MIDI channel of Ultra Analog VA to Omni. 7.7 MIDI program change MIDI program changes are supported in the plug-in versions of Ultra Analog VA.
Quick reference to commands and shortcuts 8 58 Quick reference to commands and shortcuts File Menu Command Windows New Folder. . . Mac OS Description Apple+Shift+N New Folder in the Browser Open Preset Ctrl+O Apple+Option+O Open the selected preset Save Preset Ctrl+S Apple+S Save the current preset Save Preset As. . . Save MIDI Links Save the current preset under a new name Ctrl+Shift+S Apple+Shift+S Save the current MIDI links Save MIDI Links As. . .
Quick reference to commands and shortcuts Edit Menu Command Windows Mac OS Description Undo Ctrl+Z Apple+Z Undo last command Redo Ctrl+Y Apple+Shift+Z Redo last command Copy Ctrl+C Apple+C Copy selected item Paste Ctrl+V Apple+V Paste Delete Del Info. . .
Quick reference to commands and shortcuts 60 Audio Command Windows Mac OS Description Audio Settings Display the Audio Settings window Audio Control Panel Display the Latency Settings window if DirectSound is used, the ASIO control panel when ASIO drivers are used and the Audi MIDI setup configuration tool on Mac OS systems
Quick reference to commands and shortcuts 61 MIDI Command Windows Mac OS Description MIDI Settings Display the MIDI Settings window Learn MIDILink MIDI link learn mode for the last control touched Add MIDI Link Enables one to add a MIDI link on the last controlled touched Forget MIDILink Drop a MIDI link Set MIDI Link Minimum Value Limit the value of a MIDI link to a minimum value Set MIDI Link Maximum Value Limit the value of a MIDI link to a maximum value Edit MIDIlinks Display the Edit
Quick reference to commands and shortcuts 62 Programs Menu Command Windows Mac OS Description Locate Program in Browser Ctrl-L Apple-L Locate the current program in the browser and select it Rename Program Ctrl-R Apple-R Rename the current program in the program list Switch to Program Ctrl-P Apple-P Change the current program Save All Programs Save the entire program list including modifications to programs.
Quick reference to commands and shortcuts 63 Help Menu Command Windows About Ultra Analog . . . User Manual Mac OS Description Display the About Ultra Analog window F1 Display the user manual Authorize Ultra Analog . . . Display the Authorization window. Active only if the application has not been authorized. Visit www.applied-acoustics.com . . . Launch the browser and go to the AAS website. Join the user forum . . . Launch the browser and go to the AAS forum. Get support . . .
Appendix 9 64 Appendix Figure 22: Schematic of the Ultra Analog Synthesizer.
License Agreement 10 65 License Agreement IMPORTANT! CAREFULLY READ ALL THE TERMS AND CONDITIONS OF THIS AGREEMENT BEFORE OPENING THIS PACKAGE. OPENING THIS PACKAGE INDICATES YOUR ACCEPTANCE OF THESE TERMS AND CONDITIONS. IF YOU DO NOT AGREE WITH THE TERMS AND CONDITIONS OF THIS AGREEMENT, PROMPTLY RETURN THE UNOPENED PACKAGE AND ALL COMPONENTS THERETO TO THE PARTY FROM WHOM IT WAS ACQUIRED, FOR A FULL REFUND OF ANY CONSIDERATION PAID.
License Agreement 66 5. LIMITATION OF LIABILITY.
License Agreement 67 rendered inoperative but the remaining provisions shall continue in full force and effect. 9. ENTIRE AGREEMENT.
Index adsr, 27, 41 amplifier, 26, 38 architecture, 25 arpeggiator, 46 latch, 47 pattern, 46 rate, 47 rhythmic pattern, 47 synchronization, 47 ASIO drivers, 52 audio, 52 configuration, 15, 52 device, 52 format, 52 band-pass filter, 33, 34 browser, 15, 18 customizing, 23 hide, 23 resize, 23 buffer size, 52, 55 buttons tweaking, 28, 29 challenge key, 9, 10 chorus, 47, 48 clock, 48 commands, 58 community, 17 compare, 21 contact, 16 database backup, 24 restoring, 24 delay, 47, 48 display, 28 documenting presets,
INDEX installation, 9 interface, 25 keyboard, 44 monophonic, 44 polyphonic, 44 priority, 44 sustain pedal, 44 tuning, 44 unison, 45 knobs, 28 tweaking, 28 latency, 52, 55 legato, 45 level, 38, 50 lfo, 27, 39 fade-in, 40 phase, 40 rate, 39 reset mode, 40 wave shape, 39 low-pass filter, 33 master clock, 48 MIDI, 52 device, 52 settings, 52 MIDI configuration, 15 MIDI controller, 53 MIDI links, 16 creating, 53 editing, 53, 54 factory, 24 MIDI links range, 53 MIDI map, 23, 51, 54 default, 23, 54 documenting, 23
INDEX MIDI parameters, 56 MIDI program change, 57 multiple instances, 56 performance, 57 saving projects, 56 window size, 56 polyphony, 8 portamento, 45 preset, 15, 18, 51 backup, 23 browser, 18 changing, 19 compare, 21 copying, 21 database, 23 deleting, 22 documenting, 22 edit, 21 editing, 20 exporting, 23 factory, 24 importing, 23 library, 18, 21 locating, 22 moving, 21 name, 51 playing, 19 program, 18 renaming, 22 saving, 20 preset library, 15 program, 18 saving, 21 program list, 15 pulse-width modulati