
- APW/Wyott Food Service Equipment Electric Fryer Installation And Operating Instructions


7
Filling Fry Tank
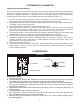
1. Ensure circuit breaker is at the -ON- position. This is done by pressing the “RESET” or “ON” part of
the red rocker handle on the front panel.
2. Set the thermostat to “OFF” and turn on the power switch marked “ON-OFF” to turn unit on. The green
indicator lamp will come on. Turn the thermostat knob to the 300° mark and a yellow cycling light marked
“HEAT ON” will come on. Turn the power switch to the "off" position. The fryer control circuit has now
been checked and the fryer is ready for use.
CAUTION: Do not leave elements on without frying compound in the tank.
a. Fill the fry tank to the “FULL” mark with approximately 30 Ibs. of liquid or melted frying compound. Do
not overfill.
NOTE: Do not use solid frying compound unless the fryer is equipped with a melt cycle option. Air
holes caused when packing solid frying compound into the fryer can cause hot spots on the heating
element sheath, resulting in momentary overheating of some of the frying compound and premature
frying compound breakdown. It can also damage the heating elements. If it is necessary to use solid
frying compound, it must be melted before adding to fry tank.
Turn the thermostat to the desired frying temperature and switch the unit "ON". The yellow "HEAT
ON" light will stay on until the temperature set on the thermostat is reached, then the light cycles off.
The fryer is now ready to begin frying. After a load has been fried, do not lower the next load into the
frying. compound until the "HEAT ON" light cycles off.
b. Do not allow frying compound level to drop more than 1/2" below the "FULL" mark. For
proper operation of the fryer and good frying results, the frying compound level should be
maintained. .
c. Use a quality frying compound.
d. Filter the frying compound frequently at least once a day.
e. Skim out food particles frequently with the strainer/skimmer.
f. Add at least 15% (of fry tank capacity) of fresh frying compound daily - more if possible -
without overloading the tank. If 15% of the frying compound is not used during frying,
remove some of the frying compound for other use (gravy, griddle frying. etc.) to permit
adding fresh frying compound.
g. Do not overload the fry baskets. Approximately half-full or even less is correct. If foods are
taking longer to fry than the chart shows. or are not browning. overloading is a probable
cause.
h. Prepare the food properly:
i. Keep salt out of the frying compound. Do not salt foods with the basket above the kettle.
j. Assure a good thermostat operation.
k. Keep the fry tank and elements clean.
3. If the fryer is equipped with the "Automatic Melt Cycle" option, the fry tank can be filled with solid
frying compound. The melt cycle can also be used to melt frying compound which has solidified
since its last usage.
To operate the melt cycle, push the white switch marked “MELT ON" to "ON". The fryer may be left
unattended during the melt cycle operation. It takes approximately 18 minutes to melt 30 Ibs. of solid
frying compound. After the solid frying compound has melted, push the melt cycle switch to "OFF".
The fryer will then heat the frying compound to the temperature set on the thermostat.
6. Cleaning
1. Follow General Cleaning Instructions on Page 4.
a. Before the first time use, clean the protective oil from the bright parts and interior of tank with
a solution of washing soda or other grease dissolving material.
2. The frequency of cleaning should depend on the load conditions. Set a definite cleaning schedule
corresponding to how hard the kettle is used. Cleaning should be done at least once a week.
a. Turn the thermostat to “OFF” and allow unit to cool down.
b. Lift the elements to drain position. Wire brush or scrape elements to remove any solids adhering to
the elements.