
- APW/Wyott Food Service Equipment Electric Fryer Installation And Operating Instructions


c. To replace fuse block, remove fuse and disconnect wire leads to the damaged fuse block.
Mark disconnected leads to identify them.
d. Replace new fuse block in the same position.
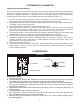
e. Connect leads to corresponding terminal on new fuse block. Check completed circuit
against circuit diagram on rear panel.
5. To replace element:
a. Remove screws securing pivotal head cover to pivotal head. Remove pivotal head cover
and gasket.
b. Lift up the elements to drain position.
c. Remove thermostat bulb and capillary tube clamps.
d. Remove element support assembly.
e. Disconnect leads to element and mark them for identification.
f. Remove the element retaining nuts inside the pivotal head.
g. Remove element. Mount the new element and reverse steps a through f to reassemble.
6. To replace hi-limit thermostat:
a. Remove pivotal head cover and gasket as in step 5a.
b. Remove hi-limit thermostat bulb and capillary tube clamps from element.
c. Dislodge capillary bushing from hole in pivotal head.
d. Remove bushing and thread the thermostat capillary and bulb through hole in pivotal head.
e. Disconnect leads to the damaged hi-limit thermostat and transfer them to corresponding
leads on the new thermostat.
f. Remove screws securing the thermostat.
g. Secure new hi-limit thermostat with screws and reverse steps a through d to reassemble.
7 . To replace cycling thermostat:
a. Remove front panel (steps 2a and 2b), rear panel (step 3a), pivotal head cover, and gasket
(step 5a).
b. Remove cover on back of end post, located on right rear comer of the unit.
c. Remove thermostat capillary and bulb from the pivotal head as in steps 6b through 6d.
d. Disconnect nuts securing the thermostat coil to end post and to pivotal head. Both are
accessible from rear of end post.
e. Disconnect leads to the damaged thermostat and mark them for identification.
f. Remove screws securing the thermostat to front panel.
g. Maneuver the thermostat to rear of the unit (through right side passage) and then into the
right side end post (through opening on top panel).
h. Remove thermostat along with bulb and capillary from the opening on back of right side end
post.
i. Wind the thermostat coil (supplied with new thermostat) around the capillary of new
thermostat, at approximately the same position from bulb as on the damaged thermostat.
Note: The thermostat coil should cover approximately 11” to 12” of capillary length.
j. Wrap the portion of thermostat capillary which is covered by the thermostat coil, into
approximately two turns of 1 ½” to 2” diameter.
k Reassemble the thermostat by reversing steps 7a through 7h.
9