BEA AquaLogic Commerce Services Deployment Guide Version 5.1.
Copyright Copyright © 1995-2007 BEA Systems, Inc. All Rights Reserved. Restricted Rights Legend This software is protected by copyright, and may be protected by patent laws. No copying or other use of this software is permitted unless you have entered into a license agreement with BEA authorizing such use.
Contents Overview .......................................................................................................................... 1 Setting up AquaLogic Commerce Services.................................................................. 1 Install AquaLogic Commerce Services .......................................................................................1 Create a New Domain .................................................................................................................
JDBC Configuration...................................................................................................................21 MySQL ..................................................................................................................................22 Oracle....................................................................................................................................22 Microsoft SQL Server............................................................................
Setup the rsync Client on the Storefront Servers..................................................................59 References ..........................................................................................................................
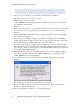
Install AquaLogic Commerce Services Overview The Getting Started Guide describes how to quickly setup a sample deployment of AquaLogic Commerce Services with a preconfigured demo store. This deployment guide will expand on that and explain how to setup your actual store and configure it to meet your needs. Path Placeholders • refers to your root path for BEA applications (for example, C:\bea) • refers to the path where BEA WebLogic Server 9.
Setting up AquaLogic Commerce Services You must have an X server configured to use this GUI configuration tool. 2. Select Create A new WebLogic domain in the window that appears. Click Next. 3. Select Base this domain on an existing template. 4. Click the Browse button and select “\common\templates\applications\commerce_services.jar” as the template to use. Click OK to select this file. 5. Click Next. 6. Enter a User name and User password.
Set Up AquaLogic Commerce Services Set Up AquaLogic Commerce Services 1. To correctly set up a JDBC connection, the JDBC driver must be on WebLogic Server's CLASSPATH. To do this, copy the JDBC driver file for your database into the \user_projects\domains\alcs\lib directory (see the JNDI and JDBC Configuration section for more information). 2. In WEB-INF\conf\spring\dataaccess\hibernate\hibernate-config.
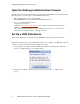
Setting up AquaLogic Commerce Services Open the WebLogic Administration Console The following sections will require the use of the WebLogic Administration Console. Perform the following steps to open and log onto the Administration Console. 1. Start the WebLogic Server by double-clicking \user_projects\domains\alcs\startWebLogic.cmd 2. Log on to the Administration Console a. Open a browser window. b.
Set Up a JNDI Data Source 3. On the right hand pane, click the New button under Data Sources. 4.
Setting up AquaLogic Commerce Services o Name: commercejndi (any descriptive name may be used here) o JNDI Name: jdbc/epjndi o Database Type: Select your database type o Database Driver: Select the name of the database driver that was copied to the domain lib directory in the Set Up AquaLogic Commerce Services section (See the JNDI and JDBC Configuration section for the correct Driver name). Click Next. 5. Click Next on the Transaction Options screen. 6.
Set Up a JNDI Data Source 7. In the Test Database Connection screen, click on the Test Configuration button. If your connection information is correct, you should see a success message. Otherwise, fix any errors reported.
Setting up AquaLogic Commerce Services Click Next. 8. In the Select Targets screen, click on the checkbox next to the name of your admin server (the default demo setting is “CommerceServicesDemoServer”). Click Next. 9. Click Finish to save the configuration. The new data source should be visible in the Data Sources window. 10. On the left hand side, click the Activate Changes button under the Change Center to commit these changes. You have now completed setting up your JDBC connection.
Configure SSL (Optional) You may need to restart your WebLogic Server before you can successfully commit changes when setting up a JDBC Connection Configure SSL (Optional) This section explains how to manually setup SSL for the admin server if you have not already set it up with the configuration wizard. 1. On the left hand side, click the Lock and Edit button under the Change Center. 2. Under your domain in the Domain Structure tree, expand Environment > Servers. 3.
Setting up AquaLogic Commerce Services 5. Click Save. 6. On the left hand side, click the Activate Changes button under the Change Center to commit these changes. You have finished configuring SSL. Authorize.net payment processing When trying to connect to the Authorize.net testing server with WebLogic, WebLogic gives an error similar to the following:
WebLogic Authentication Plug-in WebLogic Authentication Plug-in The WebLogic authentication plug-in allows the Storefront to authenticate against WebLogic Server, and also allows Single Sign-On with WebLogic Server and WebLogic Portal applications running within the same server instance. AquaLogic Commerce Services comes pre-configured with the WebLogic authentication plug-in already setup, so you should never have to manually set it up.
Setting up AquaLogic Commerce Services 1. Open the WEB-INF\commerce-config.xml under your Storefront web application root folder and change the "userId.mode" value to "2". In this mode, the system will generate a unique user id for each customer. This user id will not be changed when customers log into the Storefront to change their email address. 2. Repeat last step for your Commerce Manager web application.
WebLogic Portal Unified User Profile Plug-in WebLogic Portal Unified User Profile Plug-in WebLogic Portal supports the concept of a Unified User Profile (UUP) which allows a Portal user to be associated with profile data from external systems. The UUP plug-in provides an EAR file and user profile property set that allows you to manage AquaLogic Commerce Services user properties from the WebLogic Portal Administration Console or within WebLogic Portal code.
Setting up AquaLogic Commerce Services This warning appears, because the demo database has no password. 9. Click Done. Since extending a domain to add Portal does not update the setDomainEnv.cmd and startWebLogic.cmd files, you will need to make the following changes to those files all Portal functionality to work correctly. 1. Make the following modifications to setDomainEnv.cmd in the bin directory of your AquaLogic Commerce Services domain.
WebLogic Portal Unified User Profile Plug-in 2. Make the following modifications to startWebLogic.cmd in the bin directory of your AquaLogic Commerce Services domain. a) Add following line after “set ALREADY_STOPPED=true”: call "%WLP_HOME%\thirdparty\autonomy-wlp92\autonomy.cmd" stop b) Add the following lines after “set JAVA_OPTIONS=%SAVE_JAVA_OPTIONS%”: if "%WLP_SEARCH_OPTION%"=="" ( @REM If not set externally, this portal domain will start the full Autonomy engine stack.
Setting up the Database Setting up the Database This section explains how to create an AquaLogic Commerce Services database schema using one of the following supported databases: • Microsoft SQL Server 2005 • MySQL 5.0.x • Oracle 10g Microsoft SQL Server 2005 This section contains the instructions for creating a Microsoft SQL Server 2005 AquaLogic Commerce Services database.
Microsoft SQL Server 2005 Populate the Database 1. On the File menu point to Open, and then click on File... 2. Navigate to the \commerce\database-scripts\mssql folder 3. Select schema.sql and click Open 4. In the Connect to Database Engine dialog click on the Options >> button that is in the bottom right corner. 5. Click on the dropdown next to Connect to database and select . 6. In the Browse for databases dialog click Yes 7.
Setting up the Database 8. Click Connect 9. On the Query menu click on Execute. This may take a few seconds 10. Repeat steps 1 - 9 for the rest of the *.sql files in the following order: • base-insert.sql • snapitup-insert.sql (optional, deploys the AquaLogic Commerce Services Demo Store "Snap It Up" on your database) 11. When you are finished the above steps you may exit the SQL Server Management Studio 12. If you chose to run the snapitup-insert.
Oracle 10g If the MySQL server and the web application server run on different hosts, create a user account and grant privileges to the host which runs the web application server with the following command: mysql> grant all privileges on ALCS.* to username@'ipaddress'; If your database is on a different machine than the web application server, you may want to specify a password by adding identified by 'password' to your grant command. Commit the permission changes: mysql> flush privileges; 5.
Setting up the Database The following instructions assume that Oracle is already installed and running. Creating the alcs Database 1. Launch the Oracle Database Configuration Assistant via the start menu by clicking Start » All Programs » Oracle - OraDb10g_home1 » Configuration and Migration Tools » Database Configuration Assistant. 2. Select Create a Database, and click Next 3. Select General Purpose, and click Next 4. Enter “alcs” as the Global Database Name and the SID 5. Click Next 6.
JNDI Configuration 1. Log into the Commerce Manager 2. Click on Admin 3. Click on Import 4. Choose Select existing import job to run 5. Choose the first import job from the picklist called "01-SnapItUp" 6. Click Next 7. Choose Execute Import Now 8. Click Proceed and wait for the import job to finish 9. Repeat steps 3 through 8 for each existing import job in the picklist, being sure to import them in the order in which they are numbered (01, 02, 03, etc).
Configuring AquaLogic Commerce Services MySQL Database Driver JAR file: mysql-connector-java-3.1.11-bin.jar Database Driver: com.mysql.jdbc.Driver Database Connection URL: jdbc:mysql://HOSTNAME:PORT/DBNAME?autoReconnect=true&useUnicode=true&characterE ncoding=UTF8 (Default Port is 3306) Database Driver Download: http://dev.mysql.com/downloads/connector/j/3.1.html Oracle Database Driver JAR file: ojdbc14.jar Database Driver: oracle.jdbc.driver.
Storefront • hibernate-config.xml • quartz.xml • treecache.xml • velocity.xml • util-config.xml acegi.xml AquaLogic Commerce Services uses the Acegi security framework to perform user authentication and authorization. The acegi.xml file for configuring acegi is located in the following application-specific paths. Since the acegi.xml file contains different settings for each application, you will need to configure each of them separately.
Configuring AquaLogic Commerce Services guided-navigation.xml The AquaLogic Commerce Services Storefront uses guided-navigation.xml to generate the guided navigation menu to display to users when they are browsing a category or executing a search. Guided Navigation appears in the User Interface as a set of links on the left side of the pages. Users can click links in the guided navigation area to filter the list of products to find the product that they are looking for. The guided-navigation.
Storefront The following is a localized attribute example.
Configuring AquaLogic Commerce Services 3in. & Up 3in-and-up 3in. et Plus 3in-et-plus The attribute range filter also has the "key" property and "localized" property. Each "range" tag represents one range, which may have the "lower" value and "upper" value set. If the "lower" value is not set, then there is no minimum allowed value for the attribute filter.
Storefront $100 to $200 $100-to-$200 $100 et $200 $100-et-$200 $200 to $300 $200-to-$300 $200 et $300 $200-et-$300 More than
Configuring AquaLogic Commerce Services commerce-config.xml AquaLogic Commerce Services's configuration settings are stored in the commerce-config.xml files located in the following application-specific paths. • Storefront – \commerceServices\WEB-INF\ • Commerce Manager – \commerceServicesManager\WEB-INF\ • Connect – \commerceServicesConnect\WEB-INF\ The following are the names and descriptions of the key elements in the configuration file.
Storefront o o email.store.url - URL for images etc. in emails generated by the Storefront email.cm.url - URL for images etc. in emails generated by the Commerce Manager locale - the element containing all locale-related settings. locale.default - system default locale. Must be valid ISO Language Code and country code defined by ISO-639 and ISO-3166, such as en_CA etc. locale.all - all locales that the AquaLogic Commerce Services application supports. E.g. "en_CA, fr_CA, en_US" locale.
Configuring AquaLogic Commerce Services o maxReturnNumber - the maximum number of products to return in a search result minimumSimilarity - used in searches that do not require an exact match (fuzzy searches). This is the fraction of similarity required between the search term and a matching term prefixLength - used in searches that do not require an exact match (fuzzy searches).
Storefront 1 - Use user's email as the user id, this is the default value. If you use JAAS, you can't use this mode. 2 - Generates a unique permanent user id by appending a random four digit suffix to the email address and uses this as the user id. The user id is created when the customer first creates an account. Later, when the customer changes the email address, the user ID will not be changed. For example, if a customer email address is a@a.com, the user id would be a@a.
Configuring AquaLogic Commerce Services • Only ONE "credit card processing" payment gateway is supported at a time. Changing to a different payment gateway requires re-configuring the payment gateway settings in the commerce-config.xml file. • PayPal Express Checkout can also be configured alongside the chosen "credit card processing" payment gateway in the block. Each gateway has its own gateway-specific properties.
Storefront PAGE 39Configuring AquaLogic Commerce Services The same key must be used in all places in order for the credit card numbers that have been encrypted in the Storefront to be correctly decrypted and masked in the other applications. One Page Checkout One Page checkout is included as part of the AquaLogic Commerce Services install. It is enabled by setting "onepage.enable" to "true". You can always revert back to using the standard checkout process by changing this value to "false".
Storefront The following parameters can be configured in ep-treecache.xml's EvictionPolicyConfig element • timeToLiveSeconds - The idle time in seconds that should elapse before a node is removed from the tree cache. A value of 0 denotes no limit. • maxAgeSeconds - The maximum time in seconds that a node in the tree cache can exist regardless of idle time. A value of 0 denotes no limit. There are additional configurable parameters in ep-treecache.
Configuring AquaLogic Commerce Services 20 quartz.xml Quartz is used in AquaLogic Commerce Services to execute scheduled jobs (for example, building the Lucene index). A quartz.xml file is used to configure quartz jobs for the different AquaLogic Commerce Services applications. The quartz.xml file is located in the following application-specific paths.
Storefront Position Meaning Allowed Special Characters 1 Seconds (0-59) ,-*/ 2 Minutes (0-59) ,-*/ 3 Hours (0-23) ,-*/ 4 Day of month (1-31) ,-*/?LC 5 Month (either JAN-DEC or 1-12) , */ 6 Day of week (either SUN-SAT or 1-7) ,-*/?LC# 7 Year (optional, 1970-2099), when empty, full range is assumed ,-*/ Each component accepts the typical range of values that you would expect, such as 0-59 for seconds and minutes and 1-31 for day of the month.
Configuring AquaLogic Commerce Services Special Character Description Day of week field. / Increments. This character specifies increments of a value. For example 0/1 in the Minute field in our example means every 1-minute increment of the minute field, starting from 0. L L is an abbreviation for Last. The meaning is a bit different in Day of month and Day of week. When used in the Day of month field, it means the last day of the month (31st of March, 28th or 29th of February, and so on).
Storefront Using the env.config value to disable an index build will also disable the index build for the Commerce Manager when it is built, so be careful to remember whether index building is enabled or not in your current environment Building the promotion rule base Rules are read from the database periodically as invoked by the Quartz scheduler. The scheduler is configured in the quartz.xml configuration file.
Configuring AquaLogic Commerce Services velocity.xml Velocity is used for UI html rendering in AquaLogic Commerce Services. The velocity.xml file for configuring Velocity is located in the following application-specific paths. • Storefront – \commerceServices\WEBINF\conf\spring\views\velocity\ • Commerce Manager – \commerceServicesManager\WEBINF\conf\spring\views\velocity\ Setting Velocity properties for a production environment Changes made to velocity.
Storefront • Storefront – \commerceServices\WEB-INF\conf\spring\commons\ • Commerce Manager – \commerceServicesManager\WEBINF\conf\spring\commons\ Within the velocityProperties bean definition, the following properties can be configured. • file.resource.loader.cache – Set this value to "true" for production to cache templates in Velocity's loader. Set this value to "false" for development so that changes to templates will take effect immediately. • velocimacro.library.
Configuring AquaLogic Commerce Services class="com.elasticpath.service.catalogview.impl.
Storefront be updated, you may choose to configure JBoss Cache so that products are never evicted. To prevent eviction, modify ep-treecache.xml so that the timeToLiveSeconds and maxAgeSeconds attributes have a value of 0 as shown below.
Configuring AquaLogic Commerce Services PAGE 50Commerce Manager (CM) Important If you configure JBoss Cache in ep-treecache.xml to never evict products (by setting time values of 0), then it is necessary to use the RefreshableCachedProductRetrieveStrategy and configure the updateProductCache job in quartz.xml. Commerce Manager (CM) Follow the Storefront instructions for configuring acegi.xml in your Commerce Manager application. Then configure the following files in your Commerce Manager application: • commerce-config.xml • hibernate-config.
Configuring AquaLogic Commerce Services o productrecommendations - the element containing product recommendation settings productrecommendations.numorderhistorymonths - the number of months of previous order history that is used in product recommendation calcuations productrecommendations.maxrecommendations - the maximum number of recommendations that will be computed for each product Setting either value to -1 prevents recalculation of the product recommendations.
Connect • o categoryIndex o productIndex o customerIndex o orderIndex In a development environment, you can disable the index build by setting the following flag to true in the env.config file as follows. ep.disable.index.build=true Disabling the index build at this level will disable indexes in the Storefront as well. Computing Product Recommendations A trigger is declared for computing product recommendation data.
Configuring AquaLogic Commerce Services • Commerce Manager quartz.xml – Configuring the Lucene index for order and customer searches. One Page Checkout One Page checkout is included and turned on by default in AquaLogic Commerce Services. See the commerce-config.xml section for the One Page checkout configuration options. PowerReviews Product Reviews (optional) The basic steps required to setup PowerReviews product reviews are as follows: 1.
Configuring for Optimal Performance • velocity.xml - It is very important that you have configured Velocity for production according to these instructions. • util-config.xml - It is very important that you have configured Velocity for production according to these instructions. • ep-treecache.xml - You can tweak cache settings in this file to tune your performance (Storefront only). • hibernate-config.xml - Check that "show SQL" is off.
Configuring AquaLogic Commerce Services • Consider disabling session replication Session replication makes it possible to retain customer sessions when an application server is down. However, this will slow down application servers to some extent. If it's not critical to retain customer sessions, disabling replication can result in better performance. Reverse Proxy Server Reverse proxy servers are often used to cache static content to reduce load on application servers.
General Clustering Architecture Load Balancing and Clustering (optional) This section explains how to setup a cluster of WebLogic servers with Apache HTTP Server as a load balancer and rsync for file synchronization. General Clustering Architecture A server cluster is a group of computers that act as one server. The most common use of a cluster is to increase performance and/or availability.
Load Balancing and Clustering (optional) Clustering Scripts Setup In preparation for running the WLST scripts to create a cluster, you will need to download the WLST Clustering Scripts package at http://edocs.bea.com/alcs/docs51/pdf/wlstClusteringScripts.zip (ZIP, 7KB) and unzip it to a directory. After that, configure the environment variables in all of the scripts to match your environment.
Clustering Your Application Server 8 Start the cluster WL_HOME/common/bin/wlst.sh startcluster.py t3://AdminServerIP:AdminServerHttpPort CLUSTER_NAME Additional Useful Scripts To create another server in the cluster, execute this command after step 1 WL_HOME/common/bin/wlst.sh createmanagedserver.py DOMAIN_NAME CLUSTER_NAME To shut down server ServerName WL_HOME/common/bin/wlst.sh stopserver.py DOMAIN_NAME ServerName To remove a deployment WL_HOME/common/bin/wlst.sh undeploy.
Load Balancing and Clustering (optional) (eg. WL_HOME/samples/commerce/commerceApp/commerceServices) Environment Variables to Configure in the WLST Scripts BEA_HOME The BEA Home directory where files common to all BEA products are stored (eg. /opt/bea/) WL_HOME The WebLogic Server product installation directory (eg. /opt/bea/weblogic92/) JAVA_HOME The root directory of the Java JDK install that is used to run WebLogic (eg.
Load Balancing Url The JDBC connection URL (eg. jdbc:oracle:thin:@11.11.1.111:1111:alcs) JdbcDriverName The name of the JDBC driver (eg. oracle.jdbc.OracleDriver) DbUserName The username for accessing the database DbUserPassword The password for accessing the database Useful Websites Example setting up a clustered deployment on a single server with WLST http://dev2dev.bea.com/pub/a/2006/03/wlst-clustereddeployment.
Load Balancing and Clustering (optional) $ {APACHE_HTTP_SERVER_SRC_DIR}/make install • • Setup SSL for the Apache server o Create an SSL key and certificate Refer to the article at http://www.samspublishing.com/articles/article.asp?p=30115&seqNum=4 for instructions on how to do this. o Copy the SSL key to APACHE_HOME/conf/, renaming the file to "server.key". o Copy the SSL certificate to APACHE_HOME/conf/, renaming it to "server.crt".
File Synchronization with rsync APACHE_HTTP_PORT The port that the Apache server will be listening to http requests on APACHE_HTTPS_PORT The port that the Apache server will be listening to https requests on SERVER1_IP The IP address of the server hosting the first managed server in the cluster SERVER1_HTTP_PORT The port that the first managed server is listening to http requests on SERVER2_IP The IP address of the server hosting the second managed server in the cluster SERVER2_HTTP_PORT The por
Load Balancing and Clustering (optional) If your Commerce Manager and Storefront are located on the same server, you do not need to setup an rsync server. If they are located on different servers, however, then you will need to setup an rsync daemon on the server hosting the Commerce Manager and rsync clients on all Storefront servers. Download rsync • Download the rsync software from the rsync download page at http://samba.anu.edu.au/rsync/download.html. The rsync server and client are bundled together.
File Synchronization with rsync Setup the rsync Client on the Storefront Servers 1. Create a new file /sbin/rsync_alcs as follows (replacing CM_SERVER_IP with the IP address of the server that will be hosting the Commerce Manager and ALCS_INSTALL_PATH with the path to the root of the AquaLogic Commerce Services code base).