UHS Spa Owner’s Manual 1 PN 378100-1 Rev K Domestic
OWNER’S INFORMATION DEALER Company Address Phone E-mail ___________________________________________________________________ ___________________________________________________________________ ___________________________________________________________________ ___________________________________________________________________ INSTALLER Company Address Phone ___________________________________________________________________ ___________________________________________________________________ _____________
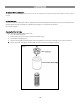
TABLE OF CONTENTS IMPORTANT SAFETY INSTRUCTIONS……………………………………………………………………………………………………………………………………4-6 SELECT A LOCATION……………………………………………………………………………………………………………………………………………………………..7 FILLING YOUR SPA………………………………………………………………………………………………………………………………………………………………..8 DRAINING YOUR SPA……………………………………………………………………………………………………………………………………………………………8 SYSTEM OPERATION………………………………………………………………………………………………..…………………………………………………………..9 AIR INJECTION VENTURI ADJESTMENT………………………………………………………………………………………………………………………………...
Important Safety Instructions When installing and using this electrical equipment, basic safety precautions should always be followed, including the following: READ AND FOLLOW ALL INSTRUCTIONS 1. 2. 3. 4. 5. 6. 7. 8. 9. WARNING: To reduce the risk of injury, do not permit children to use this product unless they are closely supervised at all times. WARNING: A wire connector is provided on this unit to connect a minimum 6 AWG (4.
d. The use of alcohol, drugs, or medication before or during spa use may lead to unconsciousness with the possibility of drowning. e. Persons suffering from obesity or with a medical history of heart disease, low or high blood pressure, circulatory system problems, or diabetes should consult a physician before using a spa. f.
18. WARNING: The use of alcohol, drugs, or medication can greatly increase the risk of fatal hyperthermia in hot tubs or spas. Despite the popular image of people in spas drinking wine or other alcoholic beverages, DO NOT use alcoholic beverages before or during spa use. Alcohol is a depressant which causes slowed reflexes and drowsiness, especially in conjunction with the relaxed soaking in hot water. This can lead to sleep or unconsciousness and possibly result in drowning.
Selecting a location Selecting electrical mode and a location Will your electrical cord reach an outlet? Locate your spa so that the GFCI plug and cord will reach a standard 120 volt / 15 amp outlet*, but not closer than 5 feet (1.5m). Do not use an extension cord. To extend the power cord, with a Philips screw driver remove the access door shown in Fig 1A, locate the coiled GFCI cord, uncoil and extend the cord as shown in Fig 1A.
Filling Your Spa Remove the access door (Fig 1) and assure the drain valve is closed and the cap is secure (fig 2). Place a garden hose into filter area (Fig 3) and fill the spa with cold (never warm or hot) water 6 to 8 inches (150 to 200 mm) below the top edge of the spa (Fig 2.1). Do not overfill, as the spa’s water level will rise as each person enters the spa. Always keep the spa water level above the jet openings. Fig 2 Valve Cap Fig 2.
System Operation 102 Initial Start-Up From the moment your spa is plug in, it is automatically pre-set to operate until it reaches 100°F (38°C). This process could take up to 20 hours depending on the initial water temperature. The spa is also preset to filter the water for 1 hour per day (30) and the clock starts the second you plug it in. If after the first 7 minutes water is not flowing from the jets you may need to purge the pump. Please see page 16.
Equipment Operation Air Injection Venturi Adjustment Air injection into the massage jet water flow may be controlled by turning the venturi dials located on either side of the spa. Surface Skim Filter The spa’s automatic surface skim filter is designed to remove floating debris and contaminants such as body lotions by drawing water through a specially formulated filter cartridge. It is critical that this element be routinely cleaned.
Water Chemistry Spa water chemistry (or water balance) affects the safety of your equipment as well as the appearance of your spa water. Water balance has five factors: pH, total alkalinity, calcium hardness, temperature and total dissolved solids. pH is the most critical but total alkalinity and calcium hardness must also be watched closely. Low calcium hardness can lead to corrosion of equipment, while high calcium hardness can lead to scaling, cloudy water and staining.
Water Chemistry (Continued) It is recommended that the spa be drained regularly depending on its size, location and the frequency of use. 1. Clean filter and cartridge periodically according to manufacturer’s instructions. 2. Keep the spa covered when not in use to reduce the loss of heat and to keep our leaves, dirt, and other foreign materials from settling in the water. 3.
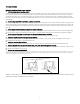
Replacing the LED light. 1. Turn off power to the spa. 2. Using a Philips screwdriver, remove the access vent located on the outside of the spa, directly behind the filter (Fig 7.1). 3. Reach in and turn the white holder counter clockwise and gently pull it, with the attached wires, out the access hole (Fig 7.2). 4. Pull the LED light out of the light socket (Fig 7.3). 5. Install a new LED light, attach the white reflector turning clockwise and reattach the access vent with the screws.
Freeze Protection DO NOT ALLOW THE SPA TO FREEZE If the spa is to be stored or transported in temperatures of 32°F (0°C) or lower, it is critical that the unit be fully winterized. To winterize the spa follow these steps: 1 2 3 The spa itself must be completely drained of water. See page 8 for draining instructions. The drain valve must be in the open position and the cap removed. Drain the pump by removing the pump wet end drain plug (Fig 6.1). Leave this plug out until it is time to refill the spa.
1. Why does my spa not shut off? Your spa is designed to run from the time you plug it in to run until it reaches your desired temperature. Once desired temperature is reached then you can control the on/off with the buttons on the top control. For example: On the initial startup the spa will run for approximately 18 hours to reach 38°C (100°F). At that point the spa will shut off, and then the spa will maintain your desired temperature settings.
PURGING THE PUMP Sometimes after a water change (draining and refilling the spa), or initial start-up of the spa, there is no water flowing from the jets. You may hear the pump operating or even see the shaft of the pump motor turning, but have no water flowing from the jets. In addition to no flow out of the jets, you may even see an error message dr, dY, HH, OH, HL, or LF. All of these error messages can be caused by a lack of water flow. When this happens there is probably an air-lock in the pump.
Troubleshooting Guide SITUATION PROBABLE CAUSE ACTION NO HEAT OR HEAT TOO LOW Operating while spa cover is open. Ensure that spa cover is properly closed. Dirty filter Remove filter cartridge and clean. JETS WON’T COME ON No power to spa control. Check the GFCI plug, circuit breaker and/or disconnect switch. NO CONTROL DISPLAY OR FUNCTIONS No power to spa control. Check the GFCI plug, circuit breaker and/or disconnect switch. LOW WATER FLOW Dirty filter. Remove filter cartridge and clean.
Glossary of Terms Venturi dials Mounted on the lip of the spa or at the equipment shroud, to induce air to the jets. BYPASS CHECK VALVE Prevents water flow stoppage due to dirty filter. CONTROL BOX Basically the brain of the spa. Power is distributed to all functions of the spa, pumps, lights, heat, etc. DRAIN VALVE Used in the draining of the spa, looks like an outdoor faucet and fits a standard garden hose.
Warranty *Limited Warranty-Non-transferable-Original Purchaser Only* 1. 5 Year Spa Shell – Should a crack in the shell result in a loss of water through the shell, ROTO OPS LLC, will, at its option, repair or replace the shell portion of the spa. Freight costs shall be shared with the consumer; ROTO OPS LLC will pay freight costs to ship shell to ROTO OPS LLC facilities, consumer will be responsible for freight costs to ship new shell back to consumer. 2.
• ROTO OPS LLC shall not be responsible for cartage, removal and/or re-installation labor or any other associated cost incurred in obtaining warranty service. • All costs for removal or reinstallation of the spa, or any components, are the responsibility of the purchaser. • With respect to any defects covered by this warranty, owner must notify their selling dealer. ROTO OPS LLC 2452 Lake Emma Rd.