
Instructions / Assembly
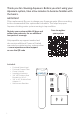


Step 1: Attach the system to the mounting surface
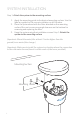
1. Apply the mounting guide to the desired mounting surface. Use the
label as a guide for the screw installation or drill location.
2. Place the system head with the lter attached on the mounting
surface. Be sure to reserve enough clearance on the bottom for
removing and replacing the lter.
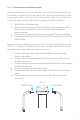
3. Hang the system using the installation screws.Step 1: Attach the
system to the mounting surface
(Important: Mount the water lter at least 2 inches higher than the
ground for an easier lter change.)
(Important: Make sure to install the system in a locaon where the connecon
to the cold water line and faucet is within reach of the hoses provided.)
4
Mounting Guide
Mounting Surface
SYSTEM INSTALLATION