Owner’s Manual Model: AR260 AR260-09-2012 www.arblueclean.
Introduction Congratulations on the purchase of your BLUE CLEAN POWER WASHER! Your BLUE CLEAN POWER WASHER is a power tool in every sense of the word that may be used outside your house and in. It is one of the finest most powerful home-use power washers in the marketplace today. AR260 features include: A proprietary, all-aluminum water pump. A full 12-month “bumper to bumper” warranty on the power washer and all parts/accessories.
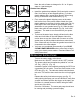
TABLE OF CONTENTS Page Introduction 2 Safeguards, Warnings, and Safety Tips 3, 4, 5 Package Contents 6 Unpacking & Assembly Instructions 7, 8, 9 Operating Instructions 9 Operating Tips and Maintenance 10, 11 Storage 11, 12 Pump Saver 12 Troubleshooting 13 Replacement Parts 14 Specifications 15 Limited Warranty & Warranty Returns 15 Safeguards, Warnings and Safety Tips • To avoid personal injury and/or damage to property and to maximize your power
En - 4 • To avoid mishaps or injury, always use the trigger safety lock when not using the power washer even if the spraying stops for a moment. • The power washer is equipped with a Ground Fault Circuit Interrupter (GFCI) which greatly reduces the chance of electric shock while the unit is in use. • Point the spray gun in a safe direction when beginning a power washing session.
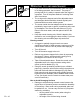
• Never permanently engage the trigger mechanisms on the spray gun. • Never operate the power washer unless all components are properly and securely connected. • Never allow the power washer pump to run for more than one minute, after you have turned off the water supply. This can cause the motor and pump to overheat and fail. • Never use lances or other parts that have not been supplied with your power washer.
Package Contents: 1. Power washer unit 2. Manual 3. Adjustable spray lance 4. Turbo lance 5. Spray gun (5A shows trigger lock button) 6. Detergent bottle 7. Nozzle cleaning wire - taped to the manual for safe keeping 8. High pressure hose 9. Garden hose adapter (blue/black) 10. Quick connect filter (clear plastic) 11.
Detergent Bottle Fig. 1 Fig. 2 Unpacking & Assembly • After unpacking the BLUE CLEAN POWER WASHER, lay out parts and accessories. Familiarize yourself with the parts in the package by comparing them to those listed on the “PACKAGE CONTENTS” page. • The BLUE CLEAN POWER WASHER requires some minor assembly. You’ll need a Phillips screwdriver to install the accessory holders. • Install the accessory holder on the back of your BLUE CLEAN POWER WASHER (Fig.1).
• Connect the other end of the high pressure hose to the spray gun by inserting the brass metal tip of the high pressure hose into the fitting just ahead of the trigger guard. It will lock into the spray gun with a “click” (Fig 5). Confirm the hose is locked into the spray gun by pulling slightly on the hose. The hose is now securely attached to the spray gun. • To release the hose from the spray gun, press the blue button on the underside of the gun toward the trigger guard.
Note: the ratio of water to detergent is 10:1 or 10 parts water to 1 part detergent. QC - Clear Adapter Garden Hose Adapter • Install the garden hose adapter (GHA) and quick connect filter. It is made up of two separate pieces. (1) A clear plastic adapter with a screen filter (about 3 inches long) and (2) a blue/black collar attachment (Fig.11). • First, remove the plastic shipping cover on the water inlet on the front of the power washer.
Operating tips and maintenance Fig. 18 Fig. 19 • If you hear the motor run intermittently when the trigger is not being squeezed, that is normal. The pump is priming itself so it is ready to operate when the trigger is squeezed. Turn off the power washer if not being used after five minutes. • The o-rings on the bayonet end of the adjustable lance and detergent bottle should be cleaned regularly and lubricated with non-water soluble grease.
o the distance of the nozzle from the surface being cleaned • Never use a narrow high pressure stream of water or the turbo lance on soft surfaces susceptible to damage. • Use the adjustable spray lance when cleaning windows. Be sure to adjust the nozzle to a wide fan spray pattern and place the nozzle approximately four to five feet away from the window with the nozzle at forty five degree angle.
outlet. Turn off the water supply. Pull the trigger on the spray gun 2-3 times to drain out the excess water and to release any remaining water pressure. Disconnect the garden hose adapter from the water inlet. Do not allow the power washer to run with no water flowing through it. GHA Fig. 23 • The GHA should be stored in the accessory holder when your unit is not in use to prevent loss or damage (Fig.22). • Remove high pressure hose from spray gun (Fig.
T roubleshooting Unit will not turn on. and FAQ s Make sure the power washer is in the “OFF” position. Plug in the electrical cord to a grounded 120 volt outlet (no electrical extension cord should be used). If the electrical cord will not plug into your outlet, your electrical outlet is not properly grounded and should not be used. Use another electrical outlet. Press the reset button on GFCI power box. If the color of red is not visible in the little window on the GFCI, unplug and plug in again.
1 3 2 4 5 7 8 6 9 Replacement Parts Pos. Description Part Number Qty.
S pecifications Model Max PSI Max GPM Max Temp Volts Amps Weight (lbs) AR260 (lbs/sq/in) 1,700 (gal/per/min) 1.55 122° F 120 12.5 23 L imited W arranty This product is under warranty to the original retail consumer against defects in material and workmanship for a period of 1 (one) year and is a complete “bumper to bumper” warranty including the spray gun, the high pressure hose and all accessories from the date of purchase. The warranty is not transferable or assignable.
Model AR260 www.arblueclean.