
User's Manual
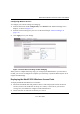
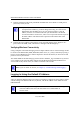
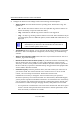
Table Of Contents
- Contents
- About This Manual
- Chapter 1 Introduction
- Chapter 2 Basic Installation and Configuration
- Wireless Equipment Placement and Range Guidelines
- Understanding MaxR-3210 Wireless Security Options
- Installing the MaxR-3210 Wireless Access Point
- Logging In Using the Default IP Address
- Setting Basic IP Options
- Wireless Settings
- Setting Up and Testing Basic Wireless Connectivity
- Understanding Security Profiles
- SSID and WEP/WPA Settings Setup Form
- Configuring the RADIUS Server Settings
- Setting up a Security Profile
- Configuring WEP
- Configuring WPA with RADIUS
- Configuring WPA2 with RADIUS
- Configuring WPA and WPA2 with RADIUS
- Configuring WPA-PSK
- Configuring WPA2-PSK
- Configuring WPA-PSK and WPA2-PSK
- Restricting Wireless Access by MAC Address
- Chapter 3 Management
- Remote Management
- Remote Console
- Upgrading the Wireless Access Point Software
- Configuration File Management
- Changing the Administrator Password
- Enabling the SysLog Server
- Using Activity Log Information
- Viewing General Summary Information
- Viewing Network Traffic Statistics
- Viewing Available Wireless Station Statistics
- Enabling Rogue AP Detection
- Viewing Rogue AP Statistics
- Packet Capture
- Chapter 4 Advanced Configuration
- Chapter 5 Troubleshooting and Debugging
- No lights are lit on the Access Point.
- The Wireless LAN activity light does not light up.
- The LAN light is not lit.
- I cannot access the Internet or the LAN with a wireless capable computer.
- I cannot connect to the MaxR-3210 to configure it.
- When I enter a URL or IP address I get a timeout error.
- Using the Reset Button to Restore Factory Default Settings
- Appendix A Default Settings and Technical Specifications
- Appendix B Command Line Reference
- Index
MaxR-3210 Wireless-N Access Point User Manual
10 Arada Systems Confidential
v1.1, Dec 2009
3. Connect an Ethernet cable from your MaxR-3210 Wireless Access Point to a LAN port on
your router, switch, or hub.
4. Connect the power adapter to the wireless access point and plug the power adapter in to a
power outlet. The PWR, LAN, and Wireless LAN lights and should light up.
Verifying Wireless Connectivity
Using a computer with an 802.11b/bg/ng wireless adapter with the correct wireless settings needed
to connect to the MaxR-3210 (SSID, WEP/WPA, MAC ACL, etc.), verify connectivity by using a
browser such as Mozilla Firefox or Internet Explorer to browse the Internet, or check for file and
printer access on your network.
The default SSID for the 802.11b/bg/ng wireless mode is ARADA_11g. The SSID of any wireless
access adapters must match the SSID configured in the MaxR-3210 Single Band Wireless-N
Access Point. If they do not match, no wireless connection will be made.
Logging In Using the Default IP Address
After you install the MaxR-3210, log in to the Access Point to configure the basic settings and the
wireless settings. The MaxR-3210 is set, by default, with the IP address of 192.168.0.237 with
DHCP disabled.
Note: By default, MaxR-3210 is set with the DHCP client disabled. If your network
uses dynamic IP addresses, you must change this setting. To connect to the
MaxR-3210 after the DHCP server on your network assigns it a new IP
address, enter the Access Point name into your Web browser. The default
Access Point name is aradaxxxxxx, where xxxxxx represents the last 6 bytes of
the MAC address. The default name is printed on the bottom label of the
MaxR-3210.
Note: If you are unable to connect, see Chapter 5, “Troubleshooting and Debugging.”
Note: The computer you are using to connect to the MaxR-3210 should be configured
with an IP address that starts with 192.168.0.x and a Subnet Mask of
255.255.255.0.