
Instructions

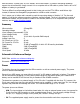


USB connection, a power jack, an ICSP header, and a reset button. It contains everything needed to
support the microcontroller; simply connect it to a computer with a USB cable or power it with a AC-to-DC
adapter or battery to get started.
The Uno differs from all preceding boards in that it does not use the FTDI USB-to-serial driver chip.
Instead, it features the Atmega8U2 programmed as a USB-to-serial converter.
"Uno" means one in Italian and is named to mark the upcoming release of Arduino 1.0. The Uno and
version 1.0 will be the reference versions of Arduno, moving forward. The Uno is the latest in a series of
USB Arduino boards, and the reference model for the Arduino platform; for a comparison with previous
versions, see the index of Arduino boards
.
Summary
Microcontroller ATmega328
Operating Voltage 5V
Input Voltage (recommended) 7-12V
Input Voltage (limits) 6-20V
Digital I/O Pins 14 (of which 6 provide PWM output)
Analog Input Pins 6
DC Current per I/O Pin 40 mA
DC Current for 3.3V Pin 50 mA
Flash Memory 32 KB (ATmega328) of which 0.5 KB used by bootloader
SRAM 2 KB (ATmega328)
EEPROM 1 KB (ATmega328)
Clock Speed 16 MHz
Schematic & Reference Design
EAGLE files: arduino-uno-reference-design.zip
Schematic: arduino-uno-schematic.pdf
Power
The Arduino Uno can be powered via the USB connection or with an external power supply. The power
source is selected automatically.
External (non-USB) power can come either from an AC-to-DC adapter (wall-wart) or battery. The adapter
can be connected by plugging a 2.1mm center-positive plug into the board's power jack. Leads from a
battery can be inserted in the Gnd and Vin pin headers of the POWER connector.
The board can operate on an external supply of 6 to 20 volts. If supplied with less than 7V, however, the
5V pin may supply less than five volts and the board may be unstable. If using more than 12V, the voltage
regulator may overheat and damage the board. The recommended range is 7 to 12 volts.
The power pins are as follows:
VIN. The input voltage to the Arduino board when it's using an external power source (as opposed to
5 volts from the USB connection or other regulated power source). You can supply voltage through
this pin, or, if supplying voltage via the power jack, access it through this pin.
5V. The regulated power supply used to power the microcontroller and other components on the