
Quick Start Guide


3
+1.818.937.0700 | www.avcostar.com | avsales@arecontvision.com
2. Use a web browser to log in to your ConteraWS account. Click My
Recorders, and then click Edit in the row of your desired recorder.
3. Click Remote Network Settings, and then type the static IP or DDNS
entry for the router in the IP Address or Domain eld, and 80 in the
Port eld.
4. Click Save.
LAN Smart Forwarding:
To optimize local connections, ConteraWS uses a feature called LAN Smart
Forward (LSF). This feature allows ConteraWS to detect if the machine using
the remote client software is on the same local network. ConteraWS then
automatically switches from a cloud relay connection to a direct connection.
This ensures the fastest connection between client and recorder.
The following conditions are required for LAN Smart Forwarding:
• You must already have an ConteraWS account, and the appliance
must be connected to ConteraWS with LAN Smart Forwarding
congured (see the ConteraWS Web Services section for more
information).
• Both client and recorder use the same external IP address, or IP
addresses within an acceptable range.
• The Client NIC port must be used for the Internet connection.
To enable LAN Smart Forwarding:
1. Use a web browser to log in to your ConteraWS account, and then click
on your desired Company Account.
2. Click My Recorders, and then click Edit in the row of the desired recorder.
3. Click the Remote Network Settings tab.
4. Set LAN Smart Forwarding to On.
Note: If your recorder and client machines have different external IP
addresses, enter the IP range in which the client and recorder reside.
ConteraWS Web Services (ArecontVision-WS.com)
1. On your Recorder, click Setup, and then navigate to the Remote
Services tab.
2. Click Web Services.
3. Type your Registration Code.
Note: If you do not have your Recorder Registration Code, you may enter your
ConteraWS Email and Password instead. It is recommended to use a Recorder
Registration Code if available though.
4. Click Connect.
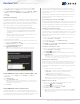
ConteraWS Web Services Connection
ConteraWS Web Services is a cloud-based management solution which
allows you to administer all your users, recorders, and VMS installations from
one central location. To get the most out of your new web-managed recorder,
we strongly recommend connecting it to the Web Services portal.
Please note that all following instructions are executed at a Channel
Partner level. For more detailed instructions on how to operate at an End
User level, please consult the ConteraWS Software Manual, available at
www.avcostar.com.
To begin using ConteraWS, you will need a Channel Partner ConteraWS
account. If you do not have one already, please contact AV Costar at
www.avcostar.com.
Connecting a Recorder to ConteraWS:
If you entered your Recorder Registration Code in the previous section, your
recorder will be automatically added to your ConteraWS Company Account.
Users associated with your Company Account and with the appropriate
permissions will now be able to remotely access the Server recorder.
Creating a Customer Account:
A Customer Account is an ConteraWS End User account created under
a Channel Partner account and managed by the Channel Partner. Customer
Accounts can only be created by the Channel Partner. Once created, the
Channel Partner can assign recorders to Customer Accounts and create
End User accounts.
1. Log in to your ConteraWS account from a web browser using your
registered Username and Password.
2. On the Management Portal, click Add New Account.
3. Enter an Account Name.
4. (Optional) Enter an Account ID, City, State/Province, and Time Zone.
5. Click Add Company Account.
Creating a Customer Account:
1. Log in to your ConteraWS account from a web browser using your
registered Username and Password.
2. Click Settings , and then click Users.
3. Click Add New User, and then enter the appropriate user information.
4. Click Add New User.
Note: This method creates users at the Channel Partner level. To create users
at an End User level, complete step 1, then click Connect next to the Company
Account you wish to add users to, then complete steps 2-4.
Managing User Permissions:
User permissions are managed via assignment of individual users to User
Groups. User Groups are classications which grant users permissions
to access various aspects of a Channel Partner or Customer Account.
User and User Group Management should always be performed through
ConteraWS.
Three default permission levels are available:
• User – Basic Live View, Search, and Clip Share functionality.
• Super User – Live View, Search, Clip Sharing, Editing,
Deleting, and Recorder Management.
• Admin – All permissions, including full administrative
access and the ability to manage Users and User Groups.
Note: Default user group permissions cannot be edited. Creating a new user
group will allow customization of available permissions.
Adding a User to a Group:
1. Log in to your ConteraWS account using a web browser using
your registered Username and Password.
2. Click Settings , then click User Groups.
3. In the row of your desired User Group, click Edit.
4. Click Users, and then click Add User.
5. Select the user you want to add to the User Group, and then click Save.
Note: Automatically include all users in the User Group by checking the box so
labeled at the top of the list.
ConteraCMR
®
| Quick Installation Guide