
Quick Start Guide


Rev 001.007
Made in the USA
*
* Except Contera NVR Appliance
+1.818.937.0700 | www.avcostar.com | avsales@arecontvision.com
© 2021 Arecont Vision Costar, LLC. All rights reserved. Arecont Vision, Contera, ConteraCMR, and ConteraWS are registered trademarks of the company.
AV Costar, and the AV Costar logo are business use trademarks of the company.
Go to: ArecontVision-WS.com
®
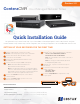
ConteraCMR
®
| Quick Installation Guide
Adding a Group to a User:
1. Log in to your ConteraWS account using a web browser using your
registered Username and Password.
2. Click Settings , then click Users.
3. Click Edit next to the desired user.
4. Click Group Membership, and then click Add User to User Group.
5. Select the User Groups you want to include the user in, and then click
Save.
Removing a User from a Group:
1. Click Settings , and then click User Groups.
2. In the row of your desired User Group, click Edit.
3. On the Users tab, click the X next to the user to be removed.
Adding a New User Group:
1. Log in to your ConteraWS account using a web browser using your
registered Username and Password.
2. Click Settings , and then click User Groups.
3. Click Add New User Group.
4. Type a Name and Description for the User Group, and then click Create.
Modifying Group Level Permissions:
1. Log in to your ConteraWS account using a web browser using your
registered Username and Password.
2. Click Settings , and then click User Groups.
3. Click Edit next to the desired User Group.
4. Click one of the following and edit the desired permission:
• ConteraWS Permissions – These permissions pertain to Video Clips,
User Management, Recorders, Alerts, and Reports from
the ConteraWS website.
• Recorder Permissions – All Live View, Web Services, and Setup
functions are available through the ConteraVMS Thin Client,
ConteraMobile
®
App, and ConteraVMS (Thick Client) application.
• AV IP Utility Permissions – View and Manage Shared
Camera layouts for ConteraVMS.
Modifying Device Access:
1. Log in to your ConteraWS account using a web browser using your
registered Username and Password.
2. Click Settings , and then click User Groups.
3. Click Edit in the row of the desired User Group.
4. Click the Recorders/Cameras tab.
5. To add device access, click Add Recorder or Add Camera,
select the appropriate device groups or devices, and then click Add.
Note: To remove a device group or device, click the dropdown arrow next to a
device, then click Remove Recorder.
Note: Users who are also assigned to another group with permission to access
the recorder removed from this group will still be able to access the recorder.
Creating a Health Alert:
1. Log in to your ConteraWS account using a web browser using your
registered Username and Password.
2. Select Rules from the Alerts dropdown menu on the main navigation bar.
3. Click Add New Rule.
4. Name your alert rule and give it a Description as desired.
5. Click Add.
6. Dene the parameters of the alert rule.
7. Add Recorders, Cameras and Users to the alert rule as needed.
8. Click Save when nished.
Note: For more information about creating Alerts, please refer to the
ConteraWS Software Manual available at www.avcostar.com.
Creating a Report:
1. Log in to your ConteraWS account using a web browser using your
registered Username and Password.
2. Click Reports on the main navigation bar.
3. Click Add New Report, then select the Report Type you’d like to use
and click Next.
4. Enter a Report Name and Report Description.
5. Click Create.
6. Add Recorders and Users to your report.
7. Click Save when nished.
Note: For more information about creating Reports, please refer to
the ConteraWS Software Manual available at www.avcostar.com.
Viewing and Exporting Alert History:
1. Log in to your ConteraWS account using a web browser using your
registered Username and Password.
2. Select History from the Alerts dropdown menu on the main
navigation bar.
3. Click Show Filters.
4. Use the elds to specify which alerts to view.
5. Click Apply when nished.
6. Click Export.
7. Click Export again.
ConteraCMR
®