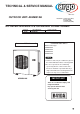
TECHNICAL & SERVICE MANUAL NOV.2003 OUTDOOR UNIT: AE4MI91AH Destination: General area (50Hz) Europe (50Hz) Australia (50Hz) General area (60Hz) DC INVERTER MULTI-SYSTEM AIR CONDITIONER Capacity 9.0 kW Indoor Model No. Product Code No. AE4MI91AH 4-room multi Outdoor unit < Combined Indoor Units > ●Wall mounted type AWMI28AHL AWMI38AHL AWMI50AHL AWMI70AHL NOTE 1. How these units may be combined is given in the Unit Combination Tables in the Appendix. 2.
When Transporting Important! Please Read Before Starting Be careful when picking up and moving the indoor and outdoor units. Get a partner to help, and bend your knees when lifting to reduce strain on your back. Sharp edges or thin aluminum fins on the air conditioner can cut your fingers. This air conditioning system meets strict safety and operating standards. As the installer or service person, it is an important part of your job to install or service the system so it operates safely and efficiently.
Table of Contents Page 1. OPERATING RANGE ............................................................................................................................... 1 2. SPECIFICATIONS 2-1. Unit Specifications .......................................................................................................................... 2 2-2. Major Component Specifications.................................................................................................... 3 2-3.
1. OPERATING RANGE Temperature Cooling Heating Indoor Air Intake Temp. Outdoor Air Intake Temp. Maximum 32°C D.B. / 23°C W.B. 43°C D.B. Minimum 19°C D.B. / 14°C W.B. 19°C D.B. Maximum 27°C D.B. 24°C D.B. / 18°C W.B. Minimum 16°C D.B. — 1 / – 15°C W.B.
2. SPECIFICATIONS 2-1. Unit Specifications Outdoor Unit AE4MI91AH Type 4-room multi outdoor unit Number of connectable indoor units 4 Maximum capacity of connected indoor units kW 15.4 Maximum capacity of operating indoor units 15.4 kW Power Source 220–240V ~ 50Hz 220V ~ 60Hz Voltage rating 230V 220V Performance Cooling Capacity kW BTU/h m 3/h Air circulation (High) Electrical Rating Cooling Available voltage range Running amperes Power input Power factor C.O.P.
2-2. Major Component Specifications 2-2-1. Outdoor Unit Outdoor Unit AE4MI91AH Control PCB / HIC PCB / Filter PCB POW-CM5A1-C-T / CR-HIC50A2-C-T / POW-CM5B1-C-T Compressor Type Compressor model Compressor oil … Amount Coil resistance (Ambient temp. 25°C) DC Twin Rotary (Hermetic) C-9RVN273H0W 80867080 FVC68S … 1900 R – S: 0.169 S – T: 0.169 T – R: 0.169 cc Ω Safety devices CT (Peak current cut-off control) Compressor discharge temp. control Operation cut-off control in abnormal ambient temp.
3. DIMENSIONAL DATA Outdoor Unit AE4MI91AH 465 Unit: mm 660 109 380 AIR DISCHARGE 13 25 33.7 15 340 296 940 Narrow tube service valve ø6.35 (1/4") 880 Wide tube service valve ø9.52 (3/8") 5 416 336 256 176 Wide tube service valve ø12.
4.
5. PERFORMANCE DATA 5-1. Performance Charts (4-room multi) Outdoor Unit Indoor Unit AE4MI91AH AWMI28AHL × 1 • Cooling Characteristics • Heating Characteristics (1) Low pressure performance chart (RH: 46%, Indoor fan speed: High fan) (1) High pressure performance chart (RH: 85%, Indoor fan speed: High fan) (50/60Hz, 220V) Lo fan (50/60Hz, 220V) Hi fan 3.5 air oor C .30° emp High pressure (MPa) Low pressure (MPa) 1.3 t Ind 27°C 1.2 24°C 1.1 1.0 o Ind 3°C p.2 tem ir or a C 20° 3.
Outdoor Unit Indoor Unit AE4MI91AH AWMI38AHL × 1 • Cooling Characteristics • Heating Characteristics (1) Low pressure performance chart (RH: 46%, Indoor fan speed: High fan) (1) High pressure performance chart (RH: 85%, Indoor fan speed: High fan) (50/60Hz, 220V) Hi fan Low pressure (MPa) ir te or a 1.2 Indo High pressure (MPa) Lo fan (50/60Hz, 220V) 4.0 30°C mp. 27°C 24°C 1.1 1.0 3.5 °C .23 mp r te ai oor Ind C 20° C 17° 3.0 2.5 0.
Outdoor Unit Indoor Unit AE4MI91AH AWMI50AHL × 1 • Cooling Characteristics • Heating Characteristics (1) Low pressure performance chart (RH: 46%, Indoor fan speed: High fan) (1) High pressure performance chart (RH: 85%, Indoor fan speed: High fan) (50/60Hz, 220V) Hi fan Low pressure (MPa) 1.2 °C mp.30 High pressure (MPa) Lo fan (50/60Hz, 220V) 4.0 r air te Indoo 1.1 27°C 24°C 1.0 3.5 Ind oo ra ir p tem °C .23 20 °C 17 3.0 °C 2.5 0.
Outdoor Unit Indoor Unit AE4MI91AH AWMI70AHL × 1 • Cooling Characteristics • Heating Characteristics (1) Low pressure performance chart (RH: 46%, Indoor fan speed: High fan) (1) High pressure performance chart (RH: 85%, Indoor fan speed: High fan) (50/60Hz, 220V) Hi fan Low pressure (MPa) 1.2 r Indoo 1.1 0°C mp.3 air te High pressure (MPa) Lo fan (50/60Hz, 220V) 4.0 27°C 24°C 1.0 3.5 Ind oo ra ir p tem °C .23 20 °C 17 3.0 °C 2.5 0.
W W G1 G2 MMV HE A T - P U MP O U TD O OR U N IT FO R F OU R -R O OM MUL TI P L E I ND O OR U NI T S FMO MVA MVB MVC MVD RV DEF TH1 TH2 TH3 TH4 TH5 TH6 TH7 TH8 TH9 TH10 TH11 1 2 3 4 1 2 3 4 1 2 3 4 1 2 3 4 1 2 1 2 3 4 1 3 1 3 1 2 3 4 5 6 CN25 DTH (YEL) 1 2 3 4 5 6 CN20 CTH (BLU) 1 2 3 4 5 6 CN22 BTH (RED) 1 2 3 4 5 6 CN24 ATH 1 2 3 4 5 6 (BLK) (BLK) CN19 COMP 1 3 5 7 CN13 COIL/GAIKI CN05 DEF 1 3 (WHT) (BLK) GRY GRY CN06 RV (RED) PNK BRN WHT YEL CN40 MVD (YEL) (YE
7. INSTALLATION INSTRUCTIONS Installation Site Selection 7-1. Indoor Unit WARNING To prevent abnormal heat generation and the possibility of fire, do not place obstacles, enclosures and grilles in front of or surrounding the air conditioner in a way that may block air flow. AVOID: INDOOR UNIT (1) ● direct sunlight. ● nearby heat sources that may affect performance of the unit. ● areas where leakage of flammable gas may be expected. ● places where large amounts of oil mist exist.
In the case below, a joint for connecting tubes of different sizes is needed when connecting the inter-unit tube (φ9.52) to the outdoor unit valve (φ12.7). (1) Connecting indoor unit types 28 to 38 at D Outdoor unit Indoor unit φ6.35 A (28 38 types) φ9.52 φ9.52 φ6.35 φ6.35 φ9.52 (28 38 types) B φ9.52 (28 38 types) C φ9.52 φ9.52 φ6.35 (28 38 types) D φ12.7 φ9.52 Flare φ12.7 Union φ9.52 Fig. 2a (φ12.7 → φ9.
7-2. Outdoor Unit NO AVOID: ● damp, humid or uneven locations. Hot air Heat source Outdoor unit DO: ● choose a place as cool as possible. ● choose a place that is well ventilated. ● allow enough room around the unit for air intake/ exhaust and possible maintenance. (Fig. 4a) ● provide a solid base (level concrete pad, concrete block, 15 × 40 cm beams or equal), a minimum of 15 cm above ground level to reduce humidity and protect the unit against possible water damage and decreased service life.
7-3. Diagram of Outdoor Unit Installation Never install only a single indoor unit. Be sure to connect indoor and outdoor units only in combinations that are listed in the catalog or in the combination table that was provided with the outdoor unit. (Use caution. Connecting any other model may result in operation failure and malfunction.) The dimensions indicated by ⇔ in the figure below are spaces that are required in order to maintain performance.
7-4. Recommended Wire Length and Diameter Regulations on wiring diameter differ from locality to locality. For field wiring requirements, please refer to your local electrical codes. Carefully observe these regulations when carrying out the installation. Table 2 shows maximum wire lengths for control line and power line and fuse or circuit capacity. NOTE Refer to the wiring system diagram (Fig. 6) for the meaning of “A” and “B” in Table 2. Table 2 Cross-sectional Max.
8. FUNCTIONS 8-1. Defrost Detection and End 8-1-1. Non-stop defrosting Defrost sequence HEAT operation 4-way valve ON Defrost detection occurs in either of the following cases: • The temperature of the heat exchanger remains at or below the L1 line for 35 minutes after the start of HEAT operation. • The temperature of the heat exchanger remains at or below the L2 line for 120 minutes after the start of HEAT operation.
8-2. Current Control 8-3. Low Start Current ● The operating current may rise as a result of causes including increasing heating or cooling loads or decreases in power voltage. In these cases, the operating frequency is automatically reduced, or operation is stopped, in order to control the operating current so that it is 20 A or less. Operation starts at 10 Hz, and the start current is less than the normal operating current.
8-5-2. HEAT operation (1) The fan speed is changed as shown in the figure below, based on the outdoor air temperature and the operating frequency. 5°C or below Outdoor air Above 5°C 5°C Fan H Above 35 Hz Fan H 19 Hz Frequency Fan H Fan L Less than 35 Hz (2) The fan speed is changed as shown in the figure below based on the highest temperature of the indoor heat exchanger for connected indoor units (including stopped units).
9. TROUBLESHOOTING ■ Both the indoor unit and outdoor unit include electronic control circuits. Be sure to pay attention to the following before inspecting or repairing the outdoor-side electronic circuits. ● High-capacity electrolytic capacitors are used inside the outdoor unit controller (inverter). They retain an electrical charge (charging voltage DC 311 V) even after the power is turned OFF, and some time is required for the charge to dissipate.
9-2. Outdoor Unit Trouble Diagnostics If a protective device has activated or there is a sensor failure in the outdoor unit, the 6 error monitor lamps on the outdoor control circuit board will indicate the nature of the trouble.
9-3. Checking the Outdoor System 9-3-1. Checking the outdoor unit No. Check items (unit operation) Control 1 • Apply 220 V AC between terminals 1 and 2 on the outdoor unit 3P terminal block. • The LED (red) on the control circuit board must illuminate. 2 • Of the connector T-RUN/TEST terminals, short-circuit the T-RUN terminal to the COM terminal. • The compressor, fan motor, 4-way valve, and solenoid valve (for the hot gas bypass) must turn ON.
9-4. Unit Problems and Inspection Points Does not heat or heating performance is inadequate. Does not cool or cooling performance is inadequate. The electric expansion valve does not operate. Defrost operation does not occur. Others The outdoor air temperature is high, however defrost operation occurs. The compressor speed does not increase. The compressor stops on occasion. 4-way valve does not operate. Outdoor fan does not turn. Outdoor unit does not operate. Indoor fan does not turn.
9-4-1. Outdoor control circuit board Refer to 9-3-1. Checking the outdoor unit. NOTE: Do not remove or insert the outdoor control circuit board connector when power is being supplied to it. (The controller will be damaged.) 9-4-2. HIC HIC measurement points Tester polarity + + (Black) U + V – – W – – (Red) – V ∞ V W + U W Continuity U U V + W ∞ Below 1kΩ Below 1kΩ Perform the continuity tests shown in the table above.
9-4-9. Electric expansion valve ● When replacing the electric expansion valve and coil, be sure to attach the connectors in the correct positions. Labels are applied to the valve body and coil, corresponding to the connector colors, to identify them. Use a tester to measure the voltage (12 V). ● When the power is turned ON, the needle will move from MMV (white) → MVA (black) → MVB (red) → MVC (blue) → MVD (yellow) in sequence in approximately 10 – 20 seconds for each point.
9-5. Explanation of Functions Control/conditions INITIAL Unit operation Breaker is ON. The ON/OFF operation button on the remote controller is pressed. Explanation Power is supplied to the indoor and outdoor unit control circuits, however the unit remains stopped. Positioning of the outdoor unit electric expansion valve is performed.
Control/conditions HEAT When defrost operation begins, frost has formed on the outdoor unit (when the ambient air temperature is low). Unit operation Explanation Non-stop defrost Defrost operation begins based on outdoor temperature conditions. ● Indoor fan: Intermittent operation Non-stop defrost (Refer to Fig. 1 below.) ● Outdoor fan: Stopped 1 After HEAT operation begins, the temperature of the outdoor heat exchanger is at or below the L1 line for 35 minutes.
Control/c onditions COOL The ON/OFF operation button on the remote controller is pressed. Unit ope ra tion E x pla na tion ● The operation lamp illuminates. ● The indoor fan operates at the set fan speed. ● The outdoor unit stops. The outdoor unit does not operate for 3 minutes even after the breaker is turned ON. The outdoor unit starts. ● The frequency is increased at the rate of 1 Hz every 0.5 seconds. (Compressor and the outdoor fan start.
(1/f fluctuation fan) Control/c onditions S E NS OR DRY The O N/O FF operation button on the remote controller is pressed. Unit ope ra tion E x pla na tion ● The operation lamp illuminates. ● The indoor fan operates at the set fan speed. ● The outdoor unit stops. The outdoor unit does not operate for 3 minutes even after the breaker is turned ON. The outdoor unit starts. ● The frequency is increased at the rate of 1 Hz every 0.5 seconds. (Compressor and the outdoor fan start.
10. REFRIGERANT R410A: SPECIAL PRECAUTIONS WHEN SERVICING UNIT 10-1. Characteristics of New Refrigerant R410A 10-1-1. What is New Refrigerant R410A? R410A is a new refrigerant that contains two types of pseudo-non-azeotropic refrigerant mixture. Its refrigeration capacity and energy efficiency are about the same level as the conventional refrigerant, R22. 10-1-2. Components (mixing proportions) HFC32 (50%) / HFC125 (50%) 10-1-3.
● Tubing precautions Refrigerant R410A is more easily affected by dust or moisture compared with R22, thus be sure to temporarily cover the ends of the tubing with caps or tape prior to installation. Never use 0.7mm-thick copper tubing or tubing which is less than 0.8mm in thickness, since air conditioners with R410A are subject to higher pressure than those using R22 and R407C. ● No addition of compressor oil for R410A No additional charge of compressor oil is permitted.
10-3. Tools Specifically for R410A ● For servicing, use the following tools for R410A Tool Distinction Tool Name Tools specifically for R410A ● Gauge manifold ● Charging hose ● Gas leak detector ● Refrigerant cylinder ● Charging cylinder ● Refrigerant recovery unit ● Vacuum pump with anti-reverse flow (*1) (Solenoid valve-installed type, which prevents oil from flowing back into the unit when the power is off, is recommended.
10-5. In Case of Compressor Malfunction CAUTION ● Should the compressor malfunction, be sure to make the switch to a replacement compressor as quickly as possible. ● Use only the tools indicated exclusively for R410A. ➞ See “10-3. Tools Specifically for R410A.” 10-5-1. Procedure for replacing compressor (1) Recovering refrigerant ● Any remaining refrigerant inside the unit should not be released to the atmosphere, but recovered using the refrigerant recovery unit for R410A.
(5) Recharging Configuration and characteristics of cylinders Valve ● Be sure to charge the specified amount of refrigerant in liquid state using the service port of the wide tube service valve. The proper amount is listed on the unit's nameplate. When the entire amount cannot be charged all at once, charge gradually while operating the unit in Cooling Operation. Liquid CAUTION Never charge a large amount of liquid refrigerant at once to the unit. This may cause damage to the compressor.
10-6. In Case Refrigerant is Leaking CAUTION Never attempt to charge additional refrigerant when refrigerant has been leaking from the unit. Follow the procedure described below to locate points of leaks and carry out repairs, then recharge the refrigerant. (1) Detecting Leaks ● Use the detector for R410A to locate refrigerant leak points.
(6) Recharging Configuration and characteristics of cylinders Valve ● Be sure to charge the specified amount of refrigerant in liquid state using the service port of the wide tube service valve. The proper amount is listed on the unit's nameplate. When the entire amount cannot be charged all at once, charge gradually while operating the unit in Cooling Operation. Liquid CAUTION Never charge a large amount of liquid refrigerant at once to the unit. This may cause damage to the compressor.
10-7. Charging Additional Refrigerant 10-7-1. When Tubes are Extended ● Observe the proper amount of refrigerant as stated in this service manual or the installation manual that came with the indoor unit. Charge additional refrigerant in liquid state only. CAUTION Never charge additional refrigerant if refrigerant is leaking from the unit. Follow instructions given in “10-6. In Case Refrigerant is Leaking” and completely carry out repairs. Only then should you recharge the refrigerant. 10-8.
APPENDIX UNIT COMBINATION TABLES NOTE Be sure to operate the air conditioning system only when 2 or more indoor units have been installed. If operated with only a single unit installed, the returning fluid to the compressor may cause a malfunction.
4-Room Outdoor Unit Combination Table Outdoor Unit AE4MI91AH NOTE 2.8: 3.6: 5.0: 7.0: Single-room operation Indoor Unit Capacity (kW) IndoorUnit unit Indoor Combination Conbination Room A Room B Room C Room D Total Performance Min. - Max. 2.8 Heating 4.0 Cooling 2.8 Heating 4.8 3.6 Heating 7.1 5.0 Heating 8.0 990 - 6.3 1,190 - 3.6 1,010 - 7.8 1,200 - 7.0 - 7.2 - 6.0 1,360 - 7.8 1,910 1,420 - 6.7 1,430 2,040 - 9.4 2,150 1,690 5.8 1,030 - 8.0 1,850 2,150 8.
Outdoor Unit AE4MI91AH NOTE 2.8: 3.6: 5.0: 7.0: 3-room operation Three-room operatio Indoor Unit Capacity (kW) Indoor IndoorUnit unit Combination Conbination Room A Room B Room C Room D Total Performance Min. - Max. 2.8+2.8+2.8 Heating 3.33 3.33 3.33 Cooling 2.80 2.80 2.80 Heating 3.10 3.10 3.80 2.75 2.75 3.50 Heating 2.65 2.65 4.70 2.40 2.40 4.20 Heating 2.90 3.55 3.55 Cooling 2.50 3.25 3.25 3.33 3.33 3.33 Cooling 3.00 3.00 3.00 2.50 3.00 4.50 Cooling 2.
Outdoor Unit AE4MI91AH NOTE 2.8: 3.6: 5.0: 7.0: 4-room operation Four-room operation Indoor Unit Capacity (kW) Indoor IndoorUnit unit Combination Conbination Room A Room B Room C Room D Total Performance Min. - Max. 2.8+2.8 Heating 2.50 2.50 2.50 2.50 2.8+2.8 Cooling 2.25 2.25 2.25 2.25 Heating 2.40 2.40 2.40 2.80 2.8+3.6 2.10 2.10 2.10 2.70 Heating 2.25 2.25 2.75 2.75 3.6+3.6 2.00 2.00 2.50 2.50 Heating 2.10 2.10 2.10 3.70 Cooling 1.90 1.90 1.90 3.30 2.8+5.
ARGOCLIMA SPA GALLARATE-ITALY