
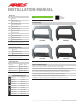
Owners manual

PAGE 3 • RB • 800.798.0813 • NEED ASSISTANCE? • ARIESAUTOMOTIVE.COM
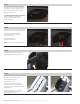
Step 5
With help, lift the bull bar into place
and align the mounting tabs on the
outside of the mounting brackets.
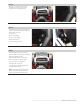
Step 6
Insert a M10 hex bolt with flat washer on
the outside of the bracket and a M10 flat
washer and nylock nut
on the inside.
Snug the hardware,
but do not fully tighten.
Repeat this process
for all mounting locations.
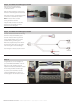
Step 7
Level and adjust the bull bar into the
desired position and tighten all hardware.
Tighten all hardware to the
recommended torque specifications
listed in the table on the first page.
If your bull bar is not equipped
with lights skip to step 10.
If your bull bar is equipped with lights
complete steps 8 and 9.
Note: If the LED lights are being used
with a 24V system, the 12V relay will
need to be replaced with a 24V unit.