
Installation Instructions


6. MAINTENANCE
6.1. GENERAL REMARKS
It is recommended that the following inspections be carried out on
the boiler at least once a year:
1. Check the seals in the water group and, if necessary, replace
the gaskets and restore the seal to perfect working order.
2. Check the seals in the gas group and, if necessary, replace the
gaskets and restore the seal to perfect working order.
3. Visually check the overall state of the boiler.
4. Visually check the combustion and, if necessary, disassemble
and clean the burner.
5. Following inspection 3, disassemble and clean the combustion
chamber, if necessary.
6. Following inspection 4, disassemble and clean the injector, if
necessary.
7. Clean the primary heat exchanger (see section 6.2)
8. Regulate the correct rate of flow of the gas: rate of flow on
ignition, partially loaded and at maximum load.
9. Check the correct functioning of the heating safety devices:
- temperature limit safety device.
10. Check the correct functioning of the gas group safety devices:
- absence of gas or flame safety device (Ionisation).
11. Check that the electrical connections are correct (in conformity
with the instructions manual).
12. Check the efficiency of the production of domestic hot water
(test the rate of flow and temperature).
13. Carry out a general inspection of the functioning of the boiler.
14. Check the characteristics for expulsion of the products of
combustion.
15. Remove the oxide from the detection electrode by means of an
emery cloth.
CLEANING THE EXHAUST SIDE
Remove the combustion chamber inspection hatch (20) (see section
1.3). Check that the exhaust passages between the blades of the
block are free; if there are deposits present, wash the blades with
compressed air, water or a vinegar-based detergent.
NOTE: it is possible to use a brush in order to mechanically remove
the residues.
Use of detergents:
- soak the blades well
- allow the detergent to act for about 20 minutes
- rinse with a strong jet of water to remove the deposits (the
control panel must be kept closed)
- make sure that there are no traces of detergents in the
exchanger.
CLEANING THE WATER SIDE
Use detergents that dissolve CaCO3. Leave to act for a short time
(in order not to damage the aluminum) and then rinse. Make sure
that the detergent does not remain inside the exchanger.
Unscrew the lower part of the condensate trap and clean it. Lastly, fill
it with water and replace the stopper.
NB: if the boiler is not to be used for a prolonged period, the
condensate trap should be filled before igniting it again. A shortage
of water in the trap is dangerous because there is the risk of exhaust
fumes escaping into the air.
22
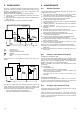
275
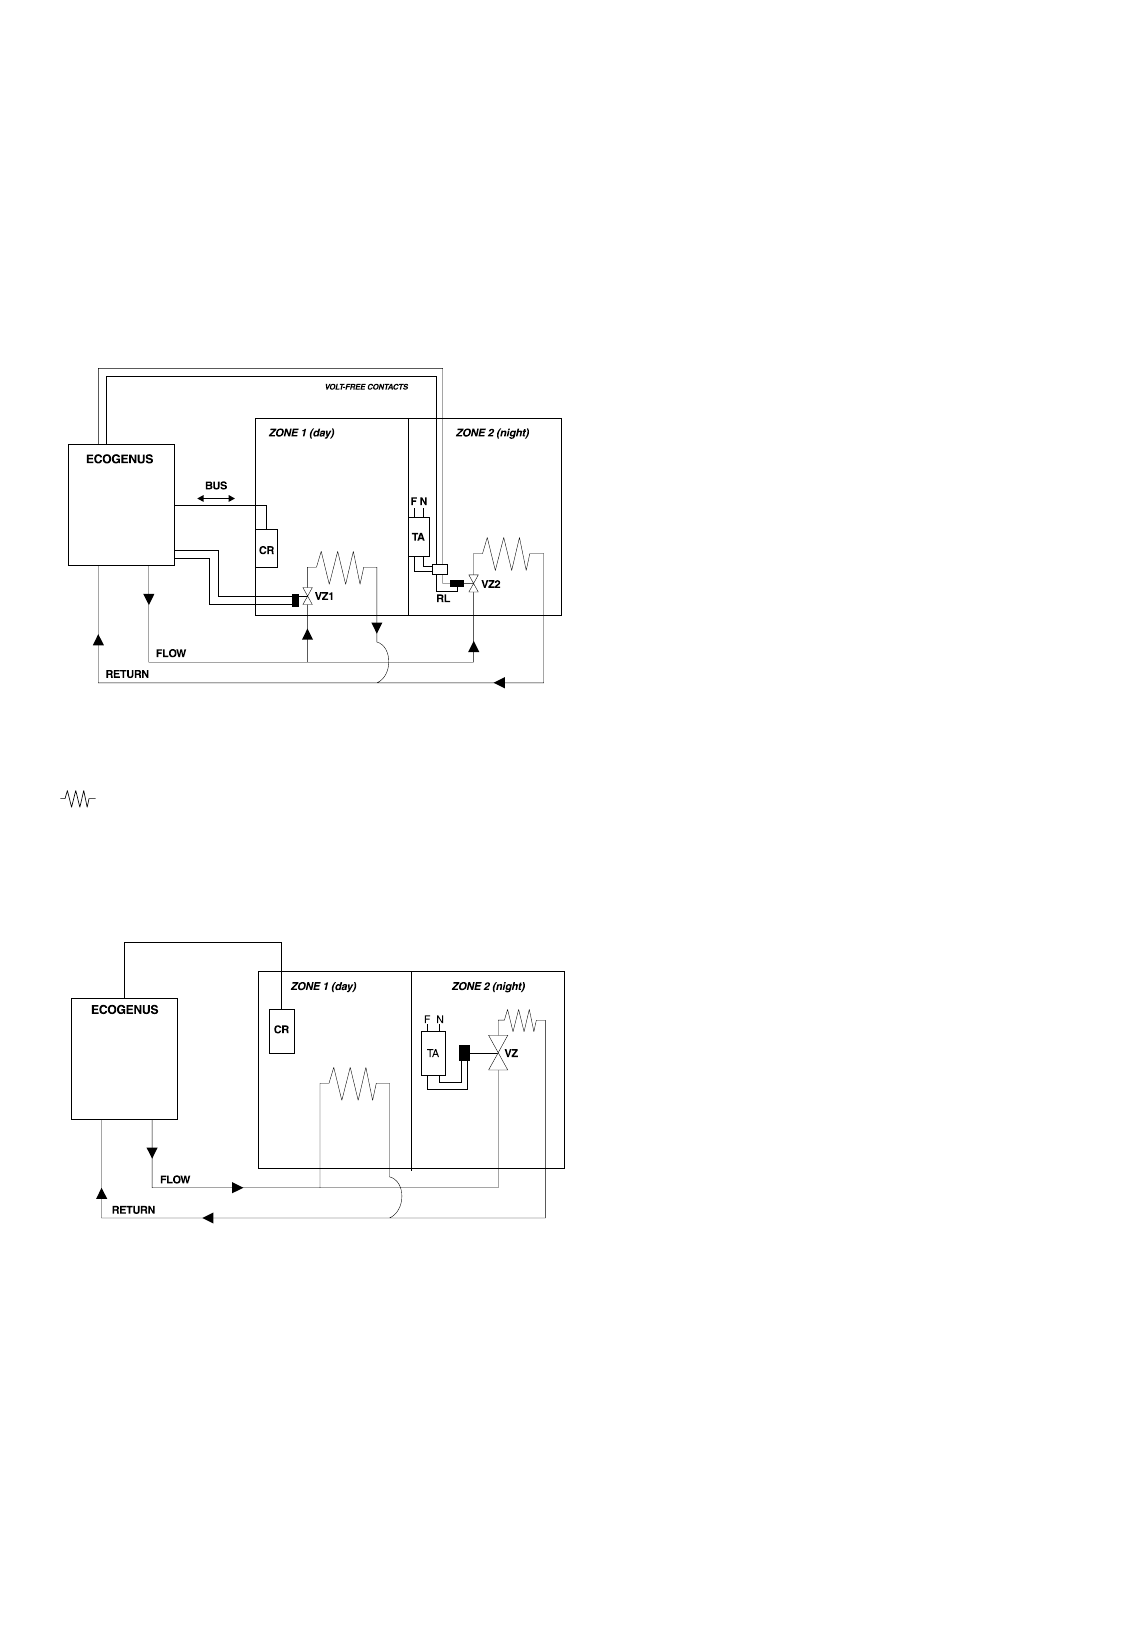
The boiler is capable of managing a heating system that uses zone
valves. The electrical connection of these valves is carried out by
means of the appropriate terminal board (indicated in the
“E
LECTRICAL CONNECTION” section).
By way of example, two possible types of systems would be:
1. System with 2 valves with independent regulation of the zones
(day and night).
2. System with 1 valve (regulation of the night zone subordinated to
that of the day).
A possible set-up for the first type of system is as follows:
5. ZONE VALVES
CR = remote control
VZ1,2 = zone valve 1 and 2
TA = roomstat or timer-thermostat
= radiators
F,N = electrical connection (live and neutral)
RL = relay
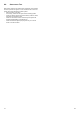
A possible set-up for the system with a single zone valve is as
follows:
This set-up is simpler and more economical because it does not
involve the use of the special relay. The night zone, however, may
only be heated during the time periods in which the remote control
timer gives consent to the heating of the day zone. Example:
• day zone programming (remote control): 8-22
• night zone programming (timer-thermostat): 20-22
6.2. C
LEANING THE P
RIMARY EXCHANGER
6.3. CLEANING THE CONDENSATE TRAP