
Clas ONE Installation Manual


40 /
SETTINGS - ADJUSTMENT - PROBLEM IDENTIFICATION MENUS
Accessing the settings - adjustment - problem identication menus
The boiler can be used to manage the heating and domestic hot
water production system in its entirety.
Navigation within the menus enables the boiler system +
connected peripheral units to be customised, optimising
operation for maximum comfort and maximum saving. It also
provides important information relating to the efcient operation
of the boiler.
Before access to the menus, the display show some “quick
settings” to have direct access to the parameters.
To see all available parameters and menu access to view FULL
MENU.
GAS - Direct access to the parameters:
220 - 231- 232- 233 - 234 - 270
SET - Direct access to the parameters:
220 - 231- 223 - 245 - 246
PCB - Direct access to the parameters:
220 - 228 - 229 - 231- 232- 233 - 234 - 247 - 250 - 253
VIS - Direct access to the parameters:
821 - 822 - 824 - 825 - 827 - 830 - 831 - 832 - 833- 840 - 835
ZONE - Direct access to the parameters:
402 - 502 - 602 - 420 - 520 - 620 -434 - 534 - 634 - 830
FULL MENU - see table on following pages
0 NETWORK
0 4 User Interface
2 Boiler Parameter
2 0 General setting
2 2 Boiler parameter
2 2 General setting
2 3 C.H. Parameters - Part 1
2 4 C.H. Parameters - Part 2
2 5 Domestic Hot Water
2 6 Boiler manual settings
2 7 Test & Utilities
2 8 Menù 2 Reset to factory setting
4 Zone 1 Parameters
4 0 Set-point Zone1
4 2 Zone 1 Setting
4 3 Diagnostics
5 Parametri Zona 2
5 0 Set-point Zone2
5 2 Zone 2 Setting
5 3 Diagnostics
6 Parametri Zona 3
6 0 Set-point Zone3
6 2 Zone 3 Setting
6 3 Diagnostics
8 Service Parameter
8 0 Statistics-1
8 1 Statistics-2
8 2 Boiler
8 3 Boiler Temperature
8 4 Solar & Storage
8 5 Service
8 6 Error History
8 7 Free parameter
The parameters relating to each individual menu are listed in the
following pages.
The various parameters can be accessed and modied using
the
“+” and“-”
, “+” OK and “-” buttons. (see g. below).
The description of the menus and of each individual parameter will
be shown on the display.
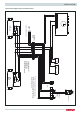
2. “+” and “-” buttons to access and modify
the parameters.
8. “+” OK button to store the adjustments of various
parameters.
“-”
(ESC) button to exit from the parameters.
2 8
The menus and parameters number is shown by the gures of
the display.
CAUTION! THE MENUS RESERVED FOR QUALIFIED
TECHNICIANS MAY ONLY BE ACCESSED AFTER SETTING
THE ACCESS CODE.
To access the Menus, open the cover and proceed as follows (for
example:
231
1.
Simultaneously press the 2 “+” and “-”
buttons for 5 seconds. Insert the service code,
the display shows 222
2. Press the “+”
button to select
234.
3. Press the “+” OK button. the display
shows the rst “quick setting”
GAS
4. Press the “+” button to select
MENU
(Complete MENU)
3. Press the “+” OK button.The display shows
menu
0
4. Press the “+”
button to select menu 2
.
5.
Press the “+” OK button to access to the menu.
The display shows the sub-menu 20.
4. Press the “+”
button to select the sub-menu
23.
3. Press the “+” OK button to access to the sub-
menu
. The display shows the parameter 230.
4. Press the “+”
button to select the parameter
231.
5. Press the “+” OK button to access to the
parameter. The display shows the value “ex:
70” .
6. Press the 2 “+” or “-”
button to select the
new value “ex: 75”
7. Press the “+” OK button p
to save the change or press “-”
(ESC) button
to exit without saving.
Press the “-” (ESC) button until the normal display screen is
restored.