ARISTON FB 86 P FO 97 P FC 97 P FD 96 P FD 97 P Four multifonction à nettoyage par fast clean Instruction pour l'installation et l'emploi Forno multifunzione a pulizia con fast clean Istruzioni per l'installazione e per l'uso 3 14 Multifunction oven with self-cleaning by fast clean Instruction for installation and use 26 Multifunktions-Backofen mit Fastcleanreinignung Installations- und Bedienungshinweise 38
La sécurité, une bonne habitude Avant d’utiliser l’appareil lisez attentivement le présent livret car il contient des instructions très importantes concernant la sécurité d’installation, d’usage et d’entretien. Conservez soigneusement ce livret pour toute consultation ultérieure. 1. Cet appareil a été conçu pour une utilisation non professionnelle, à l’intérieur d’une habitation. • n’utilisez jamais l’appareil pieds nus, évitez d’utiliser des rallonges ou, le cas échéant, prenez le maximum de précautions.
Vue de façade A. Le sélecteur de fonctions B. Le sélecteur de températures C. Le programmateur C 23.58 o A ˚C MAX C A B E D 5 s.
Les différentes fonctions de votre four Les fours ARISTON sont dotés de commandes et de voyants nécessaires à leur fonctionnement, réunis sur le bandeau. : «Pizza» Les éléments chauffants (sole et circulaire) sont sollicités afin de faire chauffer le four rapidement. Vos pizzas ainsi que vos tartes bénéficieront d'un apport de chaleur plus important sur le dessous de façon à garantir une bonne saisie de la pâte durant la cuisson.
Les accessoires Votre four est doté de nombreuses possibilités de cuissons. Celles-ci ne peuvent être réussies qu’avec un certain nombre d’accessoires que nous avons choisis. Ces accessoires coulissent dans les différents gradins de la crémaillère à l’intérieur de l’enceinte du four et peuvent ainsi être placés à la bonne hauteur pour la cuisson à réaliser. Pour chaque mode de cuisson et chaque exemple donné, nous vous précisons le numéro de gradin (à partir du bas).
Le nettoyage fast clean Sécurités Comment enclencher le nettoyage ? En fonction fast clean la température intérieure de l’enceinte atteint 500° nécessaires à la destruction des salissures, voir ci-dessus. Aussi votre four est-il doté de dispositifs de sécurité: • la porte est automatiquement verrouillée dès que la température est élevée afin d’éviter des risques de brûlure. • les éléments chauffants ne sont plus alimentés si un événement anormal survenait. – Sortez tous les accessoires du four.
Le programmateur Cadran d'affichage pour toutes les fonctions : heure, minuterie, durée et heure de fin de cuisson ou de fast clean Témoin de fonctionnement d'une opération programmée : - allumé : opération en cours - éteint : opération terminée - clignotant : opération programmée terminée Témoin d'utilisation de la minuterie sonore Témoin A de programmation : - éteint : utilisation manuelle - allumé : programmation faite Touche de démarrage de la cuisson Touche de réglage de la durée de cuisson Touche
Cuissons programmées Cuisson programmée en départ immédiat Cuisson programmée en départ différé La cuisson démarre immédiatement et s'arrête automatiquement à la fin du temps programmé. Le programmateur détermine automatiquement l'heure de début de cuisson en fonction des paramètres que vous avez déterminé : durée de cuisson et fin de cuisson.
QUELQUES EXEMPLES DE CUISSONS SUR UN SEUL NIVEAU Recettes Mode de cuisson Température Temps Gradin Remarques Préchauffage Pain (miche-1kg) Multicuisson 210°C 30-35' 2 Sur plateau émaillé Oui 2 Sur plateau émaillé Oui Feuilletés individuels Multicuisson 200°C 20-25' suivant épaisseur Pizza (pâte à pain) Pizza 240°C 10-15' 1 Sur plateau émaillé Ou Quiche lorraine (pâte brisée) Pizza 220°C 30' 1 Moule sur plateau émaillé Oui Soufflé au fromage Multicuisson 200°C 30-40' 2
Conseils de cuisson La cuisson est par définition le passage de l'état cru à l'état cuit. Le résultat obtenu est apprécié en fonction de différents critères : la coloration, le développement éventuel de la préparation, le moëlleux, le degré de cuisson souhaité, ... Les réglages du four (températures et temps de cuisson) dépendent évidemment de deux paramètres importants : - le volume de la préparation, - la capacité de l'aliment à prendre de la couleur (quantités de sucre, d'oeufs dans la recette).
Installation Encastrement Les panneaux des meubles adjacents doivent être fabriqués dans un matériau résistant à la chaleur . Dans le cas notamment de meubles en bois plaqué, il faut que les colles résistent à une température de 100 °C. Conformément aux normes de sécurité, après encastrement de l'appareil, il ne doit plus y avoir possibilité de contact avec les parties électrifiées.
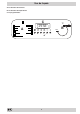
Installation Encastrement FC 97 P (figure ci-contre) 1. Positionnez les pattes "A" de manière à ce qu'elles buttent contre les cales support "B" du four. 2. Positionnez les taquets "C" contre les pattes "A".
La sicurezza, una buona abitudine Prima di utilizzare l'apparecchio, leggere attentamente le avvertenze contenute nel presente libretto, in quanto contengono importanti indicazioni riguardanti la sicurezza di installazione, l'uso e la manutenzione. Conservare con cura questo libretto per ogni ulteriore consultazione. 1. Questo apparecchio è stato concepito per un uso non professionale, all'interno di un'abitazione. umidi; • non usare l'apparecchio a piedi nudi; non usare, se non • • • 2.
Vista frontale A. Manopola di selezione funzioni di cottura B. Manopola di selezione temperatura di cottura C. Programmatore C 23.58 o ˚C A MAX C A B D 5 s.
Le diverse funzioni del forno La selezione delle varie funzioni dei forni ARISTON avviene tramite gli organi di comando e le spie luminose presenti sul cruscotto. notevoli vantaggi, in quanto il maggiore apporto di calore proveniente dal basso garantisce la corretta cottura a fuoco vivo dell'impasto durante la cottura. La funzione della ventola permette invece di ottenere la necessaria doratura sul lato superiore dell'alimento, che lo rende più appetitoso.
Gli accessori Il girarrosto Il forno è dotato di numerose possibilità di cottura, per la cui riuscita è necessario utilizzare un certo numero di accessori da noi scelti. Questi accessori possono essere installati sui vari ripiani della guida di scorrimento posta all'interno del forno, permettendo così di stabilire l'altezza più idonea in funzione della cottura da eseguire. Per ciascuna funzione di cottura e per ciascun esempio fornito, viene indicato il numero di ripiano (dal basso verso l'alto).
La pulizia automatica mediante fast clean Dispositivi di sicurezza Come attivare la pulizia automatica? Attivando la funzione fast clean, la temperatura interna del vano forno raggiunge i 500 °C necessari per la carbonizzazione dei residui, come illustrato di seguito.
Il programmatore Quadrante de visualizzazione per tutte le funzioni : ora, temporizzazione e ora di fine cottura o fast clean Spia di funzionamento di un'operazione programmata - accesa: operazione in corso - spento : operazione terminata - lampeggiante : operazione programmata terminata Spia d'uso del temporizzatore acustico Spia A di programmazione : - spento: uso manuale - acceso : programmazione eseguita Tasto di avvio della cottura Tasto di regolazione del tempo di cottura Tasti + e - per regolare
Programmazione delle cotture Programmazione cottura con inizio immediato Programmazione cottura con inizio ritardato La cottura viene avviata immediatamente e si interrompe automaticamente allo scadere del tempo programmato. Il programmatore stabilisce automaticamente l'ora di inizio cottura in funzione dei parametri impostati dall'utente: durata di cottura e fine cottura.
ESEMPI DI COTTURE SU UN SOLO LIVELLO Ricette Modo di cottura Temperatura Tempo Guida Osservazioni Preriscaldamento Pane (pagnotta-1kg) Multicottura 210°C 30-35' 2 Su piastra smaltata Sì Sfoglie porzioni singole Multicottura 200°C 20-25' secondo lo spessore 2 Su piastra smaltata Sì Pizza (pasta di pane) Pizza 240°C 10-15' 1 Su piastra smaltata Sì Crostata (pasta brisée) Pizza 220°C 30' 1 Stampo su piastra smaltata Sì Soufflé al formaggio Multicottura 200°C 30-40' 2 Sta
Alcuni consigli per la cottura al forno La cottura è, per definizione, il passaggio dallo stato crudo allo stato cotto. Il risultato dell'operazione di cottura viene apprezzato in funzione di vari requisiti: la colorazione assunta dai cibi, le successive fasi di preparazione, la morbidezza, il grado di cottura desiderato, ecc.
Installazione Installazione dei forni da incasso I pannelli dei mobili adiacenti al forno dovranno essere in materiale resistente al calore. In particolare, nel caso di mobili in legno impiallacciato, le colle dovranno essere resistenti alla temperatura di 100 °C. In conformità alle norme di sicurezza, una volta incassato l'apparecchio, non devono essere possibili eventuali contatti con le parti elettriche.
Installazione Incasso FC 97 P (figure accanto) 1. Posizionare le staffe "A" a battuta sui listelli di supporto "B" del forno. 2. Posizionare i tacchetti "C" a battuta sulle staffe "A". In particolare, se lo spessore della fiancata del mobile: • è di 16 mm: montare il tacchetto in modo che il numero 16 riportato sullo stesso sia rivolto verso l'installatore; • è di 18 mm: montare il tacchetto in modo il lato privo di indicazioni sia rivolto verso l'installatore; • è di 20 mm: non montare il tacchetto. 3.
Safety is a good habit to get into Before using your appliance, read the instructions in this owner's manual carefully since it contains all the instructions you require to ensure safe installation, use and maintenance. Always keep this owner's manual close to hand as you may need to refer to it in the future. 1. This appliance is designed for non-professional, household use. • never use the appliance barefoot, do not use extensions, but if these are necessary caution must be exercised.
Front view A. The mode selector B. The temperature selector C. The programmer C 23.58 o ˚C A MAX C A B D 5 s.
The different cooking modes available ARISTON ovens are equipped with controls and indicator lights to ease operation, all situated on the control panel. : "Pizza" The heating elements (bottom and circular) are turned on to heat the oven up quickly. Your pizzas and tarts will benefit from a greater amount of heat from below, thus guaranteeing the rapid baking of the dough during cooking. As for the fan, the latter browns the surface as necessary, making the food even more appetising.
The accessories The rotisserie Your oven offers you many differing cooking modes. These can only be achieved thanks to a certain number of accessories which we have chosen for you. These accessories slide in and out of the different oven racks inside your oven and can thus be positioned in accordance with the individual cooking requirements of differing foods and dishes. For each cooking mode and each example suggested, we specify the oven rack to use (from the oven bottom up).
Fast clean How to set the cleaning process in motion Safety devices In fast clean mode, the temperature inside the oven reaches 500°, which is necessary for the destruction of food and fat residue, as illustrated below. – Take all the accessories out of the oven. Remove the toughest grease and food spots and especially all substantial overflows in order to avoid the creation of flames or smoke. – Shut the oven door.
The programmer Display for all functions : clock, timer, cooking duration and end-of-cooking/fast-cleaning time Indicator light for a programmed operation: - lit : operation underway - off: operation finished - flashing: programmed operation has finished Timer indicator light Letter A: - off: manual mode - lit: an operation has been programmed Button to start cooking Button to set the cooking duration Buttons + and - to set the clock, timer, cooking duration and end-of-operation time, press on: + to in
Programmed cooking Programmed cooking with immediate start Programmed cooking with delayed start Cooking starts immediately and comes to an automatic stop when the end cooking time is reached. The programmer automatically selects the cooking start time according to the parameters you have set: cooking time and end cooking time.
A FEW EXAMPLES OF COOKING ON ONE LEVEL Dish Cooking mode Temperature Time Shelf level Remarks Preheat Bread (1 kg loaf) Multicooking 210°C 30-35' 2 On enamelled tray Yes Savoury pasties Multicooking 200°C 20-25' Depending on thickness 2 On enamelled tray Yes Pizza (bread dough) Pizza 240°C 10-15' 1 On enamelled tray Yes Quiche Pizza 220°C 30' 1 Tin on enamelled tray Yes Cheese soufflé Multicooking 200°C 30-40' 2 Tin diam.
Cooking advice Cooking is by definition the passage from a raw state to a cooked one. The consequent result is appreciated according to different criteria: the colouring, any development in the dish, its smoothness or tenderness, how cooked you want it to be, etc… . The oven settings (temperatures and cooking time) obviously depend on two important parameters: - the size of the food or dish, - the ability of the food to brown (quantity of sugar and eggs in the recipe).
Installation The panels of the adjacent cabinets must be made of heatresistant material. In particular, cabinets with a veneer exterior must be assembled with glues which can withstand temperatures of up to 100°C. In compliance with current safety standards, contact with the electrical parts of the appliance must not be possible once it has been installed. All protective parts which ensure the safe operation of the appliance must be removable only with the aid of a tool. Built-in installation m.
Installation Built-in installation of FC 97 P (see figure on the right) 1. Place brackets "A" well against the oven support blocks "B". 2. Place the tabs "C" well against brackets "A". In particular, if the cabinet side panel: • is 16 mm thick: mount the tab so that the number 16 it features is facing you; • is 18 mm thick: mount the tab so that the part without any wording is facing you; • is 20 mm thick: do not mount the tab. 3. Fasten the brackets and tabs on the oven cabinet side panel using screws "D".
Sicherheit - Eine gute Gewohnheit Lesen Sie bitte vor Gebrauch des Gerätes die in diesem Handbuch aufgeführten Hinweise aufmerksam durch. Sie enthalten wichtige Angaben hinsichtlich der Sicherheit bei der Installation, dem Gebrauch und der Wartung. Bewahren Sie dieses Handbuch sorgfältig auf, damit Sie es jederzeit zu Rate ziehen können. 1. Dieses Gerät ist für den nicht professionellen Einsatz im privaten Haushalt bestimmt.
Ansicht von vorn A. Drehschalter Garfunktionen B. Drehschalter Gartemperaturen C. Programmierer C 23.58 o A ˚C MAX C A B D 5 s.
Die einzelnen Backofenfunktionen Die Wahl der einzelnen Backofenfunktionen erfolgt bei den ARISTON Öfen über die auf der Schalterblende angeordneten Drehschalter und Betriebsleuchten. Schieben Sie das Gargut in den heißen Backofen. : "Pizza" Die Heizelemente (unteres und rundes Heizelement) sorgen schnell für Heißluft im Ofen. Aufgrund der starken Unterhitze ist diese Funktion besonders für das vollständige Garen von Pizzateig und Mürbeteig geeignet.
Zubehör Ihr Backofen ist für eine Vielzahl an unterschiedlichen Garmethoden ausgestattet. Damit Sie bestmögliche Zubereitungsergebnisse erzielen können, bieten wir eine Reihe an Zubehörteilen an. Dieses Zubehör kann je nach Bedarf auf den verschiedenen Führungsschienen im Ofeninnern installiert werden. Für jede aufgeführte Funktion und Garmethode wird die jeweils empfohlene Führungsschiene angegeben (durchnummeriert von unten nach oben).
Fast clean Sicherheitsvorrichtungen Wie wird die Selbstreinigung in Gang gesetzt? Bei Aktivierung der Fast-cleanfunktion erreicht die Temperatur im Backofenraum 500º. Bei derartigen Temperaturen verkohlen die im Ofen zurückgebliebenen Speisereste.
Der Garzeitprogrammierer Anzeigefeld für alle Funktionen : Uhrzeit, Zeitprogrammierung, Dauer und Ende der Garzeit bzw.
Vorwahl des Garprogramms beeinflussen) und die Garzeit. Außerdem ist es möglich, ein Garprogramm gänzlich zu unterbrechen bzw. abzubrechen und den Backofen auszuschalten. Drehen Sie hierzu den Funktionswählschalter auf "0". In einem solchen Fall wird auf dem Display für 3 Sekunden die Anzeige "OFF" eingeblendet, bevor es sich gänzlich ausschaltet. Vorwahl der Garzeit mit sofortigem Start Der Garvorgang startet sofort, nach Ablauf der eingestellten Zeit schaltet sich der Backofen aus.
EINIGE BEISPIELE ZUM GAREN AUF EINER EBENE Rezepte Backofenfunktion Temperatur Garzeit Höhenstufe Hinweise Vorheizen Brot (1 kg) Multicooking 210°C 30-35' 2 Auf Emailleblech Ja Blätterteiggebäck Multicooking 200°C 20-25' je nach Dicke 2 Auf Emailleblech Ja Pizza (Brotteig) Pizza 240°C 10-15' 1 Auf Emailleblech Ja Quiche lorraine (Mürbeteig) Pizza 220°C 30' 1 Backform auf Emailleblech Ja Käse-Soufflé Multicooking 200°C 30-40' 2 Backform Ø 20 cm auf Emailleblech Ja Pâ
Praktische Back-/Brathinweise Durch den Back-/Bratvorgang werden rohe Speisen in schwackhafte Gerichte verwandelt. Zum guten Gelingen eines solchen Back-/Bratvorgangs tragen nicht nur die Zutaten bei, sondern auch: die von den Speisen angenommene Färbung, ihre nachfolgenden Zubereitungsphasen, ob sie schön zart geblieben sind und optimal gegart wurden usw. Die Backofen-Einstellungen (Temperaturen und Garzeiten) hängen natürlich von zwei wichtigen Parametern ab: - von der Größe bzw.
Einbau Die an den Backofen angrenzenden Schrankwände müssen aus hitzebeständigem Material beschaffen sein. Dies gilt besonders für Möbel aus Furnierholz, deren Leim einer Temperatur von 100 °C standhalten muss. Gemäß den Sicherheitsvorschriften muss nach erfolgtem Einbau die Möglichkeit einer Berührung mit den Elektroteilen ausgeschlossen sein. Alle zum Schutz dienenden Teile müssen so befestigt werden, dass ein Entfernen derselben ohne ein Werkzeug zu Hilfe nehmen zu müssen, nicht möglich ist.
Einbau Einbau FC 97 P (siehe nebenstehende Abbildung) 1. Legen Sie die Bügel "A" bis zum Anschlag auf die Halterungsleisten "B" des Backofens auf. 2. Setzen Sie die Eckstücke "C" bis zum Anschlag in die Bügel "A" ein.
11/02 - 19503064204 - Xerox Business Services - Docutech Merloni Electroménager S.A. BP 80048 - 57101 Thionville Cedex tél 03.82.55.75.00 - fax 03.82.55.77.80 http://www.merloni.