Make your own DVD Model 645 DVD RECORDER User Manual 1 001-070_xRV645_Eng02 1 11/07/2005, 01:01 PM
Important notes for users in the U.K. Mains plug This apparatus is fitted with an approved 13 Amp plug. To change a fuse in this type of plug proceed as follows: 1 2 Remove fuse cover and fuse. 3 Refit the fuse cover. Fix new fuse which should be a BS1362 5 Amp, A.S.T.A. or BSI approved type. If the fitted plug is not suitable for your socket outlets, it should be cut off and an appropriate plug fitted in its place. If the mains plug contains a fuse, this should have a value of 5 Amp.
Type Wave length Output Power Beam divergence English LASER Semiconductor laser InGaAlP (DVD) AIGaAs (CD) 658 nm (DVD) 790 nm (CD) 30 mW (DVD+RW write) 1.0 mW (DVD read) 1.0 mW (CD read) 84 degrees (DVD) 61 degrees (CD) This product complies with the radio interference requirements of the European Community. Manufactured under license from Dolby Laboratories. “Dolby” and the double-D symbol are trademarks of Dolby Laboratories.
Notes 4 001-070_xRV645_Eng02 4 11/07/2005, 01:01 PM
Special Functions Using the ‘Digital Photo Manager’, you can view and modify JPEG pictures from a Picture CD, DVD, or a CD ROM. You can create slide shows and play them on a DVD player This function automatically transfers all the television channel settings onto your DVD recorder via the scart cable (EXT1 TO TV-I/O socket). At the touch of a button, your DVD recorder will check which channel is currently playing on your television set and record it even if it is in Standby mode.
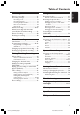
Table of Contents English Special Functions ................................... 5 Installing the DVD Recorder Care and Safety Information First Installation ................................... 21-22 TV channel programming ........................ 23 Setup .............................................................. 8 Cleaning discs ............................................... 8 About recycling ........................................... 8 General Information Introduction .........................
Recording Using the Browser Discs for recording ................................... 36 Recording settings ..................................... 36 Browsing the disc ...................................... 49 Recording mode ........................................... 37 Recording language ...................................... 37 Inserting chapter markers .......................... 37 Direct record function ................................ 38 Filter mode ...................................................
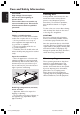
Care and Safety Information English CAUTION! High voltage! Do not open. You run the risk of getting an electric shock. The machine does not contain any user-serviceable parts. Please leave all maintenance work to qualified personnel. Some problems occur because the disc inside the recorder is dirty (frozen picture, sound disruptions, picture distortions). To avoid these problems, discs should be cleaned on a regular basis.
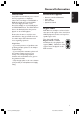
Introduction Accessories supplied Your DVD recorder allows you to record the TV programmes or duplicate camcorder recordings to a DVD+RW or DVD+R and play pre-recorded DVDs. The recordings you make on the Recorder will play on some DVD players and DVD-ROM drives. The DVD+R discs have to be finalised before they can be played on other DVD players. – – – – Please take the time to read this user manual before using your DVD recorder. It contains important information and notes regarding operation.
Connecting to TV English General The necessary cable connections must be made before you can record or playback TV programmes using your DVD recorder. Selecting a suitable connection to your TV When you install your DVD recorder for the first time, select one of the following options to connect the DVD recorder and your TV. ● Option 1: Using Scart socket Select this if your TV is equipped with a scart socket. It provides the best picture quality (see pages 11).
Connecting to TV (cont’d) English Option 1: Using SCART socket TV Antenna or Satellite/Cable TV signal AU D IO O U T S-V ID E O IN V ID E O IN SCART IN 1 2 3 4 The scart or Euro AV cable serves as the universal connector for picture, sound and control signals. With this type of connection, there is practically no loss of quality in picture or sound transmission.
Connecting to TV (cont’d) English Option 2: Using S-Video (Y/C) socket TV Antenna or Satellite/Cable TV signal AU D IO O U T S-V ID E O IN V ID E O IN SCART IN 1 2 3 4 5 This connecting cable, also known as the SVHS cable, is used to transmit the brightness signal (Y signal) and colour signal (C signal) separately. This mini DIN socket is also called a Hosiden jack.
Connecting to TV (cont’d) English Option 3 : Using Video (CVBS) socket TV Antenna or Satellite/Cable TV signal AU D IO O U T S-V ID E O IN V ID E O IN SCART IN 1 2 4 3 5 This cable, usually featuring yellow cinch plugs, is used for transmitting the Composite Video signal (FBAS, CVBS). In this method of transmission, the colour signal and the brightness signal are transmitted on the same cable.
Connecting to Additional Devices English Using second SCART socket (EXT2-AUX-I/O) Cable Box/Decoder/ VCD/DVD player Connecting a Cable Box/Decorder If your Cable Box/Decorder has a scart socket, you can choose to connect it to the second scart socket. 1 Use a scart cable to connected the Cable Box/Decoder scart socket (usually labelled as ‘TV’ or ‘TO TV’) to EXT 2 AUX-I/O socket at the back of the DVD recorder. 2 Select the TV channels to be received by the Cable Box directly on the receiver itself.
Connecting Additional Devices (cont’d) S-VIDEO OUT English Connecting a camcorder to the front sockets VIDEO OUT AUDIO OUT L 1 2 R OR You can use the front sockets to copy camcorder recordings. These sockets are located behind the flap on the right hand side. Using S-VIDEO In or VIDEO In socket Use S-VIDEO connection if you have a Hi8 or S-VHS(C) camcorder. It provides very good picture quality.
Connecting to Additional Devices (cont’d) English Using analogue audio output sockets STEREO Using digital audio output socket AUDIO IN L DIGITAL IN R You can connect the DVD recorder to a two channel stereo system or receiver in order to enjoy the stereo sound system.
English Front Panel ! @ 0 1 STANDBY-ON 2 – Turn on or off the DVD recorder. 2 Disc tray Sockets behind the flap Flip down the door as indicated by the OPEN 2 label at the right hand corner. 0 S-VIDEO 3 OPEN/CLOSE ç 4 Display panel – S-video input for SVHS/Hi8 camcorders or SVHS/Hi8 video recorders (input channel number 'CAM 1'). – Show information about the current status of the DVD recorder. ! VIDEO – Open or close the disc tray. – Play a disc.
Remote Control English 3 Alphanumeric keypad 1 2 – Enter numbers or letters in appropriate entry fields. – Select a chapter/track number to play. – Select a TV channel while in internal tuner mode. 4 TIMER 3 – Access or exit the timer recording menu. 5∞ § 4 5 6 7 8 9 0 ! @ # – Skip to previous or next Chapter/Track. – Holding down the button for fast reverse or fast forward function. 6 RECORD 0 – Start recording the current TV channel or the current video input source. 7 PLAY 2 – Play a disc.
Remote Control (cont’d) English $ TV/DVD – Switch between the DVD recorder and the antenna signal. This function operates when the DVD recorder is connected to the TV with only an antenna cable. $ % T/C (Title/Chapter) – Select a 'T'(title)/'C'(chapter) directly on the menu bar. ^ STOP 9 – Stop playback/recording. – Holding down the button will open and close the disc tray.
Remote Control (cont’d) English Inserting Batteries Using the remote control to operate the system 3 1 Aim the remote control directly at the remote sensor (iR) on the front panel. 1 2 2 Select the source you 1 Open the battery compartment. 2 Insert two batteries type R03 or AAA, following the indications (+-) inside the compartment. 3 Close the cover. wish to control by pressing one of the source select buttons on the remote control (for example TUNER, TV).
6 Press 4 to select { Done } and press OK First Installation The First Installation menu will appear the very first time you turn on the DVD recorder. These settings will help you set up the basic DVD recorder features easily, including TV channels and language options. IMPORTANT! – You have to turn on your TV and select the correct Video In channel to see the First Installation menu. – You have to complete the First Installation before start operating the DVD recorder. to confirm.
Installing the DVD Recorder (cont’d) English Note: Make sure you have successfully made all the required connections to the DVD recorder, the TV and Satellite Receiver/Cable Box (if any) and switched them on. The automatic channel search will detect the signals and save all the available programme channels. 0 Press OK again to start automatic TV channel search. ➜ The automatic search may take 15 minutes.
TV channel programming Although the DVD recorder selects available TV channels during first installation, you may want to repeat the process later if more channels become available in your area or if you are reinstalling the DVD recorder. Automatic TV channel search This will erase and replace all previously stored TV channels. 1 Press SYSTEM-MENU on the remote control. ➜ The system menu appears on the TV. 2 Press 4 repeatedly to select { Set-up }. 3 Press 2 repeatedly to select { Analogue Ch. }.
Installing the DVD Recorder (cont’d) English 7 Use the TV’s remote control to select programme number {2} on the TV set. Then, press OK on the DVD recorder’s remote control. 8 Repeat the above steps again until you have assigned all the TV channels. Helpful Hints: – If you cannot turn on your TV set to programme number {1}, and you have connected additional devices to the EXT 2 AUX-I/O socket, please disconnect these devices.
Setting favourite TV channels You can set your favourite TV channels for quick access by using the channel up/ down button on the remote control. 1 Press SYSTEM-MENU. ➜ The system menu appears on the TV. 2 Press 4 repeatedly to select { Set-up }. 3 Press 2 repeatedly to select { Analogue Ch. }. 1 Press SYSTEM-MENU. ➜ The system menu appears on the TV. 2 Press 4 repeatedly to select { Set-up }.
Installing the DVD Recorder (cont’d) English 7 Press 4 to select { Preset } and press 2 to confirm. Use the alphanumeric keypad 0-9 to enter the preset number for the channel to store (e.g., '01'), then press the matching colour coded button to select { Store }. 8 Press 4 to select { Preset name } and press 2 to confirm. Use the alphanumeric keypad 0-9 to enter the preset name for the found channel or preset, then press the matching colour coded button to select { Store }.
Installing the DVD Recorder (cont’d) DVD-VIDEO-TITLE 04|CO1 STOP Analogue Ch. Set-up Decoder TV system English Setting the time and date Fine tuning the TV channels If the DVD recorder does not set the time and date correctly, you can set the clock manually by following the steps below. 1 Press SYSTEM-MENU on the remote Nicam control. ➜ The system menu appears on the TV. Fine Tune 2 Press 4 repeatedly to select { Set-up }.
Installing the DVD Recorder (cont’d) English Setting the language You can select the language for subtitles and audio for DVD playback. For some DVDs, the subtitle/audio language can only be changed via the DVD disc menu. If the selected language is not available on the disc, the disc’s default setting language will be used instead. The menu language (on-screen display) for the system will remain as you set it. 1 Press SYSTEM-MENU on the remote control. ➜ The system menu appears on the TV.
Playable discs Using this DVD Recorder, you can play and record on the following discs: Recording and Playback DVD+RW (DVD ‘plus’ Rewritable); can be recorded on over and over. DVD+R (DVD ‘plus’ Recordable); can be recorded only once. Playback only: DVD Video (Digital Versatile Disc) DVD-R (DVD ‘minus’ Recordable); can only be played back when the recording was made in 'video mode' and the recording was finalised. Inserting a disc 1 Press STANDBY-ON 2 to turn on the DVD recorder.
Playback (cont’d) English Starting disc playback ● If a dialogue appears on the TV showing : { Do you want to access the disc content ?}. ➜ Select { Yes } to show the disc content menu (see page 50 “Browsing the discs”). ➜ Select { No } to switch to the last active mode. ➜ If you want to remove this dialogue, you have to enable the { Auto play } function (see page 55).
Playing a DVD+R(W) disc Playing a picture disc (slide show) You can display JPEG pictures in the selected roll automatically one after the other at adjustable intervals. 1 Insert a DVD+RW or DVD+R disc. 2 If the disc content menu appears on the TV Use 1 2 3 4 to navigate within the menu and select a title to play, then press PLAY 2. 3 To stop playback, press STOP 9. Helpful Hint: – If the message 'EMPTY DISC' appears on the display panel, this means that there are no recordings on this disc.
Additional Playback Features English Using Toolbar options 1 Press SYSTEM-MENU on the remote control. ➜ The system menu appears on the TV. 2 At { Toolbar }, press 2 to select { Options }. DVD-VIDEO-TITLE 04|CO1 STOP 1 Press 4 to select { Subtitle } and press 2 to enter its options.
Additional Playback Features (cont’d) This operation works only on DVDs with multiple soundtrack language or VCDs with multiple audio channel. This function can also be accessed via the Red button on the remote control. 1 Press 4 to select { Audio } and press 2 Zooming in This option allows you to enlarge the picture on the TV screen and to pan through the enlarged picture. English Changing audio soundtrack language 1 Press 4 to select { Zoom } and press 2 to enter zoom in mode.
Additional Playback Features (cont’d) English Changing to another title/ chapter/track Searching forwards/ backwards When a disc contains more than one track, title or chapter, you can change to a different track, title or chapter as follows. You can fast forward or fast reverse a disc at four, eight or thirty two times normal playback speed. 1 During playback, hold down ∞ (reverse) During playback, ● Press § to go to the next title/chapter/ track.
Additional Playback Features (cont’d) Repeat play You can select a Chapter, Track, Title or the entire disc for repeat playback. 1 Press Yellow button { REPEAT } repeatedly on the remote control to select one of the repeat options.
Recording English Discs for recording Two different formats of DVD recordable discs can be used with this DVD recorder: DVD+RW (DVD ‘plus’ Rewritable) – Discs are re-writable can be used for multiple recordings once existing data is erased. IMPORTANT! Unrecordable pictures Television programmes, films, video tapes, discs, and other materials may be copyrighted and therefore cannot be recorded on this recorder.
Recording mode The recording mode defines the picture quality of recordings and the maximum recording time for a disc. During playback, the correct picture quality will automatically be selected. This function can also be accessed via the REC MODE button on the remote control. 1 Press 4 to select { Record mode } and press 2 to enter its options. 2 Press 3 4 to select one of the following record modes.
Recording (cont’d) English Direct record function Manual recording To enable direct recording from your TV set, make sure that the direct record mode is turned on. See page 40 “Direct Recording” for more information. Use the 'Manual recording' function to start recording immediately (e.g., to record a TV show already in progress). 1 Press 4 to select { Direct record } and press 2 to enter its options. 2 Press 2 to select one of the options. ➜ { On } : Enable recording directly from the TV display.
Recording (cont’d) ➜ ‘MENU UPDATE’ or ‘CREATE MENU’ appears on the display panel to indicate that the DVD recorder is writing the list of contents. Wait until the message disappears before removing the DVD+R(W). ● If the end of a disc is reached during recording, recording will stop and the DVD recorder will turn off automatically. Pausing a recording 1 During recording, press PAUSE ;. ➜ You can use this function to avoid recording commercials. 2 To continue recording, press RECORD 0.
Recording (cont’d) English Direct recording Deleting a recording The Direct Record function allows you to record the TV programme which you are currently watching when the DVD recorder is turned off. You can delete a specific recording from the DVD+R(W). 1 Turn on the { Direct record } mode in the recording setting (see page 38). 2 On the TV, select the programme number you want to record. 1 Insert a recorded DVD+RW or an unfinalised DVD+R.
Introduction – – – – Programming recordings Use 'Timer Recording’ to automatically start and stop a recording at a later date/ time. The DVD recorder will tune to the right programme number and begin recording at the specified time. 1 Turn on the TV power. Select the correct With this DVD recorder, you can preprogramme up to six recordings within a period of 15 days. ● If the time has not set yet, the { Time and Date } menu will appear on the screen, see page 27.
Timer Recording (cont’d) English { Repeat } – Select {Weekly}, {Once} or {Mon-Fri} (Monday to Friday) recordings and press OK to confirm. { Record mode } – Select a record mode and press OK to confirm. See pages 36~37 “Recording settings - Recording mode”). { VPS/PDC } – Select to turn on or off VPS/PDC mode. For information on VPS/PDC, see page 41. ● To clear the timer entries, press the matching colour coded button on the remote control to select { Clear all }.
Changing a programmed recording 1 Turn on the TV power. Select the correct Video In channel at the TV. ➜ The timer overview appears. TIMER 10:55 23:45 21:00 06:00 08:00 11.55 Delete CNBCE Disco E BBC2 E HBO E ABCE Weekly 12.04 Daily 16.04 13.04 New Timer 1 Turn on the TV power. Select the correct Video In channel at the TV. 2 Press TIMER on the remote control.
Editing/Finalising Recording English About editing You can change disc contents and settings for a recorded DVD+RW or unfinalised DVD+R from the edit menu screen. Photo editing is limited to edit the information on a roll or album. These editing changes are available for the DVD recorder, but may not be accessible when you play the disc on other DVD player.
Changing the disc/title name 1 Insert a recorded DVD+RW or an unfinalised DVD+R. ➜ The Index Picture screen or disc content menu appears on the TV. 2 Press EDIT on the remote control. ➜ The edit menu appears. 3 Press 3 4 to select { Disc name } or { Title name } in the menu. 4 Press 3 4 to change the character/ number or make an entry by using the alphanumeric keypad 0-9. ➜ Press 1 2 to move to the previous or next field. 5 Press OK to confirm the changes. ➜ The info panel is now updated.
Editing/Finalising Recording (cont’d) English Video editing In the edit video mode, the entire recording will be played back regardless of whether they are hidden or not. 1 Insert a recorded DVD+RW or an unfinalised DVD+R. ➜ The Index Picture screen appears on the TV. 2 Press 3 4 to select a recording. 3 Press EDIT on the remote control. ➜ The edit menu appears. 4 Press 3 4 to select { Video edit } in the menu and press OK to confirm. ➜ The video edit menu appears.
Editing/Finalising Recording (cont’d) 1 Start playback a recorded DVD+RW or an unfinalised DVD+R. 2 Press EDIT on the remote control. 3 Press the matching colour coded button on the remote control to select { Chapter }. ➜ The chapter editing menu appears. PAUSE +RW | SHREK | EDIT MODE Editing title (divide/append/Index picture) 1 Start playback a recorded DVD+RW or an unfinalised DVD+R. 2 Press EDIT on the remote control.
Editing/Finalising Recording (cont’d) English { Append } - for DVD+RW only – Select this to append record to the existing recording from the position of the playback. Continue steps 5~7. Photo editing For append recording only: The editable information items are : – Title of the currently selected item – Album edit name – Photo edit date 5 Press 3 4 to select the input channel to append : { preset programme number }, { EXT1 } or { CAM1 }. 6 Press REC 0 to start append recording.
Browsing the disc You can view and manage possible contents within your discs by using an on-screen console called the Media Browser. 1 Insert a disc into the DVD recorder. ➜ The Index Picture screen or disc content menu appears on the TV. (example of an DVD) REC MODE STOP +RW | MY MOVIES MY MOVIES INFO Title1 Length1 Title2 Date1 0:1:14 Title Name 0:0:0 Lord of the Rings, The T Habla Con Ella The Ring ...
Using the Browser (cont’d) English Browsing the picture disc The Media Browser allows you to view the JPEG pictures discs or playback as a slide show or store them in an album. 3 Press OK to display the picture overview. ➜ The 12 roll thumbnails picture screen appears. 06/06/2004 DVD / Photo / Rolls / Roll KYZ JPEG Photo can handle up to a maximum of 100 photos in one album on a DVD+RW or DVD+R from this DVD recorder, depends on the JPEG file parameters.
Changing the picture order within an album You can re-arrange the picture position in the album in order to create the desired order of the slide show. The order of the pictures in the photo roll remains unchanged. 1 Press BROWSER on the remote control. ➜ The disc content menu appears. 2 Press 1 2 to select photo album menu and press 3 4 to select a desired photo album folder. 5 Press the matching colour button on the remote control to select { Move }.
Using the Browser (cont’d) English Changing the slide show settings You can adjust the various slide show settings to your individual needs. 1 Press BROWSER on the remote control. ➜ The disc content menu appears. 2 Press 1 2 to select photo roll/album menu and press 3 4 to select a desired photo roll/album folder. 3 Press PLAY 2 to start slide show play. Protecting the recorded title (DVD+RW) You can choose to protect the recorded title on an DVD+RW in order to prevent accidental loss of recordings.
System Menu - Preferences 1 Switch on the TV set. Select the correct Recording For more information on this menu, please see pages 36~38 “Recording settings”. English Accessing to the Preferences options Video In channel at the TV. 2 Press SYSTEM-MENU on the remote control. ➜ The system menu appears on TV. 3 Press 4 to select { Preferences }.
System Menu - Preferences (cont’d) English Disc Features DVD-VIDEO-TITLE 04|CO1 STOP DVD-VIDEO-TITLE 04|CO1 Disc STOP Features Preferences Preferences Adapt menu Auto resume Delete all Auto play Dealer demo { Adapt menu } If a DVD+RW has been recorded in a computer drive or in another DVD recorder, the Picture Index screen may not be displayed correctly. This feature allows you to change the format supported by this DVD recorder.
System Menu - Setup Accessing to the Setup options DVD-VIDEO-TITLE 04|CO1 1 Turn on the TV set. Select the correct Video In channel at the TV. English System STOP System Set-up Eco mode 2 Press SYSTEM-MENU on the remote control. ➜ The system menu appears on TV. Auto standby Second RC OSD 3 Press 4 repeatedly to select { Set-up }. ➜ Playback will pause. Display DVD-VIDEO-TITLE 04|CO1 STOP PBC System Time-date Analogue Ch.
System Menu - Setup (cont’d) English { OSD } Select the level of On-screen display information. – { Full } : Complete information always display during use. – { Reduced } : The help text and colour button bar will remove from the display. – { Normal } : The help-text will remove from the menu. { Display } Allows you to change the brightness of the DVD recorder display panel. – { Bright } : Normal brightness. – { Dimmed } : Medium brightness. – { Off } : Turn off the display.
{ Video output } Choose the type of video output that matches the video connection between the DVD recorder and your TV. Language For more information on this menu, please see page 28 “Setting the language”. – { RGB•CVBS} : For RGB or CVBS connection. – { S-Video } : For S-Video connection. – { Automatic } : The output setting will automatically follow the video signal received. Audio output After connecting the DVD recorder to your TV and other devices, you may need to change the digital output setting.
Setting Access Control English About Access Control 6 Use the alphanumeric keypad 0-9 to Access Control limits viewing of discs that exceed the limits you set. We cannot guarantee the availability of Access Control with all discs, and therefore denies any liability associated with unintended watching of discs. enter your new four-digit pin code. You must enter the same pin code a second time to confirm it. ➜ To cancel your change, press 4 to select { Cancel } and press OK to confirm.
Setting Access Control (cont’d) English 1 Alternatively, we can lock the disc while in browser mode; Press the BROWSER on the remote control. ➜ The disc content menu appears. 2 Press the matching colour coded button on the remote control to select { ChildLock }. ➜ The disc is now locked. You must enter the four-digit pin code the next time when you insert the disc. Helpful Hint: – Two-sided DVDs and multi-volume discs may have a different ID for each side/ volume.
Troubleshooting English WARNING Under no circumstances should you try to repair the system yourself, as this will invalidate the warranty. Do not open the system as there is a risk of electric shock. If a fault occurs, first check the points listed below before taking the system for repair. If you are unable to remedy a problem by following these hints, consult your dealer for help. Problem Solution No power. – Press STANDBY-ON button on the front of the DVD recorder to turn on the system.
Problem Solution Disc will not play. – Insert the disc with the label facing up. – The child lock is on. Read chapter “Setting Access Control Activating/Deactivating the child lock” for details. – Wrong region code. The DVD must be coded for ALL regions or Region 2 in order to play on this DVD recorder. – There is no recording on the disc or wrong disc type. Read chapter “Playback - Playable discs” for details. – Make sure the disc is not scratched or warped. Clean the disc or replace a new one.
Troubleshooting (cont’d) English Problem Solution Recordings are not occurring as scheduled. New recordings cannot be made. – The TV channel you want to record is not stored or you selected the wrong programme number. Check TV channels stored. – If you adjust the clock after you set a timer recording, reset the timer recording. – If the DVD recorder cannot read the disc, you cannot record.
Problem Solution The index screen flickers when a DVD+R is inserted. – You can finalise the disc using the following function: 1) Press OPEN/CLOSE on the DVD recorder to open the disc tray. 2) Insert the disc but do not close the tray. 3) Hold down button number {4} on the remote control until the tray closes. ‘FINALISING' appears on the display panel. 4) If finalising has been successful, the Picture Index screen will appear.
Display panel symbols/messages English The following symbols/messages may appear on your DVD recorder display: ● COMPATIBLE The DVD Recorder is busy making changes to make the disc DVD-compatible. ● CLOSING Disc tray is closing.
Display panel symbols/messages (cont’d) ● POST FORMAT The DVD Recorder is currently in the first installation mode. Turn on your TV and read the section, 'First installation', in the chapter 'Installing the DVD Recorder'. ● MAX TITLE The maximum number of titles has been reached for the disc. Each disc can have a maximum of 49 titles. English ● IS THE TV ON? The disc is being prepared after the menu structure has been created. ● PROTECTED Title is copy-protected and cannot be recorded.
Glossary English Analogue: Sound that has not been turned into numbers. Analogue sound varies, while digital sound has specific numerical values. These jacks send audio through two channels, the left and right. Aspect ratio: The ratio of vertical and horizontal sizes of a displayed image. The horizontal vs. vertical ratio of conventional TVs. is 4:3, and that of wide-screens is 16:9. AUDIO OUT Jacks: Red and white jacks on the back of the system that send audio to another system (TV, Stereo, etc.).
Disc types Front Connections Recording: DVD+RW/+R Playing: DVD-Video,Video CD, SuperVCD,Audio CD, MP3 CD, Picture CD, CD-R/RW, DVD-R, DVD-RW – S-video in – Video in – Audio left/right in Record modes – 1-month timer programming, 6 events – daily/weekly repeat recording – VPS/PDC recording control recording time / picture quality M2: 120 minutes / DVD quality M2x: 150 minutes / DVD quality M3: 180 minutes / S-VHS quality M4: 240 minutes / VHS quality M6: 360 minutes / VHS quality M8: 480 minutes / VHS
001-070_xRV645_Eng02 68 11/07/2005, 01:04 PM
Bortskaffelse af dit gamle produkt (Dansk) Dit produkt er designet og produceret med materialer af høj kvalitet, som kan blive genbrugt. Når du ser symbolet med en skraldespand, der er kryds over, betyder det, at produktet er dækket af EU direktiv nr. 2002/96/EC. Venligst sæt dig ind i de danske regler om indsamling af elektriske og elektroniske produkter. Venligst overhold de danske regler og smid ikke dine gamle produkter ud sammen med dit normale husholdningsaffald.
TV System Guide COUNTRY VHF AFGHANISTAN ALBANIA ALGERIA ANGOLA ARGENTINA AUSTRALIA AUSTRIA AZORES BAHAMAS BAHRAIN BANGLADESH BARBADOS BELGIUM BERMUDA BOLIVIA BOTSWANA BRAZIL BRUNEI BULGARIA BURKINA FASO BURMA BURUNDI CAMBODIA CAMEROON CANADA CANARY ISLANDS CHAD CHILE CHINA COLOMBIA COSTA RICA CROATIA CUBA CYPRUS CZECH REPUBLIC DAHOMEY DENMARK DJIBOUTI DOMINICAN REP ECUADOR EGYPT EL SALVADOR EQUAT.
TV System Guide (cont’d) COUNTRY VHF UHF DVD REGIONS LIBYA LITHUANIA LUXEMBOURG MADAGASCAR MADEIRA MALAGASY MALAWI MALAYSIA MALI MALTA MARTINIQUE MAURITANIA MAURITIUS MEXICO MONACO MONGOLIA MOROCCO MOZAMBIQUE NAMIBIA NEPAL NETHERLANDS NETH. ANTILLES NEW CALEDONIA NEW GUINEA NEW ZEALAND NICARAGUA NIGER NIGERIA NORWAY OMAN PAKISTAN PANAMA PARAGUAY PERU PHILIPPINES POLAND PORTUGAL PUERTO RICO QATAR REUNION RUMANIA RUSSIA RWANDA SABAH/SAWARA ST.
DVD RECORDER 645 CLASS 1 LASER PRODUCT 3139 246 15522 SgpJP-0528-01-1 72 001-072_xRV645_Eng_15522 72 11/07/2005, 02:53 PM