EN Marine CD Receiver CDA-118M FR ES • OWNER’S MANUAL Please read before using this equipment. • MODE D’EMPLOI Veuillez lire avant d’utiliser cet appareil. • MANUAL DE OPERACIÓN Léalo antes de utilizar este equipo. ALPINE ELECTRONICS MARKETING, INC. 1-1-8 Nishi Gotanda, Shinagawa-ku, Tokyo 141-0031, Japan Phone 03-5496-8231 ALPINE ELECTRONICS OF AMERICA, INC. 19145 Gramercy Place, Torrance, California 90501, U.S.A. Phone 1-800-ALPINE-1 (1-800-257-4631) ALPINE ELECTRONICS OF CANADA, INC.
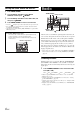
ENGLISH Contents Operating Instructions WARNING WARNING ................................................. 4 CAUTION .................................................. 4 PRECAUTIONS ........................................ 4 Getting Started Accessory List .................................................. 7 Turning Power On and Off ............................... 7 Initial System Start-Up ..................................... 7 Multi-Zone Volume Control ............................. 7 Adjusting Volume ....
SETUP BLUETOOTH Setting Setting the BLUETOOTH Connection ............ 23 Audio Setting AUX Zone Select (AUX ZONE SELECT) ...... 24 Setting the MUTE Level (MUTE LEVEL) ..... 24 Operating the External Audio Processor (USER PRESET) ......................................... 24 Turning Media Xpander ON/OFF .................... 24 Setting the MX Level ....................................... 24 Subwoofer On and Off ..................................... 24 General Setting Setting TUNER mode (TUNER) ..............
IMPRINT Operation (Optional) Changing MultEQ mode ................................ 32 Adjusting Sound Setting in Manual Mode ..... 33 USER PRESET ........................................... 33 Storing the Audio Adjustment Level ...............33 Recalling the Audio Adjustment Level ............33 Turning Media Xpander ON/OFF .............. 33 Equalizer Presets (Factory’s EQ) (FR-EQ) ................................................... 33 Sound Field Adjustment .............................
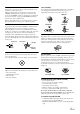
Operating Instructions WARNING DO NOT PLACE HANDS, FINGERS OR FOREIGN OBJECTS IN INSERTION SLOTS OR GAPS. Doing so may result in personal injury or damage to the product. WARNING This symbol means important instructions. Failure to heed them can result in serious injury or death. DO NOT OPERATE ANY FUNCTION THAT TAKES YOUR ATTENTION AWAY FROM SAFELY DRIVING YOUR BOAT. Any function that requires your prolonged attention should only be performed after coming to a complete stop.
Inserting Discs Correct Handling Your player accepts only one disc at a time for playback. Do not attempt to load more than one disc. Make sure the label side is facing up when you insert the disc. “ERROR” will be displayed on your player if you insert a disc incorrectly. If “ERROR” continues to be displayed even though the disc has been inserted correctly, push the RESET switch with a pointed object such as a ballpoint pen.
About media that can be played Use only compact discs with the label side showing the CD logo marks below. If you use unspecified compact discs, correct performance cannot be guaranteed. You can play CD-Rs (CD-Recordables)/CD-RWs (CD-ReWritables) which have been recorded only on audio devices. You can also play CD-Rs/CD-RWs containing MP3/WMA/AAC formatted audio files.
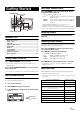
Getting Started Multi-Zone Volume Control Press VOL.ZONE to switch the volume mode, and the appropriate indicator lights up. TUNER/SOURCE Rotary encoder (OPEN) ALL ZONE1 ALL : ZONE1 : ZONE2 : ZONE2 ALL All Speaker Volume control (Front, Rear, Subwoofer, ZONE2 Speaker). Volume control for 3 Preouts (Front, Rear, Subwoofer). Volume control for ZONE2 Speakers only (ZONE2 Speaker). • When the ZONE1 or ZONE2 is selected, its Volume Level is adjustable, and another Volume Level is fixed.
Setting the Quick Search ON and OFF 1 2 3 4 Radio Press FUNC./SETUP. TUNER/SOURCE Turn the Rotary encoder to select QUICK /ENTER. SEARCH, and then press Rotary encoder Turn the Rotary encoder to select ON or OFF, and /ENTER. then press Press FUNC./SETUP to return to normal mode. • Pressing during the procedure will return to the previous mode. • If no operation is performed for 60 seconds, the unit will return to normal mode automatically.
2 Press TUNE/A.ME to select the tuning mode. DX SEEK (Distance mode) SEEK (Local mode) (Blank) (Manual mode) DX SEEK (Distance mode) Presetting Stations Automatically • The initial mode is Distance mode. 1 Distance mode: Both strong and weak stations will be automatically tuned in (Automatic Seek Tuning). 2 Manual mode: The frequency is manually tuned in steps (Manual tuning). Press or Holding down continuously. to tune in the desired station.
Receiving a Multicast Station (HD Radio™ mode only) CD/MP3/WMA/AAC Multicasting is the Ability to broadcast multiple program streams over a single FM frequency. This increases the amount and diversity of content choices. A maximum of eight multicast station channels can be selected on this unit. 1 Rotary encoder (OPEN) CD Press FUNC./SETUP to select MULTICAST, the indicator program number is displayed, and lights up. Program No. FM1- 2 88.
• Do not remove a CD during its eject cycle. Do not load more than one disc at a time. A malfunction may result from doing either. • The “ ” indicator lights up when a disc is inserted. • Three-inch (8 cm) CDs cannot be used. • WMA format files that are protected by DRM (Digital Rights Management), AAC format files that have been purchased from iTunes Store and files that are copy-protected (copyright protection) cannot be played back on this unit.
File/Folder Name Search (Concerning MP3/WMA/AAC) Select the desired Folder (Folder up/ down) (MP3/WMA/AAC) Folder and file names may be searched and displayed during playback. 1 2 During MP3/WMA/AAC playback, press to activate the search mode. /ENTER Turn the Rotary encoder to select Folder Name Search mode or File Name Search mode, and then press /ENTER. Folder Name Search mode 3 4 Turning to the right will advance to the next folder. Turning to the left will return to the previous folder.
About MP3/WMA/AAC CAUTION Except for private use, duplicating audio data (including MP3/ WMA/AAC data) or distributing, transferring, or copying it, whether for free or for a fee, without permission of the copyright holder is strictly prohibited by the Copyright Act and by international treaty.
Order of files Files are played back in the order that the writing software writes them to the disc. Therefore, the playback order may not be what is expected. Verify the writing order in the software’s documentation. The playback order of the folders and files is as follows. iPhone/iPod (Optional) Rotary encoder iPod/USB Root folder VIEW FUNC./SETUP /ENTER / An iPhone/iPod can be connected to this unit by using the Interface cable for iPod (supplied).
1 2 Playback 1 2 Press iPod/USB to switch to the USB IPOD mode. Press or to select the desired song. Pressing and holding forward the current song. 3 or To pause playback, press Pressing / will fast backward/fast / Press /ENTER to activate the Menu Select mode. Turn the Rotary encoder to select the ARTISTS, and then press /ENTER. The artist search mode is activated and artists names are displayed. 3 Turn the Rotary encoder to select the desired /ENTER.
Quick Search Alphabet Skip Function You can search a song from all songs in the iPhone/iPod without selecting an album, artist, etc. The default skip mode is alphabetic. Use this function to skip to the next number, symbol or letter (for example from A to B, B to C). You can skip in reverse order such as B to A by pressing . 1 2 Press and hold /ENTER for at least 2 seconds to activate the Quick Search mode. 1 Turn the Rotary encoder to select a desired song.
Random Play Shuffle (M.I.X.) Repeat Play 1 2 1 Press FUNC./SETUP. Turn the Rotary encoder to select M I X, and press /ENTER. The Shuffle mode is activated. 3 Turn the Rotary encoder to select the M I X /ENTER. (Shuffle) playback mode, and press : An album in the iPhone/iPod is selected at random, and is played back in the album song order. : If you select a song in the search mode, all songs in the selected mode are played back at random. : Shuffle mode off. M I X ALBUM SONG OFF 4 Press FUNC.
USB memory (Optional) iPod/USB Hands-Free Phone Operation About the Hands-Free Phone / VIEW Controlling USB memory (Optional) A USB memory device may be connected to this unit. With a USB memory device connected to this unit, the audio files will be playable from this unit. • The controls on this unit for USB memory operation are operative only when a USB memory is connected.
Adjusting the volume when receiving a Call 3 : DIALED / RECEIVED / MISSED / PHONE BOOK / VOICE DIAL*1 DIALED : Dialed history RECEIVED : Received history MISSED : Missed incoming history PHONE BOOK : Mobile phonebook VOICE DIAL : Voice dial operation Setting items During a call, the voice level is adjustable. This adjusted volume is stored for future calls. Turn the Rotary encoder to adjust the volume.
Dialing a Number In the Phone Book (PHONE BOOK) Sound Setting Up to 5,000 telephone numbers are downloadable to the BLUETOOTH compatible unit from a mobile phone. Dial a call by selecting a person from the phone book list. Rotary encoder Setting item: PHONE BOOK • If a name cannot be obtained via the phone book, only the “--------” is displayed for 2 seconds. • The names registered in the telephone book are displayed. If the name is not registered, a number is displayed.
3 Turning Subwoofer ON/OFF SYS 1 When the subwoofer is on, you can adjust the subwoofer output level (refer to page 20). For this unit, the following setting can be made only when the IMPRINT audio processor (PXA-H100) is not connected. 1 2 Press and hold AUDIO for at least 2 seconds to activate the AUDIO selection mode. Turn the Rotary encoder to select the SUBW mode, and then press /ENTER. SUBW SUBW SYSTEM*1 HPF SUBW BASS TREBLE *1 Displayed only when subwoofer is ON.
Setting the Bass Center Frequency Adjusting the High Pass Filter 3-3 Turn the Rotary encoder to select the desired bass /ENTER. center frequency, and then press 60 (Hz) 80 (Hz) 100 (Hz) 120 (Hz) 60 (Hz) Emphasizes the displayed bass frequency ranges. 4 Press to return to normal mode. • If no operation is performed for 60 seconds, the unit will return to normal mode automatically. • If is pressed during setting, the unit returns to the previous item.
DISPLAY: VOL DISP ILLUMINATION DIMMER DIMMER LEVEL SCROLL TYPE TEXT SCROLL VOL DISP SETUP Use the SETUP menu to flexibly customize the unit to suit your own preferences and usage. Choose settings from GENERAL, DISPLAY, etc., to make the desired changes. TUNER/SOURCE Rotary encoder IPOD: PLAYLISTS ARTISTS ALBUMS SONGS PODCASTS GENRES COMPOSERS AUDIO BOOKS PLAYLISTS XM: XM ADF*12 SIRIUS: CLEAR LOCK*12 CLEAR SKIP*12 S-SEEK*12 CLEAR LOCK*12 HD RADIO: STATION CALL*13 FUNC.
Audio Setting AUDIO is selected on the setup menu in step 2. AUX Zone Select (AUX ZONE SELECT) ALL (Initial setting) / ZONE1 / ZONE2 When AUX ZONE is ON, you can select the connected speaker to output the sound signal of AUX Zone. ALL : ZONE1 : ZONE2 : The sound is output from all Speakers. The sound can only be output from the Boat Speakers. The sound can only be output from the ZONE2 Speakers.
Setting the AUX ZONE NAME mode AUX (Initial setting) / TV / DVD / PORTABLE / GAME You can change the AUX Zone Name when AUX ZONE is set to ON. Setting the AUX Mode (V-Link) AUX ON / AUX OFF (Initial setting) You can input TV/video sound by connecting an optional Ai-NET/RCA Interface cable (KCA-121B) or Versatile Link Terminal (KCA-410C) to this component. You can change the AUX NAME display when AUX is set to ON.
Changing Lighting Color (ILLUMINATION) TYPE1 (Initial setting) / TYPE2 You can change the lighting color of the unit's buttons. TYPE1 : The color of the buttons is blue. TYPE2 : The color of the buttons is red. SIRIUS Radio Setting (Only when a SIRIUS Receiver Box is connected) SIRIUS is selected on the setup main menu in step 2.
GAME ALERT: 1 After access to this item, operate the unit as follow. The manage list for the selected alert is displayed. You can set the alert to on, off or delete the alert. You can select the alert type if the managed alert is a song alert or a game alert. Turn the Rotary encoder to set GAME ALERT to ON or /ENTER. OFF, and then press If ON is set, the alert for all stored sports teams is set. If OFF is set, no announcements will be made.
SAT Radio Receiver (Optional) SAT 1 2 Press SAT to activate the SAT Radio mode. Press or Holding down continuously. to select the desired channel. or will change channels • When using the optional remote control (RUE-4190, etc.), an SAT Radio Channel can be directly called up with the numeric keypad of the remote control. 1 While in XM or SIRIUS Radio mode, enter the Channel number you want to call up with the numeric keypad on the remote control.
Receiving Stored Channels 1 Press and hold PRESET for at least 2 seconds. The Preset screen is displayed. 2 3 Turn the Rotary encoder to select a radio station. Press /ENTER. The selected channel is received. • You can also call up the desired preset memory by pressing PRESET repeatedly. Storing the desired Sports Team (SIRIUS only) Store a favorite team from one of the available leagues SIRIUS covers.
Activating the stored Alert (SIRIUS only) Make sure that GAME ALERT (Refer to “Setting the Favorite Sports Team announcement (SPORTS)” on page 26)/S-SEEK ALERT (Refer to “Setting the Sirius Seek (S-SEEK) Alert” on page 27) is set to ON. When the Game Alert/S-Seek option is enabled. Whenever the stored sports team, artist(s) or song(s) are playing, an interruption Alert appears in the display of the unit. The interruption ( ) ALERT indicator is either on or blinking depending on the conditions listed below.
Receiving Weather or Traffic Information from SAT Radio 1 2 Select the SAT Radio Channel for your local traffic/ weather information. Press and hold SAT mode. / for at least 2 seconds in the In XM or SIRIUS mode, press VIEW. Each time you press this button, the display changes as shown below. Press and hold SAT for at least 2 seconds. The stored Weather or Traffic channel will be recalled.
• When the “Scroll Setting (TEXT SCROLL)” (page 26) is set to “AUTO”, the channel name and song title scrolls continuously. When the Scroll Setting is set to “MANUAL”, the song title scrolls only once. • Depending on the model, the display may differ from the one shown above. Setting the Auxiliary Data Field Display (XM only) The XM Auxiliary Data Field (ADF) display can be switched on or off. There is no ADF function for the SIRIUS receiver. 1 2 Press and hold FUNC.
Adjusting Sound Setting in Manual Mode You can change these sound settings to create your own preference when the MultEQ mode is set to MultEQ off (Manual Mode). However, subwoofer in the subwoofer system can be set to ON/OFF regardless of whether the MultEQ setting is ON or OFF. Use steps 1 to 5 to select one of the Sound menu modes to modify. See the applicable section below for details about the selected item. 1 2 Turn the Rotary encoder to select AUDIO, and then /ENTER.
Adjusting the Graphic Equalizer Curve Sound Field Adjustment The setting of Parametric EQ/Graphic EQ Adjustment, Time Correction and X-Over can be adjusted in this mode. Adjusting the Parametric Equalizer Curve You can modify the Equalizer settings to create a response curve more appealing to your personal taste. To adjust the Parametric Equalizer Curve, set the EQ mode to PARAMETRIC EQ. For details, refer to “Setting EQ mode” (page 36).
Adjusting the Crossover Settings (X-OVER) 4.2ch (FRONT/REAR/SUBW.) System Before performing the following procedures, refer to “About the Crossover” (page 38). 1 2.2ch (3WAY) System 1 After selecting X-OVER from the Sound Field Adjustment mode, turn the Rotary encoder to select the band adjustment, and then press /ENTER. After selecting X-OVER from the Sound Field Adjustment mode, turn the Rotary encoder to select the band adjustment, and then press /ENTER. 4.2ch (FRONT/REAR/SUBW.
Turning Subwoofer ON/OFF When the subwoofer is on, you can adjust the subwoofer output level (refer to page 20). OFF ON (Initial setting) Setting the Subwoofer System SYS 1 : SYS 2 : SYS 2 Subwoofer level changes according to the main volume setting. Subwoofer level change is different from the main volume setting. For example, even at low volume settings, the subwoofer is still audible.
These values are the time correction values for the different speakers. Setting these values to make each sound reach the listening position at the same time as the sound of other speakers. About Time Correction The distance between the listener and the speakers in a boat vary widely due to the complex speaker placement. This difference in the distances from the speakers to the listener creates a shift in the sounds image and frequency characteristics.
Level adjusting Output frequency range (0 to –12 dB) About the Crossover Crossover (X-OVER): This unit is equipped with an active crossover. The crossover limits the frequencies delivered to the outputs. Each channel is controlled independently. Thus, each speaker pair can be driven by the frequencies for which they have been optimally designed. The crossover adjusts the HPF (high pass filter) or LPF (low pass filter) of each band, and also the slope (how fast the filter rolls off the highs or lows).
Changer (Optional) Rotary encoder CD Playing MP3 Files with the CD Changer (Optional) If you connect a changer compatible with MP3, you can play CD-ROMs, CD-Rs, and CD-RWs containing MP3 files on this unit. 1 2 3 PRESET /ENTER / Selecting a Disc (Changer) (Optional) An optional 6-disc or 12-disc CD Changer may be connected to this unit if it is Ai-NET compatible. With a CD Changer connected to the Ai-NET input of this unit, the CD Changer will be controllable from this unit.
Information In Case of Difficulty If you encounter a problem, please turn the power off, then on again. If the unit is still not functioning normally, please review the items in the following checklist. This guide will help you isolate the problem if the unit is at fault. Otherwise, make sure the rest of your system is properly connected or consult your authorized Alpine dealer. Basic No function or display. • Boat’s ignition or radio switch is off.
Audio The sound is not output from the speakers. • There is no signal output from the internal amplifier. - POWER IC is switched to “OFF” (page 25). iPod iPod does not play and no sound is output. • The iPod has not been recognized. - Reset this unit and the iPod. Refer to “Initial System Start-Up” (page 7). To reset the iPod, refer to the Owner’s Manual of the iPod. Indication for CD Player • No CD is inserted. - Insert a CD.
Indication for iPod Mode CURRENT ERROR • Abnormal current is run to the USB connector device. - You can solve the problem by switching the source, turning the unit power off, or ACC to the OFF position. DEVICE ERROR • A USB device that is not supported by the unit is connected. - Connect a USB device that is supported by the unit. NO USB DEVICE • An iPhone/iPod is not connected. - Make sure the iPhone/iPod is correctly connected and the cable is not excessively bent.
Indication for SAT Receiver Mode (XM mode) • MiniTuner missing/disconnected or no communication between the unit and XM Radio. - Check the XM Tuner. (XM mode) • Radio is acquiring audio or program information. - Wait until the radio has received the information. (XM mode) • The channel currently selected has stopped broadcasting. - Select another channel. (XM mode) • The XM or SIRIUS antenna is not connected to the XM or SIRIUS radio module.
CHASSIS SIZE Specifications Width Height Depth FM TUNER SECTION Tuning Range Mono Usable Sensitivity 50 dB Quieting Sensitivity Alternate Channel Selectivity Signal-to-Noise Ratio Stereo Separation Capture Ratio 87.7-107.9 MHz (MODE1) 87.50-108.00 MHz (MODE2) 9.3 dBf (0.8µV/75 ohms) 13.5 dBf (1.3µV/75 ohms) 80 dB 65 dB 35 dB 2.0 dB AM TUNER SECTION Tuning Range Sensitivity (IEC Standard) 530-1,710 kHz (MODE1) 531-1,602 kHz (MODE2) 22.
Installation and Connections Before installing or connecting the unit, please read the following and page 4 of this manual thoroughly for proper use. Caution HAVE THE WIRING AND INSTALLATION DONE BY EXPERTS. Warning MAKE THE CORRECT CONNECTIONS. The wiring and installation of this unit requires special technical skill and experience. To ensure safety, always contact the dealer where you purchased this product to have the work done.
iPhone/iPod Connection (sold separately) Installation Connect USB cable to an iPhone/iPod with Interface cable for iPod. Caution Do not block the unit’s heat sink, thus preventing air circulation. If blocked, heat will accumulate inside the unit and may cause a fire. USB cable Heat sink Interface cable for iPod (supplied) Remove the iPhone/iPod Remove the iPhone/iPod from Interface cable for iPod. • The main unit must be mounted within 30 degrees of the horizontal plane, back to front.
Connections Speakers (Gray) (Violet) (Black) Amplifier (Sold Separately) Front left Amplifier (Sold Separately) Rear left Amplifier (Sold Separately) ZONE2 Left Front right Rear right ZONE2 Right Amplifier (Sold Separately) (Blue) Subwoofers To USB memory or iPhone/iPod To Marine Remote Commander CD Changer (Sold Separately) Antenna To BLUETOOTH INTERFACE (KCE-400BT) (Sold Separately) REMOTE TURN-ON (Blue/White) POWER ANT (Blue) AUDIO INTERRUPT IN (Pink/Black) To amplifier to equalizer To
Front Output/Input RCA Connectors System Switch It can be used as Front Output or Input RCA Connectors. When connecting a processor or divider using Ai-NET, place this switch in the EXT AP position. When no device is connected, leave the switch in the NORM position. When switched to NORM, the RCA Connectors and can be used as Output RCA Connectors. When switched to EXT AP, the RCA Connectors and can be used as Input RCA Connectors.
LIMITED WARRANTY ALPINE ELECTRONICS OF AMERICA, INC. AND ALPINE OF CANADA INC. (“Alpine”), are dedicated to quality craftsmanship and are pleased to offer this Warranty. We suggest that you read it thoroughly. Should you have any questions, please contact your Dealer or contact Alpine at one of the telephone numbers listed below. PRODUCTS COVERED: This Warranty covers Audio Products and Related Accessories (“the product”). Products purchased in the Canada are covered only in the Canada.