
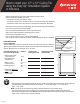
Installation of 12-in x 12-in ceiling tiles


BEF
O
RE Y
OU
BE
G
IN
:
• Store and install ceilings in areas with a temperature range of 60° to 85° F and not more than 70% relative humidity.
• Remove ceiling tile from cartons 24 hours before installation and allow to adjust to normal interior conditions of the
installation area.
• Do not apply loose fi ll or batt insulation so that it rests directly on the back of the tiles
.
• Do not install ceiling tiles below embedded radiant-heat coils.
• Keep hands clean during tile installation to avoid fi ngerprints and smudges.
• Handle ceiling tiles carefully to protect the face and edges from damage.
• Always cut ceiling tiles face up with a sharp utility knife
.
• For Adhesive Applications of
mineral fi ber only
y
tiles directly to existin
g
drywall or plaster ceilin
g
s: Ceilin
g
tile adhesive
recommended, such as Henr
y
237 AcoustiGum
™
Acoustical Ceilin
g
Tile Adhesive. Please follow adhesive manufacturer’s
instructions
f
or application and usage. Armstrong does not guarantee the per
f
ormance o
f
this or other adhesive products,
e
i
t
h
er a
l
one or
i
n con
j
unct
i
on w
i
t
h
A
rmstrong pro
d
ucts.
S
AFETY TIP
S
:
• Establish and maintain adequate ventilation in the work area. I
f
high dust levels are anticipated during installation, such as with
t
he use o
f
p
ower tools, take
p
ro
p
er
p
recautions.
• Wear long-sleeve, loose fi tting clothing and gloves
.
• Wear safety
g
lasses to minimize the risk of eye in
j
ury.
• Use a shar
p
utilit
y
knife to ensure clean cuts. When not in use, store
p
ro
p
erl
y
.
MAINTENAN
C
E HINT
S
:
• Remove dust and loose dirt with a soft brush or vacuum hose with a soft brush attachment.
•
R
emove penc
il
mar
k
s, sma
ll
smu
d
ges, or c
li
ng
i
ng
di
rt w
i
t
h
an or
di
nary art-gum eraser.
•
C
lean with a damp sponge, mild soap and lukewarm water if necessary. Do not soak tiles with water.
TOOLS NEEDED TO INSTALL YOUR CEILING
HELPF
U
L HINT
S
:
Keeping the tiles “square” to one another is a key part o
f
the installation process.
• Proper installation will have all the edges o
f
the tiles in line, with no staggering or gaps, and the entire tile edge in
f
ull contact
with the nei
g
hborin
g
tile.
•
B
y
i
nsta
lli
ng t
h
e ce
ili
ng
i
n t
hi
s manner, you can ensure a v
i
sua
ll
y appea
li
ng ce
ili
ng.
• When installing the string line to guide the fi rst row of tiles, check that the string is close to square with the side wall.
• You can do this by usin
g
the 3-4-5 trian
g
le method.
3-4-5 Tr
i
angle Method
• M
easu
r
e
3
f
ee
t fr
o
m th
e
co
rn
e
r in
o
n
e
d
ir
ec
ti
o
n
a
n
d
m
a
k
e
a
m
a
rk.
How to install your 12" x 12" Ceiling Tile
using the Easy Up
®
Installation System
or Adhesive
L
A-297872-101
8
Safety Glasses
Tape Measure
Straight Edge
Hammer
Pencil
#6 Coarse Thread
Drywall Screws
4’ Carpenter's
Level
Utility Knife
Stud Finder
Hacksaw
Dust Mask
Drill/Screw Gun
Gloves
Tin
Snips
String
Chalk
Line
Screw Driver