
Instructions / Assembly


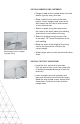


adjusted for the 10 unit grid
Installing Suspended Ceilings
Assembly and Installation Instructions
The ceiling system is made up of Armstrong
®
panels
(either 2' x 4' or 2' x 2') which are supported by a
suspension system (main beams, cross tees and
hangers), and perimeter molding. The integrity of the
entire suspended ceiling depends on the hangers –
commonly wires – which are used to support the
suspension system main beams. Sections of main
beams are spliced together and are connected by
cross tees. The ends of the main beams and cross
tees rest on the wall molding which runs around the
perimeter of the space.
Before You Start
Although temperature and humidity recommendations
vary by product, the space must be cleared of debris
and, in general, should be enclosed.
• The ceiling panels should be kept clean, dry, and
protected from the elements. Panels should be
removed from cartons 24 hours before installation
to allow them to adjust to interior conditions.
• The tools you will need will vary depending on the
type of hangers used, but generally, you will need:
– ladders or scaffolding
– a tape measure
– pencil
– chalk line
– hammer
– powder- actuated
fastener
– awl
– pop-rivet gun
– screw driver or drill
– sheet metal punch
– aviation snips
– wire cutting pliers
– utility knife
– level (water level or laser)
– string; key hole saw
– and compass or dividers.
Most jobsites also require some safety equipment like
a hard hat or safety glasses.
This ceiling system installation brochure is intended as a general
application overview, covering essential steps of a basic suspended
ceiling installation.
Armstrong
®
Ceiling System
YOU INSPIRE
™
SOLUTIONS CENTER
1 800 988 2585
email: solutionscenter@armstrongceilings.com
armstrongceilings.com/youinspire
Design Assistance
Collaborative design
Detail drawings
Specifications
Planning and budgeting
Pre-construction Assistance
Layout drawings for standard
and premium products
Project installation recommendations
Contractor installation assistance