
Installation Guide


Planning
Your
Armstrong
Ceiling
Safety Glasses
Tape Measure
Straight Edge
Hammer
Pencil
#6 Course Thread
Drywall Screws
4’ Carpenter's
Level
Utility Knife
Stud Finder
Hacksaw
Dust Mask
Drill/Screw Gun
Gloves
Tin
Snips
String
Chalk
Line
Screw Driver
1
HOW TO INSTALL YOUR SUSPENDED CEILING
Safety Tips
■ See Warning statements elsewhere on this document.
■ Work Site Environment: Initially there may be a potential adverse impact on
indoor air quality within the general work area during the installation
process. During installation, adequate ventilation of the work area should be
maintained without causing the entry of contaminants to other parts of the
building. Persons who are sensitive to odor and or chemicals should avoid
the work area during this process.
Important Information:
■ Store and install panels in areas with a temperature range of 60° to 80°F
and not more than 70% relative humidity.
■ Remove panels from the cartons 24 hours before installation and allow
them to adjust to normal interior conditions of the area where installation
will take place.
■ Never install ceiling panels below an existing ceiling that contains
imbedded radiant-heat coils.
■ Do not apply loose fill or batt insulation so that it rests directly on the
panels.
■ Keep hands clean to avoid smudges on the finished ceiling.
■ Always cut ceiling panels face up with a sharp utility knife.
■ Main beams run the opposite direction of the joists.
■ Main beams are on 4 foot centers.
■ The minimum drop is 3 inches.
■ Allow for drop-in lights by adding 2" to the height of the light for clearance.
■ Locate Hidden joists by tapping on the ceiling until you hear a solid thud.
Drive a nail in here. Repeat this to locate other joists and determine their
direction.
■ Mark the joist locations with chalklines.
10'6"
9'
Sample Room
Joists Usually
16" on Center
A
Joist Direction
Snapped Chalk
Lines in Center
of Joists
B
Locate Hidden Joists to Install Wire Fasteners
1. Find joists (A).
2. Drive nails to find exact center line of joists.
3. Snap chalk line for each joist (B).
Determine Length
of Border Panels
1. Divide width of
room by length of 2'
single panel *4' 9'
–
8
2. Add the remainder......1'
to length of
single panel + 4'
= 5'
3. Divide it by 2 . . . . = 2' 6"
Length of the Border Panels
is 2' 6"
9'
2'6"
2'6"
1' 3" 1' 3"
Determine Panel Layout
1. Determine length of border panels.
2. Determine width of border panels.
For best appearance,border panels
should be the same size on the
opposite sides of the room. Use your
room dimensions and follow the
formula in the worksheets at right.
Sample Room Panel Layout
10'6"
Width
of Border
Panel
Length
of Border
Panel
Cross Tees 2' Apart
*Use 4 for 2' x 4' panel, 2 for
2' x 2' panel
*Use 2 for 2' x 4' panel, 2 for
2' x 2' panel
Main
Beams
4' Apart
Determine Width
of Border Panels
1. Divide length of
room by width of 5'
single panel *2 10'6"
–
10
2. Add the remainder......6'
to width of
single panel + 2'
= 2' 6"
3. Divide it by 2 ... = 1' 3"
width of the
Border Panels is 1'3"
Sample Worksheets
,using 2' x 4' panels in a 9' x10' 6" room.
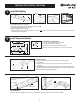
Tools
Needed To
Install Your
Ceiling
We are constantly working to improve our instructions with learnings from customers like you.
For the most up-to-date instructions, please visit ceilings.com/installation. If you need additional
guidance, call our Techline at 1-877-ARMSTRONG.