
Product Brochure


Estimating:
How Many Cartons Do You Need?
• Find your room size on chart
• Number in square is the number of cartons you need
Note: Chart includes at least five extra tiles per 100 needed to allow
for waste and odd room size.
Prepare Subfloor
Subfloor must be clean, dry and smooth.
A subfloor is the surface over which your new Armstrong
™
tile flooring
is installed.
PREPARE
OLD VINYL FLOORING
Must be noncushioned-backed and
firmly bonded. Check for loose vinyl,
gapped seams, cuts, tears, rips or
other damage.
PLYWOOD
If installing a new plywood
subfloor, use APA Underlayment
Grade. For new or existing plywood
subfloors, check for loose panels,
gapped joints, knots, nail holes or
other damage.
CONCRETE/CERAMIC
Must be clean, dry, and dust-free.
Check for cracks, scaling, levelness,
and other damage. Tiles may be
installed over a painted concrete
floor. (Self-stick only) If installing
over ceramic tile, terrazzo or marble,
ensure that the tiles are firmly bonded.
Utility Knife
to remove loose vinyl
S-184 Patch & Skim Coat
For patching or filling textured surfaces
S-183 Underlayment or
S-184 Patch & Skim Coat
For patching or leveling
Smooth Edge Trowel
For applying S-184
Smooth Edge Trowel
For applying S-183 or S-184
Sanding Block
Use medium grit sandpaper for smoothing
rough areas of the floor patch/skim coat
Sanding Block
Use medium grit sandpaper for smoothing
rough areas of the patch and underlayment
S-185 Latex Primer
For a superior bond
S-185 Latex Primer
For a superior bond
Short Nap
Paint Roller
For applying S-185
Short Nap
Paint Roller
For applying S-185
IF INSTALLING OVER...
6' 7' 8' 9' 10' 11' 12' 13' 14' 15' 16' 17' 18' 19' 20'
6'
7'
8'
9'
10'
11'
12'
13'
14'
15'
16'
1 1 2 2 2 2 2 2 2 3 3 3 3 3 3
1 2 2 2 2 2 2 3 3 3 3 3 3 4 4
2 2 2 2 2 2 3 3 3 3 3 3 4 4 4
2 2 2 2 3 3 3 3 3 3 4 4 4 4 5
2 2 2 3 3 3 3 3 4 4 4 4 5 5 5
2 2 2 3 3 3 3 4 4 4 4 5 5 5 5
2 2 3 3 3 4 4 4 4 5 5 5 5 6 6
2 3 3 3 3 4 4 4 5 5 5 6 6 6 6
2 3 3 3 4 4 4 5 5 5 6 6 6 7 7
3 3 3 3 4 4 5 5 5 6 6 6 7 7 7
3 3 3 4 4 4 5 5 6 6 6 7 7 7 8
ROOM WIDTH (ft)
ROOM LENGTH (ft)
Installation Methods
• Tile-on: Allows installation over most smooth, completely bonded existing resilient flooring installations. Eliminates the time
and expense of removing the old floor. Lay out the job in such a way that the joints in the new installation do not coincide with
those of the existing installation.
• Full-Spread: Allows installation over approved wood floors and all grade levels of concrete floors. When installing over wood
underlayments, lay tile so the joints do not coincide with the joints of the underlayment.
Find the midpoint of the installation area and strike a chalk line. Using a fine notched trowel, apply the adhesive over the area
not covering the chalk lines. You may prefer to spread and install one quarter of the room at a time. Allowing the recommended
open time, let the adhesive set until dry to the touch. To test, press your thumb lightly on the surface of the adhesive in several
places. If the surface feels slightly tacky as your thumb is drawn away and does not stick to your thumb, the adhesive is ready
for the installation. Install the tile along the chalk lines, laying the field area first and then fitting in the border tile.
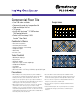
Laying tile in
step method...
31410 11
2591220
6813 19
71418
15
17
16
21
1
Maintenance
Maintenance Immediately After Installation
Armstrong commercial vinyl composition tiles are coated with the exclusive Fast
Start
®
factory finish. This finish does not require removal after installation. It is
compatible with commercial floor polishes and eliminates the need to strip the
tile. This saves time, money, and possible damage to the tile and adhesives.
Initial Protection
The application of several coats of polish immediately after installation will help
protect the new flooring, and most likely reduce the number of tiles needing
replacement before the area is put into actual use.
1. Sweep or vacuum thoroughly.
2. Damp mop with a properly diluted neutral detergent carefully removing black
marks and excessive soil.
Do not machine scrub the floor for at least four to five days after installation.
This is to prevent excess moisture from interfering with the adhesive bond.
3. Apply several coats of a high-quality commercial floor polish.
�
INSPECT
New Beginning
®
Extra-Strength Cleaner
Removes dirt and
wax build-up
S-199 One Part
Embossing Leveler
Fills and levels embossing
on your old vinyl flooring
Smooth Edge Trowel
For applying S-199
Sanding Block
Use medium grit sandpaper
for smoothing rough areas
of the liquid underlayment
OR
NA-3160-1216 Armstrong and the Armstrong logo are trademarks of AWI Licensing LLC. All other trademarks are owned by Armstrong Flooring, Inc. or its subsidiaries.
© 2016 AFI Licensing LLC.